Beyond Canning Winner! (Bonus: GF Peanut Butter Granola Recipe)

Congratulations to the winner of Autumn Giles' Beyond Canning book: #14 Sheila!  Sheila, please email me your particulars and I'll be in touch.  I hope you'll give canning a go after you read this book, and it has plenty of information for new canners as well!

One thing that I don't think Autumn even made a mention of in Beyond Canning is that she is unable to have gluten.  Gluten intolerance and sensitivity has definitely hit the mainstream, but for those with celiac disease like Autumn, gluten is not even a consideration. Whatever your feelings about those who choose not to eat gluten on a regular basis, in my opinion it's more of a flavor choice to consider other options.  So many alternatives to wheat are just more interesting and flavorful, like these crackers for instance which I'm going to make later today...

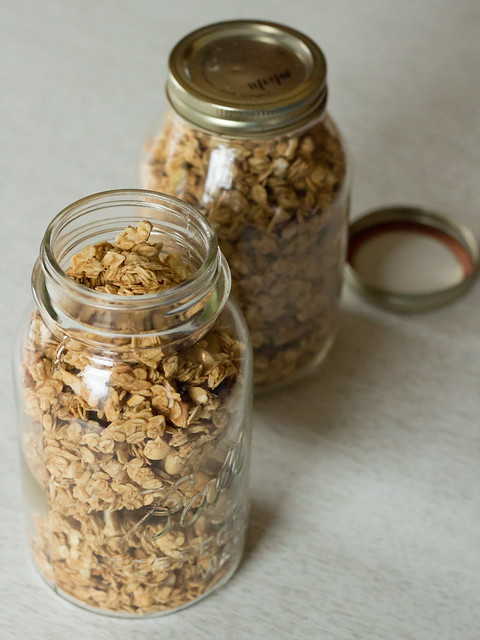
Some things, like granola, are inherently gluten-free.  Oats are naturally free of gluten, but are sometimes processed in facilities that handle other grains. If you are not able to have any gluten, it's best to purchase certified gluten-free oats processed in a gluten-free environment. 

My house has been box cereal free for going on 5 years (except for the occasional "treat" for my boys), so granola is a very good thing for me to have on hand in the cupboard. My oldest son used to eat a steady diet of granola, but as my resident picky eater, he grew out of it - or maybe just grew tired of it - and hasn't been convinced of eating it in a long time. He also used to eat more peanut butter than is probably recommended for a kid, every day, for what seems like (and probably was) years.  Then, without warning, he was over peanut butter as well.  Until I brought these two things together, I was convinced he would never eat either again.

peanut butter granola

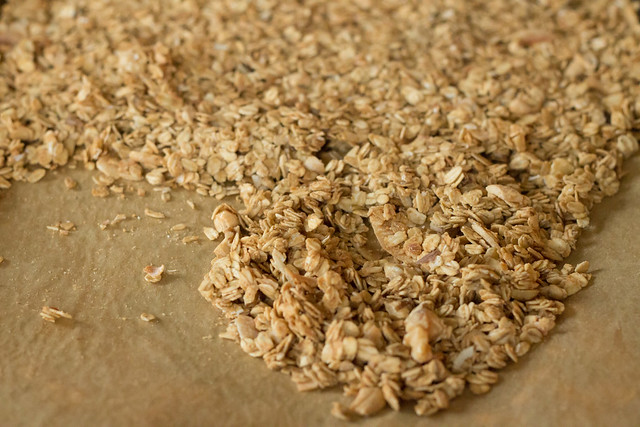
This has become our staple granola; it's one I've been making weekly for several months. Sweetened with a bit of maple syrup and even without using exact measurements (sometimes I can't be bothered with that), it always bakes up extra crunchy with a few clumpy bits that always get picked out and eaten first. It's a granola that can continue to adapt with you too. 

Gluten-Free Peanut Butter Granola

(yields about 1 1/2 quarts)

  • 1 quart (4 cups) rolled oats
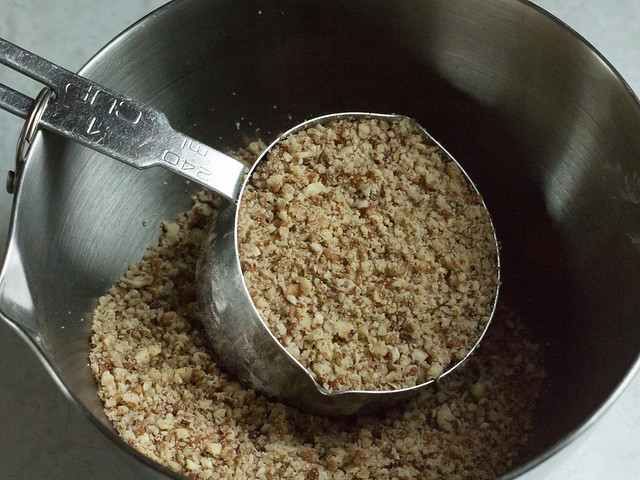
  • 1/2 c. cashews, chopped
  • 1/2 c. walnuts, chopped
  • 1/2 c. unsweetened flake coconut
  • heavy pinch of salt
  • heavy pinch of cinnamon
  • 1/3 c. maple syrup
  • 1/3 c. peanut butter
  • 2 T. (or a bit more) of coconut oil

Preheat oven to 325.  Line a sheet pan with parchment paper. 

Mix dry ingredients, salt, and cinnamon in a large bowl.  In a small saucepan, combine the maple syrup, peanut butter, and coconut oil.  Heat over medium heat until it's well combined and runny enough to coat the dry ingredients, then pour it over the dry ingredients and mix well. Pour the mixture on the prepared sheet pan and gently tamp it down into a single layer.

Bake for 30-40 minutes, or until golden brown, rotating the pan halfway through the baking time. Cool completely on the baking sheet before storing in glass jars.  You can stash it in the freezer to store extra long and to keep it extra crunchy, but it stores well at room temperature for 3 weeks or so.  If you can make it last that long.

peanut butter granola

Beyond Canning! (And a Giveaway!)

It has been an embarrassingly long while since I've updated this space and without divulging the details of my completely overturned world I'll just say that when this book arrived on a very dark and cold day in February it lightened my heart in more ways than I can mention.  I think I have read Autumn's blog since forever, although I can't even remember exactly when that began. I love her candid way of writing and her spot on recipes, everything she does she does with passion and excitement. I could tell from the beginning that this was a girl who loved to make, and was going to make well for years.

I enjoyed this new book for so many reasons, but especially for small (even on occasion single jar) recipes that other makers just "get". Maybe the reason I've liked Autumn for so long is that she understands the need to make that drives us fellow makers on a daily basis.  There is a deep need to find satisfying homemade goods for our own bellies and those of our families, friends, and neighbors if you are a maker. You makers know who you are: you probably already make all of your own jams, krauts, and condiments.  This, then, is the book you will want to pull out when planning your spring and summer preserves, but also your fall and winter ferments.  This is the book that will make you love Autumn and follow up on her for the coming years.

chocolate banana icebox dessert.

If life hadn't gotten in my way, I would have made more recipes right away.  So far, I've only tried a couple.  The first was a take on a chocolate-hazelnut spread, only it was nut free and made with bananas.  I know a couple of banana haters, and if you dislike banana this definitely isn't your jumping off point.  But if you like happen to like bananas, you will cook them down with a bit of cocoa powder and a pinch of cinnamon and come up with a chocolaty banana base for toast or little icebox desserts like I made.  (I used barely sweetened whipped cream with layers of Maria cookies.  These keep amazingly well stored in the fridge for at least a few days.) 

As a self-proclaimed condiment junkie, I pulled a recipe to highlight here that I just assumed after reading that I would love, and I was more than right. I do love it. And I've been eating it on everything sandwich related for the past week - you know, the way you do with a new condiment crush.

Rhubarb Cardamom Chutney

Cardamom is a fickle spice, I love it but it seems like too much can tend towards bitter. When I saw that there was a chutney with a whole tablespoon included I almost read no further.  I had to make it for myself and I'm so glad I did.  The cardamom is mellowing nicely as the open chutney ages, and splurging on a half cup of 25$ per pound dried cherries was good for my soul.  I pulled the rhubarb from my deep freezer; my stash from last year still safe and needing to be used up quick before the new season is upon us.  I always think to myself that I don't have the pretty pink "food blogger" rhubarb... my family heirloom plants are the mostly green "industrial" workhorse rhubarb variety.  So my chutney is more mauve and not quite as beautiful as the one pictured in Autumn's book - but I'm sure it's every bit as delicious.  When I see some pretty pink rhubarb in the markets this spring, I'm likely to buy a pound and make this all over again to store on my shelves.

Rhubarb-Cardamom Chutney (Autumn Giles, Beyond Canning)
Cardamom and tart rhubarb together in a chutney that will be the star of your cheese plate

Ingredients
¾ cup granulated sugar
½ teaspoon kosher salt
1 tablespoon ground cardamom
2 tablespoons whole yellow mustard seed
1⁄3 cup diced white onion
½ cup dried cherries, coarsely chopped
1 tablespoon grated fresh ginger
1 pound rhubarb, trimmed and sliced into ½ -inch chunks
¾ cup apple cider vinegar

Materials
Basic supplies for vinegar preserves (see page 78)

Yield: about 2 half pints

1. Combine all of the ingredients in your preserving pot.
2. Over high heat, bring the mixture to a boil that cannot be stirred down. Stir frequently as it comes to a boil.
3. Reduce the heat to low and simmer until the mixture has thickened and the rhubarb has broken down completely, about 20 minutes. Toward the end of the cooking time it may be necessary to stir the chutney more frequently to prevent scorching.
4. Ladle into prepared half-pint jars, leaving 1-inch headspace. Remove air bubbles and wipe rims. Place the lids on the jars and screw on the bands until they’re fingertip tight.
5. Process in a water-bath canner for 10 minutes, adjusting for altitude if needed.
6. After 24 hours, check the seals. Label, date, and store out of direct sunlight without the bands for up to a year.

Rhubarb Cardamom Chutney

I didn't actually can this chutney, I left it portioned into three jars to enjoy now and share with friends.  (Or maybe just hoard to myself since I haven't actually given any away yet...) It's tart and the texture is great with the cherries and mustard seeds.  It's not too sweet and it really is good with any kind of cheese (that is a smoked swiss above).  I need to include it on some grilled cheeses, and I need to get some brie ASAP, since I feel it would be an especially good compliment.

I'm so happy that I am able to offer one copy of Beyond Canning to one lucky reader so he/she can begin to make pretty, fermented Pink House Kraut, Pickled Figs with Port & Black Pepper, and a single jar of Rosé Wine Jelly for him/herself.  To enter, please leave a comment telling about one thing you love to make (or would love to make) on this post before next Wednesday, March 16th (11:59 p.m.) and I will assign each name a number and choose a winner via Random Number Generator.  After commenting, hop over to visit Autumn Makes and Does to catch up on all the beautiful things that come from Autumn's hands.  You can also catch other recipes and reviews of Beyond Canning throughout the month of march with a virtual book tour on a host of other wonderful food blogs.  Find the complete list and dates here.

In my current days of uncertainty, it's good to mosey over to the fridge and see some very certain and comforting jars of chutney peering back at me.  And books like this make me so thankful to be a tiny part of a large network of amazing people.  Autumn, this book is totally the first of many and I'm just thrilled that I could have one of the early copies in my hands from the start!

Rhubarb Cardamom Chutney

On to 2016! And a Simple Yeast Bread to Take You There.

I’ve said before that the time frame between Christmas and New Year’s Day seems like bonus time to me.  Like the 52nd week in the year is a free space on the calendar that simply exists for me not to put anything into.  There is always ample food.  And sweets: those are always even more plentiful than actual sustenance.  I find that I eat often, too much, and continually all at once, and getting back to a more austere schedule with a brand new year ahead is always a very welcome sight.

But being interested in food means that the end of a year also signals a slew of “best of” lists and new year in food predictions. The last week of the year and even the first few of the new one I spend in my own mind reflecting on my favorite things in my personal kitchen, what new cookbooks I can’t imagine living without, even what old year recipes were on my radar but never seemed to materialize.

For the past 2 years, I kept track of every loaf of sourdough bread I baked by photographing them and putting them in flickr albums.  This year in review got me thinking about how our appetites wax, wane, and change, and how my solid wild yeast addiction has changed over the years from my first intrepid loaves back in 2010.

I logged 114 loaves of wild bread in 2014, and only 83 this past year.  The odd 30 loaf change spurred me to thinking about my bakery habits.  My daily life has changed enough that bread isn’t as romantic as it used to be, it’s more methodical and dutiful.  I don’t enjoy it any less, but it is a hard fact that the time I once had for experimentation and 3 days cultivation has temporarily left me.  I’ve made more quick breads, many (many) more tortillas, and towards the end of 2015 huge batches of whole wheat chapatis thanks to Hot Bread Kitchen.

While I still feel that long, slow bread is best, I also have cut myself some slack in the whole foods prep department.  I do not have the time to soak every almond and walnut, I do not have the time to even keep a yogurt culture from dying out on me and I’m going to say that is okay.  I also know that “quick” yeast bread that came out of my kitchen is (in my opinion anyway) infinitely more healthy than planning a trip to and picking out a store bread devoid (for the most part) of character.  There are good bakeries out there, there are good bakeries here in Milwaukee! But there is still something about bread coming from my own hands, by way of my cheap (but oh so accurate) Hotpoint oven that I will never get over.  

It’s what gives me the soul of a baker I think, that as the years pass it’s the one constant I insist I produce myself.

Instead of a 2016 sourdough only flickr album, I’ve decided to include all breads (I’ll omit flatbreads - unless something really stands out - since they are last minute additions to a meal and let’s face it, we need to eat!).  This is the first loaf of 2016, which brings me all the way back to the beginning of my bread baking life (I still have Jeff Herzberg and Zoe Francois' first 2 books).  A friend of my mom gave her a “loaf of bread in a jar” gift for Christmas, and we baked it when I was visiting.  The flour was a blend of coarsely ground wheat and plain old AP, but it tasted so good.  And I didn’t even weigh the ingredients!  When I double checked, I found that it was a ratio from Artisan Bread in 5 Minutes a Day which were the first hearth-style loaves that I ever made.  I hadn’t revisited it in years, perhaps due to my bread snobbery, but it has a place in my kitchen once again.  

"artisan bread"

What’s interesting is that I never baked Artisan Bread in 5 Minutes a Day right after the first rise, I always aged it in the fridge for a few days.  Baked fresh, and with freshly ground flour, it has the simplicity of a soda bread and a soft and nubby texture.  It’s crust is soft too, and while I do miss the chew of my old bread, this is nice for sandwiches, for toast, for 2 year olds with problems chewing his food well enough sometimes. 

My ratio for a single loaf was 3 oz. coarsely ground spelt, 3 oz. whole wheat flour, and 10 oz. AP flour.  Mix in a generous teaspoon of salt (more if you like saltier bread), 2 1/4 t. instant commercial yeast, and 1 1/2 cups 100 degree water and mix well - but don't focus on kneading.  Cover the bowl and let it rest at room temperature for about 2 hours until it has risen at least double.  Transfer the dough to a well floured surface and form into a round loaf.  Let the loaf rise at room temperature (I like to let it rest on a sheet of parchment for ease of transport), and when a gentle finger poke shows an indent that doesn't pop back score simply, since there won't be a ton of oven spring, and immediately bake in a preheated 450 degree oven for 30 minutes or so until nicely browned and hollow sounding.  (Internal temp should be around 200 degrees.)

I baked in without a pot (transferred with the parchment to a sheet pan) at my parents' house and the crust was about the same as when I baked in a preheated iron pot with a lid on.  If you choose to bake it in a pot, bake it for 20 minutes with the lid on, then remove the whole loaf from the pot and finish baking for 10-15 minutes directly on the oven rack.

Untitled

I've never included a detailed list of my year end favorites, but I think I'll give it a go since I read a number of really lovely baking books this year.  I'm sure it's far from complete as there were titles I probably didn't get to or know about in 2015, and unfortunately some I may have forgotten.  Some of these are may be older but I read them for the first time last year.  Going forward to 2016 with a broader world view of bread once again, I'm excited to dig in and bake a little more liberally from some of these!  Happy 2016 to you!

(In no particular order:)


Giveaway Winner! (Bonus: Bourbon Balls Recipe)

Congratulations to the winner of PRiMO preserves, #11, Katie Sweet!  I'm certain you'll love these preserves, Katie, and I hope you agree that they are the next best thing to homemade.

For December 12th, it looks more like March 12th out there today.  It’s nearly 50 and heavy with fog. In years past, I’d already be nearly done with my Christmas baking by this date. But the factors stacked against me, including freezers near capacity with little room for stashing cookies for safe keeping, have me just beginning today. We’ve been talking about making Mexican Wedding Cookies for some time. They were called “Butterballs” as I was growing up and for good reason as they seem nearly half their weight in butter.  I had 30 cookies from this recipe from King Arthur Flour, and they fit nicely into a single container that I did have room for in the freezer.  Since I was nearly coated in powdered sugar myself, I figured I’d keep the oven on and give some bourbon balls a go.

Traditionally, I make rum balls.  I’m not a fan of rum in general, unless it is baked into something chocolatey or used as a flavoring in quick breads or cakes.  I watched an interesting documentary once on the history of Puerto Rican rums and even still I never developed more than an intellectual appreciation for it… though I do love rum balls.  LOVE rum balls.  I love that the earlier you make them the better they get.  I love that by the first of January, they seem a little tired and crumbly but that makes them all the more delicious.  And I love them all the more since I bit the bullet a few years ago and started making my own vanilla wafers to use in them.  

vanilla wafers.

I thought I’d try something different this year. In part because the only rum on hand was a dark, spiced one (and not what I’ve used for rum balls in the past), I thought I’d give some bourbon balls a go. I usually don’t post a recipe I make only once, but this is one I’m going to. In part, I’ll do it to remind myself next year of my method and also to remind myself to include a bit of espresso powder, since I think it needs it.  I also wanted to record the weights of things, since making homemade vanilla wafers throws one off of regular recipe.

pecans

I chose a base bourbon ball recipe from Epicurious, and I have to say I was suspicious of it holding together… but it did just fine.  I also would like to preface that I’m not an advocate of corn syrup.  But 3 tablespoons once yearly I am not going to get bent out of shape about.  And besides: rum balls!  (Or bourbon balls!)  I am also assuming that before you begin, you have made a single batch of vanilla wafers using the best recipe I’ve ever seen for them, by Alton Brown.  A single batch makes 14 oz. of vanilla wafers (about 3 3/4 c. of pulverized crumbs).

Bourbon Balls (adapted from Mrs. Harold M. James)

yields about 40

14 oz. (3 3/4 c. ) pulverized vanilla wafers

1 1/4 cup (4.75 oz. / 135 g.) crushed raw pecans (see photo above)

1 cup (3.75 oz. / 110 g.) confectioners sugar

1/2 t. - 1 t. espresso powder (optional, but I regret not adding it)

2 T. cocoa powder

3 T. light corn syrup

1/2 c. bourbon (I used Bulleit) 

additional powdered sugar for rolling

Pulverize the vanilla wafers in a food processor if you have not done so.  Aim for a uniform, sandy texture slightly finer than rice, and then transfer them to a large bowl.  Do the same with the pecans, and also transfer them to the bowl.  Add in the confectioners sugar, cocoa powder, and espresso powder if using.  Stir well to combine and transfer the mixture to the food processor and process until very finely ground - it should look like it’s almost starting to clump together. Transfer the finely ground mixture back to the large bowl.

Whisk together the corn syrup and bourbon in a small measuring cup and add to the dry ingredients.  Stir well with a spatula until well combined and no dry pockets remain.  Use a 1 tablespoon size scoop to scoop out packed balls of dough.  Roll them gently between your palms to form balls, drop them into confectioners sugar to coat thoroughly, and store in an airtight tin to age for at least a couple of weeks.  You may wish to re-coat with confectioners sugar before serving.

bourbon balls.

PRiMO Giveaway!

I know if you are a regular reader you might feel I've abandoned you...  Really, I think about what I would write every day.  Every time I'm stirring a pot of something, or wiping off the dining room table for the 10th time in a day, when I'm so excited about learning about Hannibal and the Punic Wars that we scratch the rest of the afternoon to make rough puff pastry and bake up baby elephant ears.  (I even took pictures of that, thinking I might get to setting pen to paper about it!) Time elapses and I don't need to make excuses for it. I have taken to embracing that I'm wrapped up in the hug of a two-year-old, or busy diagramming sentences and reading about Hannibal. The food world will still be there when these boys have all of a sudden grown into men and I wonder where the days of hectic life went.  Those days I try not to daydream of, when my small house is trashed with stuffed animals and legos and it's 4 o'clock and I haven't thought about what supper will emerge from my hands.

The folks at PRiMO preserves reached out to me again this fall and asked if I'd like to host a giveaway of one of their beautifully packaged gift boxes. I felt really guilty because I really love their preserves and felt like their preserves deserved a more prominent place in the food blog world than on my all but neglected site.  My metrics are a sorry state since I've taken to one post a month, and as far as "career" bloggers go, I am just plain terrible at updating social media.  Even so, I am so flattered that they like my little corner of the Internet, and I'm pledging my best to get the word out about their line of preserves.  

thanksgiving cheese plate w/ PRiMO

I hesitate, and rightfully so, to describe their preserves as "product".  They aren't a product but rather something so homemade that you can be proud to have it sent out as a gift, or even to enhance your entertaining at this end of the year time.  I opened my gift set at Thanksgiving when I hosted my parents and we all agreed that these little jars taste like we made them ourselves.  That might be another reason why PRiMO appeals to me so much: from a DIY standpoint, their entire line not only tastes like you made it, but is packaged so well you can go on reusing the heavy glass jars for just about ever.  And don't get me started on the box it's packed in.  As a quality design fanatic, it's just plain nice to have something that feels so good in the hands... and can be repacked and sent on for a new life with someone else instead of sheepishly getting chucked into the recycle bin...

image from PRiMO

image from PRiMO

So I'll keep the rules simple: just leave a comment on this post before midnight on December 10th (that's next Thursday) and I'll assign a number to each commenter in the order they appear and select a winner at random.  You'll receive a gift box of 4 jars of PRiMO's signature preserves, one jar each of limited release Holiday Pumpkin Spread, Spiced Cherry Preserves, Berry Pasilla Preserves and Raspberry Habanero Preserves. You can read more about PRiMO and their preserves line on their website. I know you'll enjoy all of the flavors for yourself, but it would also make the best host/hostess gift or "secret Santa" type gift.  You could also separate the jars, I'd imagine one would fit nicely in the foot of a stocking!

I hope you are happy happy during this Christmas season, even in spite of all the terrible news accosting us every single day.  Even in the midst of that I think it's more important to concentrate on what good things come each day, what blessings we have to be thankful for.  Sweet things that come in the mail, and genuine artists that create!

It's Giveaway Time!