Vegan Monday: Pumpkin Coconut Bread


Just in time for Vegan Monday and Thanksgiving, I accidentally made this amazingly good quick bread. It was an accident because I didn't even know it was vegan.

Another of the things I have come to count on in my life, is that when I go to visit my Parents, there is usually a quick bread involved. It's ready when I come in, hungry with travel. It's ready when I need a little something sweet after dinner and before dessert. It's ready with the coffee when my early rising Mom quietly hits the kitchen long before I awake - she slices it in fat slices and cuts them in half, arranging them on a platter for quick grabbing when the rest of the household joins her in the kitchen.

There are numerous breads we enjoy, certainly banana bread and it's variations run a common thread throughout the year, taking care of any sad members that ripen too quickly on our counters. I was just thinking that it was about time to make Ina's Date Nut Spice Bread, a Fall favorite of mine, when I visited last weekend and found this tender pumpkin coconut bread waiting on the counter. My Mom found the recipe in her October co-op newsletter, and had it earmarked for awhile.


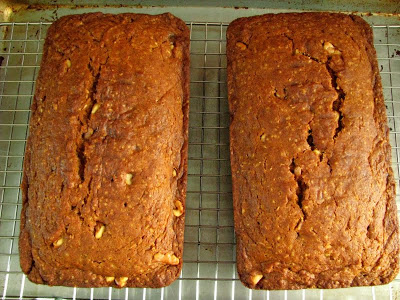
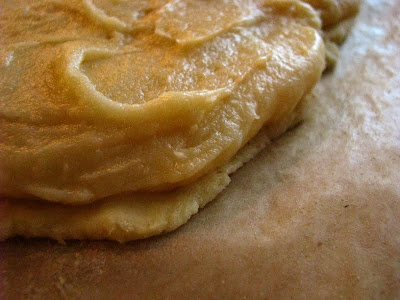
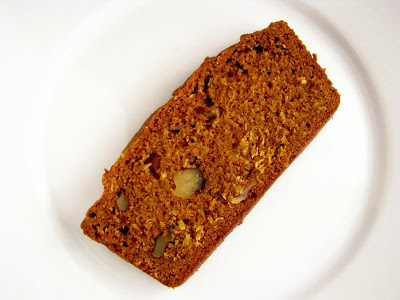
It's not a quick bread to me, if it doesn't have the hallmark cracked middle...

One reason my family may love quick breads is that so often, the recipes are written to make two loaves. When you don't know how many people will be dropping by, or if you wish to gift a loaf and eat one yourself, baking two loaves instead of just one is just plain economical. Hiding it in your freezer makes for an instant short notice treat, and giving one as a gift makes you just plain popular. This one was so good, I snapped a picture of the recipe with the iPhone, enhanced it in mobile Photoshop for easier reading, and planned my baking week around making it for Friday. I knew I had a taker for one of my two loaves, and wanted to wait for the end of the workweek, so it was fortunate that my Mom had baked two loaves. I had a half loaf gift to tide me over until I could bake it myself. It wasn't until I was actually mixing it up, that I noticed is was totally vegan.

Vegan baking can be tricky, since sometimes there isn't a whole lot of rise and the results can be too dense. Usually, a "healthy" tasting bread emerges, edible, but not fully enjoyed. This is not that bread. In fact, it is so moist and tender you would swear it was laden with butter. It probably helps that it is packed with sugar, but, c'mon... it's Thanksgiving! If you can pick one good time to indulge during the year, this is it. You could make half the recipe, but you may as well make two and give one to someone you love.


I think quick breads taste best at room temperature, but for longer storage, you can refrigerate it. If you slice them cold, the slices will be neater. The slices come back to room temperature fairly quickly, which is good for me since I do store it in the fridge. If I leave something like this sitting around on my counter, I tend to eat a bit every time I walk past it. I've got to "straighten those rows", you know.

Pumpkin Coconut Bread (originally called Coconut Pumpkin Nut Bread from the People's Food Co-Op newsletter)
makes 2 loaves, easily halved
  • 3 1/2 c. ap flour
  • 2 c. packed dark brown sugar
  • 2/3 c. white sugar
  • 1 15 oz. can pumpkin puree (scant 2 cups)
  • 1 c. vegetable oil
  • 2/3 c. coconut milk
  • 2 t. baking soda
  • 1 t. salt
  • 1 t. ground nutmeg
  • 1 1/2 t. ground cinnamon
  • 2/3 c. flaked coconut, I use unsweetened shredded Let's Do Organic!)
  • 1 c. toasted chopped walnuts
Preheat oven to 350 degrees. Grease and flour two loaf pans, I used a spray with flour.

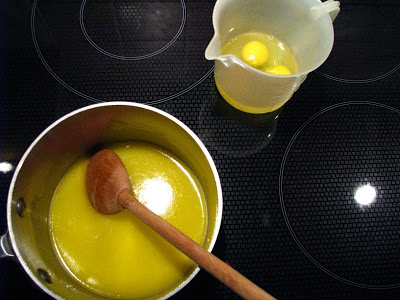
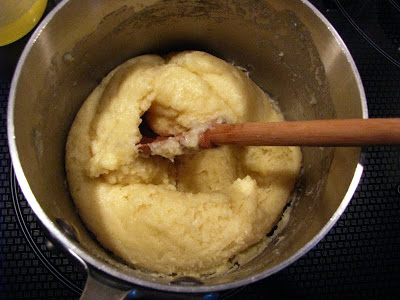
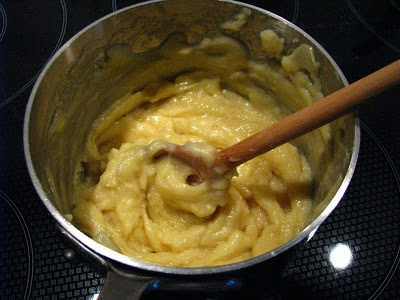
Combine flour, sugars, pumpkin, oil, coconut milk, baking soda salt and spices. Mix well until blended. Fold in coconut and nuts. Spread gently into prepared pans.

Bake for about 1 hour and 15 minutes, checking after an hour. Bake until toothpick inserted in the center comes out clean. Remove from oven, cover tightly with foil, and allow to steam for 10 minutes. Remove foil, remove from pans, and cool completely on a cooling rack.


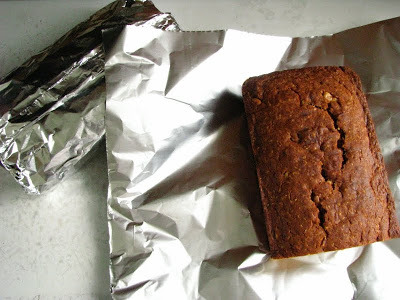
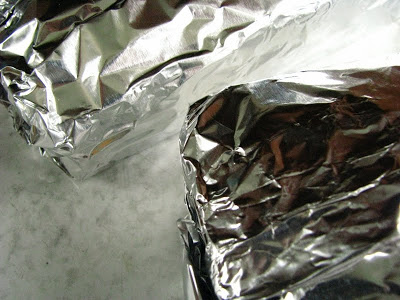
If you are savvy (and I was not, but will remember to be next time...), you can make sure to cut the two pieces of foil large enough to wrap the finished breads in. I saved my steaming pieces for another use, but if you were short on foil, you could kill two birds with the one stone. I have never used this steaming technique before, but the bread is nice and moist, so I'm keeping it as a trick up my sleeve.

I like wrapping things in foil, and usually keep a roll of "heavy duty" on hand to use for the demands of opening and closing sometimes many times a day. I try to be neat about it, and usually use a wrapping that I learned from folding origami. There's something about a fresh shiny brick gracing my counter top, and it's even more exciting to know that something delicious is preserved from the elements beneath something as utilitarian as aluminum foil.


It also makes a good package for dropping off. So, weather you need a Thanksgiving morning treat or a little something to bring to a get-together, this is the bread for you. Vegan, or not, I promise you won't know the difference!

UPDATE 10/2011:

These also make great muffins, a whole batch makes 2 1/2 - 3 dozen, depending on how full you fill the tins. I have also made them easily with half the amount of sugar, and replaced the coconut milk with yogurt or milk in a pinch with fine results (though dairy milks will render them non-vegan).

The Infamous Tennis Shoe Pastry.

Ok, Julia... this one's for you.


After reminiscing about the Spanish Bar Cake (Applesauce Cake) last week, which itself was a response to What Julia Ate's Applesauce Cake recipe, she commented about the tennis shoe coffee cakes of my youth. The mere mention spurred me on a mission to remember to get the recipe from my Mom. Since I was there over the weekend, I asked her for the recipe. It didn't take much prompting to "might as well just make it", and using the last half pound of butter in her fridge, I did just that. Julia will also be pleased that it is fairly almondy, since another thing that she and I have in common is our passion for Almond Extract. Perhaps she will make it using her homemade butter, something that's also on my list to do!

Driving up Friday afternoon, I was able to catch part of Food Friday on Wisconsin Public Radio (Radio Without Borders). The hour was devoted to Gourmet's Cookie Book, and featured Sarah Moulton, the longtime executive chef of Gourmet Magazine. The book highlights one cookie recipe for every year of the magazine's life, from 1941-2009. (You can listen to the hour in the archives from Friday 11/12/10.) I always like "vintage" recipes, and noting how things have changed over time. This book shows the fascinating progression of cookies from wartime rationing to luxury chocolate decadence. When my Mom found the yellowing card in an old recipe box, I knew right away that this must also be one such rationing recipe. I read and reread to be sure that there was no sugar in it - and there isn't. The only sweetener comes from the powdered sugar glaze drizzled over the top.


My Mom received this recipe when I was young (so likely, the '70's), from a woman named Ruth Peterson. It's technically called Danish Puff, but my Great Aunt always said they looked like a couple of tennis shoes. Maybe, but they are so good that they won't be around long enough for anyone to notice.

I'm actually glad that I was able to make this recipe at my Mom's house. Had I made it here, I would have employed the food pro to cut the butter into the flour and then how vintage would it have been? I love being reminded that the hands are my most valuable asset, and they served me just fine. In fact, I think they are key to the recipe, since the warmth of them aids in the formation of the base dough layer. Without warm hands, the dough would not come together with a mere 2 T. of water. Remember that when you are working the dough together the bowl, and you start to think that you need to add additional liquid.


"Tools were made, and born were hands." William Blake

When the dough (very sticky eventually, due to those warm hands) is formed, the tennis shoes are made:


It's easiest to roll the equal portions of dough into longish snakes and then use the heel of your palm to coax it into flat submission. And, try to use parchment paper, since it will make your life easier - though I'm fairly certain that it would not have been a necessity at the recipe's birth. The dough certainly has enough butter in it that it would not stick to a sheet pan.

The layer, or puff, part of the Danish Puff comes from a pate a choux type application. Mine didn't raise as much as my Mom remembered it raising, but she thinks perhaps she used a hand mixer to incorporate the eggs. I did not; I just stirred with a wooden spoon in classic pate a choux style. I may try the electric mixer next time and see what happens.


butter and water melted.


flour added.


eggs added.


Spread the "puff" over the dough base, close to the edges.

I will write the recipe as it is on the card. As the radio show pointed out, recipes used to assume that you knew how to cook and bake. But, that said, I know how to cook and bake, and I still asked my Mom how she used to do it. I'm betting that a fair number of vintage recipes are vague because one had someone to ask. Isn't that the best part of baking? Sharing... it's not just for kindergartners.

Danish Puff (Tennis Shoe Pastry)
  • 1 c. flour
  • 1/2 c. butter
  • 2 Tbsp water
  • 1/2 c. butter
  • 1 c. water
  • 1 t. almond (extract)
  • 1 c. flour
  • 3 eggs
"Measure first cup of flour into bowl. Cut in butter. Sprinkle with 2 Tbsp water. Mix with fork. Divide in half. Pat into 12"x3. Place 3" apart on ungreased baking sheet.

Mix second amount of butter and water (in a small to medium pot). Bring to boil. Remove from heat: add almond (extract). Beat in flour, stir quickly to prevent lumping. When smooth, add one egg at a time, beat well after each one. Divide in half, and spread evenly on each half of pastry.

bake 60 min.

Frost with a confectioner's sugar icing and sprinkle with nuts.
8-12 servings "


My icing also had almond extract in it, and next time, I'll probably add a bit more to the puff part. The baking time was exactly one hour. It turns a golden brown, and is puffed up when it's ready. Cool it completely before frosting, and sprinkle it with chopped nuts, in our case walnuts, before slicing into it. It really is a great coffee cake recipe, and after not having it for maybe 20 years, I can say that it is as I remember it: flaky and buttery, the center custardy and not so sweet, and gone by the end of the day.

Well, actually it was gone by the next morning, when just 3 little pieces remained. Somehow, my family adheres to the credo that little bites don't matter. At least, I do, and cut most desserts into smaller and smaller pieces until the "row is straightened" accordingly. This method is most often applied to our fudge making, when those rows just will not be straight, and a sharp knife deftly tries to even it out, scraps going directly to my hips...

Ahhh, the trappings of a dessert-eating family. We do what we can, right? And if we want to cut back on sugar, we just don't make dessert, because if it's there, it needs to be eaten.


Vegan Monday: Sourdough Flatbreads

Vegan Monday this week has to be totally bread related. I know that bread is my gig right now, and that I am living and breathing dough daily for the past two months. I am reading, simultaneously mind you, no less than 5 separate bread related books and I would be lying if I said that I could remember everything that I've been reading. Every baker has a different approach to bread, every sourdough cultivator a different feeding schedule and method. What I really love about experimenting with sourdough is that there are only three ingredients in my bread: starter, water and flour. That's it, and it can feed almost anyone. And it is amazing how tweaking the proportions even in the smallest degree changes the entire finished product.

I am beyond excited now that I have successfully converted, with success, several regular yeast recipes into sourdough starter recipes. If I run into you and start elaborating at length, please forgive me (and/or stop me). In part, I'm excited because the more I can incorporate the culture into my daily life, the less I have to wash away down the sink, and given my recent focus on waste, that makes me very happy. It would also make me very happy to share my starter, so once again, if you are local(ish), let me know and you can have some to experiment with yourself!

I think the key to my successful conversions is counting my sourdough starter as liquid, and adjusting the water in a recipe ratio accordingly. It also probably helps that I am an obsessive type, and regularly bake by weight and not by measure. I usually feed my starter equal weights of water and flour, keeping it roughly the consistency of pancake batter.

Earlier this summer, I had tried the Msemmen (Algerian Flatbread) recipe from the Healthy Bread in Five Minutes a Day book and loved the flavor. I had never seen a flatbread recipe that actually incorporated a spice mixture right into the dough, and being a spice fanatic, I loved it. The day after making the cauliflower pizza, I figured I would try a few of these breads with the leftover dough, and it worked out better than I imagined. The flatbread is called "msemmen", which is a Morrocan or Algerian bread that is almost like a crepe. From what I have read elsewhere, it is less pliable than traditional flatbread, maybe a bit more similar to a cracker.

This could be what I love most about cooking "ethnic" foods: I don't have a frame of reference, so I can infer all of the best things and from reading about food and countries and eat something I find truly delicious, that suits me alone. My apologies to those who have grown up eating this delicious staple, and on whose authorities I would likely change my opinion... But as of this writing, and short of taking a very long trip, it is unlikely that I could gain a frame of authenticity no matter how much I would LOVE to do so.


I made tortilla-sized breads, maybe about 6 or 7 inches across, but rolled them up the same way that Jeff and Zoe suggest in their book. I have scaled the recipe back here, but you can find the original recipe and conventional measures in the HBin5 book. If you are interested in adding more sourdough to your life, I hope my scribblings of a recipe will help!

I add only enough olive oil to the spice mix to make a thick paste. This way, it doesn't run out of the dough as much when it is rolled out. It is inevitable that some escapes, but it stains the bread a gorgeous deep turmeric yellow so I count it as a positive.

This is a lolly-gagging, beat-around-the-bush approach to writing a recipe, and I do apologize in advance. If you have a question, please ask! Since I am making far more work out of a quick and easy recipe, it seems par for the course... but really the work is in the natural yeast taking longer to do what it needs to. If you do give the dough time to rest in the refrigerator overnight, you will have more "sour" flavor in the sourdough.


Coiled doughs, resting.

Sourdough Msemmen (adapted from Healthy Bread in Five Minutes a Day)
makes about 10 flatbreads
(Begin the dough the day before you'd like to bake the breads...)
  • 180 grams whole wheat flour (6.25 oz.)
  • 67.5 grams AP flour (2.5 oz.)
  • 1 t. kosher salt
  • 1 T. vital wheat gluten
  • 80 grams sourdough starter (heaping 1/4 c. or 2.8 oz.)
  • 145 grams water, room temperature (5.11 oz.)
(The total amount of liquid for the recipe should equal roughly 225 grams or 8 oz. ) In a small bowl, I first measure in my starter, and add liquid to come up to the correct weight. Stir the starter well with the water to emulsify, then add to the dry ingredients. Correct with additional water if the dough seems too dry, but remember than the dough will slacken some with the long rising time. You don't really have to knead the dough, but I like to turn it over several times in it's bowl to make a cohesive ball of dough. Let rest until double in size, about 8 hours depending on the strength of your starter. At this point you can refrigerate the dough. (I haven't attempted any longer term storage, but left the dough under refrigeration for a day, and had positive results.)

for the spice paste:
  • olive oil
  • 1 t. ground cumin
  • 1 t. paprika
  • 1 t. turmeric
  • 1/2 t. cayenne pepper
  • 1/2 t. salt, to taste
Mix all the spices in a small dish, and add oil enough to make a semi-liquid paste.

When the dough is raised, you can make the breads right away, but since mine was refrigerated, I took out the dough and pinched off golf ball sized pieces. I formed them quickly into balls, taking care not to deflate the dough too much. Just try and be gentle. Then, I let them under a towel for at least a half hour. Roll each ball into a thin round, spread with the spice mix to within an inch of the sides, and then roll up the round tightly like a cigar. Then, coil the cigar tightly onto itself to form a "cinnamon roll looking shape". Let these coils rest on an oiled sheet for about 20 minutes.

When ready to bake, heat a cast iron skillet over medium heat until a drop of water sizzles when tested. (I did not need to grease my pan at all, since I have a very well seasoned one.) Roll the coil out into a thin round and don't worry if some of the spice mix escapes. Use a bit of flour to keep it from sticking as you roll, but try not to add too much. Transfer to the pan and bake until small bubbles form on the surface of the bread. Flip, and continue cooking on the second side until deep brown speckles form, maybe a minute or two. (I covered the pan with the lid of a larger, non-related pan during the cooking of the first side. I don't know why, but I figured it would make it more tender. You wouldn't have to - it boils down to doing it how you like!)

A good rule of thumb for handling this dough is to treat it gently. It is fragile, or at least I pretended it was and it worked for me. Wheat flour has far less gluten in it that regular old white flour, and there is but a whisper of the white stuff in this dough. You can't hurt by erring on the side of caution.


I think, since I was raised on them, I equate all things baked in a cast iron skillet to tortillas. My Mom's version unmatched still by anything I have ever made or likely will make. She does not measure, but the flour tortillas are so light and tender, fully floppy and studded with brown 'beauty spots'. I tend to compare everything round to them, even things like this that are not really that similar, just to see how they stack up.

These are tender in spots and crisp in others, spicy with cayenne (heavy on that, in my case...) and interesting in general. They separate into layers due to how they are coiled and then rolled, and I am amazed that they are still soft at all after the beating they seem to take with the rolling pin. I ate them for lunch with ample amounts of hummus I made using roasted red peppers I had made in advance and frozen (I do about 10 lbs of them late every summer, and then use them throughout the year), and with garbanzos I had pressure cooked a month ago and frozen. With totally unrelated, but no less delicious, chile marinated olives from Outpost, I was in vegan dining bliss.

Had I had some cucumber and tomato, maybe some lettuces, I could have served it to others as a main course. But for me, bread alone is worthy of a meal. Simple, yes, but wholesome and satisfying - and now successful which makes it even better.


These two that were leftovers were cooled several hours and then cut into wedges and polished off when SS came for dinner later that evening. We had pizza for supper, since I did make the Lahey Cauliflower pizza again using the traditional Lahey crust. I have officially crossed it off my list. I may just have to try more Lahey recipes using the sourdough starter. I can't help it. It's in my blood now.


UPDATE:
I tried making a version of these using this leftover sourdough dough that I had in the refrigerator for several days. The dough is from Burp! blog, and it also makes great pizza. I didn't even let it come to room temperature, I just broke off a couple balls of dough, and rolled them out as described above. They puffed up and made a more puffy flatbread, but they were delicious! Creamy inside, with a nice, brittle crunch to the outside - I'll definitely make them again soon. Pictures here.

The Lahey Project (kinda...): Cauliflower Pizza


Being in the throes of sourdough, I have lately abandoned my Lahey Project fervor. I have not forgotten dear Jim, since yesterday I produced my best loaf of sourdough to date using his ratio (in metric) of flour to water, and counting a heaping 1/4 c. of my starter in the liquid part of the equation. When I saw this Habenero Apple Jelly recipe today, I knew I had to rush off to my favorite apple vendor at the farmer's market in West Allis to get some cider - and while I was there I couldn't pass up a yellow cauliflower. One thing always leads to another, doesn't it?

Even though I have ample things to eat, I know that the winter season will soon be upon us and then that yellow cauliflower will then be the only thing I can think of: so often is that the case when I don't give in to instant gratification. And, while I'm at it, if I'm going to be instantly gratified, it behooves my healthfulness to include a cauliflower. High in vitamin C and fiber, and full of cancer fighting phytochemicals, the yellow version shouldn't actually taste much different than a milky white varietal. I swear that the yellow version is gentler and much more sophisticated. But then again, it's probably just the divine combination of ingredients that comprise a Lahey pizza...


Long before the purchase of said cauliflower, I had started a whole wheat dough this morning using my sourdough starter. I applied the same idea of counting a heaping 1/4 c. of starter as a liquid, and tried a mostly wheat "no knead" dough from Healthy Bread in Five Minutes a Day. I own this book, and was initially very excited with it (before Laheyitis set in...). The premise of both Artisan Bread in Five books is that you are able to mix up a large batch of no knead dough, and then bake with it for a week or longer. The bread is good, and the time saving is valid for those who may be busy. But after trying my first bite of Lahey bread made with a minuscule amount of yeast, I couldn't go back to stored dough; my new breads developed much more flavor over that longer period of fermentation time.

I also have the luxury of pretty much babysitting any dough project since I work in the home... and there is a very satisfying reward for me personally to be able to bake on demand and set my alarm clock for the middle of the night or supremely early in the morning to attend to such needs of experimentation. It's kind of funny that here I am, trying to take a simple method and make it more laborious, but that is what I do I guess. There are a lot of great recipes in the Artisan Bread books, and now that I know I can make more work for myself, I may set out trying to replicate more of them using a longer, single baking approach.

I scaled back the HBin5 master bread dough recipe to 1/4 of it's intended amount (fairly easy, since the book lists metric weights for the master recipe) using my starter, and compensated for having ALL of my windows open for most of this unseasonably warm November day by leaving the dough in my oven with the light on to raise for about 8 hours. It was ready by dinner time, and by then I had this gorgeous cauliflower. Though I may be stretching to count it in my Lahey Project, I used the recipe for the topping from My Bread.


The dough was super sticky, so I rolled it super thin on a piece of parchment, and baked it on a stone at 500 degrees. When the dough "set", I slid the parchment out from underneath.

Brilliance. The mandolined cauliflower tossed with green olives (I "borrowed" queen sized manzanillas from my in-laws), chile flake, fresh garlic, Parmesan cheese and a trace of olive oil. The dough was nice and crisp - but to be honest, I was so enamored of the topping it was clearly in the backseat. I saved the rest of my dough in the fridge to play with tomorrow - and am figuring that I'll likely make the second half of the cauliflower into another pizza tomorrow night, dutifully complete with Lahey crust.

(Oh, and I forgot to mention that this cauliflower pizza is topped with breadcrumbs. Beautiful, uniformly dusty breadcrumbs now thanks to the VitaMix! But breadcrumbs of any size or shape and added to the top of any pizza just prior to baking are probably only going to enhance your outcome, and that is just one thing I have learned from Jim Lahey.)


The only enhancement that can make a Lahey Pizza better in my eyes is some heat. Even with the ample chile flake my heavy hands added, pizza in my book needs to be consumed with peppers alongside. My candied jalapenos were perfect, and I ate a slice with each bite until my eyes were hot and nearly watering. Not so much watering as "sweating". I've said it before and I'll say it again, you know it's good when your eyes sweat.

The End.


Vegan Monday: Tofu Scramble (and Bonus: Sweet Potato Smoothie)


I sometimes wonder if my library sees my check-out trends and stocks new books just for me. On our weekly trips to the library, Boy-O usually dictates the time that I can spend looking at books for myself, but usually is able to use his "library voice" long enough for me to at least peruse the New Books shelf. Last week, I was excited to find a brand new vegan cookbook: The Vegan Table by Colleen Patrick-Goudreau.

Colleen's book is a guide to vegan entertaining, and recipes are organized seasonally and by occasion. It's full of great photography and recipes, exactly the type of cookbook that I can read cover to cover and then drop into my endless Amazon cart since I know it will continue to be an inspirational addition to my kitchen library.

So, early this morning when I was "Vegan Mondayless", and awake bright-eyed at 6 AM instead of bleary-eyed at 7 thanks to that daylight savings time, I decided that I had to make a tofu scramble for breakfast. Tofu scrambles, or the vegan approach to scrambled eggs, are things that I've eaten out numerous times, but for some reason have never made at home. The scramble in The Vegan Table looked so good when reading about it late last night, and since I had it on two accounts with recently reading a similar recipe in the VitaMix cookbook, I felt more than confident that a good breakfast would ensue. Well, needless to say, I loved it... and now know that I will probably be making it a lot using up all kinds of different veggies.


Now, I should note that I wish I had a bottomless appetite. The truth is, it usually doesn't take much to fill me up. I used a half recipe (amount from The Vegan Table) which should have fed me, one person, but it actually could have fed me twice. That's OK, since now I have tomorrow's breakfast taken care of...

Vegan Tofu Scramble (adapted from The Vegan Table and the Vita-Mix cookbooks)
serves 1-2, easily doubled
  • 8 oz. firm tofu, crumbled (not silken)
  • 1 T. olive oil or water
  • 1/2 onion, chopped
  • 10 crimini mushrooms, chopped
  • 1/2 - 1 red or green (or some of each) pepper, chopped
  • 1 clove garlic, minced (or pinch of granulated garlic)
  • 2-3 leaves fresh spinach, coarsely chopped
  • 1/4 t. turmeric
  • 1/2 t. cumin
  • 1/4 t. paprika
  • 1 T. nutritional yeast
  • salt and pepper
  • (optionals: chopped jalapenos, diced tomatoes or salsa, red chile flakes... etc.)
Heat olive oil or water in a large pan over medium high heat. Saute onion, mushrooms, garlic and pepper(s) until softened. Stir in crumbled tofu, spices, nutritional yeast and spinach, and saute about 5 minutes until tofu is bright yellow, and heated through. Season with salt and pepper.

I ate half of the above portion with a Black Bean Tortilla that I had made the other day using some leftover pinto beans. The tortillas are also vegan and freeze well.


Tomorrow's breakfast.

Happily working through my morning organizing my house and paring down clutter before Winter comes, I eagerly anticipated this smoothie for lunchtime. Yesterday afternoon, I roasted some sweet potatoes (whole, in their skins at 400 degrees for about an hour) with this recipe in mind. It is in the VitaMix cookbook, and I never would have imagined how delicious it is. So good in fact, that even if you don't have a VitaMix, it would be worth trying to approximate in a food pro or with an immersion blender. But hey, if you live in Milwaukee, just stop in so you can share one with me!

Autumn Sweet Potato Smoothie (VitaMix cookbook)
makes 2 generous cups (I drank one glass, and saved one glass for later...)
  • 1 c. red grapes
  • 1/2 medium orange, peeled
  • 1/2 sweet potato, cooked and cooled
  • 1/2 medium apple, halved
  • 1/4 c. fresh or frozen cranberries
  • 1/2 t. fresh ginger root (I love ginger, so I used a two inch section of ginger root, roughly chopped)
  • 2 whole pitted dates
  • 2 c. ice cubes
  • (I also added about 1/4 c. water)
"Place all ingredients into the VitaMix container in the order listed and secure lid. Select Variable 1. Turn machine on and quickly increase speed to Variable 10, then to High. Blend for 1 minute, or until desired consistency is reached."


Every once in a while, one part of a whole makes me feel like alone it is worth the price of admission. That is how this smoothie is. Like if it was the only thing I ever made in my new machine, it would be fully worth astronomical VitaMix pricing. (Though, in all reality, I couldn't be happier with my machine. It stands up to it's hype, is worth it's price, and impresses me daily - so consider me a proud spokesperson!)

I was thinking about Mark Bittman today, and how he likes to "go vegan until 6 PM". I guess that would be 5 PM central time, and I'm well on my way for today anyway. It is an intriguing idea for those of us omnivores who tend to be heavy on the veg side of things. If it wasn't for my leftovers, that often loom large for me to clobber days after a meal if I forget to appropriately scale down, I would certainly be able to commit to this diet myself!