Orange Liqueur.

I never used to think much about preserving the Winter fruits. The past two Winters, I indulged myself in marmalade, and I have preserved lemons in the past, but really I have yet to branch out into canned clementines, or other lightly sweetened sectioned fruit. Next Winter, I will be better prepared with a list of citrusy canning projects, but until then I'll have an orange liqueur to keep me company.


I came about "liqueurizing" an orangy concoction somewhat by accident this year. It seemed there was a buzz surrounding Cara Cara oranges, which I had never before tried, and were available at my co-op. When I ate one, they quickly became a favorite, melding a slightly grapefruit undertone with the recognizable orange. Julia had been busy making triple sec, using brandy. I was daydreaming of Spring and rhubarb season, and remembered that I hadn't tasted my rhubarb liqueur in a very long time. When I poured a little cordial glass, it was as fine and mellow as a cordial could be, all the harsh bite of gut-rot grain alcohol successfully tamed as time did it's thing.

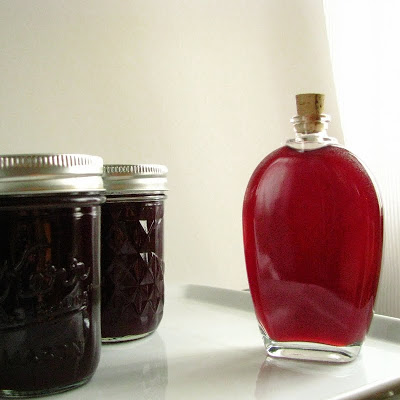
Deena's recipe was such a good base ratio (and it stands as one of my favorite food blog posts ever), so I decided to apply the same method to oranges, hoping to create an orange liqueur that could stand in both drink and baked good as proud and bracing fresh orange substitute. When I decided to bottle it up yesterday, I feel I've succeeded, but I won't truly know until time works it's magic, and smooths out all the edges.


iPhone pics.

Not being a huge drinker, and being downright snobbish in demanding the finest when in the company of alcohols, I consider Cointreau the gold standard, the King of orange liqueurs. I should preface that I have not ventured far down this orange paved road, triple secs in general not something I buy or drink often at all. In my mind, there are two premium options for orange liqueurs widely available, my favorite, Cointreau, and the slightly sweeter Grand Marnier. The ethereal and pearly clear sophisticate of Cointreau is a mysterious thing. It is so intensely orangy, my limited drinking self has never found anything to compare.

The bottle, at home in my spice cupboard, has flavored rice puddings and nut-studded quick breads with ease, and a splash here and there has enlivened beverages with bright, unmistakeable orange flavor. Could I dare come close to making something this incomparable?

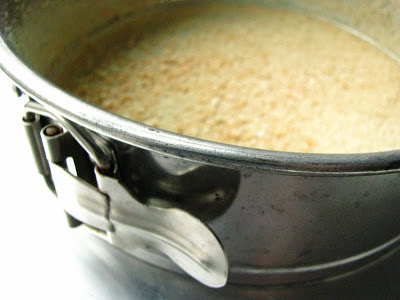
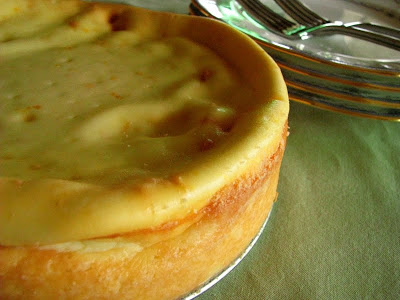
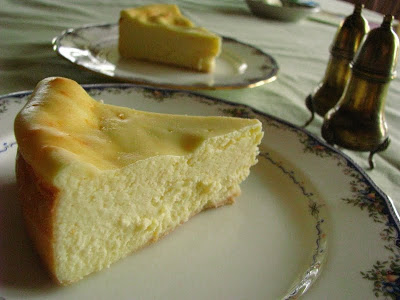
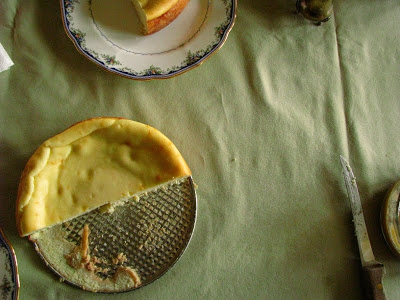
I figured since I was near the bottom of my Cointreau bottle (I've since polished it off, adding the remainders to a rhubarb sauce for the Easter ricotta cheesecake), I could spend the money on another - or take the risk of spending about the same amount on a bottle of grain alcohol and try infusing my own.

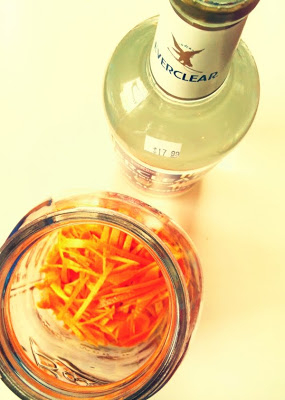
Grain alcohol, by the way, is creepy stuff. Not only do I feel the overwhelming compulsion to explain to the clerk what I'm planning to do with the stuff, it comes with flammable warnings, and disclaimers in bold face on the very visible front of the bottle: "NOT INTENDED FOR CONSUMPTION UNLESS MIXED WITH NON-ALCOHOLIC BEVERAGE". If you ever needed a reason Not to drink something, this is probably the bottle for you. It does, however, do a stellar job of leaching every last drop of color and flavor from whatever you drop into it, making it the perfect medium for liqueur base.


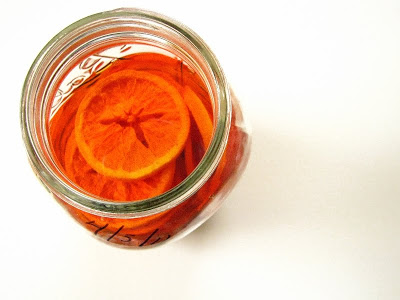
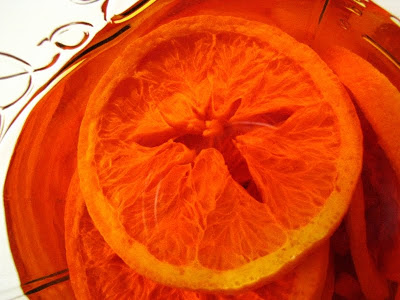
Partially inspired by Marisa's post on dehydrating lemons and limes, and my "internet friend" E. from Maine, I sliced 4 Cara Cara oranges thinly and dehydrated them until crisp. I added them to the peel of 6 or 8 (I can't quite remember) navel oranges in a half gallon canning jar. Then, I poured in the grain alcohol, screwed the top on tight, and forgot about it for a month as it sat on the shelf in my dark basement. The shocking traffic cone orange and the pure orange scent was overwhelming, and both were cues that I should bottle.

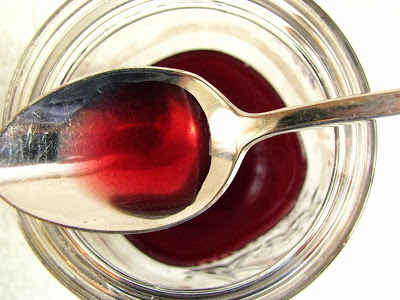
Using Deena's formula and the trusty Metric System, I used a beginning measure of infused grain alcohol (866 mL), added 1 1/2 times spring water (1299 mL) and the bare bones of sweetening: half of the beginning measure of sugar (433mL). (Yes, I know I should not have probably used mL's to measure the sugar, but I did.) I heated the water/sugar just enough to dissolve all of the sugar, and then let it cool. When I added it to the crystal orange clarity of the base alcohol, I was surprised as it turned opaque. When I tasted it, it was a little harsh, a little sweet, and a little bitter, but it was also fully orangy and already quite good.


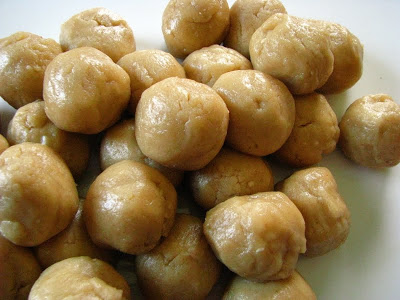
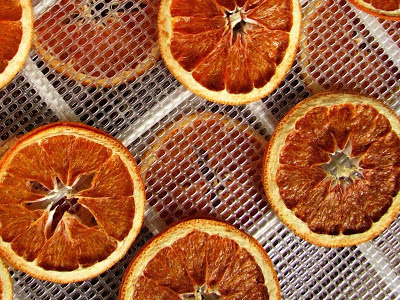
It seemed like the Cara Cara oranges "rehydrated", but they were brittle and dried when removed from the grain alcohol.


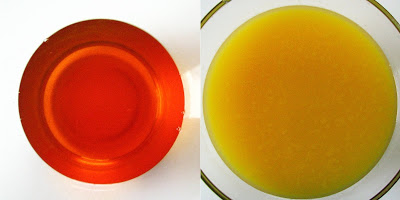
a blurry comparison of color pre-dilution (left) and post-dilution (right).

Will I give up Cointreau and it's gorgeous opalescence in sole favor of my new homemade version? Not likely. But I feel that mine will be at home in baked goods, jams and glazed carrots to be sure. The tangerine opaqueness is a pretty thing to look at sitting on my counter, but I know I must soon transfer it to the dark basement to both preserve it's color and let it mellow.

I saved last year's boozy rhubarb remains and cooked them down. Too strong to be eaten on it's own, it did make a good kombucha flavorant... but I don't think the brittle, alcohol-dried orange peels will do the same. They are still sitting in a bowl on my counter, since it pains me to have to throw them out. Just a nibble on them makes my tongue numb from both the bitter peel and the creepy-strong grain alcohol. Any suggestions before the whole lot goes into the garbage? Not sure about composting it, what with the high toxicity of that alcohol...


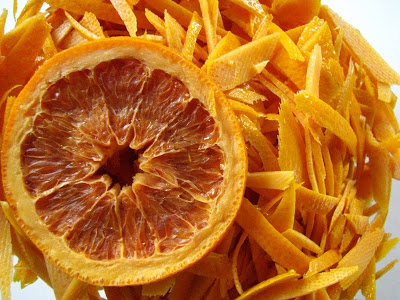
color leached oranges.

Our Spring is very fickle this year. It's cold, rainy, cloudy and then there will be an 80 degree day directly followed by a 45 degree one. Maybe that is why the sunny orange of this liqueur appeals to me so much. Maybe that is why citrus seems so great in the Winter. No matter the season, citrus preserved is something that never fails to make me happy. For no other reason than the surreal color, I am glad for my experiments with this orange liqueur.

Mothers.

Mother's Day is here once again. This particular day of the year has taken on entirely new meaning since I became a mother. It seems incredible that this is my own personal 4th Mother's Day, and that the tiny, helpless babe that existed those 4 years ago is now already memorizing books, writing his name, and drawing numbers all over the driveway in sidewalk chalk. I never realized just how much sacrifice my own Mother gave for me, giving everything from sustenance to laundry her full attention, and even occasionally her finger-wagging that has made me what I am today. Mother's Day now not only reminds me of my amazing Mother, but of the endless circle of life, the ebb and flow of both the seen and unseen.


Mothers. Of Vinegar.

When Lizzy brought up a bucket full of vinegar mother from her basement for me, I flung myself at the mercy of this organism. Mother of vinegar is essentially a mixture of cellulose and acetic acid bacteria, a growing colony (not unlike the kombucha SCOBY) that does it's job day in and day out with very little human intervention. It's actually hard not to let this process start on it's own, unless you are beginning with a liquid that has some type of preventative, like the sulfites present in most wines. Given this no-brainer-type information, I felt that finding some solid instruction on how to make amazing vinegar would be easy. That wasn't really the case, and now I think I know why: it is shamefully easy, and you really just learn by doing.

One thing that certainly is a given, is that to make vinegar, you need an alcoholic medium. You may remember that Jeremy at Northern Brewer gave me 2 gallons of home-brew wine (which is coming along nicely, but it's going to be awhile yet due to the volume), and lots of advice on how to open ferment fruit juices using different strains of yeasts.

Around the time that I began the rhubarb-strawberry version, I also decided also to ferment some preservative-free blueberry juice my Parents' had brought me from a trip they made to Nova Scotia. That bottle was only 375 ml., so I added some homemade apple juice I made by blending some green apples with a little water in my Vitamix, then straining it. I emailed Jeremy to see if I could use the same yeast strain that I had used to ferment my strawberry-rhubarb juice, and he confirmed I could. (I would say that I need to learn more about yeast strains, but that is a topic for another day...)


I use unbleached cotton muslin in my kitchen a lot. I get it at the fabric store.

I split the fermented juice, which took about 2 days to finish, into two mason jars and added a small chunk of vinegar mother to each. Within a week, the mothers covered the surface of the jars.

Now would be a good time to add that if there is one thing I have noticed about Lizzy's house, it is that it has flies... even in Winter. To make vinegar efficiently, you need room temperature, not the cool depths of my basement. (Lizzy kept her cider vinegar in the basement, but it took more than a year to do it's conversion. I suspect she did not want to make room for a giant barrel in her kitchen.) The things I worried about on the drive home with a pail full of mother of vinegar were twofold: first that my husband is not fond of flies - especially indoors, and second that he doesn't like the smell of vinegar. He doesn't really know what I'm doing in my kitchen, spending countless hours tinkering around, but this I suspected, he may detect if I wasn't careful.


Leaving the mason jars, covered with muslin and sheltered from light, on my kitchen counter only worked for so long. A few weeks ago, I started noticing tiny 'vinegar flies' as far away as my bedroom. The growing scent of vinegar was actually even putting me off of drinking my daily kombucha - I just began to feel vinegared out. I have a shallow, dark pantry in my dining room, and moved the jars inside - warning my husband that if he went in there it would likely smell like vinegar. It seemed to take care of any tiny flies too; I haven't seen a trace of them since.

Meanwhile then, I noticed the mothers steadily growing in thickness and a small amount of sediment sinking to the bottom of the jars. This morning, I figured I'd stop procrastinating, and find a way to bottle it up. From miscellaneous reading, I knew that if I bottled it without heating it (left it completely raw) it would continue to develop and in time be extremely strong. From this link, I determined to heat it gently to 140 degrees, and then bottle in in sterilized glass jars.

As I mentioned earlier, there was a little sediment in the bottoms of the jars. As careful as I was not to disturb it, it really did make for cloudy vinegar. I strained it through more muslin, still concerned that my finished product was just going to be cloudy and there was nothing I could do about it. I loaded my glass jars (and some canning lids) into a pot of hot water and brought them to a boil for 10 minutes to sterilize, and at the same time, I brought the vinegar to 140 degrees.

As soon as it reached that magic temperature, all of the cloudiness parted, floated to the top. I poured the whole lot once more through some muslin, and had beautifully clear vinegar. Then I loaded the hot vinegar into the hot jars, suspecting they would seal. Even though it wasn't necessary, they did seal and I have a pretty tasty finished blueberry apple vinegar. I'm new to vinegar, and know that it must be aged to mellow out. I have no idea how long that will take, but I left one of my jars sealed only with a stopper so I can check up on it periodically.


I am happy with my plummy purple vinegar. I may not get to actually enjoy it for quite some time, but for very little investment I feel like I have learned a whole lot and will have a whole lot to show for it. I still have to bottle the strawberry rhubarb, which did smell even stronger than the blueberry apple, but now I have a better confidence on how to do it. I keep a curious eye on the 2 gallons of wine that appear to have grown a shag carpeting over the top. Why my blueberry apple mother looks completely different, gelatinous by comparison, I have no idea.

I assume the differences are par for the vinegar course, and the whole experience is not unlike human motherhood: it is ever changing and somewhat demanding, and probably some of the best of what can happen to me in my lifetime. While I only have one child, I suspect if I had many, each would be just a little different, requiring me to be as different as the mothers coating the tops of different-ingredient vinegars.


Backlit, you can see the true colors.

I could go on with the comparisons, how straining and clarifying relate to human experience, how depth and age improve the personality of both liquids and people but I'll spare you. I'll say instead that I am so privileged to be a mother, and one of a real live human being. It's a role I never imagined for myself, but one that has brought me the deepest pleasures in life to date. More likely than not, it is what has caused me to learn about such things as vinegar, and what keeps me learning on a daily basis! These are the very same things I know I learned from my own Mother, in her quiet way. I am thankful for her, and all she has inspired me to do and be in my life.

Blistery Peter Reinhart Bread and Peanutty Cookies

Of all the cookbook reading I do, it's possible that I believe the best cookbook writing comes from bread bakers. I know that there is passion in all different genres of the culinary arts, but there is just something about the bakers that click with me. They rise early and alone, they are obsessed with perfection. And, uniting all of them are the common ingredients of flour, water, salt, yeast. When you think of the volumes written about the ratios, techniques, and the utter transcendentalism of this quartet of humble beginning ingredients, it is overwhelming.

I know that sometimes I avoid reading books just because everyone has read and applauded them. I do the same with movies. It's completely feasible that I am the only North American who has never seen (and never will see) Titanic. I think, wrongfully, that I felt this way about Peter Reinhart - the indelible image of the tightly clutched mammoth loaf of bread on the cover of The Bread Baker's Apprentice just one of the things on everybody's list and the last thing on my own list of things to read.

When out of town last week, I bought a copy of his 1998 Crust and Crumb from my Mom's co-op in LaCrosse. Peter Reinhart calls this book Master Formulas for Serious Bread Bakers, and said that his methods detail a way to achieve World Class bread. As always, I read the preface, the introduction, the bits of information in the Table of Contents - marveling over all of it masterfully printed on nearly 90 lb paper. When I finally got past the introduction, where a writer typically seems to shed their personal language and really open up into writing as an art form, I found myself re-reading whole pages but for the beauty of sentence structure and the English language as it describes the ancient sustenance that is bread. It's tricky stuff to write both artful and informational simultaneously, and Peter Reinhart does it flawlessly.


"My bread epiphany occurred a few years before the bread revolution hit full force. I was cooking for the seminary of a Christian order in San Francisco (I am still a lay brother in that order, the Christ the Saviour Brotherhood). One of my friends, a very talented cook named Brother Philip Goodrich, took on the then-practically-unheard-of challenge of following all eight pages of Julia Child's instructions, in From Julia's Kitchen, for making French bread. The results were so spectacular that I followed his example, forcing myself to carry out every little step and consulting with him when I stumbled. The bread was so much better than anything we could buy, even the fabled sourdough of San Francisco, that I began making bread every day. Sometimes the results were disastrous, especially when I strayed too far from what I now know to be common bread sense. However, when the bread came out right - even accidentally - when the crust crackled and then dissolved into sweet, roasted wheatiness and the interior felt cool and buttery even without butter, I was hooked. This was my subjective initiation.

Firm Starter.

I confess, that while I've read about such (standard) bread techniques as the "windowpane test", I never before did this myself. Perhaps I felt like it was maybe a little needless for a home cook, I also kind of felt like I would be succumbing to full-out craziness, kind of the way I used to toss pizza dough up into the air (but only when no one was looking so they didn't think I was trying to be cool or something). Gluten development that happens through proper mixing is miraculous, and the temperature increases that the dough undergoes also indicate it's readiness. As great as I consider Nancy Silverton's book (Breads from the LaBrea Bakery), I couldn't grasp that until reading it through Peter's eyes.

I have graduated to a WindowPaner. There is no turning back now. To do a window pane test, simple take a small amount of dough, and try and stretch it into a thin pane-like membrane while moving it circularly around. If it rips, the gluten isn't ready, if it stretches thin and lets light pass through, it's ready.


My first duo of loaves was made with what Peter calls a firm starter. It was a starter made with my wild yeast culture that formed the ball seen above. Essentially, starter is mixed with water and bread flour, fermented 4 hours, then left to refrigerate overnight. Being firm, it is able to be kneaded by hand and as it sat it rose and became overwhelmingly sticky. To break it apart into the 6 pieces he suggested, I had to wet my hands thoroughly.

I used my stand mixer to get the sticky dough going, knowing that higher hydration does lead to better, bigger, airier holes in the finished bread. I feel that it is difficult to avoid adding too much flour when working solely by hand, but someday I'll work up to that I hope. It would be nice to have a huge, wooden bench type counter where I could fully let the flour fly, but my reality is an 18 inch maple cutting board that is dedicated to dough. I love to dream.


To calculate when you will bake, work backwards to see about what time you should start. I wanted to bake in the afternoon, so I started the firm starter the morning of the day prior to baking. I think "overnight" usually refers to about 8 hours, but I let it go more like 16 with good result. I also baked these in a pot, Jim Lahey style. The moisture from the bread creates it's own steam, which is trapped in the pot and released as baking goes on and the lid is removed. I was happy with my results.

Peter Reinhart Bread (Crust and Crumb)
makes two loaves

for the Firm Starter:
  • 1 c. (4.5 oz.) unbleached bread flour
  • 6 T. room-temp water
  • 1 c. (4 oz.) starter
for the Dough:
  • 5 1/4 c. (24 oz.) bread flour
  • 2 c. cool water (65-70 deg.)
  • Firm Starter, from above use all (11.5 oz.)
  • 2 1/2 t. salt
To make the Firm Starter: mix the starter ingredients in a mixing bowl. When they form a ball, turn the dough out onto a floured surface and knead just until all the ingredients are incorporated, and dough forms a smooth ball. Place dough in a clean bowl, cover, and let ferment at room temperature for 4 hours. Then transfer to the fridge overnight.

Remove the Firm Starter from the fridge 1 hour before mixing up the dough. Before mixing, cut it into 6 pieces. It will be pretty sticky, I used wet hands.

To make the dough: combine the flour, water and starter pieces in a stand mixer fitted with a dough hook. Mix on low for 1 minute, then on medium for 3 minutes. (At this point, you can save 12 oz. of the starter to become the Firm Starter or 'chef' for additional loaves at a later time. I assume from reading, that it would be viable in the fridge for up to 3 days.)

Add the salt, and continue mixing for another 4 minutes, or just until gluten sets up. Dough should pass the windowpane test, and read 77-80 degrees on a thermometer. Hand kneading will take 10-12 minutes to get to this stage.

Put the dough in a clean bowl, cover (Peter uses plastic, but I used a lid for my stock pot), and let rise at room temperature about 3 hours. The dough may not double fully, it just needs to "begin swelling".

Divide the dough into 2 pieces, and round each into a ball. Let rise ("use a prepared banneton, basket or mixing bowl and place the smooth side down) about 4 hours until doubled in size. Peter has specific method for this, but I let them rise the way I normally treat breads: one in a well floured linen cloth inside a colander, and the other in a reed banneton (basket) that was heavily coated with flour and wheat germ. He also recommend misting them with cooking spray, and placing them in a plastic bag. I just make sure they are away from drafts, and cover with a dry towel topped by a water-moistened towel. I just have a thing about cooking spray... I'm sure that would work perfectly, though.

About 45 minutes from the end of the second rise, place a cast iron pot (with it's lid on) in a cold oven, and preheat to 475. I decided to bake them both, one after the other, but you could also choose to let a loaf retard in the fridge overnight. Peter notes that it will develop a more sour flavor and that you should remove it from the refrigerator an hour before baking.

Gently turn over the risen loaf, score and transfer the loaf to the hot pot. Replace the lid, and bake for 30 minutes. Remove the lid, and continue baking for 10-15 minutes more until deep golden brown. Remove the loaf to a cooling rack, and cool at least an hour until slicing.


Blistered Crust.

Because I was standing around the kitchen for 1 1/2 hours during baking, and because I had decided to clean and wash out my refrigerator on Sunday afternoon (discovering a pint jar of Sally Fallon crispy peanut butter lurking in the far back), I figured I'd take advantage of the hot oven and make some cookies. Sally Fallon's nut butter tastes a bit different than most nut butter since the nuts are soaked and dehydrated, then blended with coconut oil to replace some of the natural oils that are lost in this process. There is also a little honey in her recipe, which really makes the blonde peanut butter taste unconventional. I liked it, but the Boy-O is both picky and a peanut butter connoisseur. Cookies are sure ways to use up "suspect ingredients", and while he thought they didn't taste like peanut butter, he still gobbled them down.


I cut traditional amounts of butter and sugar in half, since there was oil added to the nut butter I made. The things I loved about these peanut butter cookies were the things that often sadden me about others: they were not too sweet, they were not too rich, and they were both a little chewy and a little crunchy. They also celebrate the homemade nut butter, and I can't tell you how many times I have read "do not use natural-style peanut butter". Use it! And, they will be great.

Natural Peanut Butter Cookies
  • 1 c. peanut butter (I used Sally Fallon's sprouted kind, but I'd imagine any nut butter would work well)
  • 1/2 c. (1 stick) butter, softened
  • 1/2 c. brown sugar
  • 1/2 c. white sugar
  • 2 eggs
  • 2 t. vanilla
  • 3 c. AP flour
  • 1 t. baking powder
  • pinch of salt if using non-salted nut butter
Preheat oven to 350.

Sift the flour and baking powder (and salt) in a small bowl.

In a large mixing bowl, cream the nut butter and butter until well mixed. Add both sugars, and mix well. Add about a cup of the sifted, dry ingredients, and blend.

Add eggs, one at a time, and vanilla - mixing well (1 minutes) after each egg addition.

Add the rest of the dry ingredients, and blend until just combined. Form batter into uniform ball.

Arrange them about 2 inches apart on parchment lined baking sheets, and flatten them criss-crossed with the tines of a fork. (They don't spread too much, so you can keep them pretty close together.) Bake for 15-18 minutes, rotating pans about half way through baking time.

Cool on the pan for a few minutes, then transfer to a wire rack to cool completely.


By the time the last of the cookies were cooling, I finally felt I could risk slicing open my first "World Class Bread" loaf. Peter Reinhart's descriptions of a buttery interior, the wheatiness, the thin cracking crust: they were all there. This bread tasted different than the countless others I've made using the exact same ingredients. It was the method and ratio that was changed, and perhaps the romantic way he describes the way that this bread should taste. Because I had formed the loaves the way I did, tiny blisters popped up on the skin of the crust, something that I don't think has happened to my bread before. They were both gorgeous. They were both World Class. They looked luminous inside, and they came from my oven.

It seems I've run into a string of exceptional writers lately, and it causes me to over-analyze my own paltry attempts at words on a page. What I lack in wordiness, I make up for in passion, at least I hope. As for Peter Reinhart... I will be reading The Bread Baker's Apprentice, and I haven't looked forward to anything more in a long time. As I continue to read on through Crust and Crumb, I continue to be infinitely inspired by the lowliest and earthiest food, and the way bakers think. I inch closer to becoming a baker myself. Maybe this is my own "bread epiphany", or maybe just another in a string of epiphanies. All the while, I just sense in the back of my being that one of these days I'll figure out what I want to do, what I want to be when I grow up. Then, certainly, the next obsession will strike.


The post has been Yeastspotted.

My Love-Hate Relationship with Technology (and Low-Tech Ricotta Cheesecake).

I spent nearly all of the past week technology free. Since my little Boy-O was on Spring break, we left early Saturday morning for the Farm with a car packed with cultures, various foodstuffs, my Husband, and my electronic scale. I love every occasion I can spend with my Parents, especially in the country at the place that is most deeply home to me.

I was born in the Great Northwoods of Wisconsin, and I daresay it took a long time for me to feel like I could be from somewhere else. Moving to southwestern Wisconsin when I was in 5th grade was probably the reason that I felt such devotion to the place of piney wilderness, a ruralness of sandy loam and lots of lakes. Living that nearby to the mighty Mississippi was of no real appeal to me until years later a friend of mine decided to build a raft from 50 gallon drums and drift southbound. In 6th grade when we settled out of the city, the bucolic hills surrounding my Parents 10 acre farm didn't really begin to sink in until I became a horse owner around age 15, those hills of the driftless region becoming part of my blood as I ran my quarter horse, King, scaring my liver half out of my body. The farm-lined hills slowly, patiently, wormed their way into my heart, never caring that it took decades for me to fully appreciate them. Now when I drive the back roads they feel good, I don't know their proper names, but I remember them and they remember me.

Now when I think of home, the pine trees and fern lined forts of my birthplace are a thing of distant memory and the rolling hills of the Farm are firmly embedded in my body. My first breaths outside of the car instantly calm my city-worn nerves... and I wonder if my city born and bred Husband could ever change that much for me - that I might be able to live there once again...

It's no secret that I can't travel lightly. My car travels with not only human life, but with sourdough and yogurt culture that can't be left unattended for a week (or maybe it could, but I just choose to Mother it a bit more than I should). Filling up the extra back seat spaces were a gallon of cranberry flavored kombucha for my Mom and a from scratch Italian-style ricotta cheesecake I knew my Dad would love, that cheesecake proving to me after Easter Sunday dinner that it could very well be my new favorite dessert.


It seems every time I read a new cookbook, the desire to see what the author is all about overwhelms me. David Lebovitz's book Ready for Dessert was a recent read, and it seems that I am infinitely inspired by it. Like Dorie's Baking Book (probably still my favorite comprehensive baking book), everything I've made so far seems to turn out no matter what tweaking I do - the marks of very good recipes in my opinion. I scaled down a ricotta cheesecake that David pared with a truly lovely rhubarb sauce: a sauce that was light as Spring and as softly sweet, a hint of Cointreau's alcoholic orange that I added last second. I'm making more sauce this week with some frozen rhubarb I should use up before the new season brings a bumper crop. It was also great on yogurt, and the pearly pink liquid that I drained from it so it could be thicker was perfect for swigging as is.


When I decided to make the cheesecake, I figured why not go all out and make the ricotta, too. I haven't made it in a very long time, and never have made it with my favorite cream-line whole milk from Crystal Ball Farms. A gallon of milk yielded me a scant pound and a half of gorgeous curds, that set up surprisingly overnight in the fridge. The next day, I mixed my cake David Lebovitz style, barely sweetened and luxuriously nestled, into a vintage 8 inch springform pan that my Mother-in-Law gave me.


To make the ricotta, I followed the instructions in Home Cheese Making by Ricki Carroll. Simply mix a gallon of whole milk with 1 teaspoon of citric acid in a large, non-reactive pot, and heat milk until 185-195 degrees (Fahrenheit), stirring often to prevent scorching. When the curds and whey begin to separate, turn off the heat, and allow to sit undisturbed for 10 minutes. Drain the curds in a piece of fine cheesecloth, butter muslin, or like me in unbleached muslin from the fabric store. (Reserve that whey for bread making and other mischief.) Drain for 20-30 minutes, until desired consistency. Transfer the cheese to a storage vessel and into the fridge, where it will keep for 1-2 weeks.

Forgive me the way that I post this recipe in both metric and conventional measure. Since I used roughly 3/4 of the original recipe, it was easier to figure the sugar and cream in metrics. I like this site for conversions, if you need to approximate.

Italian-Style Ricotta Cheesecake (adapted for size from David Lebovitz)
  • 1 recipe whole milk ricotta, about 1 1/2 pounds (see paragraph above)
  • 97 g. sugar
  • 80 ml. heavy cream
  • 4 eggs
  • 3/4 t. vanilla extract
  • pinch of salt if desired, and you know it is desirable
  • 2-3 t. grated orange peel
  • 3/4 T. flour
Preheat oven to 350.

Butter an 8 inch springform pan well, and sprinkle with cookie crumbs or graham cracker crumbs, or just leave it plain. I used a couple of crushed Maria cookies.

In a stand mixer or with a hand mixer, blend the ricotta with the sugar until creamy. Add the heavy cream, the eggs one at a time (beating a minute after each addition), the vanilla, the salt and finally the orange peel and bit of flour.

Spread the batter evenly into the springform pan, and bake for about an hour, slightly less, until the center barely jiggles when tapped. I baked mine slightly too long, but it was still delicious.

Cool completely before unmolding, and run a thin knife around the edge of the springform pan before trying to release.


Baked just a little too long, it rose and fell. You'd never know from the texture, however...

I baked this specimen on Friday late afternoon, and it was just fine when served on Sunday afternoon. It remained fine for leftover dessert cravings later in the week. My Mom thought it could use a bit more sweetener, but she confesses to having the Mendez sweet tooth. My Dad and I thought it was perfect. We served it with my rhubarb sauce and some sliced and sugared frozen strawberries from my Mom's freezer.


When I was in about the 10th grade, my Parents decided to disconnect the television antenna. Rurally, that meant that I could no longer get my weekly fix of Northern Exposure and my nightly fix of David Letterman. I didn't realize at the time what an amazing service they did me: causing me to use my imagination and to flex my reading muscles instead of depending on television's hollow appeal. It was actually years after I lived on my own until I started re-introducing t.v. back into my life, and even still I don't watch a whole lot. That's why I make ricotta cheese around 9 o'clock on a Thursday night I suppose. If you ask me, it's far better use of my time. The farm still has no antenna and no computer or Internet, my cell phone operates on the "E" instead of 3G, making any web-browsing painfully slow and patience testing. After the last week spent with very little technology, I realize again that it has no mastery over me - I like it fine, but I can very easily live without it.


I had a great week, technology-free. I chatted for hours with my best friend, my Mom. I met up with my old boss the Goddess of Pie, and was inspired by seeing so many great handmade pieces of art. (Especially when I was reacquainted with Susan Johnson. I actually told her that I wanted to be her when I was younger, and that I still do. I'm pretty sure she thought I was crazy. She is an amazing weaver, yes, we have weavers where I am from...) I talked so much in an afternoon I felt like I'd lost my voice. I went to bed early, and got up at the crack of dawn. We flew kites as a family on the windy Saturday afternoon in the field, and I freaked out when two hours later I found a deer tick crawling on my arm. I took tons of iPhone pictures that I didn't even bother uploading yet to see how they looked on the "big" screen of my netbook. Best of all, I spent Easter thinking about what Easter truly means, while sitting around the afternoon table with my family. All of it, proof that I haven't lost all of the country in me, that in a moment, I could leave all the technology behind and survive quite well.

Maple Mousse, Edible Container: Daring Baker Challenge April 2011

The April 2011 Daring Bakersโ€™ challenge was hosted by Evelyne of the blog Cheap Ethnic Eatz. Evelyne chose to challenge everyone to make a maple mousse in an edible container. Prizes are being awarded to the most creative edible container and filling, so vote on your favorite from April 27th to May 27th at The Daring Kitchen!


One of the things that I was most excited about when I first started my blog was joining the Daring Kitchen. The idea of a challenge to make sweets that I'd normally never attempt was alluring, and so was the feeling that I would be "educated" a little each month by a technique or by stretching my palate to come up with unique flavor combinations. Of course, the expectation that I needed to make and eat a decadent dessert once a month was a good excuse to participate as well.

Our challenge this month is probably one of my favorites so far, and this is my 20th challenge (I believe I only missed one since I joined up). We had to make a maple mousse and serve it in some sort of edible container. For some reason I had baklava on the brain, and thought I could kind of work in a personal challenge to myself to make phyllo dough to turn into phyllo cups. Yeah. Who makes phyllo dough?

I tried. I failed. I knew it wasn't going to be easy, I recalled seeing a clip on Martha Stewart like 10 years ago in which an old Greek man and wife team stretched the paper thin dough over a room sized table, flapping it in tandem like a huge king-sized bed sheet. I should have known straight off that I'd need a partner, but figured that maybe I could use my pasta roller and roll small, long, thin sheets.


The dough was awesome (and easy). I never made anything like it. It was as pliable and soft as an earlobe. But, what I didn't know beforehand was that I should have used a higher protein flour. Still, for using AP flour, I was able to coax it into thin panes, I just wasn't able to keep it from snapping back to it's starting position. I've since looked at a lot of YouTube videos and examined other recipes and I've decided I will recruit a partner before trying this again. I may not attempt it again soon, but someday I will...


mess.

For about 2 1/2 hours, I tried all kinds of ways to get the dough to do what I wanted. I could see myself proud at the finish line, "I have made phyllo dough from scratch!" bellowing from my dusty lungs as I happily cleaned up my kitchen mess. The mess was there, but I ditched all my leftover dough, chalking it up to learning experience.

Meanwhile, I had made a trio of "crispy nuts". Crispy nuts is the term that Sally Fallon gives to salt-soaked then dehydrated nuts. I've come to be rather addicted to them, and the promise that they are better for me than their non-soaked counterparts. Since I had intended to use Alton Brown's recipe for baklava (he devoted an entire episode, down to making rose water, see it here: part 1 and part 2...), I used almonds, walnuts and pistachios - the pistachios at more than 16$ a pound being my most expensive ingredient. My dark, almost black, maple syrup (just the way I like it) is relatively local - from my Parent's Amish neighbors. It's downright affordable by comparison.


but pistachios are so worth it. probably my favorite nut.

Crispy nuts in hand, I scanned my pantry to see what I could use to make shells. I was going to make more graham crackers, but spied a box of Maria cookies. I usually keep them on hand in case I need pastel helado, but I haven't "needed" it since last summer. I forgot I had a huge box, 4 sleeves of cracker type biscuits. They are lightly sweet, and I figured they would make a good base, so I did it: 1 sleeve (7 oz.) Maria cookies, 6 T. butter, melted, a teaspoon of Saigon Cassia cinnamon and an egg for good measure. Then, I pressed them into tart(let) molds. They bake at 350 for 20 minutes or so until golden brown, pretty much the same as a graham cracker crust.


I may have made them a bit too substantial, but they were perfect with this maple mousse which was the most amazing texture and flavor. Super rich, super decadent, this is a thing that I'm going to be insisting all my friends try (and probably I will annoy them in the process) for many months to come. And, those crispy nuts that I figured I would use anyway were accidentally the perfect extra-crispy and slightly salty counterpoint for so much rich creaminess.

Maple Mousse (Evelyne via Jaime Oliver is not my boyfriend)
  • 1 cup (240 ml/ 8 fluid oz.) pure maple syrup (not maple-flavoured syrup)
  • 4 large egg yolks
  • 1 package (7g/1 tbsp.) unflavoured gelatine
  • 1 1/2 cups (360 ml. g/12 fluid oz) whipping cream (35% fat content)
Bring maple syrup to a boil then remove from heat.

In a large bowl, whisk egg yolks and pour a little bit of the maple syrup in while whisking (this is to temper your egg yolks so they donโ€™t curdle).

Add warmed egg yolks to hot maple syrup until well mixed.

Measure 1/4 cup of whipping cream in a bowl and sprinkle it with the gelatine. Let it rest for 5 minutes. Place the bowl in a pan of barely simmering water, stir to ensure the gelatine has completely dissolved.

Whisk the gelatine/whipping cream mixture into the maple syrup mixture and set aside.

Whisk occasionally for approximately an hour or until the mixture has the consistency of an unbeaten raw egg white.

Whip the remaining cream.

Stir 1/4 of the whipped cream into the maple syrup mixture. Fold in the remaining cream and refrigerate for at least an hour.

Remove from the fridge and divide equally among your edible containers.


I am so fortunate that my co-op, the Outpost, decided to carry the Crystal Ball heavy cream. Crystal Ball is amazing milk: it is cream line milk which means that it is not homogenized, and while it is pasteurized, up to 1/3 of it is unpasteurized (that is the amount allowed by law.) The heavy cream in particular is perfect for challenges, since it is minimally processed and will act the way that cream is supposed to when it's not ultra-pasteurized and homogenized. On one Daring challenge, my mascarpone did not work, when I found Crystal Ball cream and re-tried it, it worked magnificently.

A dozen tarts (and I did fill them just before eating and not all in advance) wasn't going to touch the amount of maple mousse I had to contend with. I figured, I'd trifle some with Maria cookies and crispy nuts. This is actually how I'd probably serve them for a party - they look great, and all of the flavors melt together, the cookies becoming almost like soaked ladyfingers. Nuts only on top, and added just before serving, would prevent the inner layered nuts from becoming soggy. I will remember that, since it did seem to take a day for the cookies to get properly softened.


in Dur-O-Bor scotch glass. I had two, and broke one, and felt awful. they were from E.


in a wine glass.

Maple syrup is such a favorite of mine. It reminds me of my Gram since it is her favorite flavor, it reminds me of the regeneration of Spring. It's one of the mysteries I love thinking about: who in the world first saw a maple tree and decided to experiment with the sap? That is another reason I like the Daring Bakers. Someone always has a different idea, one that I never would have thought of. I had so much fun with this challenge, even though I certainly will not be the most creative. I look forward to seeing what other Daring Bakers came up with - and if any of them had the idea of making phyllo dough...