Pectin-Free Blackberry (Punk) Jam.

This year, it appears I've accidentally fallen into making pectin-free jams. I didn't really intend to, I just never purchased any boxes of liquid or powder and then discovered upon reading that it's really not necessary anyway. Sure, packaged pectin makes a batch of jam go a little more quickly, but if it is one thing I am rich in it's time.

My first pectin-free batch was Tigress's rhubarb-lavender jam, which if you need a super delicious jam and happen to love rhubarb is certainly worth your time. I LOVE it: in yogurt, on toast, plain on a spoon. I'm so glad I have 10 half pints sitting on the shelf, since it will likely be gifted to many people and devoured personally. That batch was also my first canning experience this season, which tends to open the floodgates of food preservation via the hot water bath for me. "What else can I can?" all of a sudden becomes my mantra, inspiration coming from unlikely sources.


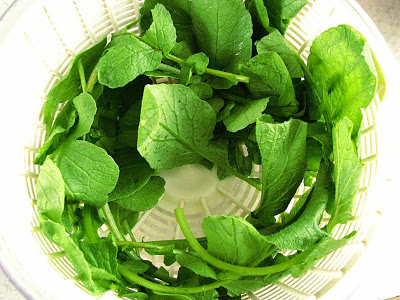
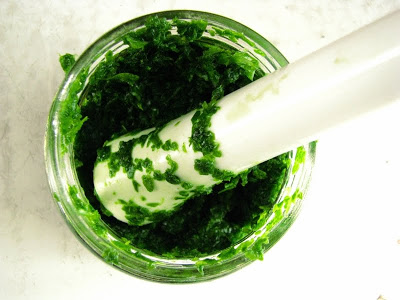
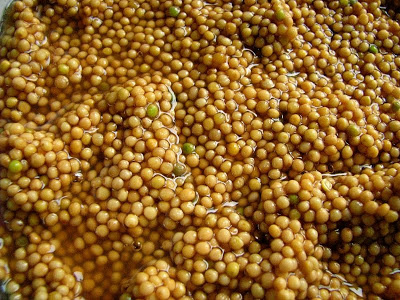
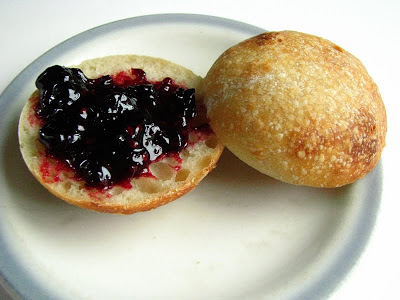
not bad for iPhone photography in my opinion...

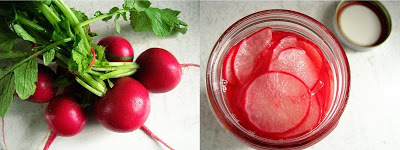
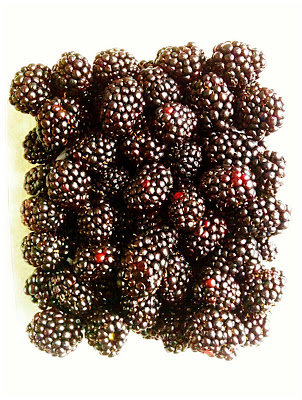
The same day that Punk Domestics announced a Punkberry theme for the summer, my Mother-in-Law asked me to go shopping with her. Although I didn't need anything (except we were also going to a garden center) I perused. I found 18 oz. packages of giant California blackberries at a good price, and they were organic. For about 10$, I got 2 lbs. 5 oz. when I weighed them at home, the perfect amount for a small batch of blackberry jam. I have never concocted my own canning recipe before, and I really wanted to come up with something punky for Punk Domestics. I'm a little early for the July submission date, but this jam can't wait. I am so excited that it worked well and tastes great!

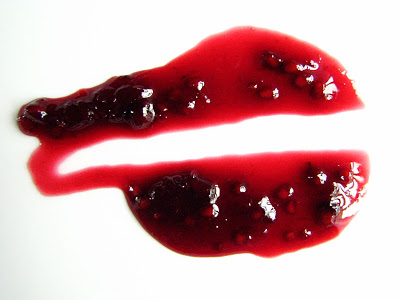
Small batches of jam, as it turns out, are actually better for pectin-free jams, especially ones containing fruit that doesn't have a whole lot of natural pectin. Blackberries, according to one chart I found, are kind of in the middle of the road for pectin containing, whereas the rhubarb jam I started with ranks higher. I still have a lot to learn about pectin-free jam, I almost feel like my jam got too "jammed" by the time it cooled - even though it looked and reacted perfectly to the "plates-in-the-freezer" test. I like the texture, even though it got a little more solid than I was expecting.


What is more Punk than booze? Not much, I'd say. After considering some kind of herby blackberry jam, I settled on a tamer, slightly more ordinary orange version. I figured it would be a good excuse to use a little of my homemade orange liqueur from earlier this year, and I think I was right. The result was tart-sweet jam with a slight booze kick from my not-quite-mellowed liqueur. My ratio was based on methods from Linda Ziedrich (via Julia) and a photocopied recipe for Strawberry Grand Marnier jam that I found in a book from the library. I used weight measurement on the sugar since I used raw, a good conversion table is here.

Pectin-Free Blackberry Punk Jam
yield 3 half pints
  • 2 lbs., 5 oz. blackberries, washed and lightly dried
  • zest of one (organic) orange, grated
  • 540 g. sugar
  • 2 T. lemon juice
  • 1/4 c. orange liqueur (homemade or purchased)
You may use whatever jam-making method you prefer. Since I am new to pectin-free jams this is what I did:

Put several small plates into the freezer for use as jam testers. Ready jars, hot water bath and other canning accoutrements. (Sterilize jars for 10 minutes in boiling water and keep warm. A good canning primer can be found here.)

Mash the berries, orange zest and sugar in a large non-reactive bowl and let macerate for several hours at room temperature. At this point, you can decide if you want super seedy jam, half seedy jam or seedless jam. I opted for half seedy and pushed the macerated fruit mixture through a china cap. Then, I added half of the fruit pulp back to the mixture.

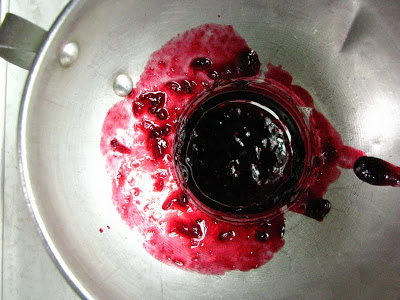
In a large, non-reactive pot, heat the blackberry mixture with the lemon juice until boiling. Skim off the foam (reserve in a bowl, see below...) carefully, and continue to stir pretty regularly until the jam starts to thicken.

Test for the "jam" by dropping a teaspoon or so of jam onto a frozen plate and returning the plate to the freezer for one minute. If you can draw a line with your finger on the plate and no jam runs back into it, you should be at the jamming stage. When sure of your set, remove from heat and stir in the booze. Then fill the sterilized jars, wipe rims, add lids and ring them and process in hot water for 10 minutes. Remove from water bath and let sit for 24 hours before checking for seal.


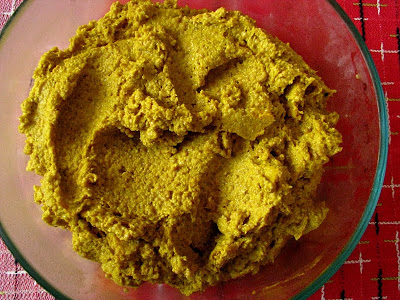
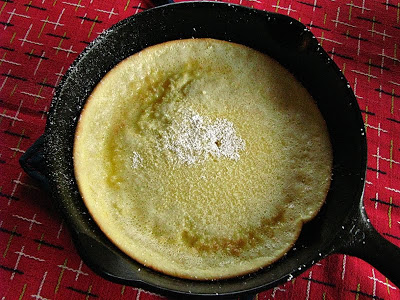
I was so happy to be reuinited with the flavor of blackberry. I was equally excited to have some fruit pulp and reserved "foam" that I skimmed off the top... Our weather has been so chilly that my kombucha has been taking longer to brew, but this next bottling is certainly going to be blackberry and I can hardly wait. Even though the fruit pulp is super seedy, it hasn't stopped me from eating it. So what if I have to floss a little more often during the day. It's worth it in the flavor department. I have enough leftover that I may try this coffee cake too. In fact, I may do that right now. I am out of dessert after all.  (Here's a pic.)


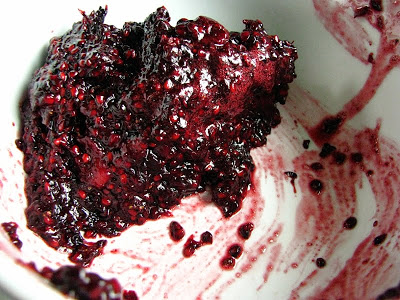
waste not, want not: blackberry foam.

Also fortunately for me, I planned bread to be out of the oven yesterday afternoon. I shaped my new favorite Peter Reinhart bread into one large pound and a half sized loaf, and had enough dough leftover for about 5 smallish dinner rolls. I never formed sourdough bread into rolls before (except the multi-grain variation) and I liked them a lot. I happen to be a "crust person", and these babies are like all crust. They also were a grand vehicle for newly minted jam surplus.


I have not had blackberry jam in what seems like forever. Growing up in the northwoods, we had a brambly patch of blackberries, one that even though we were semi-rural my Parents had to chase tourists from every so often. We actually called the Summer people "Berry Pickers", and my Mom tells me that in the '60's (when her family ran a drive-in restaurant), come Labor Day, the business owners of the community would line state highway 51 and shout "Goodbye, Pickers!" as they all drove south back to their city homes.

The wild blueberries we picked and our cultivated maze of thorny blackberries are still some of my favorite flavors, my Mom canned both into jams. When our family moved south, to the Driftless Region closer to the Mississippi, our farm came with established raspberries. At first we were all extremely happy with this change, but forever-after it seems I have been craving the deep purple blackberry. I finally have my fix, and though it's a tiny batch that I'll hoard (excepting one jar to my Parents), it's one that I will thoroughly enjoy.


I'm going to try and go the whole Summer pectin-free. I'd like to make my own pectin as well, which doesn't seem difficult just a little uncertain due to the strength of the finished product. So far, however, I do know that it feels good not to rely on that little box of Sure-Jell, knowing that if I don't happen to have one on hand I can still preserve something handsomely. If anyone has any good pectin-related information, send the links my way!

No Waste: Radish Green Pasta

As you may or may not know, I planted radishes for the first time this year. I've always liked them, but never grew them - and I think all of my excitement for this bright red taproot is seriously messing with my brain. I finally began to harvest some of the first sowing, and being the diligent, industrious person I am, I vowed that this would be the year that I will eat (and enjoy eating) radish greens. Last year, I tried to like them. I tried to pickle them in a slightly sweet vinegar solution. I tried to convince myself that they were good, but in fact I ended up ditching them every time. It seemed such a shame: the radish root is so lovely and crunchy and addicting, but the beautiful tops I just couldn't stomach. I recently read a post by Annie Wegner-Lefort in which she minced up the greens to add to a salad, and it was her example of zero waste that inspired me to do the same.


Radish greens are beginning to remind me of parsley. One summer when I was younger, I worked on an organic farm tucked into a dead-end road that led to the end of a bluff in southwestern Wisconsin. I started in the greenhouse in March, mixing potting soil and starting seeds while cursing my employer's belief that the plant pores opened up to this high-pitched "warbling" sound that they piped into the greenhouse and out into the fields. I'm not sure if it helped, but I disliked the constant noise in an otherwise idyllic setting. I still find it sad that the constant sound is etched more into my memory than the gorgeous surroundings...

It was a small farm and I was their only non-family help. We did everything by hand, the weeding of the parsley that year fell to me. I never really liked parsley, but had read how good it was for you. I had also read that you can make yourself like something if you try it enough. I swear that by the end of an 8 hour stretch of weeding parsley, I had an indescribable taste for it, and I still have it to this day. After a day of playing around with radish greens, I feel like I'm on my way to appreciation, if not full-out enjoyment of them. I made myself the most incredible lunch today, and it was inspired completely by using up the part of the radish that normally I just get rid of.

When I posted a picture of my radish harvest on my facebook page, Neil commented with a link to a fermented condiment called gundru. Made of radish greens and a being a condiment, it sounded right up my alley! I didn't have huge amounts to contend with, just the prolific tops to about 6 radishes. I figured it was worth a shot to mash them up.


I ran the greens through the food pro first, then started mashing them in a jar.

Gundru uses no salt or whey to preserve, just radish greens, the juice they create, a glass jar, and some sun. I have a few tablespoons sitting on the counter near the window for a week, but figured that I needed more instant gratification for the bitter green sludge that I was trying so hard to like. (I also wasn't quite sure I had enough liquid released from the greens to prevent them from rotting, and I was grinding away with a mortar and pestle for about a half hour.)


For some reason, the only thing I could think of (other than adding garlic and nuts and using it on pasta) was to turn it into some pasta. I have made pasta with flavorings before, but usually prefer not to. I think this is because I first started making pasta according to Marcella Hazan's expertise in Marcella Cucina, which includes that you flavor a sauce and not the noodle. I figured Marcella would agree with the spirit of adventure, and then my radish green pasta was born.


Radish Green Pasta
  • 1 c. AP flour
  • 2 eggs
  • pinch of salt
  • about 2 T. pureed radish greens
Make a well in your flour, I do this in a bowl, and add the eggs and pureed greens. Whisk with a fork, whisking in the flour a bit at a time until all of the liquid is incorporated and a dough begins to form. Transfer the ball of dough to a floured surface, and knead until it is smooth. Marcella says to knead for 8 minutes, but I don't do it that long. Wrap it in plastic, and let it rest at room temperature for at least an hour.

Roll out dough either by hand or machine. I roll with plenty of flour to make sure the dough doesn't tear as it rolls through. I also make sure there is an extra coating of flour on the last thinness of dough rolled (6 on my machine) before putting it through the cutters. This is more important with pasta dough that has any kind of herb or green added, since the little fibers in them can cause the dough to tear. (If it does tear, just fold it back up, and start over on the thickest setting; it may make it a tad tougher, but not noticeably so.)

When cooking fresh pasta, it really only needs to cook for 4-5 minutes. It will be floating, and should taste al dente.


Yesterday afternoon, I admired my celedon noodles hanging in the kitchen as the day progressed alternately with sun and rain. Tasting it raw, I couldn't even detect the bitter radish green - it just tasted eggy and fresh. Knowing that I couldn't expect my Husband who insists he doesn't like radishes to enjoy a dinner centered around their greens, I made myself a lunch of them instead. When he saw what I was eating (having just come in from work), and after I explained it, he said that I could make it for him for supper tonight. My Husband, eating radish green pasta with butter-sauteed radish "sauce"? You couldn't have sold me that idea 24 hours ago... but it is so amazing, I'd bet anyone would love it.


A flickr contact of mine, leedav, has been making all sorts of inspired "garden grub" that I have been amazed looking at. She has inspired me to look at my little backyard plot and make something with what grew there today, which turned out to be radish roots, green onions, Russian tarragon, lemon thyme. I sauteed all of that in a little bit of butter and olive oil (or maybe it was a lot of butter, I'll never tell), a sliced garlic clove, lots of black pepper and some coarse grey salt. I think this was the best Spring lunch I've ever had, and I ate it up in my messy kitchen, wishing I had gotten up in the middle of the night to make the bread so that I could have a thick slice of it fresh on the side.


I can't stop thinking about all of the people I don't really know, but I feel like I do. These Internet acquaintances inspire me daily to be better in the kitchen, in the garden, to make the most of my free time, and to focus on what is important in life. The busy people that have time to respond to emailed questions about recipes, to give little boosts of encouragements when I need them most. This pasta and sauce would not have happened without them, and I would not be nearly as happy as I am right now. Whenever I think that maybe the whole blogging thing is a waste of time, I am overwhelmingly reminded that is is not.

On Fathers and Condiments.

I'd swear I was raised in a gypsy caravan in the English countryside. In reality, nothing could be further from the truth but as a child my imagination ran rampant with stories told by James Herriot and Roald Dahl. One of the first books I remember reading aloud with my Dad was Danny the Champion of the World, and that is where I turned from a tomgirl with waist-long braids into a full fledged boy living in a gypsy caravan with my Dad, bathing standing up in the sink (to avoid sitting in my own dirt) and drugging pheasants with spiked raisins so we could poach them, cook them, and dine like kings.

Both of my parents are really something special, people that I consider my friends as well as my life-givers. Many children naturally seem closer to their mothers, and now that I am a mother I can see why. The bond that forms when a life lives within you is really something indescribable. Mothers are the driving force of the family much of the time, certainly not in every case but often I'd say. In my world, my Mom did the cooking and stayed home with us, eschewing her own ambitions for what was best for the family, making soup from a pork chop when times were tough.

My Dad worked regular banker's hours for as long as I have known him, but always had time to take each of us fishing, mushroom hunting, on imaginary trips to England. He was the one to make us wild before bedtime, take us on bike rides and teach us about cars and trees and birds. It still seems to me that my Dad knows all of the answers, and I know that he would be able to point out a Spruce tree at a distance - something I wish I could boast as I painfully envied Peter cooking with Spruce tips this Spring. He understands plumbing and electricity, has built garages and other structures by hand, can understand and repair clocks and knows just what bird is singing when I don't even hear a bird at all. My Dad is the ultimate condiment to my life, and someone that I admire most in the world.


my first garden radish, ever. it's only the size of a marble so I have to wait a bit longer.

My Dad loves growing a garden, and I think I call him every year to ask him some question regarding planting or cultivating. This year, I called to ask him about thinning which I never really did before. I never really direct-sowed seed before, save a few peas that never really produced last year. My Dad also loves to eat, though not really to cook. It's well understood that my Dad likes to grill and make eggs, but other than that his hands slip into his pockets and he likes to observe. (He's also really great at washing dishes, but if you ever make the mistake of saying "I'll do that, Dad", he'll quickly say "OK!", and rush out of the kitchen!)

Since I seeded those radishes, I have seriously been hawk-eyed over them. I swear I'm out in the backyard 3 times a day, crouched over them, seeing if I can will them into growing faster. I'll bet even as an old woman, I will still be as excited about waiting and watching something grow from the ground, from something so small as a needle's head. Even more is my excitement since I can't seem to satiate the radish fixation I've had since about March. Yesterday when I saw beautiful local bunches for sale at my co-op, I bought one to pickle using this method from Eugenia Bone. I didn't intend to give them away, but after a taste, I knew I'd have to give them to my Dad for Father's Day.

All of a sudden, I seemed to be planning an all-food gift which is pretty much my favorite thing to give. The rest of the day I spent organizing and planning my attack.


I made bagels over the course of a day and froze them. I cooled them about an hour before slicing them almost all of the way through and freezing them.


I saw this recipe for BBQ rub at Well Preserved, another great blog that I never really read before, and before I knew it, I had a Pulled Pork Kit:


The spice rub is a blend of mustard powder, bay leaf, coffee, celery seed, garlic and onion powders. I added some cayenne, since we like spicy stuff, and kept tasting it to see if I thought it would be good. After I was happy with it, I decided that I should really make some kind of BBQ sauce to douse the pork with. I altered an Emeril recipe I found to use (my favorite condiment ever) Marisa's Tomato Jam, and I should mention that it is insanely good. It's vinegary and much thinner than corn syrup laden commercial sauces. Tasting them both together and using a bit of imagination confirms to me that this will be a good kit for making some pulled pork.

BBQ Pork Spice Rub (Well Preserved's ratio, a few minor adjustments from me)
yields about 1 c. spice rub
  • 2 T. dry mustard
  • 2 T. chile powder
  • 4 T. onion powder
  • 2 T. garlic powder (I used granulated garlic)
  • 1 T. celery seed
  • 1 T. kosher salt
  • 1 t. (maybe more) cayenne pepper
  • 2 T. ground coffee
  • 3 ground bay leaves (I ground them with the coffee beans, and it smelled herby and almost floral. I was almost curious enough to brew some into a beverage...)
Blend all together.

Tomato Jam BBQ Sauce (adapted from Emeril Lagasse)
yields about 2 cups
  • 1/2 c. tomato jam
  • 1/2 c. ketchup
  • 1 c. Bragg cider vinegar
  • 1 T. yellow mustard
  • 1 T. molasses
  • 1/2 t. crushed red pepper
Mix everything together. That's it. Store in a glass jar.

For a good primer on what to do to make stellar pulled pork, check out Well Preserved's tips. I have even had good results doing this type of pulled pork in a slow cooker, just rubbing a spice rub into a dry chunk of meat and not even bothering to brown it. But, I have also made a charcoal grill into a "smoker", and soaked wood chips and let it go all day and that was pretty fantastic. I'm going to make this sometime this Summer for us. I'll even go ahead and say that I'll bet it works fine for a pulled beef application too.


Continuing the theme of condiments, I knew that I'd have to make a mustard. A few weeks ago, I saw a recipe for Kombucha Mustard on the Cultures for Health facebook page. I do not have a bloated amount of information on my facebook, and I love it as a resource for updates from just my favorite places. Soaking mustard seeds in kombucha? How easy, and I would never have thought of it. Of course, I had to wake up my kombucha first.

I had put it into hibernation during all of the vinegaring, and let a new mother grow out of some plain tea. I think since our weather has been so wonky, it seemed to take forever to get a suitable batch of tea finished, and I bottled up what I didn't use to soak the yellow mustard seeds yesterday.


I only soaked the seeds for a few hours, since they seemed to swell easily and were soft when I bit into them. I added a glug of cider vinegar, some salt and pepper, a couple teaspoons of turmeric and some honey. It was so thick, I added some water as it spun in the food pro, and also a couple of tablespoons of olive oil. I kind of like the thick consistency, I think I'll use it on salmon since I once did that with non-homemade mustard and it was pretty great. Since I have more than 3/4 lb. of thick yellow mustard, I will have plenty to share and experiment with, and since it seems well fermented (mustard is a natural preservative itself as well), I'll be in no hurry to use it up. I'm considering taking some for a trip in the Vitamix with additional kombucha tea to make a runnier version too.


So it looks like a good food gift is taking shape. I'll probably also make a little something sweet later today since that seems to be one of my trademarks, though lately I have been doing better at cutting back on the sugar. I think that my parents are some of the best people to give gifts to. They are difficult to shop for because they don't really need anything, so I almost always end up making something for them that is consumed, which in turn makes me insanely happy.

I do wonder if the gypsy caravan in the English countryside is still there, and if I showed up with this gift basket would a sandwich made on a bagel with some poached pheasant, a spread of mustard, a tangle of pickled radish would emerge as we sat around a campfire enjoying our food fit for kings. I never stop being thankful for my Pop, his steady and unwavering demeanor, his expertise on all manner of things. The way he was when I was young and the way he still is as I'm aging: a dreamer who never once put his dreams ahead of his family, a traveler who gave us all roots in the most important things. For all of the enhancements you have made to my life: I love you, Dad.

Sourdough Dutch Baby.

Continuing on the theme of crazy Springtime weather, I heated my kitchen this morning by turning on the oven. I'm not sure I've ever made a Dutch Baby before, or why it popped into my head this morning. It's possible that the dinner I had with friends last night (in which we declared the burritos to be as big as babies, and jokes circulating about babies, D. stating that he felt so full that there was a baby in his belly...) seeped into my subconscious and I had babies on the brain as soon as my feet hit the floor this morning.

Dutch babies are essentially egg heavy pancakes that are baked instead of griddled. I shouldn't say that I've never eaten them, since I have under the name of oven pancake. I did some summer camp cooking when I was younger, and a staple of the health-minded cook I worked under was the oven pancake. Huge amounts of eggs, unrefrigerated, lest she would cause you to lose your fingers she assured us, flour and enormous baking sheets, and slabs of gelatinous puffy pancake was baked short order for hungry middle-schoolers. About half of the kids didn't like it, but I always did, and I figured a cold morning was just as good a time as any to revisit this taste memory.


I also have this renewed love for my cast iron, and while the home-baked oven pancakes of my past were done in glass, I liked the idea of using a skillet. I also liked the idea of using up some sourdough starter. In short order, I found this amazingly detailed and sound recipe for them that met my desired criteria. By the time the oven was heated, the batter was blended and the dishes already done.


I used a number 5 Wagner skillet, which oddly is about 6 1/2 inches of cooking surface, and nearly 8 inches across the top. I had a thinnish pancake, that didn't puff tremendously... but I think I'll let the skillet get hotter before adding the batter next time. I also have a well-seasoned pan, so I only used about a tablespoon of butter. I had no sticking, the butter was buttery in the surface of the finished pancake.

Sourdough Dutch Babies (from InnerLodge. See the original recipe for pan size/cook time ratios.)
  • 1 T. butter
  • 2 eggs
  • 2/3 c. sourdough starter (mine is 100% hydration)
  • pinch of salt
  • pinch of sugar (could use honey or maple syrup), optional
  • 2 T. milk
Preheat oven to 425.

Blend eggs, starter, salt, milk and sugar if using. You can use a blender, or do it by hand.

When oven has come up to temperature, place butter in the skillet, and place the skillet in the oven to let the butter melt. (You can also let the brown the butter if you prefer.) When the butter is melted, and the pan hot, remove the pan from oven. Pour in the batter, return to oven, and bake for 10-15 minutes until the pancake is puffy and lightly browned.

Out of the oven, it will start to deflate immediately. Sprinkle it with powdered sugar when it's still hot, and when it cools a bit, it will form (and this is for you, Julia) a "pellicle" of sorts as it melts into any butter that pooled then baked on top...


I will confess that the Boy-O didn't like the Baby. He was excited, in his nearly-5-year-old rational way of thinking he said "WOW. That pancake will be the same size as that pan?" It's possible he thought it would just be a giant sourdough pancake, which he is accustomed to eating. When I cut it into quarters, dispersed the blueberries, drenched it in maple syrup it still didn't appeal to him - but to his credit, and my amazement, he did try it 4 times. What possibly did not appeal to him were the things that did appeal to me: the slightly sour, fermented sourdough flavor, the wiggly mouthfeel, the eggy oven pancake taste that I was after.


I brewed some coffee that I drank hot, I put on another shirt over the long sleeve one I was wearing. After a belly full of sweet breakfast, I have decided to pretend today is late September and not mid-June, and I look forward to a day of indoor organizing, cleaning, and maybe making these before heading across the street to a birthday party this afternoon. Meanwhile, the garden grows, I save my energies for the work I know is coming... the Dutch Baby tucked into my sourdough arsenal for quick, cool morning breakfasts in the future.

Re-Seasoning Cast Iron: Why Do I Do This Stuff on the Hottest Day of the Year?

It never fails that if you lack something to say, you can always discuss the weather. Garrulous as I am, even I have resorted to discussing this crazy Springtime we've been having with complete strangers as well as family members. It's just bewildering. Yesterday morning, I took my Boy-O to his last Monday of 4-year-old kindergarten in a long sleeve shirt since I was chilly, and by yesterday afternoon I felt as if I was relaxing in a sauna with no reprieve of a cool lake to jump into.

Before the spike in temperature yesterday, I decided that I should stop procrastinating the renovation of a newly acquired vintage Dutch oven. On my last visit to the Farm, my Mom and I performed our sporadic pilgrimage to our favorite "junk shop". Usually, I don't find anything. (Usually, I HOPE I don't find anything.) I didn't really need another 5 quart dutch oven, but when I saw this one in need of a bit of loving I stopped in my tracks. I actually didn't even buy it right away. I waited until we got back home (a half hour away), and then milled it around in my head over dinner and thought aloud "that is a really good deal for a nice old oven". My Mom said I should have it, and she actually drove back and purchased it for me, $38 (plus gas) well spent - especially after I have successfully restored it. It has exceptional design in my opinion, a boxiness that the newer models cannot boast. It also has a handle, should the desire to hang it over a campfire ever strike me.


I could tell that this oven was well used, and well cared for. The inside didn't have any build-up, though the outside told a different story. When I got it home, I washed it hard with soap and couldn't get around the "stickiness", blackish crud washing only a little away. Simple washing wasn't going to clean this new pot, I was going to have to do my first re-seasoning.


I always was a bit scared of re-seasoning. I supposed it's only because I have never had to do it. My old skillets are really in great shape, and I suspect I'll never have to put them through this process. I am actually glad I had the excuse to try it, since I was surprised at how well it worked. My reward for a bit of work is a gorgeous black pot, slick and ready for whatever I can throw at it.

I followed instructions at Byron's Dutch Oven Care. This required me to run a self-clean cycle on my electric oven, which did need it, and which I was also procrastinating. I figured a cool morning before Summer hit would be a good time to get both tasks accomplished simultaneously, but Crazy Spring heard me and decided to do a little self-cleaning outside as well. The downside is that my kitchen was hot as blazes, the upside was that years of build-up miraculously burned away from my pot.


The rust washed away; I used my favorite kind of grease (elbow) to steel wool the pot down to a dull grey color. I was meticulous, but not so much that it took me hours. I got the little hobnails underneath the lid and the curiously well-designed parts that hold the handle as best I could. Then, I opted to keep my kitchen cool and use my gas grill to bake on a couple layers of seasoning. My grill is pretty small, so I only did the base today. (I'm making some bread as a gift for the Boy-O's teacher for the last day of school tomorrow, so I figured I'd do the lid late tonight when I'm baking and the oven is on. I also had expired an entire canister of propane...)


I used coconut oil. I Googled, and read a few different sources that assured me it was ok. I do not detect any strange smell or feel. When using my iron skillets daily, I use coconut oil to grease them as well. I'm sticking with it, since I always have it on hand, and it appears to do the job well.


The handle catches on the well-designed tab, allowing you to pour without the whole pot tipping.

I know my electric oven will do just as great a job baking the seasoning on the lid, and then my handsome new pot will be fully ready for action. I now own 4 different Dutch ovens, and I can't say that I don't love each and every one of them. I rearranged my china cupboard this afternoon to appropriately show them all off, all four of them lined up like a detail of finely trained culinary soldiers.


You can see the difference in color from the baked-on seasoned base and the not-yet-baked-on seasoned top...

Do you have a cast iron skillet or Dutch oven that needs some attention? If it's not 96 degrees in your neck of the woods, give this a try. You will be happy you did!