Daring Baker Challenge November 2011: Sans Rival Cake

Catherine of Munchie Musings was our November Daring Bakers’ host and she challenged us to make a traditional Filipino dessert – the delicious Sans Rival cake! And for those of us who wanted to try an additional Filipino dessert, Catherine also gave us a bonus recipe for Bibingka which comes from her friend Jun of Jun-blog.

sans rival cakes

You may notice that I'm 3 days late in posting my challenge this month. That is because I had planned to make this dessert when I visited my Parents over the weekend for 2nd Thanksgiving. We had pies (plural), and pecan tarts, and way too much food, so last minute we agreed that we didn't need the additional dessert.

When I got back, I thought I would just skip it. I cleaned my house, I carried in my Christmas tree. I cleaned out my refrigerator, which needed it desperately, and I attacked the laundry and did a little sewing. Then today, the last day of November, I knew I just had to give this one a go. You know you are a baker at heart when you are sitting over your morning coffee and decide on a whim to soak 10 eggs in warm water since they needed to be a room temperature to begin a project...

chocolate cashew meringue

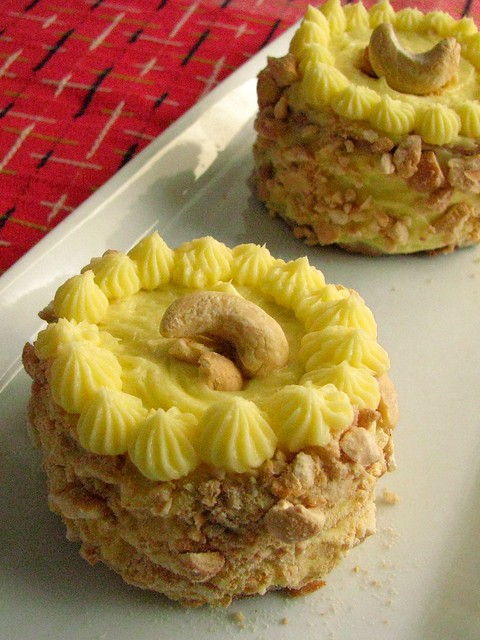
Sans Rival cake, so called since it has no rival, is a cake made from cashew meringue layers and my old nemesis, French Buttercream. French (and Italian) buttercream and I don't seem to understand each other too well. I'm thankful for challenges that force me to practice them or I'd always choose the more cloying confectioner's sugar-based frostings.

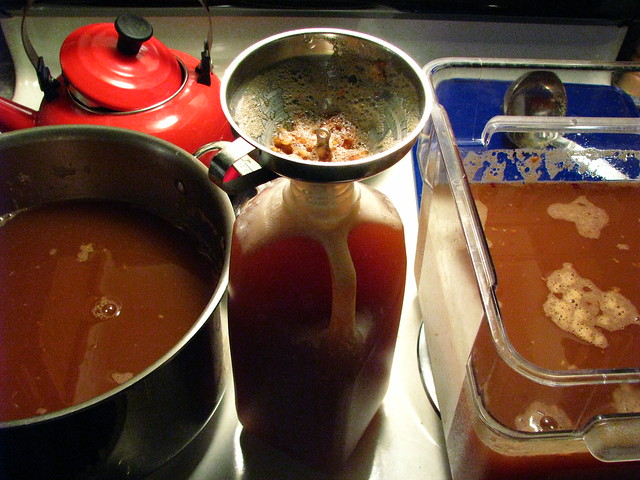
I'm not absolutely certain that the frosting I made today was proper, after adding the boiling sugar-water it took an entire half hour in my stand mixer on high to whip it down to room temperature. I added the butter, slowly, cube by cube until it disappeared and then I tasted. I decided to flavor it with a pinch of salt and some almond extract, and then I tasted it again. I was pretty sure this is what angels dine on. I had a flashback to standing around the kitchen not too long ago with my Parents and sampling some really (really) great donuts - and one of us said "How can these be bad for you, they taste so light, and so good?" Another flashback immediately appeared to me of a high school friend who fed her little brother a stick of butter so he'd keep his pudgy fingers out of the butter dish. That kid just loved butter, so much he would eat spoonfuls of it. He would love this frosting. I could devote a lunch to it. Oh yes, I did kind of do that today.

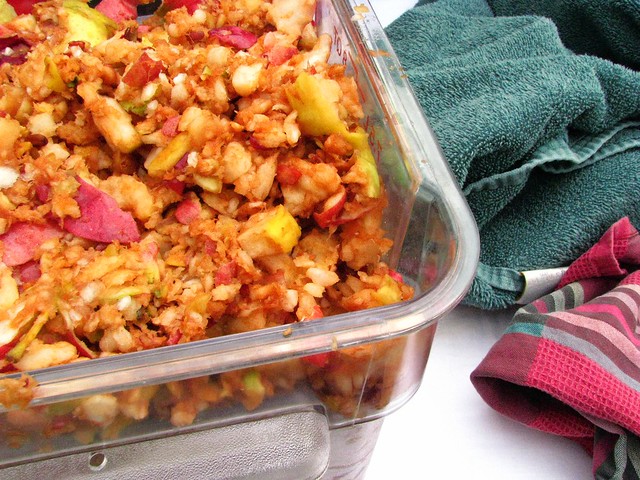
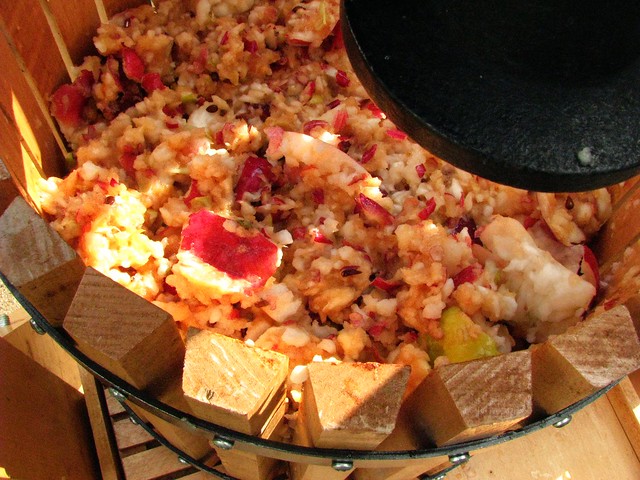
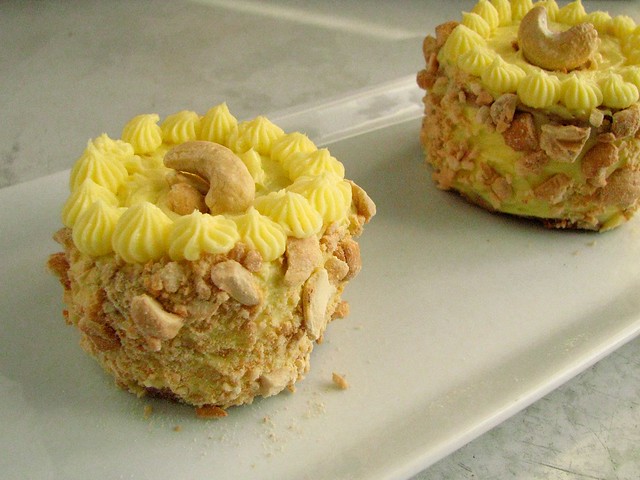
But enough on the frosting... Cashews, being the most buttery of all nuts in my opinion, were an extravagant purchase for me and a good fit for the dessert, as well as being traditional. I had already toasted up the amount needed for the challenge, ground about half into fine powder for inclusion in the meringue itself, and reserved the rest of the pebbly fellows for the outside decoration. What took me the most time then, was making petite portions by recommissioning my egg rings as molds for smaller-sized meringues. I think I got about 44, plus a small, thin sheet that I spread on the parchment, a result of my spatula gleaning all I could from the edges of the mixer.

chocolate cashew meringue (2)

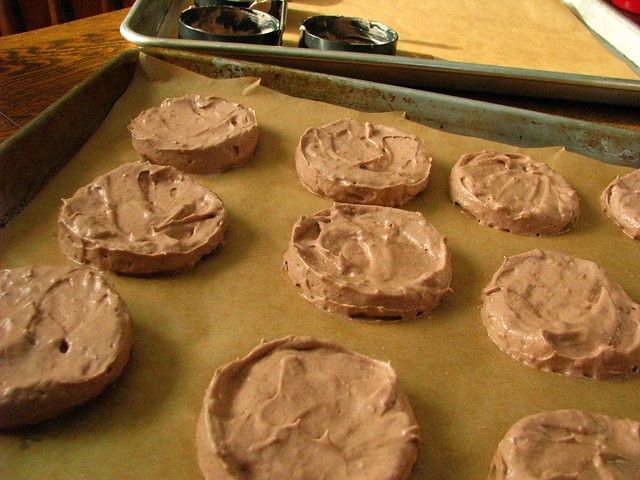
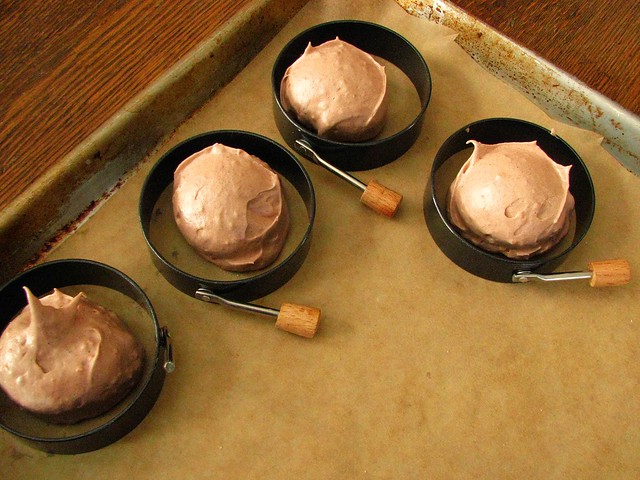
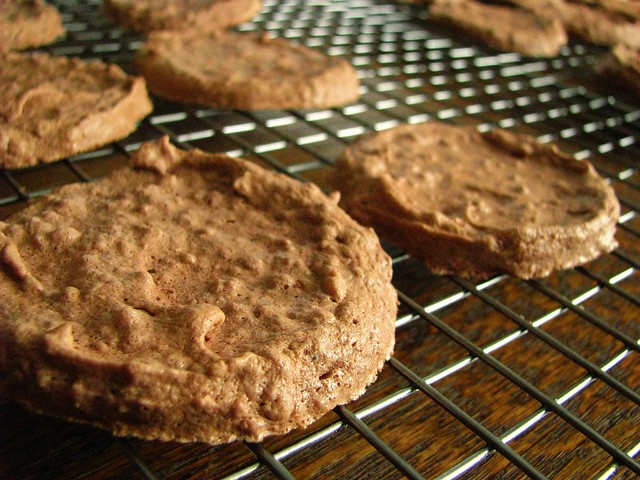
I quickly developed a good method for uniformly small portions. I put one scoop of meringue in each ring and spread evenly with an offset butter knife. Then, I ran a small paring knife around the edge to "break the seal", and removed the molds. Finally, I evened out the tops of the meringues with the knife. Baking these was a little trickier. Even though they weren't that thick, they still took upwards of 30 minutes to even get close to being dried out and crisp. In fact, I took them all out prematurely, and after making the frosting, I reheated the oven, and popped them all back in for 15 minutes to dry out some more. That did the trick; they felt light and not spongy, and had that Styrofoam sound that meringues typically do.

baked meringues

beaten egg yolks
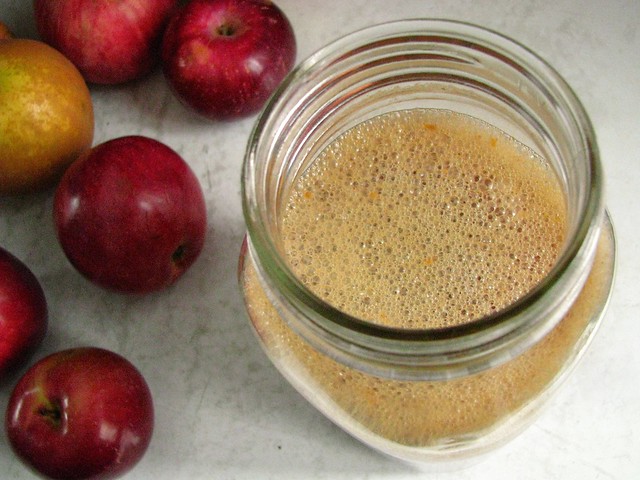
egg yolks: after lightening them they were still a sunny yellow since they were nearly orange to begin with...

French <span class=
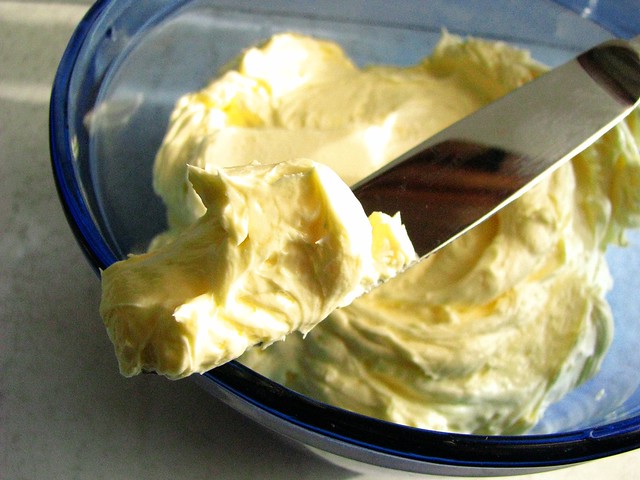
that goes to say that my finished frosting then looked unsurprisingly like really good butter. really good butter that angels eat.

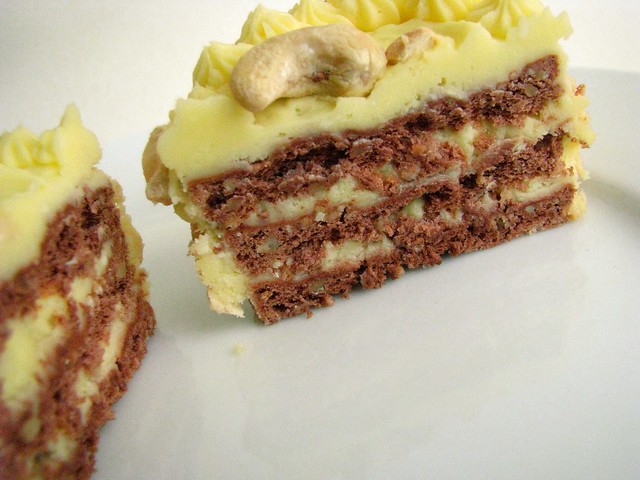
That frosting chilled for a good hour, and maybe the butterfat in my butter is too high, but it came back to room temperature so fast that it was really hard to frost with. I did my best, and hid the rest with clever piping - but I did have to pause quite a few times and pop everything in the refrigerator. I froze one before trying to cut it in half:

sans rival cake, interior

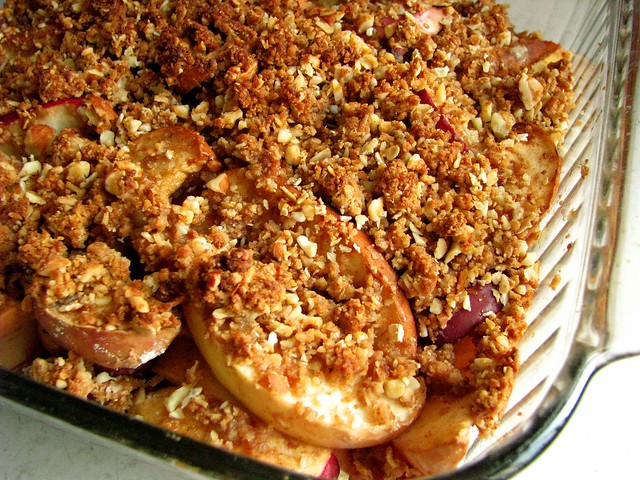
I broke the "tray meringue" sheet into shards, and made a pretty deconstructed version:

deconstructed sans rival

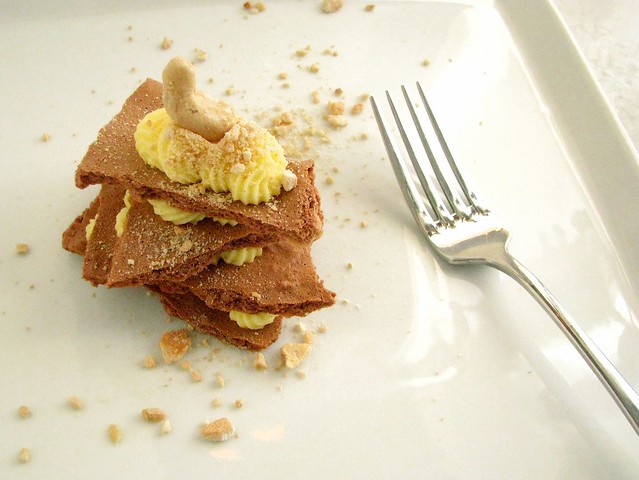
I've already confessed to quite a bit of frosting consumption, but I did also have a few bites of fully finished dessert. This is rich, and I am glad I went with almond extract in the flavoring of my frosting. While the cashews have a heavy, buttery, toasty taste, they needed the freshness of astringent almond to cut through it. It also bears noting that I am positively addicted to almond extract...

If I make this cake again, I will definitely make one large cake. I think my frosting woes may have been solved if I handled it less, and one large cake would have easily enabled that. I also think I may leave out the cocoa powder which was optional (and not traditional) in the meringue. It had more of a mild "mocha" flavor than a full out chocolate one, but I suspect it did something to the texture of the meringues that I wasn't entirely pleased with.

If you reread above and find that I thought this cake was rich, buttery, sweet, texturally suspect and tedious, you would be correct - but it was also just decadent enough to capture my imagination. I'm really looking forward to trying it again tomorrow, when my taste buds have started forgetting the mouth-coating properties of that angel frosting, and I have a clean palate to discern with. I really did enjoy this challenge, which was more of a challenge than I thought it would be!

I'm not reprinting the recipe here this month, since I did follow it exactly (by metric weights), using the cocoa powder in the meringue and almond extract in the frosting. You can find the recipe here at the Daring Kitchen, as well as the blogroll guide to so many Sans Rival cakes your head will spin.

Tomorrow is a new month and a new challenge, and I'd be lying if I said that I don't get a little too excited on the eve of each new reveal. What will I learn next? Stay tuned.

sans rival cake

Updates: Pre-Thanksgiving

Given the state of my "unemployment", I sometimes feel the need to justify what I do with my time. I shouldn't feel this way, I know. Almost 6 years into my homemaking career, I haven't forgotten what it's like to put in a full 40-65 hours a week outside my home, and I also know what challenges that brings to the dinner table. I have been so tired getting home from odd-hour jobs that I've made the choice to sleep instead of eat. Now any bleary-eyed mornings are due to reading too late into the night, knitting, or getting up to attend to doughs, and I can't say that I'd like it better any other way. I continue my projects, though many of them secretive, since the cookbook recipe testing is still underway - and that actually generates quite a lot of food that must remain discreet. This post will give you a peek at what is going on around here pre-Thanksgiving, the things that I am thankful for and excited about.

alcoholized apple cider and innoculated cider for vinegar.

It appears that I have finally attained relative ease in the vinegar-making department. Using almost all of the beautiful cider I pressed with my Parents, I left it open to open fermentation under written affirmation from Peter's post on how good, non-treated apples will naturally do their best to become vinegar. After the open ferment appeared complete (and I tasted it, and it tasted beery), I inoculated it with vinegar mother that I had stored. The pictures here are from two weeks ago, but you can see the mat on the top of the jar on the right: it's now a full 1/4 inch thick. The photo below is the active fermenting cider. After the success of the first jar, I started another half gallon. I am happy to announce that I'll get my gallon of homemade cider vinegar, which was seriously one of my goals for the cider press. Mission (almost) accomplished!

alcoholized cider

This week, I have also bottled my Bachelor's Jam. I started it back in July when I got my strawberries, and I added throughout the Summer a number of fruits, a pound at a time. Bachelor's Jam, also called Rumtopf, piqued my interested when I first read about it last year. I made mine using the methods outlined in the River Cottage Preserves Handbook, a pound of fruit and a cup of sugar at a time until it was full.

Since I am in Wisconsin, the brandy consumption capital of the world, I opted to use a brandy base for my liqueur. I'm actually not all that fond of brandy, cognac yes, but that would be my famous "Champagne Taste" talking. I thought using brandy would help me to appreciate it a little more, and I may just be right about that. When I stirred up the pot, strained out the bleached and boozy fruit and tasted a little, it completely reminded me of Christmas: Wintery and warm, fruity and sweet - just the thing to drizzle over some ice cream, since we Wisconsin folk eat just as much ice cream in the Winter as we do the rest of the year...

bachelor's jam fruitbachelor's jam, liqueur
it's such a pretty color, too.

With the success of my vinegar, and having a number of flavored "cheat" vinegars that I made this Summer on hand, I wanted to purchase some bottles for packing some up as gifts. I found some nice ones, inexpensive and perfect for my needs (both vinegar and hot sauce bottles), but after I had them in my online cart to check out, the shipping was as much as the bottles, and I couldn't take that leap. Instead, I'm revisiting my collections of jars and bottles in the basement that I've obsessively collected for some time now.

I am using far less purchased bottles of *whatever* lately, but when I do buy something, I pay special attention to the jar or bottle it comes in. I wash them out thoroughly (even taking several days of repeated washing recentely to try and get an olive oil bottle with a nice cork stopper perfectly clean...), glean every last smidgen of label adhesive from the exteriors. If I've been to your house and you have an interesting jar, I've probably asked you to save it for me too. It's a habit, and one day, someone will probably clean out my basement and wonder what in the world I saved all the glass jars and bottles for.

I don't usually fuss too much over cool labels, but an ancient Cointreau bottle with only a teaspoon (really, that was it) left was just about falling out of my cabinet the other day and I decided that I had to clean it up and repurpose it for my Bachelor's Jam. I'll bring this out when my "Christmas Company" comes, so I did fuss a little - trying to do my artistic best to match the font and content of a Cointreau label. I used to do a lot of pen and ink drawings, and sitting for 20 minutes to concoct this makes me want to illustrate all kinds of little bottles taking up space in my house. Maybe one will make its way to you.

reusing a bottle...
believe it or not, I even Google Translator-ed the French on the front of the bottle...

On Monday, I finally went to the new Glorioso's location on Brady Street, just across the street from their charming old location. Part of the reason I took so long to check it out is that I feel bad when tiny hole-in-the-wall groceries are replaced by bigger, more luxurous digs. The souls of the ancient tiny establishments whisper to me in thunderous voices, and usually bigger never means better to me. The new Glorioso's is beautiful, you definitely won't turn around and hit someone like you could in the old place. I won't forget the wood floors and miniature space it came from, but wandering around was just as inspiring. A whole aisle of panettone, reminding me that I need to try my hand at that this year. I went there specifically for these bright green Castelventrano olives, some that I'd never tried before, for testing a recipe. I am smitten. They are soft and almost herby, not too salty and the most beautiful shade of green:

castelventrano olives.

I also came home with Italian "00" flour, some cheese, a pound of lupini beans, and advice from an old man in the deli on how to prepare them. "Oh, just try it honey, you'll do just fine", he encouraged as he concluded, his arm resting on the gleaming case of prepared Italian deli foods. I am so glad I asked about them, since the process is time-intensive, and completely different then I would have thought. The beans need to soak, with a daily water changing, for at least 5 days, maybe longer if they still remain bitter. When I looked them up online, every source confirmed that, and also that they are worth the amount of time you spend since they are some of the highest protein beans other than the soybean.

When the man told me the lupini beans are bitter, I couldn't have been prepared for just HOW bitter they were. One bite of an undone lupini bean leaves a bitterness that extends all the way down your throat, and it stays there for 10 minutes; they are the very definition of bitter. When that bitterness is gone and the beans taste sweet, the beans are complete - and I'm on day 4 now, so I hope that will be soon. After the first 48 hours of soaking, I brought them up to a gentle boil for an hour or so and then let them cool back to room temperature. I continue to replace their water daily, tending to these chubby beings, these blonde Chicklets of supreme health, and I dream about eating them one after another, fully addicted. I should listen to an old Italian guy when he said to just eat them plain, but I may have to marinate them in oil and vinegar, since that is the way I've eaten them on occasion at overpriced deli-per-pound sections of other nameless luxury grocery stores. For under 3$ a pound, it's been cheap entertainment around here.

lupini beans

Cold wind has been blowing, along with a fair amount of rain lately. It makes me add layers, consider upping the thermostat and then deciding against it, and take up my knitting once again since working with warm fiber seems to warm you like nothing else. I finished up 3 small felting projects that were on the needles since last Spring, some potholders and an oven mitt for myself that I've already been putting to good use. My old oven mitt was burning me as I shoveled bread pots in and out, and I was ignoring the fact that I could really be seriously burned. I doubled the strands of wool so there is plenty of insulation, and wool is naturally fire retardant as well - not that I'm planning on being careless. The patterns I like best for kitchen felts are in this book by Beverly Galeskas.

good weather for felt.

So, never a dull minute really. Odds and ends come into place, my craftiness starts to run rampant now that I feel I have more time and Christmas to prepare for. The cookie list is beginning to form in my brain, and so are the details of things to make for others, bready experiments that will hopefully hold up well, and lots of things that I'll likely be excited to share. You can be sure that if those lupini beans turn out as well as I hope I'll be telling you all about it soon. My days are full, I fall asleep quickly, often mid-page, and I remember all the while that my Mom told me once her 30's came in "clumps". The days do fly by, but yet I appreciate each one and what it brings. I try to hold them still a little longer by making good use of my time.

Interviews.

Yesterday, I was asked by Shane to participate in an interview for his new and building website, National RV Parks. I wondered why he would want someone like me (a homebody who most of the time only can dream of travel) to be included in his articles on a travel based website. After I spent some time looking through some of the other interviews on his site, I found so many really interesting stories told through his questions. I'd encourage you to check them out. Even if you aren't bitten by wanderlust, I'm sure you will enjoy it as good reading, and maybe even find a few new websites to visit in the process. You can read my interview from today here, though I can't promise that I am half and interesting as some of the other people I read about!

On the topic of interviews, I remembered this interview I did when I was "tagged" last year by Brooke Fish of Pure and Noble. It's curious that interviews really make you stop and think, about yourself, your past, and what you love about your life. A small platform and a few questions, and anyone can be interviewed. Celebrity is really not that interesting to me, what is are the people I am surrounded by everyday - perhaps those that I've even overlooked. Everyone has something to say in his or her own way, and this could be just another of the reasons blogs are so addicting to read.

Thanks for including me in your project, Shane. I hope your site builds, and that your dream is realized!

Pan de Muerto.

pan <span class=

As you may already know, I've started writing a second blog for the community pages at Milwaukee Magazine. Yesterday, I wrote about cajeta - the Mexican caramel that is made from boiling down milk until it is rendered silky smooth and heartbreakingly brown. These first two days of November mark the celebrations of Dia de los Muertos, the days of the dead, and as I recounted yesterday, my family has not traditionally celebrated it.

My Mexican heritage is something somewhat buried inside me. Watered down by the generations of American citizenry, brought first to Texas then Chicago through my (maternal) Great Grandmother Carmen, a prize of my Mendez side is our love of sweets. My Mom has told me that my Great Grandmother used to love sweet sips of Pepsi, and all sweets really. "It's where we get it." she said, referring to our predisposition to sugar.

Personally I ebb and flow on the tide of desserts, all of them invade my thoughts and pulse through my culinary veins like the addiction I know it really is. In the past year, I have successfully cut back on sugary sweets, but I've given up trying to deny myself completely. Dessert is one of the great joys of my life, and if I lose a year or a tooth in the arms of this paramour, it will be worth it.

pan <span class=

Having never celebrated Dia de los Muertos traditionally, I am a foreigner to the specialty sweets it brings with it. For my birthday, I had treated myself to a copy of Fany Gerson's My Sweet Mexico. Since, I've read it cover to cover, treasuring the photography as much as the descriptions of the recipes. She paints this holiday vividly, complete with with this enriched Pan de Muerto, flecked with orange peel and scented with orange water. I began it yesterday, unsure if it would succeed. The dough was unruly and sticky, but I stuck to Fany's insistence not to add additional flour unless absolutely necessary (after 15 minutes of stand mixer beating) and then no more than a small amount. My perseverance was worth it - and this is one of the loveliest, softest, gently sweet breads I've ever made.

inside pan <span class=

When reading through the recipe, I felt like I had tried something similar before. A quick consultation with my aged recipe box (the kind that holds the 3x5 cards that no one uses anymore) confirmed my familiarity: I had tried to make something called Portuguese Sweet Bread years ago without luck. I had gotten the recipe from my ex-boyfriend's bread-genius mother, and I remember her lemony little breads raising all over her kitchen one year around Christmastime. The amount of butter and egg involved create doubt in the most seasoned baker I think, but if you pay it no mind and continue as if you know exactly what you're doing, pillow soft egg bread is your reward.

pan <span class=

There is a reason this is a special occasion bread. It's a bread meant to evoke memory and bring with it a specialness of an occasion. There are variations on flavors included in My Sweet Mexico, but I had to try the orangy flavor that was recommended. I secretly wondered if combining the yeast with orange flower water would kill it off, but it did not. It is simply decadent with a stick of butter (and more for the top) and 2 eggs, but worth every little nibble. I halved Fany's recipe to yield a single loaf. This is going to make some stellar toast tomorrow morning.

Remember to begin the day before baking.

Pan de Muerto (Fany Gerson)
yield 1 loaf

Dough:
  • 1 1/8 t. (a heaping teaspoon) active dry yeast
  • 1 T. orange flower water
  • 1/3 c. milk (whole or 2%)
  • 2 c. bread flour
  • 1/4 c. sugar
  • 1/2 t. salt
  • 1/2 t. grated orange zest (I keep some in the freezer)
  • 2 eggs, lightly beaten
  • 1/2 c. (1 stick) butter, room temperature
Topping:
  • 2 T. butter, melted
  • 1/4 c. sugar (more or less)
Dissolve the yeast in the orange flower water. Add half of the 1/3 c. of milk (leave the other half out on the counter at room temperature), and 1/4 c. of the bread flour. Mix well with a whisk (dough should be sticky and smooth), and leave at warm room temperature for 20-30 minutes until the mixture begins to bubble and look puffy.

Put the remaining flour (1 3/4 c.) in the bowl of a stand mixer fitted with the hook attachment and add sugar, salt, and orange zest. Mix for about 30 seconds. Add the eggs, the remaining milk and the yeast dough mixture. Mix on low speed until the dough comes together, then add the butter a little at a time in small pieces with the mixer running, increasing the speed to medium. (Here is where Fany begins to suggest that you should resist the urge to add more flour!) The dough will be sticky!

Continue beating for 10-15 minutes. (I let mine go 20 actually.) The dough should start to pull away from the sides of the bowl a little bit, but if it doesn't (like mine), add a small amount of flour, but no more than half of a 1/3 c. (I added a little handful.)

Lightly oil a large bowl, and place the dough inside. Cover well with plastic wrap, and let raise at warm room temperature until doubled in size 1-1 1/2 hours (mine took considerably longer, 3 hours, but my house is on the cool side). Lightly punch down the dough, gathering the sides up and flipping it over so that the seams are on the bottom. (I tried to do this like I did for making Deena's focaccia bread, leaving some air and being gentle.) Refrigerate for at least 4 hours or overnight.

When ready to continue, bring the dough out of the fridge and leave at room temp to warm up for an hour. Cut off a lime sized piece of dough to use for the "bones", and on a lightly floured surface, quickly shape the (still sticky) dough into a ball. Transfer to a parchment or silicone mat lined sheet and press down gently. Form bones out of the excess dough, 2 (that would intersect in the center as they make an "X" over the top) or 4 (small bone "snakes", like I did), and a little gumball-sized drop for the top. Let rest, covered with a clean towel, until doubled in size about 1 1/2 hours, maybe longer.

Towards the end of the rise, preheat oven to 350. Bake for 20 minutes, check browning (mine never got too brown, but if appearing to be browning too quickly, tent with aluminum foil). Continue baking for 10-20 more minutes until the bottom is browned (and temperature taken from the bottom is 190 degrees).

Remove from the pan to a wire rack and cool for a few minutes. Brush with melted butter, and immediately sprinkle with sugar evenly all over the top.

pan <span class=

I know I shouldn't have been shocked that this bread was so soft, but I was. I was actually shocked that something so sticky could result in something so perfectly beautiful as well. After it cooled and I finally cut off the end to try, I was surprised that it reminded me of my my other (maternal) Great Grandmother Laura. She was from Poland, and made plenty of amazing sweets that I am lucky enough to remember eating as a child. Cheese crepes, blintzes really, and something I remember as a round doughnutty thing, Pączki. She likely treated the tops the same way, with melted butter and granulated sugar. In fact, the texture of this bread was nearly identical to what I remember as her soft bread-like buns with sugary crusts. This bread really did cause me to stir up all kinds of memories of loved ones, maybe the intent all along.

Reading farther in My Sweet Mexico I see that this same bread base is used for Three King's bread, Rosca de Reyes, which is studded with candied fruits and figurines on the 6 of January to celebrate the day that Jesus became known to the world. This in turn reminded me of the Stollen I made at Christmas for the first time last year, and the more I thought about it, I realized that the flavors were very similar.

This Pan de Muerto, however, is far more tender and delicate than it's German counterpart, one worth daydreaming over for a day or two until you can't take it any longer, and you have to celebrate something for the first time. Dia de los Muertos, these days of remembering, have been very special for me. Now, I'll have taste memories to go along with it and fondly revisit. ¡Necesito recordar mi herencia mexicana! Through a few of the celebratory foodstuffs, I can do just that.


This post has been Yeastspotted.

Apples: Pressing, Cider, Vinegar, Pectin, Crisp.

cider apples

Last Thursday, my Parents, Kiddo and I went to Weston's Antique Apple Orchard. I have been buying apples from them at the West Allis Farmer's Market for several years; they have been a vendor there for 45 seasons. I never thought of looking to see if they had a website until I learned that I inherited my Gram's apple press, and I needed a good urban source for great apples. I called and spoke with a older man, who informed me good-natured-ly that I'd interrupted his nap, "Since I'm retired!" he'd said. I told him it was our first year with a press, and we just wanted to do a couple of bushels of apples to see about approximate yield and ease of the workload. We negotiated a price for windfalls, and I figured that any price would be worth seeing the land where some of the most exotic apples I've ever tasted have grown for generations.

Even though I'd called back the cell phone number he gave me, I wasn't entirely certain that we would find anyone at this antique orchard when we drove out in my Dad's truck on Thursday. But fortunately we found a sole worker: a middle-aged man in heavily patched pants and a lifting belt who had been debriefed about me and my desire for 2 bushels of apples. A talkative man, he explained that the orchard's brother and sister team worked 7 days a week with just a few helpers like him. He mentioned they were both notoriously difficult to get a hold of, and that we could pay him and then just walk around in the orchard and see which trees had fresh fallen apples. "If you wonder what they taste like, just find one on the tree, shine it up on your shirt, and try one," he reminded us. And we did. Some hard, yellow and tart, leather skinned and bursting with autumnal dryness, others as sweet as honey, plum colored and snowy white inside - the apples the witch likely offered the gullible Snow White.

We spent a hour or so wandering around collecting the bounty of fruits under some trees that seemed perfectly perfect, reminding my Kiddo to show us each apple before tossing it in the bushel basket in case it was buggy or bruised. I had wished the whole while I hadn't already done my applesauce with budget (but perfectly serviceable) apples from the farmer's market. My Mom was more excited that I was, we tried many types and each one distinct and almost unreal. Antique apples are the way to go. If you have a few minutes, just read about some of the unusual varieties that are grown at Weston's Orchard.

<span class=

My Dad had brought baskets for us to use, those mysterious things that never seem to wear out and have appeared from nowhere. My Parents have all sorts of gardening baskets like that, old wired things with history that just seem immortal. The press was really something too. My Gram had an apple tree in her yard that was extremely prolific most years. We never knew which variety it was, but it was on the tart side and made the best sauce. There was always enough fruit for anyone who wanted any. She hadn't had the press for that many years, but my Dad cleaned it up thoroughly and carted it down here just so we could try this experiment that none of us expected to be so life changing.

apples in the truck

In less than an hour, we had pressed our 2 bushels (less the amount my Mom took home for pies, and a couple of pounds that she left me for eating). My Mom washed each apple in the kitchen sink, her nurse's credo preventing her from just hosing them off outdoors like my Dad and I figured would be fine. The press is amazingly efficient, and when we weren't even half done, we had agreed that next year we have to have a family pressing out at the farm. The mess was actually minimal compared to what I thought, we hauled most of the expired, squeeze-dried fruit to my compost bin and I saved one 8 quart bucketful to make pectin with. I am letting it drip now as I write, and will pick up some rubbing alcohol later this morning to see if it gels. To test if the pectin is developed, you mix 1 t. of pectin with 2 t. rubbing alcohol. If it forms a solid mass that can be lifted up with a fork, the pectin has enough gelling power.

I made my pectin according to Linda Ziedrich and several other concurring sources online. For every pound of fruit in a large, covered pot, add two cups of water and bring to a boil. Cover and simmer for 20 minutes, then drain through a jelly bag for at least 4 hours. Return the juice to the pot, and boil it rapidly to reduce by half. It can be stored in the freezer, or water bath processed for 10 minutes for shelf stability.

cider pressapple grinder

pressed apple pulp
pulp, for pectin.

ground apples
ready to press.

I also threw together an apple crisp this morning. I seem to never follow the same method twice when making fruit crisps this year. I didn't skin my beautiful apples, I added perhaps too much ground ginger, a tablespoon each of flour and brown sugar, and topped it off with a crisp topping which I had leftover in the freezer. I like a lot of different crumble toppings, but this one was fairly exceptional. It could be because it has a fair amount of butter in it, but I mix it up in a snap, adding everything including the yogurt to the food processor. Unlike Heidi, I don't even melt the butter, I just pulse it with the flour a few times before adding the oats. I also like to add about 1/2 c. of nuts - walnuts are a favorite of mine with apples. I usually mix up a double batch, and eyeball how much I want to include on top of a makeshift crisp. It does also freeze well.

unpeeled apple crisp

Crisp Topping (adapted from 101 Cookbooks)
  • 3/4 cup white whole wheat flour, AP flour, or whole wheat flour
  • 1/3 c. butter, cut into tablespoons
  • 3/4 c. rolled oats
  • up to 1/2 c. brown sugar or cane sugar
  • 1/2 c. walnuts, pecans, hazelnuts, or other (optional)
  • 1/2 t. or more cinnamon
  • pinch of salt
  • 1/3 c. plain yogurt
In the bowl of a food processor, combine flour and butter. Pulse several times until the butter is the size of tiny peas. Add the rest of the ingredients except the yogurt and pulse to combine into a uniform texture. Add yogurt, pulse once or twice to incorporate. Use right away, store in the fridge for a day, or freeze for impulse baking.

fresh, unfiltered apple cider

As soon as the amber colored cider made it's way down to the waiting bucket, we all stood mesmerized, as if we had no idea that apples under pressure would indeed give up their juice. It's silly really, all of us so excited that we took little cups and stood in the crisp air drinking the best cider we've ever tasted - probably the best since we went through so much work to get it. It was so sweet, thick, tart and refreshing. We got about 4 precious gallons of cider all accounting, and we split it up pretty evenly. We let it sit to rest for several hours, and then I ladled it into jugs and canning jars - setting some aside a little more than a half gallon right away to try and open ferment for eventual vinegar. We didn't filter it into oblivion like we had seen recommended - all of us agreed that having a little sediment was perfectly fine with us.

bottling cider

I have had my issues with vinegar. Making "mock" flavored vinegars (out of Bragg's cider vinegar) this summer made me feel a little better, but like I've said before I felt like I was cheating. This easiest thing seems to be a great challenge for me, and I suspected that I could easily waste my good-as-gold cider trying to ferment and then vinegarize it. Fortunately, yesterday morning, I saw the bubbles of fermentation first appear. This morning, the foam is about a half inch thick, and I suspect in a couple of days I'll be able to strain it into clean jars and inoculate it with mother. Meanwhile, my other quarts of cider are in the fridge waiting to see if their fate will also be vinegar. It is my sincere hope that I can get at least a gallon of homemade cider vinegar, and I don't want to jinx myself, but it looks as if I may be on my way toward that goal.

fermenting cider

Every time we visit, I remember how insanely lucky I am to have such amazing Parents. They get every bit as excited as I do for good food and hard work, experimenting and being together with family. As I helped my Dad hoist that press back up onto his truck (and I didn't think that I'd be able to lift it, maybe I need to start a weigh lifting regimen...), I knew exactly where I get all my quirky obsessions and experiments from. The press traveled 500 miles to my house and another 180 back to the Farm, where it will over-winter in their ample garage or outbuilding until next apple season when we will meet there and be as excited again to see such an amazingly simple thing as cider drip casually from an iron and wooden press directly into our waiting cups. In those moments of simple pleasures, I feel so full up with appreciation for life and the sweet tart of it that I can not really express it. What an amazing way to enter the Thanksgiving season.