Pear Ginger Ginger Jam.

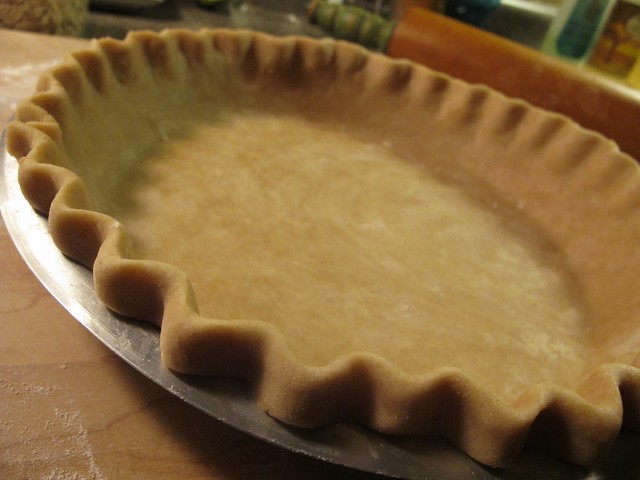
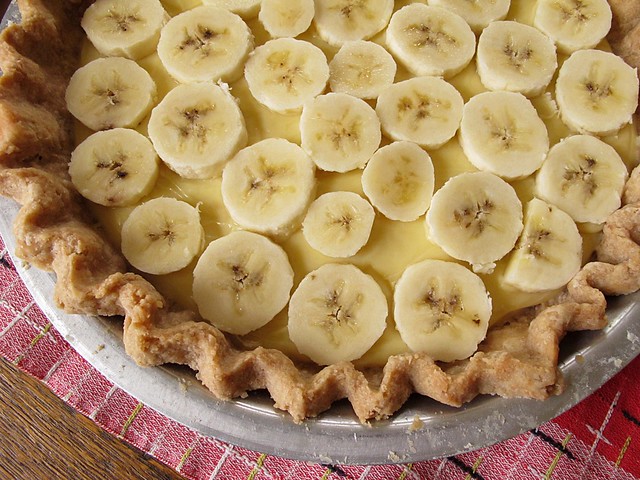
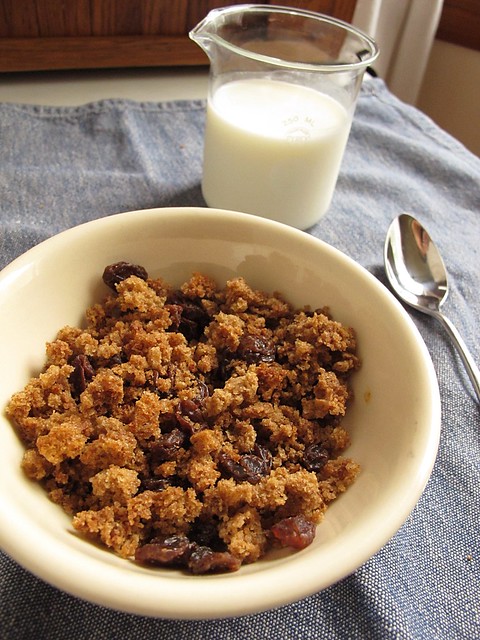
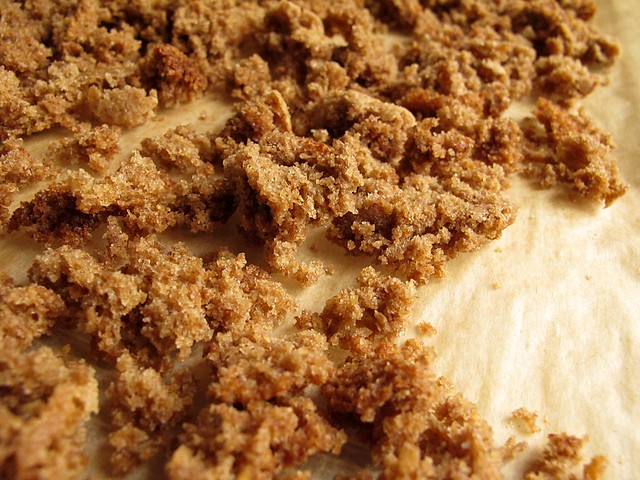
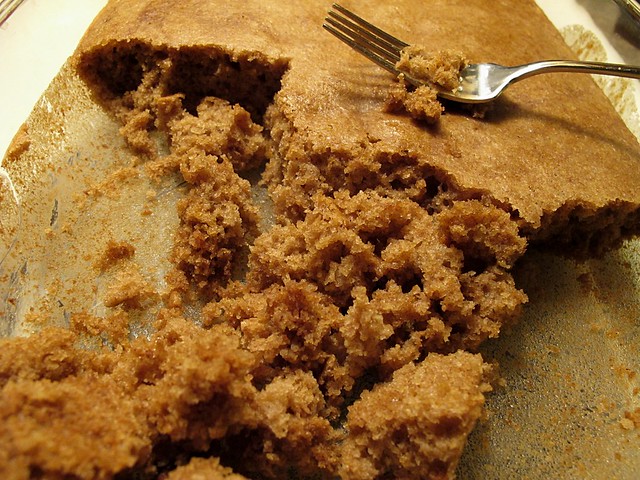
This first week of school seems more productive and much different that I had expected.  I wandered around the house feeling lost and a little empty for a day or two, but then seemed easily able to buckle down to the important work of deep cleaning and mastering the art of high-hydration whole wheat sourdough.  I always forget just how deafening the quiet is when the kid isn't around.

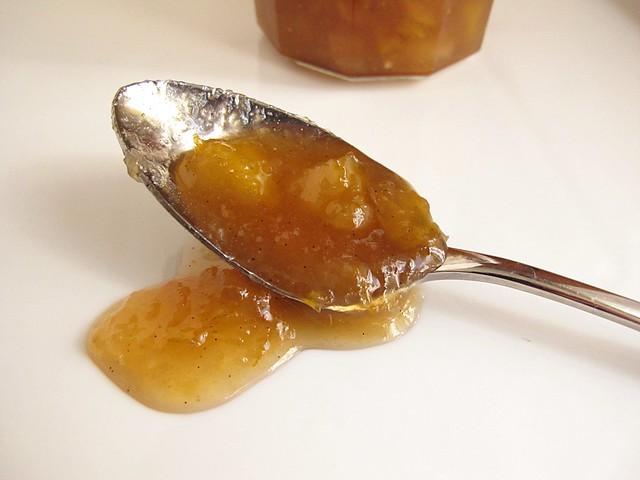
Last week I had picked up a 3lb. bag of organic pears at the regular old store, beguiled by their $3.99 price tag to be sure, but also craving a gingery jam.  My across-the-street neighbor had made Marisa's pear jam not long ago and gave me a tiny sample.  I really liked it.  It had a nice consistency, and she had bumped up the vanilla bean even more - making it truly special.  The day before yesterday, my pears had miraculously softened (and I had wondered if they would, little green rocks that they were for nearly a week in a bowl on the counter).  Their pear-ness overwhelmed me.  I fooled even myself into thinking I had got them from a tree somewhere.

Pear Ginger Ginger Jam

Pears and I have a long relationship.  Growing up, my Mom canned whole peaches and pears every year in light syrup, and if I ever got to choose between the two, I'd always pick the pear.  I love the grit in the skin of a pear and that settles happily into it's flesh.  I love that it doesn't seem as sweet as a peach and keeps some toothsomeness even after canning.  I used to love, and still do love cutting a home-canned pear with a knife into thin slivers before eating.  And I love drinking the sweetened pear juice, cold from the fridge, that is left in the jar after all of the pears have been devoured.

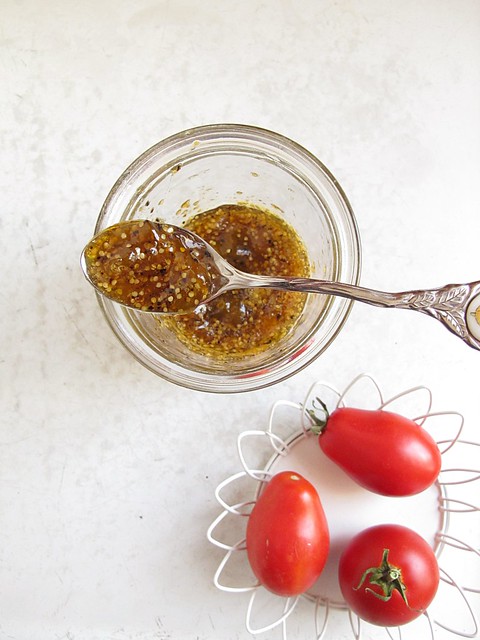
When thinking about a pear jam, I knew I definitely wanted to keep the pear skins.  Not only does is make less work of things, it keeps some additional fiber.  Most of a pear's fiber and considerable amounts of Vitamin C are located in the skin - but more importantly, all the texture that makes a pear a pear is found there as well.

relaxing pear ginger jam.

crystalized ginger

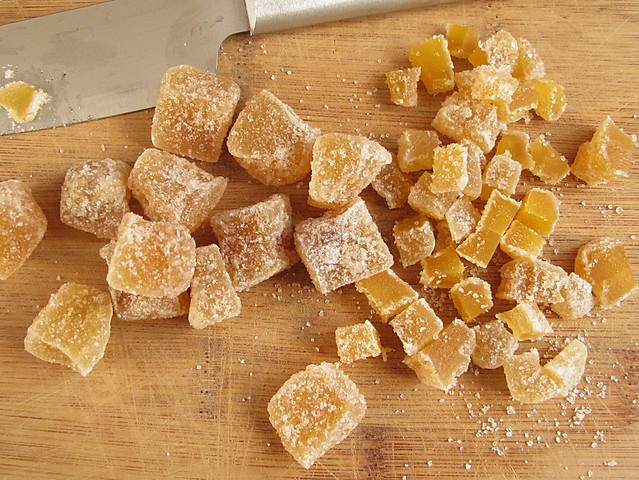
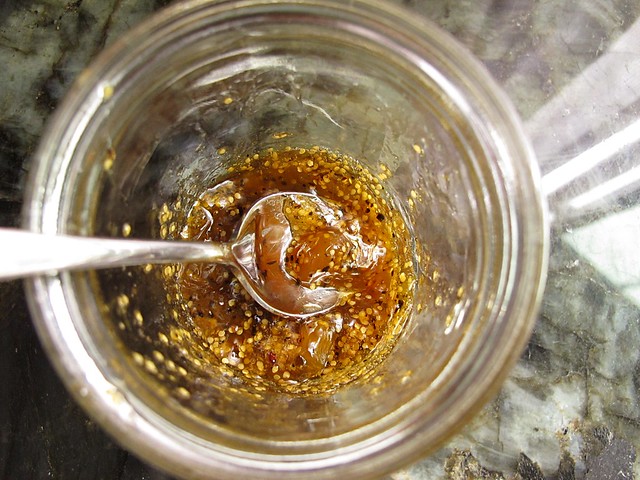
I decided to go box-pectin free, and as I have come to do with most jams of this sort, I let the fruit macerate with the sugar for about 16 hours and I used raw sugar, which by the end of the relaxation had completely liquified.  Some of the pear edges turned brown, but I wasn't worried about a little oxidization since I knew the whole pot was going to cook down.  I let everything stand overnight together except the crystallized ginger, which I added just before the cooking down, and the vanilla, which I added just before packing into jars.  As with all jam, let your taste dominate the end result, and cook down until you are satisfied of the set.

Pear Ginger Ginger Jam (inspired by Marisa McClellan and Linda Ziedrich)
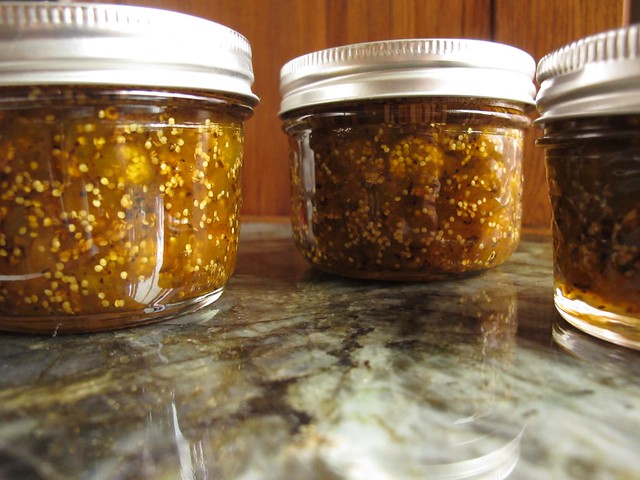
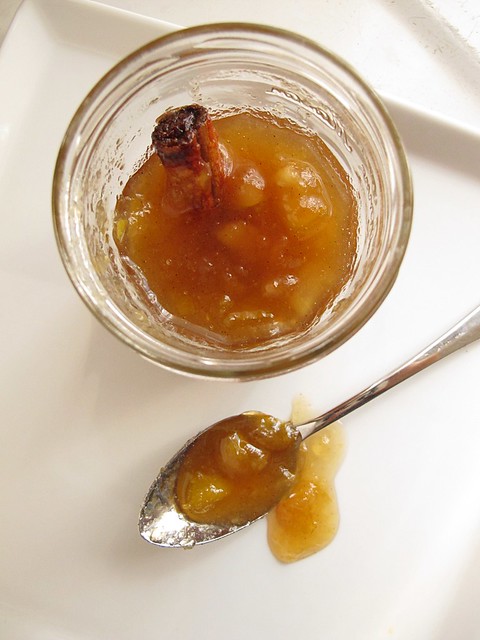
my yield was 6 half pints plus some run-over
  • 3 lbs. pears, ripe and giving to pressure, cored and chopped (skin on)
  • 2 oz. fresh ginger, grated (to taste, about 3-4 inches off a "hand")
  • 1 lemon, zested and juiced
  • 5 c. sugar (I used raw sugar by weight - the weight of granulated - 958 g. or 33.8 oz.)
  • 1 cinnamon stick, broken in half
  • 3 oz. crystallized ginger, cut into small cubes
  • 1 T. vanilla extract (I used the last of some vanilla bean paste I scraped from the jar and enough extract to equal 1 T.)
Combine the pears, fresh grated ginger, lemon juice and zest, sugar and cinnamon stick in a large, heavy preserving pot.  Let sit, covered, for 8-16 hours, stirring as you think of it.

When ready to make the jam, ready jars, lids and water bath.  Add the crystallized ginger and bring the pot up to a boil.  Boil the jam down until the consistency is as you like (and the jam falls nicely from the spoon, or mounds in a chilled dish).

Remove the jam from the heat and add the vanilla.  Ladle the jam into hot jars (remove the cinnamon stick - I like to keep them in the run-over jam I have), put on the lids and rings and process in a boiling water bath for 10 minutes.

Pear Ginger Ginger Jam

I refrained from adding more cinnamon than what was gleaned from a single stick of rough cinnamon stick during the resting and boiling.  So often, cinnamon dominates North American bakery and jam efforts.  I love cinnamon and feel it does have a place, but prefer it in the background of this gingery jam.  The jam was full of ginger flavor, but not spicy-hot from it which was my goal.  The lemon kept things in line from turning too sweet, and vanilla is always a good idea in just about anything I think.

Yesterday afternoon, another friend whose child is now is school all day came over and we tried it on simple, eggy, sourdough popovers.  I made a pot of tea, even though it grew warmer out than I had anticipated, and we sat for 45 minutes chatting the way I'd imagine women did 60 years ago. I appreciated every second of a spontaneous visit, while simultaneously keeping an eye on the clock to see when my son would be done with his school day.

sourdough popovers
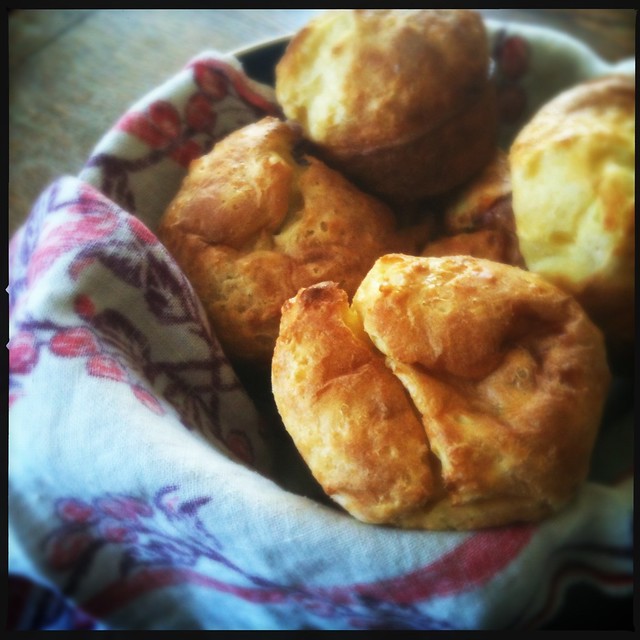
These sourdough popovers were a King Arthur Flour recipe.  Super simple, and really excellent!

I am surprised again at how fast time flies.  And at how much I can accomplish in a day.  Laundry is once again caught up, the weather cooperates for line-drying in record time, and I found and eradicated dust I didn't know existed.  While those time-honored housekeeping things never truly end, I feel renewed in my purpose - strengthened by cooler temperatures and the need to bake, and the comfort of those who appreciate the bakery.  We're off to a good start this September!

More Adventures in Gluten-Free Baking

I somehow feel like it's my personal goal to bake gluten-free treats that taste so good no one has any clue they are gluten-free.  It's not because I have trouble with gluten, and it's not because I'm vying for blog clicks and cashing in on a trend:  it's purely because baking is an adventure and gluten-free baking is the biggest adventure of all.

It's been awhile since I tried my first experiments with GF baking.  It began when I realized that my Vita-Mix could easily turn any whole grain into flour.  Since I run a fairly "whole food" kitchen, I already had tons of  raw material to work with - and the only thing standing in my way were a few minutes of prep time and the mess involved when grinding up lots of miscellaneous grains at once.

I've gotten a little smarter since I've discovered I love baking with GF ingredients, and I made a shelf in my pantry for all of my supplies.  Instead of grinding what I need when I need it, I can usually reach for a quart jar and then only occasionally run into the need to refill it.

GF baking pantry shelf

What exactly is on the shelf?  I keep jars of sorghum flour, brown rice flour, teff flour, tapioca flour (also called starch), potato flour, xanthan gum, a gluten-free AP mix that I make up according to this recipe, and a canister of coconut flour that a friend gave me and I haven't tried it in anything yet.  I personally have not yet found much difference between brown rice flour and white rice flour, so I only keep brown rice - and a nice bonus is that it is available in bulk at my co-op without being prohibitively expensive.  (Purchased rice flour is also much more finely ground than what I can produce in my Vita-Mix.)  Now that I've got a basic GF pantry going, it's easy to keep things in stock - and grind things from my other whole food staples like quinoa, millet, and oats on an as needed basis.

And, can I add that sorghum flour is my most favorite flour ever?  It's absolutely worth the expense, and I adore the texture and flavor it gives baked goods.  In fact, there was a whole cup of it in the blueberry muffins I decided to make yesterday...

GF blueberry muffin

These muffins, admittedly, were best fresh from the oven.  In fact, all of my tasters didn't suspect they were GF at all, and the texture was exactly like that of a regular blueberry muffin.  When I tried one this morning, the texture had changed a little, but was still very good - especially with a cup of coffee.  I should have tossed the frozen berries with a tablespoon or two of the floury mix to keep them from congregating towards the bottom of the muffins... I'll remember next time.

When I want muffins, I usually decide last minute - so waiting on butter to come to that magical room temperature isn't always an option.  I used coconut oil to great effect, it's 10 tablespoons by weight (the weight of butter),  I've given you the gram measurement.

Gluten-Free Blueberry Muffins (adapted from Gluten-Free Girl)
  • 142 g. coconut oil, soft room temperature
  • 1 c. white sugar
  • zest of one orange
  • 2 eggs
  • 1 c. brown rice flour
  • 1 c. sorghum flour
  • 1 c. tapioca flour (also called tapioca starch)
  • 1 1/2 t. baking powder
  • 1/2 t. baking soda
  • 1/2 t. kosher salt
  • 1 c. + 2 T. plain yogurt (I used full-fat)
  • 1 c. blueberries, not defrosted if frozen
Preheat oven to 350.  Ready 18 muffin liners in muffin tins.

Mix the brown rice, sorghum and tapioca flours, the baking powder, baking soda and salt together in a medium sized bowl and set aside.  (Toss the frozen berries with a tablespoon of the flour to keep them from sinking to the bottoms of the muffins.)

In a large bowl, mix the coconut oil, sugar, and orange zest with a hand mixer until just well combined.  Add the eggs, one at a time, mixing well after each.  Add half of the flour mixture, and mix until just combined.  Add 1/2 c. of yogurt and mix until just combined.  Add the rest of the flour mixture, then the rest of the yogurt, mixing after each addition as previously described, taking care not to overmix.

Fold in the blueberries.  Portion into the muffin liners, about 2/3's full, and bake for 20-25 minutes.  They should just be starting to brown around the edges, and a tester should come out clean from the centers.

I considered juicing the orange I used for zest and mixing it with enough powdered sugar to make a glaze.  They didn't need it, but would be pretty and perhaps more dessert worthy if you do it.

GF blueberry muffins.

For a picnic last Sunday, I baked up some GF brownies - and I have to say they were better than any brownies I've ever made before.  They were also adapted from a Gluten-Free Girl recipe taken from Alice Mendrich, so I knew before I even began that they would be amazing.  What I didn't know is that they would age well.  I saved one a full 4 days to test this theory, and they were even better than when fresh.  I didn't bother with a double boiler to melt the butter and chocolate, and I didn't bother with the cold soak to stop cooking either - I just made sure to heat the chocolate over low heat and watched not to over bake.

Gluten-Free Brownies (adapted from Gluten-Free Girl/Alice Mendrich)
  • 8 T. butter (1 stick), cut into 8 pieces
  • 4 oz. dark chocolate (I used Callebaut), chopped
  • 1/2 c. white sugar
  • 1/2 c. raw sugar
  • 2 eggs
  • 1 t. vanilla extract
  • 1/4 t. kosher salt
  • 1/4 c. brown rice flour
  • 1/4 c. tapioca flour
  • large handful of raw walnuts, broken by hand over the batter
Preheat oven to 400.

In a small, heavy saucepan, melt the butter together with the chocolate.  Remove from heat and let cool slightly.

Line an 8x8 square pan with parchment paper (I use 2 pieces that overlap in a criss cross, so that I can lift them out easily).  In a medium sized bowl, blend the sugar and eggs for a full 3 minutes - until the sugar starts to break down a little and the mixture looks thickened.  Add the vanilla and salt and blend in well.

Add the flours, and use a spatula to blend in thoroughly.  Scrape in the melted chocolate and butter mixture, and fold in well until no streaks remain.  Crumble some walnuts over the batter and fold them in too.  Then, spread the mixture into the prepared pan and bake until the pan isn't jiggly when tapped, and fudgy crumbs cling to a tester inserted into the middle of the pan.  I started checking at 20 minutes - and they were perfect within 24 minutes.  Remove pan from oven to a cooling rack, and let cool completely in the pan until room temperature before slicing.

Store any leftovers tightly wrapped (I used foil, since we were picnic-ing).  They will remain very good for several days.

gluten free brownies

Like all alternative kitchen adventures, GF bakery can have the connotation of being healthier.  These two examples of baking are not necessarily healthier for you, but they are proof that GF bakery can taste amazing and fool anyone who may have the predisposition to think that by their very nature, GF bakery tastes rubbery and awful.

In general, I'm baking a lot more thoughtfully these days.  I'm not baking just for the joy of baking as I usually do;  I have successfully stopped eating so many baked goods personally.  So I'm making the most of each opportunity I have at my oven: taking care to ensure that no matter your dietary need, there can be a quality, homemade baked good made to amaze you.  If you happen to have a GF challenge for me, let me know... maybe it will be my next gluten-free kitchen adventure!


It's Called Ground Cherry.

Ground cherries actually are not cherries at all, but members of the nightshade family - closely related to the tomatillo. They are little and wrapped in a dusky paper husk; they are yellow or greenish, juicy and sweet at first but somehow tart and a little bitter at the same time. I have only experimented with them for a couple of years now, preferring them in hot sauces spiked with ample amounts of raw cider vinegar. This season, their paradox of flavor seemed to call me to the sweet side of things. I needed a lift on the wings of a really stellar preserve, and this one fit the bill.

ground cherries, chai spice

I often wonder how information on such singular, seasonal things as ground cherries proliferated prior to the Internet. I checked my first source for all things Jam and Preserves related - in my copy of Linda Ziedrich's Jam book. I googled around for ideas, and settled immediately on an infusion including both orange and chai flavors. As I read and considered, I could already taste the finished jam on my tongue, the breath of Fall in my nose, and the remembrance of all good things that bridge the gap between sweet and savory. Those fickle things most of all remind me of the grey areas in life, where there are no absolutes and hence no mistakes that can be made. Sometimes, I need something that is sweet and bittersweet and bitter and savory all at once, and I need the reminding of the patience to see (and taste) things for what they really are.

preserves set

This jam is soft set and translucent, like setting sun in September. The calender turned the day after this went into jars and on that last day of August, the humidity still lingered in the air, but it felt different, like the flocking geese knew something that I didn't: like Autumn is coming much more quickly this year because the Summer made me so weary that it knows I need a quick change.

For good or bad, when I look back over the season's worth of dates on jars, I feel every pang that went along with it. The taste of sweet-sour ground cherry picked me up and made me feel confident; this is a gem of a preserve, as easy going on a cheese topped cracker as in alongside a fat scoop of whole milk yogurt - or sucked straight off the spoon, trying to identify all of the satisfying flavors that make it up. It's a very small batch, but it will be worth every lingering mouthful.

citrus chai ground cherry preserves

Ordinarily, I prefer the flavor of raw sugar in preserves because the caramelly depth is usually more interesting. I chose to use the more refined white sugar in this because I wanted to be able to keep the integrity of the citrus flavors, and highlight the tea (which I also feared was so old that it may have dulled with age). I also brought the jam up to a boil, dissolved the sugar, and then let it sit at room temperature for about 16 hours. In part because I got busy, but also partly intentionally. It then took virtually no time to bring it up to jamming stage.

Citrus Chai Ground Cherry Preserves
(inspired by Linda Ziedrich, Cheese and Champagne, and Kitchen Therapy - also a nod to the Hip Girl Kate)
(my yield was 2 half pints and 1 quarter pint, and just enough run-over to enjoy now)
  • 5 pints ground cherries (1 lb. 9 oz.)
  • juice of 1 lemon, zest of half of the same lemon
  • zest and juice of 1 orange
  • 1 heavy T. of chai tea (I would have liked a premium Rishi chai here, but settled for the year-old Frontier bulk tea I had in the cupboard)
  • 2 c. sugar
Combine everything in a heavy preserving pot and bring to a boil over medium high heat. Stir to make sure the sugar dissolves, then turn off the heat, put the lid on and let the pot sit at room temp overnight. (You can refrigerate if room temperature makes you nervous.)

The next day, ready some jars, lids and the like, and bring the jam up to a rapid boil. Stir constantly until desired consistency is reached, and jam gels when placed on a chilled plate. I mashed about half of the ground cherries with a potato masher when they were maybe halfway to the gel point, you can mash more or less or not at all if you prefer. (As I boiled and tasted, I also added a 1/4 t. of ground ginger, since the ginger component of the chai I used was lacking and missed.)

Ladle the preserves into hot jars, leaving 1/4 inch headspace, and process 10 minutes in a hot water bath.

citrus chai ground cherry preserves

Sometimes, things that aren't what they seem present new challenges. Sometimes challenges wear you out like a too-hot Summer. But also sometimes, they can turn a silver lining, and become something more wonderful than you can imagine. Ground cherries certainly have a sweet side, and when full of warm chai flavor, they comfort. Lemon and orange lift, the seeds are interesting and break up the monotony of a otherwise transparent gel. When I pluck a jar from the shelf in a few months, when the cold surrounds me and the trials of August and September have passed, I will be thankful for these facts: that things by other names can be loved the same if given the time, patience and grace to do so, and that sweet sour preserves are welcome on any table.

citrus chai ground cherry preserves

New Adventures in Sourdough: Piecrust.

Several months ago, I wrote an article for the Daring Kitchen website on uses for discard sourdough starter. After that article, I was contacted by fellow Daring Baker, Shelly, about a new baking group that was forming. A monthly, no pressure challenge to bake up something using sourdough starter and then link up to each other to compare, contrast and congratulate. I was really excited, and then - sadly - I totally forgot about it.

Fortunately, Shelly sent me another reminder email. And also fortunately, the item this month was pie crust!

sourdough pie crust

When I clicked through to the link on Sourdough Surprises for a recipe suggested as a starting point for sourdough pie crusts, I was so happy to see Alanna's (the Bojon Gourmet) site pop up. The Bojon Gourmet has been one of my longtime favorite baking sites, and I also know from experience that her recipes are usually very reliable. In fact, I really thought that her all-butter pie crust was my favorite!

bojon piecrust.
Alanna's All-Butter Pie Crust.

I wondered if sourdough fortified pie crust would remind me of the fermented yogurt dough crust I've made from Sally Fallon's recipe. I actually thought about letting the butter come to room temperature and then mixing the crust more like a dough, and allowing it to fully culture (7 hours or longer) before refrigerating and continuing. Then, I decided that I would take a shortcut and just process everything in the food processor.

That choice eliminated the messy work of fraisage, or using the heel of your hand to scrape bits of the dough across the work surface to enhance flakiness. I used the food processor to first aerate the flours with the salt and sugar, then to cut in the butter, and finally to pulse in the sourdough starter. Then, I transferred the whole mess into a plastic bag, where I gently kneaded it into a ball. I let it sit for several hours in the fridge before taking it out to bake into a shell to house a banana cream pie.

banana cream pie layer

I'm certain that using the fraisage method to work the dough would have contributed to a more tender, flaky crust - but I actually really liked the quick, no mess version as well. It made a very stable crust for a baked shell. For the pre-baked shell, I preheated the oven to 350, rolled, crimped and then docked the crust with a fork thoroughly. Then, I lined it with parchment and filled with my pie weights: a few cups of red and white beans. Bake for about 20 minutes with the pie weights in place, then remove the weights and continue baking until lightly browned, another 10-15 minutes or so. Cool on a wire rack until room temperature and then fill with your choice of icebox pie favorites. This crust is substantial, nutty tasting and crisp - a great choice for a refrigerator pie.

To make my banana cream pie, I used a lighter pastry cream that I snagged a while back from a disappointing Epicurious recipe. It was billed as a light version of Boston Cream Pie, and let's face it, if you are making a Boston Cream Pie, don't go for a light version. This pastry cream has only 2 egg yolks per cup of milk (by contrast, I think Dorie Greenspan's has 6), making it a good, not-too-sweet layer to complement sliced, ripe banana.

There is no way I would use skim milk in a pastry cream recipe(I have to draw the line somewhere). I also doubled the volume, which is the perfect amount for a 9 inch pie.

Vanilla Pastry Cream - Light Version for Pie (adapted from epicurious)
  • 4 egg yolks
  • 6 T. sugar
  • 4 T. cornstarch (I would suspect arrowroot would also work well)
  • 1/4 t. salt
  • 2 c. whole milk
  • 2 t. butter (I eyeball this, just add a little butter)
  • 1 t. vanilla extract

Whisk yolks, sugar, cornstarch, salt and 2 T. of the milk together in a small bowl or measuring cup. Bring remaining milk to a bare simmer in a saucepan, and add the yolk mixture, stirring constantly. Boil until thickened nicely, about 2 minutes, but maybe not quite that long. Remove from the heat and add the butter and vanilla extract, whisking well to combine (and make sure the butter is fully melted in). Transfer to a bowl, and cover with plastic wrap, letting the wrap rest directly on the surface so that a skin doesn't form. Cool to room temperature.

banana cream pie

When both the pastry cream and the pie crusts are cool, spoon the pastry cream into the shell, and smooth gently with a knife. Slice bananas, (I used almost 2 for this pie), arrange them on top of the pastry cream so that they sit shoulder to shoulder and then top with lightly sweetened, whipped heavy cream. Stash in the fridge for a few hours prior to eating.

So, now for the links:


I hope to be able to make a better commitment to this baking group, and it shouldn't be too difficult since sourdough starter is always plentiful around my house!


On The Addictive Nature of Breakfast Cereal.

I live a moderate life. I usually insist upon whole, from scratch foods (especially in my own home), but I will stop for an ice cream cone once in a while. I will eat greasy pizza that I know has dough conditioners, and I will eat canned "baked" beans - but those are all occasional indulgences, part of the philosophy I grew up with to "do what we can, and trust God with the rest".

I also read a whole lot about health and diet, but am slow to jump on the latest trend. I never was sold on Atkins, The Zone, South Beach or other low carb or carb-free diets. I can, however, see valid points to "real food" diets such as GAPS, Paleo and what is usually referred to as the NT or Nourishing Traditions diet. Nourishing Traditions ("The Cookbook that Challenges Politically Correct Nutrition and the Diet Dictocrats") is a book I've had on the shelf for several years now. I got my copy after running into an old boyfriend's parents in the health food store. His mom saw the canola oil in my cart and said innocently, "You are still eating canola oil?" Within the month, a copy of that book found its way from her generous zeal to my hands. I opened it and scoffed at the shear ridiculousness of the length of it, the unbelievable attention to detail, the amount of information also crammed into into the margins, and the simplicity of the numerous recipes.

To that point, I had never heard that canola oil may not be good for you, that whole milk and full fat dairy were not actually the things that clogged arteries were made of. I couldn't be bothered with crazy, time consuming diet ideas when I had a 2 year old kid to chase around. But little by little I read that book, and found supporting information in many other places around the Internet. Gradually, I became one of the crazy people who actually think that what we put into our bodies has a huge outcome on our general health - from skin and hair to dental and digestion. My moderate lifestyle was altered even more by gradually cutting back on sugar and caffeine, and especially changing the way I think about whole grains.

In particular, I no longer buy breakfast cereal. What? But breakfast cereal is the staple of my generation, the stuff we all learned to get ourselves in the mornings before school. I'll bet the vast majority of Americans still choose a box from a shelf to validate themselves as a "breakfast is the most important meal of the day" type. Breakfast cereal is still my Kiddo's most favorite thing, and given the opportunity, he will eat huge amounts of it and request it for every meal. That alone could be why I just stopped buying it. Now I get him a single box for special occasions and limit him to one smallish bowl per sitting. Even though boxes haven't been entering my house for at least 2 years now, he still loves the stuff - and I'll admit that I still occasionally long for the crunchy, quick staple too.

But why are the health food nuts like me demonizing breakfast cereal? It all boils down to processing. Any quick Google search will show you in a number of places that all grains contain phytic acid, a naturally occurring acid that prevents the minerals in grain from absorption into you body. You can unlock the nutrition in whole grain by giving it the time to soak in acidulated liquid (like buttermilk, yogurt, or whey), or by first sprouting the grain and then dehydrating it and grinding it into flour.

Just typing that last sentence in seems like a lot of work, but consider how fast paced our lives are now. Traditional foods dictate traditional time, and when you have no t.v. show or Facebook to get to, gobs of time suddenly appear. This is the opening paragraph of Sally Fallon's Nourishing Traditions book:
Technology is a generous benefactor. To those who have wisely used his gifts, he has bestowed freedom from drudgery; freedom to travel; freedom from the discomforts of cold, heat and dirt; and freedom from ignorance, boredom and oppression. But father technology has not brought us freedom from disease. Chronic illness in industrialized nations has reached epic proportions because we have been dazzled by his stepchildren - fast foods, fractionated foods, convenience foods, packaged foods, fake foods, embalmed foods, ersatz foods - all the bright baubles that fill up the shelves at our grocery stores, convenience markets, vending machines and even health food stores.
Breakfast cereal is the definition of fractionated food: it is made from grain that is treated harshly with heat and pressure, coatings to keep it crunchy and artificial colors and flavors. Even the added vitamins are from suspicious sources - most of which are not even viable after the heat and pressure treatments. Grains are reduced to liquid form and extruded into shapes, and as Fallon mentions in this article, it costs pennies to produce and sells for $4-$5 a box, making it one of the highest profit margins in the food industry. Skeptical as I can be about the latest health crazes and claims, it seems fairly logical to me that something that makes so much money for so many involved is hiding and harboring all kinds of things that consumers don't want to know about. (Like the recent reveal of GMO's in Kashi...)

real breakfast cereal

But enough on boxes of processed cereal. We can eat real breakfasts! We can even eat real breakfast cereal once again. I just finished making a big batch of this cereal I recently read about on The Healthy Home Economist. It's good. It's really good. And even the Kiddo liked it.

The best thing about this recipe is that it is basically a cake that is crumbled up and dehydrated. Not only can you just enjoy it as a cake the possibilities are endless for cereal flavor variations. I'm thinking even a chocolate version could easily appear sometime in the near future. I dehydrated this because I have a dehydrator, but Sarah bakes hers at a low temperature until crisp and dry.

Real Cold Breakfast Cereal (the Healthy Home Economist)

(my yield was 2 half gallon jars of cereal)
  • 6 c. freshly ground organic flour (I used about 3 cups each of soft wheat and spelt)
  • 3 T. whey added to enough water to make up 3 cups
  • 3/4 c. coconut oil, melted prior to measuring
  • 1 c. maple syrup
  • 1 t. maple extract
  • 1 t. vanilla extract
  • 1/2 t. salt
  • 1 T. cinnamon
  • 2 t. baking soda

In a very large bowl, mix the flour with the whey/water until it is smooth and well combined. Cover with a clean towel (I like to also top it with a lid from a large pot to prevent a skin from forming on the top), and let soak at room temperature for 24 hours. (I have read elsewhere that as long as you soak 7 hours or longer, the enzymatic change has taken place in the grain. I let mine soak for about 20 hours.)

After soaking, preheat oven to 350 degrees. Add the rest of the ingredients and stir very well until well mixed. Batter will be very sticky will kind of form a single mass. Divide the batter into 2 9x13 glass pans (no need to grease them, and no need to be exact), and bake for 20-30 minutes until a tester comes out clean.

Cool the cakes in their pans, then crumble them into small pieces. Spread onto dehydrator trays and dehydrate at 147 degrees (or as hot as your dehydrator goes) until fully dry and crisp - this was just overnight for me. Time will vary with heat and the size of the cake pieces. When dry, you can crumble the pieces further if you like. Store in glass jars or a zip top bag - it's recommended to store in the fridge, but I have some space so I may pop my jars into the freezer for optimum crunch preservation. I would recommend storing without dried add-ins, and adding them directly to your cereal bowl.

real breakfast cereal

This cereal tastes exactly like a raisin or "All-Bran" type cereal, and was especially great with raisins. I'd recommend storing it out of sight quickly, because it's really easy to keep on munching on it dry. If you eat at a moderate pace, it keeps fairly crunchy in milk too. I'd really like to sneak some ginger into the batter, but may have to settle for a few cubes of crystallized ginger in my own bowl since the Kiddo doesn't share my taste for it.

Also, earmark this recipe as a really great cake in its own right: it reminded me of the soaked and sourdoughized applesauce cake I've made in the past. Add in some raisins and nuts prior to baking, and you're in business! (I may recommend using half the recipe, unless you need 2 9x13 cakes...)

real breakfast cereal

It's easy to want to grab a quick breakfast before running out to start our harried, modern days, so it's easy to see just why marketed boxes invade our homes. My challenge to myself was just not to buy any cereal, and then I was forced to make and eat real food for breakfast. I usually just have a smoothie fortified with chia, but it's definitely more of a challenge to satisfy a child without the aid of the almighty cereal box. But time has passed enough now that we don't miss cereal as frequently as we once did. Now with the revelation of "dehydrated cake as breakfast", the upcoming school year may have one more breakfast option on the menu. I'll take the long waiting times to produce my own convenience food, it's definitely worth it!