Sourdough Surprises

Sourdough Surprises: Flatbreads (Sourdough Pita)

Flatbreads were the item of the month for the Sourdough Surprises bake along... and I couldn't have been happier since I've been meaning to convert one of my favorite pita bread recipes into a true sourdough version for quite a while.

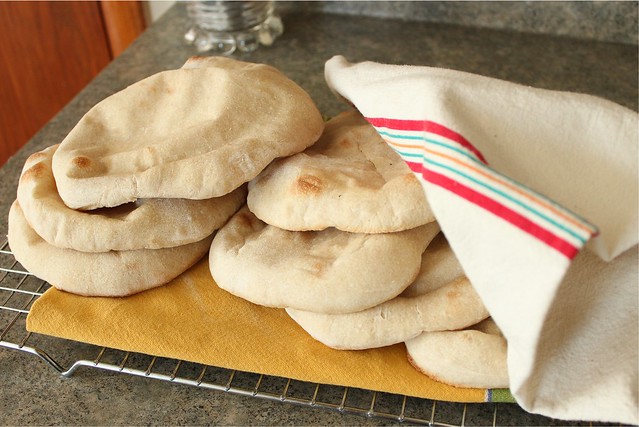
sourdough pita

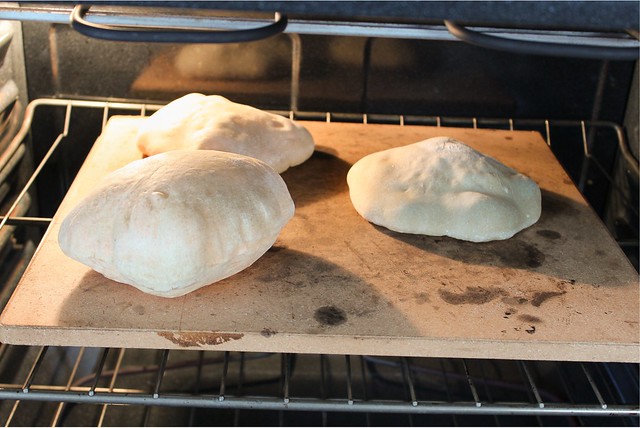
Long before I ever baked a loaf of bread, I had started playing with flatbreads.  Something about them is much less intimidating than traditional loaf baking; they are smaller things that don't require as much time or effort, and usually they can be baked in mere minutes.  Part of this infatuation with pita in particular likely came from the bread-genius Mom of one of my friends.  I clearly remember standing in her kitchen as she rolled out small discs about the size of your palm, telling me that "you want the dough to be the same thickness as your earlobe, that's how you can be sure they'll puff in the oven."  Her oven was perpetually lined with blackened quarry tile (or maybe it was brick), and she'd deftly slap the pitas on there and we'd peer through the oven door as they rose.  I did the same thing with these, my growing belly all of a sudden requiring me to grab a step stool to sit on instead of crouching or sitting on the floor for the several minutes of baking time.

I think this could also be the first sourdough recipe that I've made up entirely myself, basing the proportions loosely on a fast, favorite food processor version of pita that Cook's Illustrated published more than a decade ago.  I used some pointers on Sourdough Home on how to go about converting, but instead of letting the dough ferment at room temperature, I let mine linger in the fridge until I was ready for it.  My result was a sturdy pocket bread with a good, not-too-sour sourdough flavor.  It's a keeper of a recipe for those times when sandwiches packed in bread need to travel well.

sourdough pita ('batter')

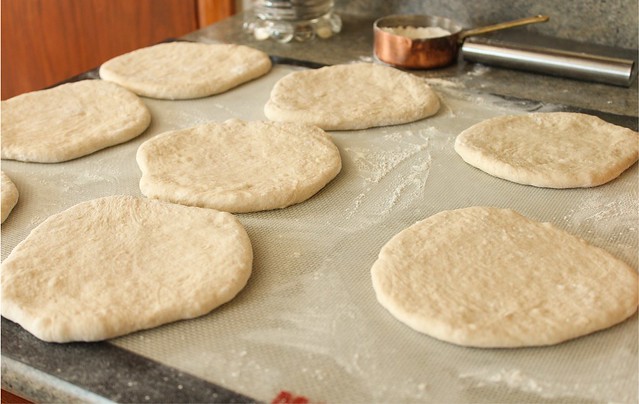
Part of the reason my bread was a bit more stable was that I recently read about pita on a Food52 post.  The baker suggested rolling out the dough and letting it sit for a while until puffy, resulting in a pocket that was more uniform on both sides.  Prior to this revelation, my pita was always thinner on one side, leading to leakage when the bread was stuffed.  Let them hang out only the length of time it takes the oven to heat, and you'll be surprised at how "professional" your breads turn out!

sourdough pita

sourdough pita

I divide this dough into 8 pieces, making pita that is pretty substantial in size - about 7-8 inces across.  Of course you can divide them into smaller portions to make more petite breads - just follow the rule of the earlobe thickness.  It really works!  Ordinarily I scale all ingredients for breads, but this one is casual enough (and you kind of know how soft and pliable a pita dough should be, right?) that I used conventional, non-weight measurements.  Be sure to start the bread 12-18 hours before you want to bake the pitas.

Sourdough Pita Bread
yields 8 breads

For the sourdough "poolish":
  • 1 c. 100% hydration starter, well fed
  • 2 c. bread flour
  • 1/2 c. whole wheat flour
  • 1 c. water
To finish the pitas: 
  •  1 T. olive oil
  • 2 t. granulated sugar
  • 1/4 c. plain yogurt
  • 1 1/2 t. kosher salt
  • 1/2 c. bread flour (plus 1/2 cup additional, likely)
Start the poolish at least 12 hours before baking.  Mix all ingredients together well.  The dough will be more like a batter than a stiff dough.  Cover tightly, and put into the refrigerator to rest.

When ready to continue (12-18 hours later), take the sourdough poolish out of the fridge and add it to the bowl of a stand mixer.  Add the olive oil, sugar, yogurt, salt and 1/2 cup of flour and mix well.  (You can do this by hand if you like, but it's easier in a stand mixer.)  The dough will be quite sticky, and will likely need another 1/2 cup of flour as it is being kneaded.  Knead for about 5-7 minutes until you can feel the dough turn soft and pliable. Turn the dough out onto a lightly floured surface and knead for a minute or two adding just enough flour to bring together a soft dough.  The dough may still be a little tacky, and this is ok.  (Try not to add too much flour so the dough feels soft rather than tight and dry.)  Put into a clean container (I didn't bother to grease it), cover well with cling film, and let it rise at room temperature until doubled in size, about 3 hours depending on room temperature.

Turn dough out onto a lightly floured surface, and divide into 8 equal portions.  Roll each portion into a ball, trying not to add too much additional flour.  One at a time, use a rolling pin to roll each ball into a disc about 6-7 inches across.  Aim for even thickness across the disc, that is about the same thickness as your earlobe.  Let the discs rest on a lightly floured surface, covered by a clean, lint free cloth.  Preheat the oven to 500 degrees with a pizza stone or unglazed tiles (a plain sheet pan in a pinch) in the center of the oven.

After the stone has fully heated, about 30 minutes, take a disc of pita and gently stretch it out slightly as it probably sprang back a little bit.  The discs might feel a little tacky again as they rested, and that's ok; it's easier to take the side that feels driest and make that the bottom of the bread.  You can bake as many pitas at once as your stone will allow - 3 or 4 for me - but I recommend baking one first to observe about how long it will take.  It should be fully puffed and lightly browned within 5-6 minutes.  After baking, transfer to a stack of towels.  You may have to help the steam come back out of the middles - just let them rest for a few minutes, then gently and carefully (to avoid burning yourself) press down on them  to flatten.

sourdough pita

These breads are not quite as tender as the non-sourdough version, but I really enjoyed them.  In fact, I had too much bread going around here this past week, and plan on turning the last few into pita chips today - which I figure will be a very good use for aged and sturdy pita breads.

Be sure to check out sourdough flatbreads from the many other Sourdough Surprises participants.  There's sure to be plenty of inspiration!

Sourdough Surprises: Babka

 babka

The January Sourdough Surprises bake along was babka, and I felt particularly excited to experiment since I am finally feeling more like myself.  I can't tell you how disappointed I was for so many weeks to have my stomach turn at the mention or sight of bread!  It was like my lifeblood was replaced with someone else entirely and while my brain knew that it was likely to be temporary, my heart worried that I would never return to my old self.

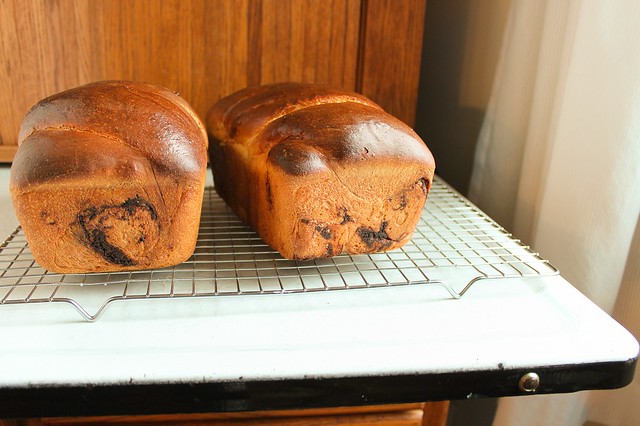
Well, the carbohydrates look appealing once again - and not a moment too soon, since this fortified bread is one of the lovliest I've ever made.  There is something about working with large amounts of eggs and butter and coaxing it into a durable dough that is so satisfying.  The bread seems to take on a life of its own too, changing ever so slightly as the days wear on but still wonderfully tasty in new ways.

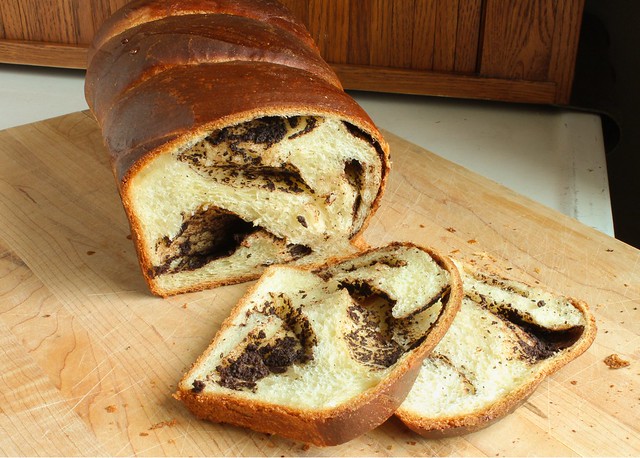
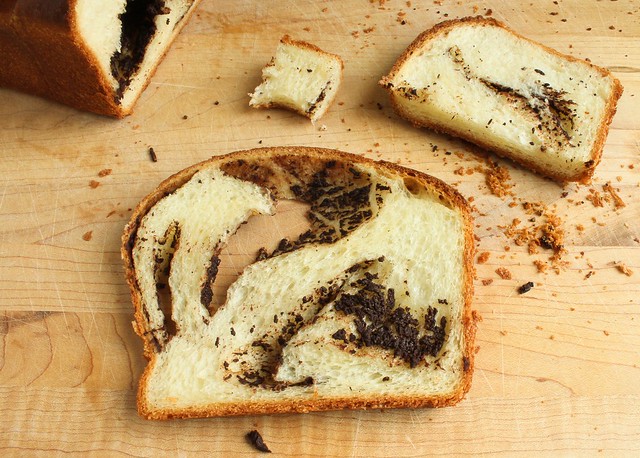
I have never eaten a babka.  Not once.  Until recent years, I left all heavy duty, enriched breads to my imagination, never making the excuse to play around with them.  But no more.  Like for most people I'm assuming, babka conjures images of 90's television, when Jerry Seinfeld and Elane Benes are disheartened at the prospects of bringing an inferior offering to a dinner party.  Even though I'd never had one, I knew that my sourdough babka would need two things:  to be based on a recipe by Nancy Silverton (a native Los Angelean who no doubt knows her bread) and to have both chocolate and cinnamon twisted into the middles.  Both turned out to be good requirements.

rising babka

babka risen

I based the bread dough on Silverton's brioche recipe, using my 100% hydration starter that had been recently fed.  In her book Breads from the La Brea Bakery, she writes the recipes by days.  This bread for example takes 3 days, and I will follow her writing format since it is a good way to keep track of what you are doing.  While I usually prefer bread weights in metric, her book is written with conventional measurements.  I will keep them as she had them.

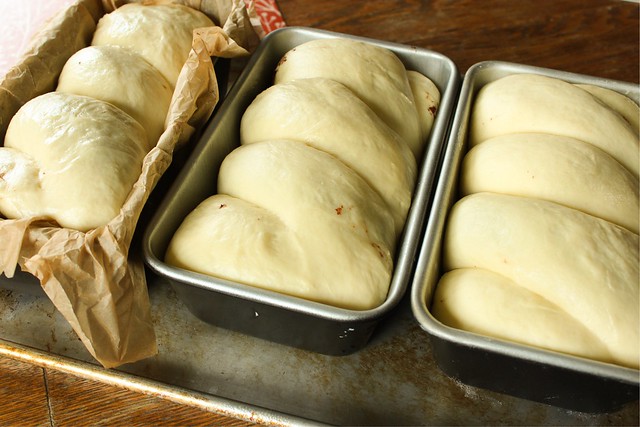
Her recipe yielded almost 4 pounds of dough for me, and I got 3 loaves from it (each about 1 lb, 5oz. prior to baking).  I recommend using a wider, shallower pan rather than a longer, deeper one - and I also recommend using melted butter to coat them.  The parchment test wasn't such a success.  It "sliced" into the sides of the bread as it baked and made for an unattractive loaf.

Sourdough Babka with Chocolate and Cinnamon (inspired and adapted from Nancy Silverton and Peter Reinhart)

First Day (best to start in the morning)

  • 6 oz. (about) 3/4 c.) cool water
  • 1 t. active dry yeast
  • 6 1/2 oz. (about 3/4 c.) 100% hydration sourdough starter
  • 4 oz. (about 1/2 c.) milk
  • 10 oz. (about 2 1/4 c.) bread flour
Make a sponge by combining everything in a large mixing bowl and stirring well to combine.  Cover tightly with plastic wrap, and leave it at room temperature for 10-12 hours.  The dough should have bubbles across the top.  Transfer to the refrigerator for another 10-12 hours.

Second Day
  • 5 eggs, room temperature
  • all of the sponge from the first day (above)
  • 1 pound (about 4 cups) bread flour, plus extra for dusting
  • 3 oz. sugar (about 1/3 c.)
  • 1 T. Kosher salt
  • 9 oz. (2 sticks, plus 2 T.) unsalted butter, cut into tablespoon sized pieces and at room temperature
Beat the eggs gently in a small bowl just to break them apart and set aside.

Remove the sponge from the refrigerator and take off the plastic wrap.  Place sponge, half of the eggs, flour, and sugar in the bowl of a stand mixer fitted with a dough hook.  Mix for about 2 minutes.  (Dough should be kind of wet and sticky, but may not be depending on how much of the eggs were added.)

Add the salt, and continue mixing for 2 minutes, scraping down the sides of the bowl if needed.  With the mixer still running, add the rest of the eggs a little at a time, making sure they are incorporated into the dough each time before adding more.  Once all of the eggs are in, increase the mixer speed to medium high (Silverton recommends holding on to the mixer - and I had to!) and continue mixing until the dough is smooth and satiny and begins to "climb" up the dough hook, about 8 minutes.  (The dough will also clean itself from the sides of the bowl.)

Turn the mixer speed back down to medium, and begin adding the butter one piece at a time.  Make sure each piece is incorporated before adding the next.  After adding all the butter, increase the mixer speed again to medium high and mix the dough until "smooth and shiny (but not greasy)", about 4 minutes.  Silverton notes that the internal temp of the dough should be 76 degrees, mine didn't make it quite that high.  (You may have to add a bit of flour to encourage the dough to wrap around the hook, but I found that after the mixer stopped, the dough seemed more slack than it did as it was mixing.  I added more flour as I had it out on the counter.)

On a lightly floured work surface, turn out the dough and knead by hand for a few minutes.  Use a bench scraper to help you, the dough will be quite sticky.  Try to avoid adding too much extra flour. Coat a clean, large mixing bowl (or clean the mixer bowl you just used) with oil, and place the dough in it.  Put it in the refrigerator, to let it continue fermenting 12-24 hours.

Third Day

Mix up chocolate cinnamon filling as described in the recipe below.  Melt a little extra butter to coat the loaf pans, and brush the melted butter on them until they are well covered.  (My pans were 9"x5"x3".)

Remove the dough from the refrigerator.  It should be noticeably risen to a twice the starting size.  (If it isn't, let it rise at room temperature about an hour to continue rising.)  Turn the dough out onto a lightly floured surface.  The dough is easier to work with cold, and it may be somewhat sticky as the coldness leaves it.  Weigh the bulk of the dough, and then divide into 3 equal loaves.  Put the portions of dough you aren't working with back into the fridge to keep cool.

On a very lightly floured surface, or not floured at all, roll out the dough until it is about twice the length of the loaf pan you are using.  (The width is not as important as the length - I watched this video, and you can see about the size around 2:06.)  Don't aim for dough that is too thin, about 1/8 of an inch is what mine was.

Spread 1/3 of the chocolate mixture evenly over the dough, leaving a bit of a border so that the dough will seal.  Starting with the long edge nearest you, begin to roll the dough up until you have a long snake.  Find the mid-point, and slice through it so that you have two equal sized pieces.  Place the pieces side by side, seam down, so that the cut edges are opposite (about 5:10 in the video above), and then gently twist from the center out so you have a nice, even twist throughout the bread.  Tuck it carefully into the buttered loaf pan, and set aside while you complete the others.

When all three loaves are completed, put them on a sheet pan and cover with a clean cloth.  The best way to proof the breads is by this setup:  Arrange the oven racks so that there is one on the bottom and one in the second position from the bottom.  Put an empty cake pan on the bottom rack, boil some water, and fill it.  As soon as it's filled, put the tray of breads on the rack above it and close the door.  Leave to rise until the dough is cresting the top of the pans, about 2 hours.

Just before the dough is about done rising, remove them from the makeshift proofer, remove the cake pan full of water, and preheat the oven to 500 degrees.  (The oven racks can stay in the same position.)  Let the oven heat for a good half an hour to ensure it is hot enough.  When ready to bake, beat an egg with a teaspoon of water and brush the tops of the breads.  Open the oven, and place the tray of three breads on the second to the bottom rack of the oven.  Immediately reduce the heat to 450.  Set the timer for 20 minutes.  After 20 minutes, the breads should already been a deep golden brown, but they still need to bake for an additional 15-20 more minutes.  Cover them with a sheet of aluminum foil if they are in danger of getting too dark.

After the breads have baked a total of 40-45 minutes, remove the tray from the oven.  One at a time, immediately remove the breads from the pans to a wire rack.  (If you buttered well, they should come out easily.)  If the sides of the breads feel firm, the breads are done - if they have some give, they will cave in as they cool... so return to the loaf pan and pop them back in the oven.  As with all breads, let them cool before slicing, but since there are three loaves, you can be impatient with one and slice into it after 20 minutes if you can't wait.

Chocolate - Cinnamon Mixture (adapted from Peter Reinhart via the Purple Foodie)
  • 225 g. dark chocolate (about 1 1/2 cups), grated (I used Callebaut bittersweet)
  • 1 heaping t. cinnamon
  • 1 heaping t. espresso powder
  • pinch of Kosher salt
  • 55 g. butter (about 1/4 cup), melted
Grate the chocolate over a medium sized bowl, then add the cinnamon.  Melt the butter and pour over the chocolate.  If it doesn't melt completely, use a microwave to carefully melt it fully or put the bowl over a saucepan of simmering water.   If the mixture cools as you are working with it, just heat it again and stir until smooth.

babka

Is this bread worth three days of waiting?  Yes.  And aside from just eating it still warm from the oven, it makes marvelous toast or French toast.

I hope I'm back to stay in this baking group!  I sure was happy with the experimenting this month - and I can't wait to see what's up next!

(This post has also been Yeastspotted.)

babka

babka

Sourdough Surprises: Twisted Breadsticks

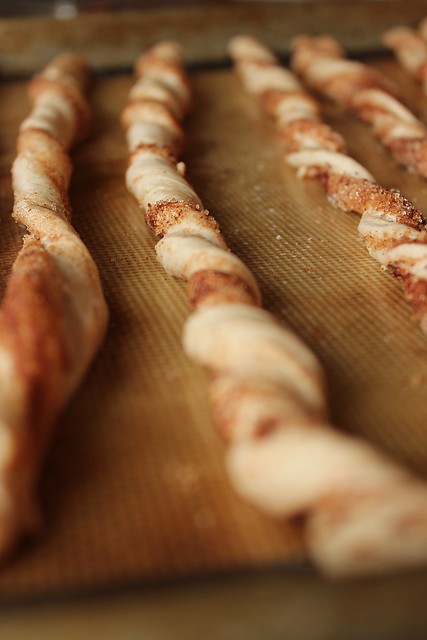
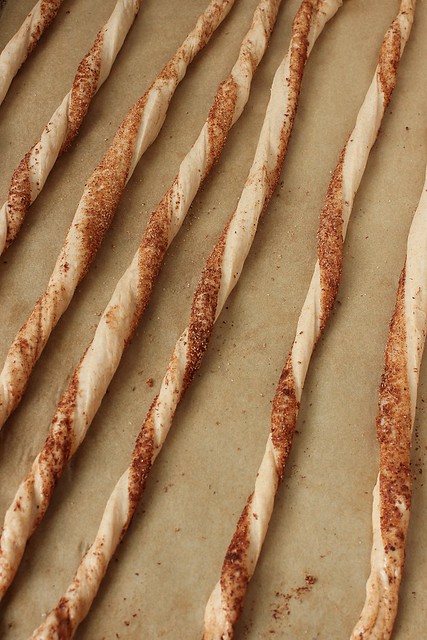
sourdough cinnamon twists.

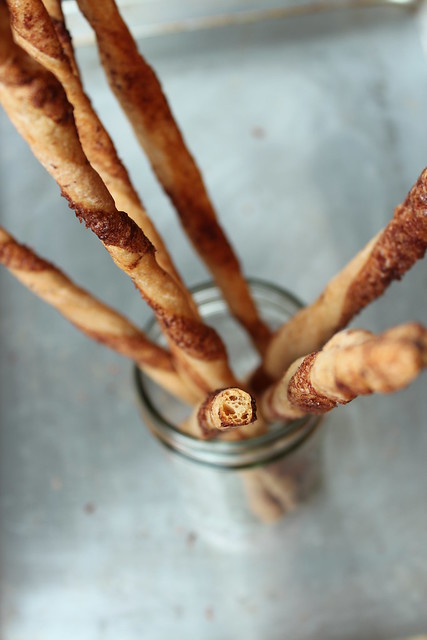
The bake-along challenge for the Sourdough Surprises group this month was twisted breadsticks.  Thin breadsticks, also called grissini, are something I actually make quite frequently - typically out of a portion of pizza dough as a precursor to a pizza dinner night.  I had never attempted a twisted variety however, and thought I'd try to sweeten things a bit by using a heavy dusting of cinnamon sugar - and a grating of Callebaut bittersweet chocolate for good measure.

The dough was easy to throw together, and quite a quick time frame by comparison of other sourdough projects.  The bulk ferment time was only about 2 hours for me, with folds at the 40 and 80 minute marks as recommended.  I may have let the dough sit a bit longer, but only because I got busy with other things.  I think it helps that my starter has been aggressively vigorous lately.  Maybe the Autumnal rains have some part to play in that!


I divided the bulk of dough into 3 portions, and carefully formed them into rectangles about 7x4 inches big.  I brushed them heavily with melted butter, sprinkled on cinnamon, sugar and then grated bar chocolate across the tops.  I may have dotted a bit more butter across the top as well.  Each rectangle, I cut into 8 pieces, but next time I would go with 16 since they would be thinner.

When dealing with grissini, thinner is always better.  They bake up completely crisp that way.

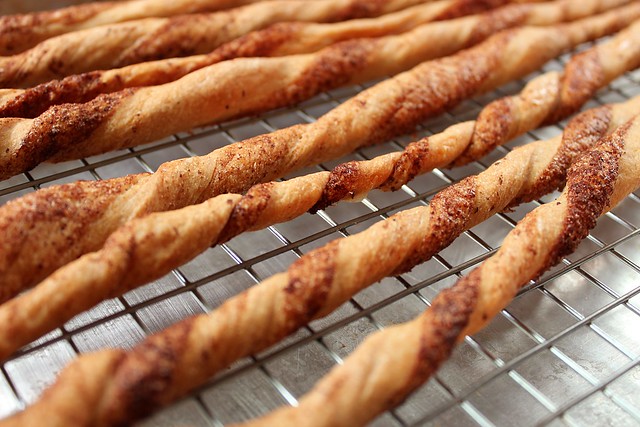
sourdough cinnamon twists.

You may look at the photos and think they aren't that thick, but they do have some oven spring.  And the undulating nature of the dough creates parts of the breadstick that take longer to bake.  I let them bake for about 35 minutes, and then let them cool on the pans.  Even then, I still had a few that weren't crisp throughout.

That didn't stop us from eating them!  The flavor dramatically improved as they became completely cool.  When warm, I wondered if I had made a mistake in trying a sweet application.  The wheat flavor of the dough seemed like it would have been better paired with olive tapenade as suggested.  But when cool and crisp, the cinnamon-chocolate decision was definitely justified.  I would make them again, and I will remember to make them thinner and perhaps make half the recipe since the yield was too many for eating in one sitting.  Breadsticks are never quite as good the next day.


You can find the dough recipe here.  And remember that if you enjoy baking with sourdough, you can join the baking group as well!  Check out the details on the Sourdough Surprises website.


Sourdough Surprises: English Muffins

This is the second time I've participated in a newly formed baking group Sourdough Surprises.  The monthly bake-along choice for September was English muffins, a baked good particularly close to my heart.  Over a year ago, I worked tirelessly trying to perfect the sourdough English muffin; I made so many English muffins in a week, that I knew I had to hit on something - and I definitely did.  (This final version I thought was the best, but all of my trials were completely edible).

When I read the challenge was going to be English muffins, I knew there could be no better time than now to test-drive another Tartine dough.  I already knew it to be wonderful, since it was one that Chad Robertson had based his famous baguettes on. That same dough was coaxed into a classic, muffiny shape... and it did not disappoint.

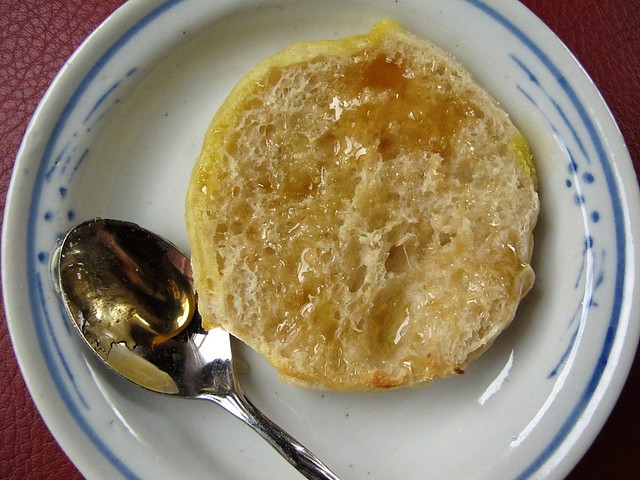
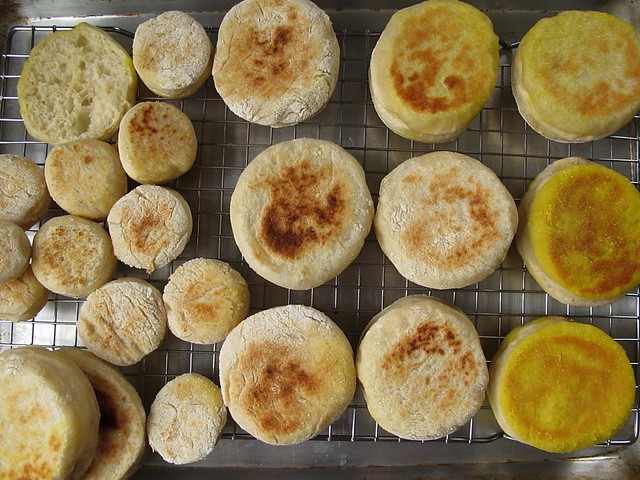
sourdough english muffin
Tartine english muffins
Did you notice the bright yellow exteriors on a few of the muffins?  That's because I used my cast iron skillet the day before to fry some vegetables in turmeric.  It stained the pan.

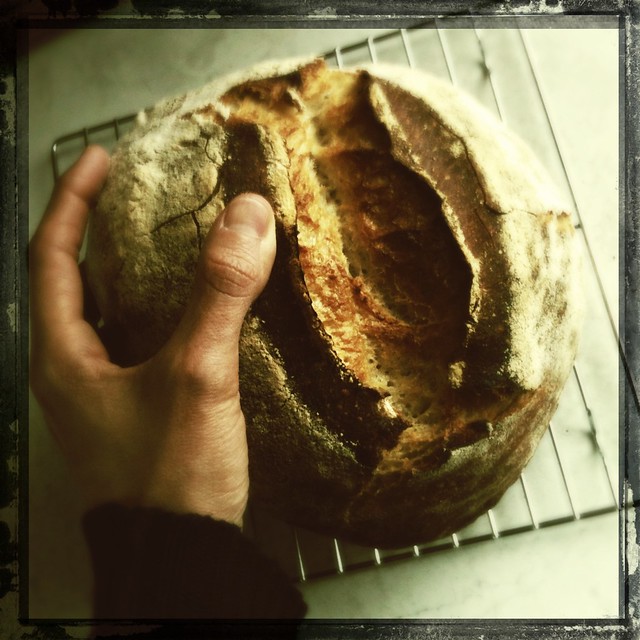
The dough is a hybrid of commercial yeast and sourdough starter.  A poolish, created by letting a small amount of active dry yeast ferment in a flour mixture for several hours, is combined with sourdough starter (in my case, the 100% hydration starter that I keep perpetually on my counter).  I altered the amounts to suit one sheet pan, but otherwise, it is the very same dough that made this thin-crusted, naturally seamed loaf named Fendu.  I loved this bread wholeheartedly, so I knew that the same dough coerced into English muffin form would also delight.

Untitled 

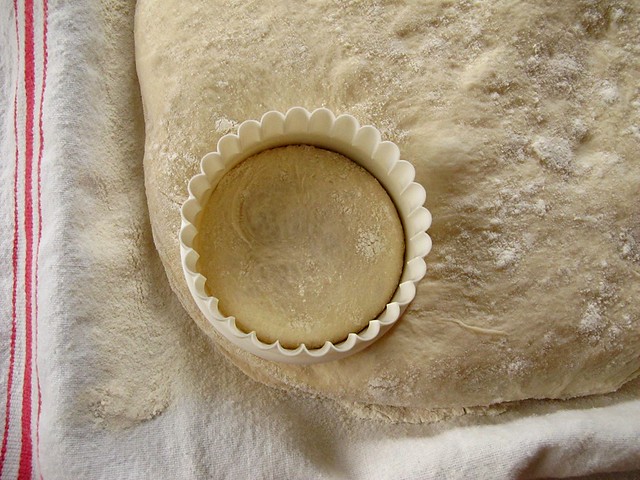
What I loved about this recipe, is that the bulk of the work is done the day before.  When you bake the muffins, you have only to cut them out with a circle cutter, and fry them in some butter - clarified if you follow the Tartine instruction.  I cut some of the leftover spaces into tiny, bite-sized muffins, but I don't think the scraps would rise much if re-rolled.  There was a small lump of dough that was sacrificed. 

cutting 

Since I keep my starter well fed and ready to go, I do not mix Robertson's "leaven" as directed for this particular recipe.  I instead substitute the same amount of starter. and make sure that I feed it just a little bit before building the poolish.  (Since the poolish is mature and ready in about 4 hours, and my starter is most active 4-6 hours after feeding, I mix the poolish about an hour after feeding my starter for the day.)  

Tartine-Method Sourdough English Muffins (adapted for starter and quantity from Chad Robertson)
yield 1 dozen 3-inch muffins, plus a few bite-sized

poolish:
  •  100 g. ap flour
  •  100 g. water
  •  1 1/2 g. active dry yeast
to build dough:
  • 200 g. well fed starter (a teaspoon should float in a glass of water)
  • 250 g. water
  • 200 g. poolish (it should be all of the above)
  • 325 g. ap flour
  • 175 g. bread flour
  • 12 g. salt (but I feel this is too salty.  I actually salt to taste - I add 1 1/2 t. kosher salt, and taste the dough to correct.)
 To make the poolish, mix everything in a small bowl, and let ferment 3-4 hours at room temperature (or overnight in the fridge, but I haven't done that).  

(Both the poolish and the starter should pass the "float test" as described above; a teaspoon should float in a glass of water.)

To mix the dough, pour the water into a large bowl.  Add the poolish and starter and stir to blend well.  Add the ap and bread flours, and use your hands to mix well until no floury bits remain.  Let the dough rest for 30 minutes.  I didn't forget about the salt:  we won't add it just yet.

Transfer the dough to a large, clean, clear container for the bulk fermentation.  Bulk ferment should take about 4 hours, and every 40 minutes, fold the dough.  The salt should be added with the first turn (or 40 minutes after transferring to the clean bowl.

When the bulk fermentation is complete, turn the dough out onto a well-floured towel (use flour that is 1/2 regular ap flour and 1/2 rice flour - it prevents sticking really well) that is spread flat over a sheet pan.  Let it rest for 10 minutes in a mound, then dust the top with rice flour/ap flour mix and ease the dough into a rectangle of even thickness.  Dough should be about 1 inch thick; aim for uniform thickness overall.  Cover with a clean, lint-free towel, and place in the fridge to rise overnight or 8 hours.  (I worried that it would dry out, so I placed some plastic bags loosely over the top of the towel.)

Take the dough out of the fridge 30 minutes before baking them.  Ready a heavy cast iron skillet, and clarify some butter if you like.  Do not cut the muffins until ready to place them in the skillet.

Brush the skillet with butter, cut a 3-inch round of dough and immediately place it in the hot pan.  Pick up each carefully, and hopefully you used enough flour and nothing sticks!  (In a number 8 skillet, I could fit 3 muffins at a time easily.) Cook for 2-3 minutes on the first side, until brownish - or as brownish as sourdough can get.  Carefully flip, and continue cooking 2-3 minutes more until they appear done.  Try to let them cool somewhat before slicing, they continue to cook for a minute or two after removing them from the heat.

(Robertson says they'll keep well in a covered container at room temp for a day or two, but I prefer to freeze what I can't eat in a day.  Let them come to room temperature before splitting them open and toasting them, but that can take up to 2 hours.  An impatient bread fiend can dangerously wiggle a paring knife around enough to split a mostly frozen puck enough to get it into the toaster oven.  But that does involve a stabbing hazard.  You have been warned.)

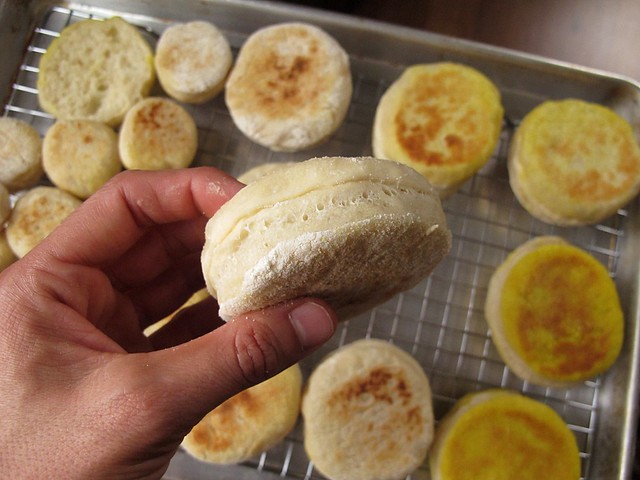
Tartine english muffin 

I really liked these muffins, but I can't say that I liked them any more than the ones I've made in the past.  I think because I first used this dough as a loaf bread, that flavor of bread lingered in my mind, the craggy holes of English muffin-dom seemed imbued with regular bread flavor.  Because other recipes I've made had a bit of whole wheat flour and a small amount of milk and/or sweetener, the texture of the middles seemed more akin to what I think of as a true English muffin.  But that is all just particulars, since this is a perfectly respectable muffin in all ways. 

And, since they rest overnight - it feels like there is no mess the next day when you go to bake them.

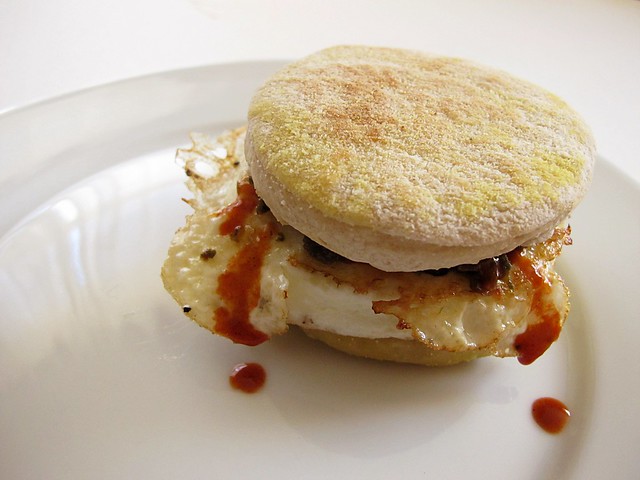
muffin sandwich
Fried egg, cilantro-raisin chutney, and hot sauce on a fresh sourdough English muffin.


Do you love to use sourdough and want to bake along?  You don't need to have a blog, you can find out more on the Sourdough Surprises website.  With the busy Summer behind me, I'm definitely looking forward to the coming months of bakery! 

Oh, and be sure to check out the other participants:

This post has also been Yeastspotted.

New Adventures in Sourdough: Piecrust.

Several months ago, I wrote an article for the Daring Kitchen website on uses for discard sourdough starter. After that article, I was contacted by fellow Daring Baker, Shelly, about a new baking group that was forming. A monthly, no pressure challenge to bake up something using sourdough starter and then link up to each other to compare, contrast and congratulate. I was really excited, and then - sadly - I totally forgot about it.

Fortunately, Shelly sent me another reminder email. And also fortunately, the item this month was pie crust!

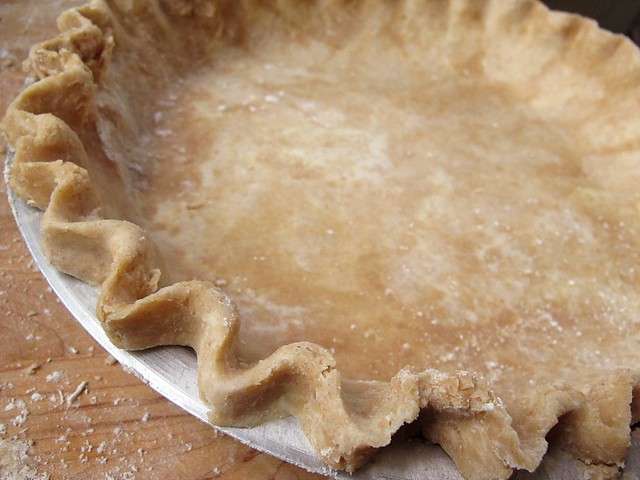
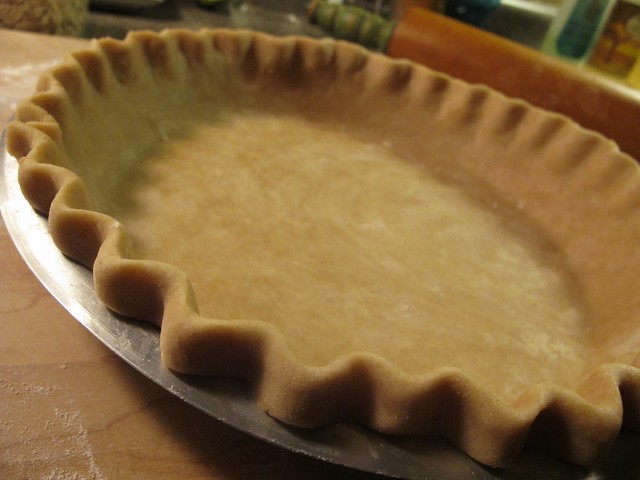
sourdough pie crust

When I clicked through to the link on Sourdough Surprises for a recipe suggested as a starting point for sourdough pie crusts, I was so happy to see Alanna's (the Bojon Gourmet) site pop up. The Bojon Gourmet has been one of my longtime favorite baking sites, and I also know from experience that her recipes are usually very reliable. In fact, I really thought that her all-butter pie crust was my favorite!

bojon piecrust.
Alanna's All-Butter Pie Crust.

I wondered if sourdough fortified pie crust would remind me of the fermented yogurt dough crust I've made from Sally Fallon's recipe. I actually thought about letting the butter come to room temperature and then mixing the crust more like a dough, and allowing it to fully culture (7 hours or longer) before refrigerating and continuing. Then, I decided that I would take a shortcut and just process everything in the food processor.

That choice eliminated the messy work of fraisage, or using the heel of your hand to scrape bits of the dough across the work surface to enhance flakiness. I used the food processor to first aerate the flours with the salt and sugar, then to cut in the butter, and finally to pulse in the sourdough starter. Then, I transferred the whole mess into a plastic bag, where I gently kneaded it into a ball. I let it sit for several hours in the fridge before taking it out to bake into a shell to house a banana cream pie.

banana cream pie layer

I'm certain that using the fraisage method to work the dough would have contributed to a more tender, flaky crust - but I actually really liked the quick, no mess version as well. It made a very stable crust for a baked shell. For the pre-baked shell, I preheated the oven to 350, rolled, crimped and then docked the crust with a fork thoroughly. Then, I lined it with parchment and filled with my pie weights: a few cups of red and white beans. Bake for about 20 minutes with the pie weights in place, then remove the weights and continue baking until lightly browned, another 10-15 minutes or so. Cool on a wire rack until room temperature and then fill with your choice of icebox pie favorites. This crust is substantial, nutty tasting and crisp - a great choice for a refrigerator pie.

To make my banana cream pie, I used a lighter pastry cream that I snagged a while back from a disappointing Epicurious recipe. It was billed as a light version of Boston Cream Pie, and let's face it, if you are making a Boston Cream Pie, don't go for a light version. This pastry cream has only 2 egg yolks per cup of milk (by contrast, I think Dorie Greenspan's has 6), making it a good, not-too-sweet layer to complement sliced, ripe banana.

There is no way I would use skim milk in a pastry cream recipe(I have to draw the line somewhere). I also doubled the volume, which is the perfect amount for a 9 inch pie.

Vanilla Pastry Cream - Light Version for Pie (adapted from epicurious)
  • 4 egg yolks
  • 6 T. sugar
  • 4 T. cornstarch (I would suspect arrowroot would also work well)
  • 1/4 t. salt
  • 2 c. whole milk
  • 2 t. butter (I eyeball this, just add a little butter)
  • 1 t. vanilla extract

Whisk yolks, sugar, cornstarch, salt and 2 T. of the milk together in a small bowl or measuring cup. Bring remaining milk to a bare simmer in a saucepan, and add the yolk mixture, stirring constantly. Boil until thickened nicely, about 2 minutes, but maybe not quite that long. Remove from the heat and add the butter and vanilla extract, whisking well to combine (and make sure the butter is fully melted in). Transfer to a bowl, and cover with plastic wrap, letting the wrap rest directly on the surface so that a skin doesn't form. Cool to room temperature.

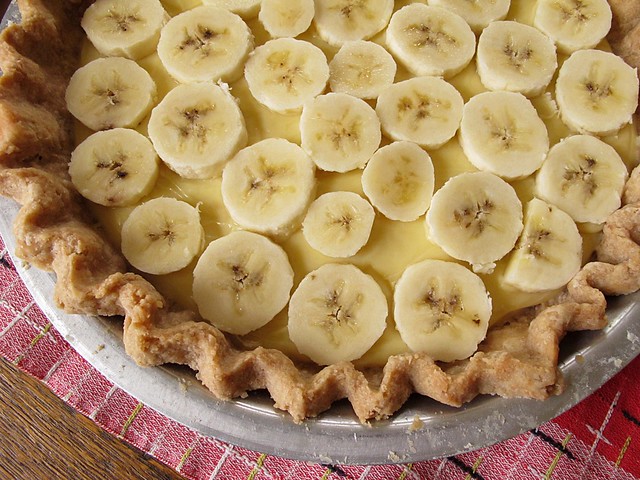
banana cream pie

When both the pastry cream and the pie crusts are cool, spoon the pastry cream into the shell, and smooth gently with a knife. Slice bananas, (I used almost 2 for this pie), arrange them on top of the pastry cream so that they sit shoulder to shoulder and then top with lightly sweetened, whipped heavy cream. Stash in the fridge for a few hours prior to eating.

So, now for the links:


I hope to be able to make a better commitment to this baking group, and it shouldn't be too difficult since sourdough starter is always plentiful around my house!