Christmas

Christmas Cookies.

What makes a Christmas cookie a Christmas cookie?  I ask myself this question every year as I prepare to bake.  Since I became a full-time homemaker I usually organize my thoughts and baking pantry in November, beginning with a thorough detailing of my kitchen.  That didn't happen this year - for some reason the time is flying much faster than I can fathom.  But I'm nearly done with my baking for the season, using my method of batch-a-day baking, which I pretty much have always done around Christmastime since setting off on my own.  It might be hard to make 12 kinds of cookies in a single day, but 12 types over a couple of weeks, even when holding down a couple of jobs is surprisingly easy.  Or maybe just surprisingly easy for someone who loves to bake.

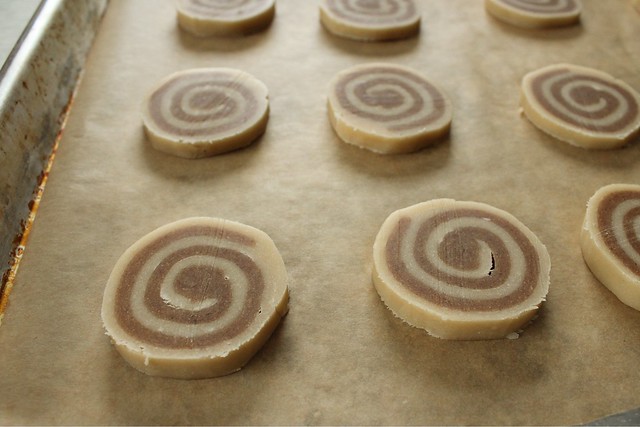
cinnamon pinwheels

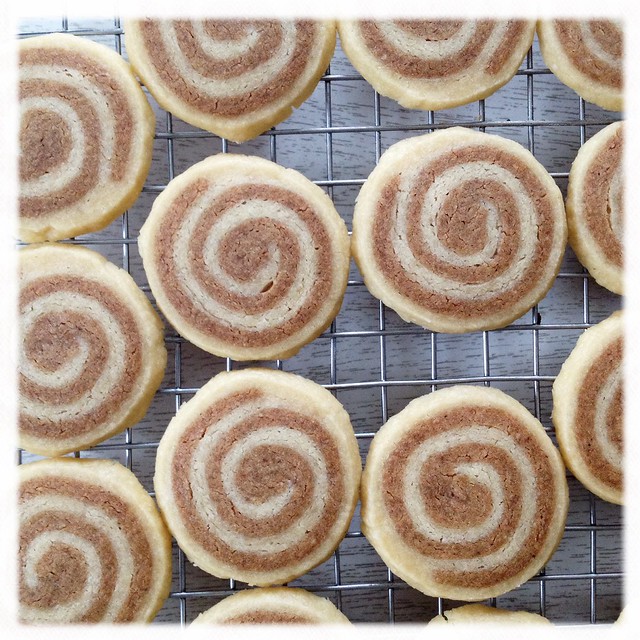
Frequently I end up with more than 12 types of sweets, but 12 is my goal for a nice selection for a cookie plate or tin.  I like to choose naturally long-lasting things to bake first like biscotti, and then move on those that freeze well after baking, leaving any more perishable types for last minute.  But I'm not so much an icebox cookie fan; the slice and bake notion is appealing, but requires some finesse that I can't always muster.  (But, I did make time and patience enough for these Cinnamon Pinwheels from King Arthur Flour.  The dough was a bit tricky and soft, but they paid off.)

cinnamon pinwheels.

I have no rhyme or reason for Christmas cookies, what makes my cookies Christmas cookies is baking them around Christmastime.  It's unfortunate that I never make decorated sugar cut-out shapes.  My Mom makes dozens and dozens of sugar cookies at Christmas.  For the bulk of my youth, visions of wax paper lined countertops with drying cookies decorated by our family signaled that Christmas was almost here.  My Mom would spread the icing and my brothers and I, armed with sprinkles and colored sanding sugar, and red hot candies (not to mention the silver dragees that were not intended to be eaten but always were), would take turns making miniature, edible artworks.  I don't think I'm exaggerating that some years there were upwards of 70 dozen when we finished.  They were stored in big plastic bowls on our old-fashioned, naturally frozen back porch, and given freely to nearly every friend and neighbor.

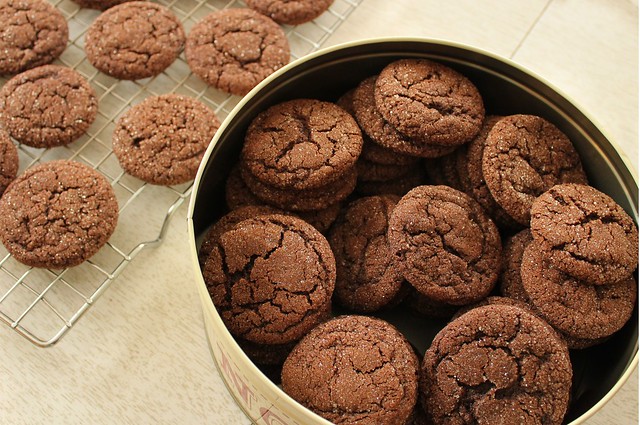
I can't say that I have many traditions of my own like that.  I make different cookies every year, ones that catch my attention here and there, ones that might require slightly more dedication than a non-holiday event cookie.  Some are just plain, however.  One of my favorites happens to be this one from a decade-old Martha Stewart Magazine:  Grammy's Chocolate Cookies.  I do make this cookie nearly every year, so I suppose in a way it has become my tradition.

grammy's chocolate cookies.

These cookies don't seem remarkable, until you pop one in your mouth.  They are definitely the cookie that you swear you remember sitting at your grandmother's table eating too many of... along with a glass of cold milk of course.  They store well in the freezer and at room temperature, and the recipe makes a lot.  I like to use coarser raw sugar for rolling them in; it makes them sparkle a bit more. 

I always make the dough the day before using it, or at least several hours before if I'm in a hurry.  If you rush it, the butter-heavy dough melts into a big mess when you attempt rolling it into balls.  I know from experience.  I adapted the way I store the dough to allow for less mess.

Grammy's Chocolate Cookies (Martha Stewart Magazine - but this recipe differs from the in print version)
yield about 6 dozen
  • 2 cups + 2 Tablespoons all-purpose flour
  • 3/4 cup Dutch cocoa powder
  • 1 teaspoon baking soda
  • 1/2 teaspoon salt
  • 10 oz. butter (2 1/2 sticks) unsalted, butter room temperature
  • 2 cups granulated sugar (additional granulated or raw sugar for dipping)
  • 2 large eggs
  • 2 teaspoons pure vanilla extract
Sift flour, cocoa powder, baking soda, and salt together in a medium bowl.  Set aside.
In a large bowl (or the bowl of  a stand mixer with the paddle attachment), beat the butter with the sugar and eggs until fluffy, at least 3 minutes.  Add the vanilla, and beat another minute to combine.  (Scrape down the sides of the bowl as needed.)

Reduce mixer speed to low and add the sifted dry ingredients slowly until just mixed.  Spread a sheet of parchment (or cling film will work too) out on the counter, and transfer the dough onto it.  Use a knife to spread it into a flattish rectangle, and top with another sheet of parchment (or cling film).  Put the dough in the refrigerator for at least 2 hours and up to 2 days.  (Make sure the dough is well covered so the air doesn't get at it.)

When ready to bake, preheat the oven to 350, and line sheet pans with parchment paper.  Use a bench scraper to portion the dough into 1 inch squares, and roll each between your palms to make balls.  Drop them into a bowl of raw sugar (or more granulated sugar) to coat, and place them about 2 inches apart on the baking sheets.  (If the dough softens too much at room temperature, pop it back in the fridge as you are waiting on the batches.)

Bake for 10-12 minutes, rotating pans halfway through the baking time.  Let the cookies stand on the pans for 5 minutes after baking before transferring to a wire rack to cool completely.


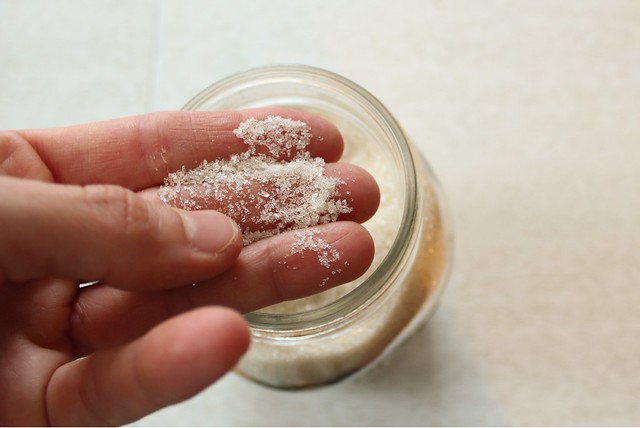
Amish bulk store raw sugar.


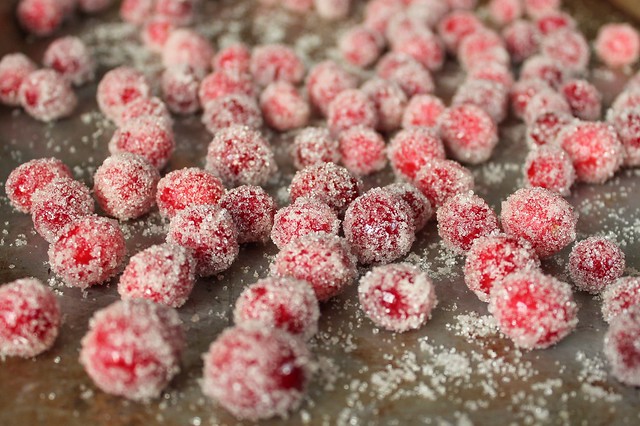
When I was back home visiting for Thanksgiving, I picked up the most gorgeous raw sugar from one of the Amish bulk stores that dot the countryside near my parents house.  I was disappointed that trying to take a picture of it proved so tough.  It was some of the prettiest, sparkly sugar I've ever seen.  Even though it was an off-white color, I used it to coat my frosted cranberries.  The recipe is from Heidi Swanson at 101 Cookbooks, and I've been making them since she first introduced me to them in 2009.  I've found that using half the amount of simple syrup (or twice the amount of cranberries, since they are so addicting) works fine.  I also save the pink syrup to use in other things.


frosted cranberries

I've all but wrapped up my baking for this year.  There is a bowl of jam thumbprint dough chilling that I'll need to attend to, and just this morning I decided to make the world's easiest (and tastiest!) peanut butter fudge.  All that remains is double checking the list I keep on the counter to make sure I don't forget any varieties that are stashed throughout the house, and matching plate or tin sizes to recipients.  I don't plan to give out a ton of cookies, really, but I bake in December for the sheer joy of baking.  Believe it or not, I don't end up eating very many myself (except for those cranberries: I usually have to make a second or third batch of them).  Whatever cookies you made or wish you made for the season, I wish you all a Merry Christmas! 

December 2010 Daring Baker Challenge: Stollen

The 2010 December Daring Bakers’ challenge was hosted by Penny of Sweet Sadie’s Baking. She chose to challenge Daring Bakers’ to make Stollen. She adapted a friend’s family recipe and combined it with information from friends, techniques from Peter Reinhart’s book... and Martha Stewart’s demonstration.


Even before this month's challenge was revealed, I was contemplating making the very near cousin of stollen, fruitcake. I made fruitcake two years ago for the first time, diligently dousing it liberally and nearly daily with brandy or rum, I can't quite remember. It was a delicious result, albeit rich and dense. Meanwhile, I have never made stollen and only had tasted it once when a German employee I worked with brought some in around Christmastime one year.

All the while I worked with this beautiful dough, I was completely infatuated with it. Of course I even tasted the dough raw, an early confirmation that it was going to be my new favorite Christmas bread. It really isn't that hard to make, and the flavor will beguile even those who dislike fruitcakes.

While fruitcake is assertive and outspoken, stollen is decidedly comforting and understated. It has just a nuance of alcohol, from the rum soaked raisins, and pleasant citrus notes from the candied peel. The finished bread is rather dry, but toasts superbly and keeps well.

I soaked my raisins for 3 days in dark rum:


On the second day of rummy raisin soaking I made the candied peel. I used 4 oranges and 1 lemon, all organic. I don't think that I've ever made candied peel, but I will be making it again. Fortunately, I had more candied peel than the stollen recipe called for! It was delicious on it's own, but even better dipped in tempered dark chocolate.

Candied Peel (Elizabeth LaBau)
  • 3 oranges, or you could substitute 2 grapefruit or 4 lemons (I used 4 oranges and 1 lemon)
  • 4 cups sugar, plus more for rolling
  • 4 cups water
Peel citrus. Make 4 cuts along the curve from top to bottom, cutting through the peel but not the fruit.

Remove the segments of peel carefully, trying not to tear them. Cut the peel into thin strips between ¼ inch to ½ inch wide. If using fruit with a very thick skin, you might want to use a paring knife to slice away some of the bitter white pith, but if it’s a thinner-skinned fruit, you can skip this step.

Place the strips in a large saucepan and cover them with cold water. Bring the water to a boil, then drain the pot.

Repeat this process two more times. This step removes a lot of the bitterness from the peels and makes the final product much sweeter, but don’t worry, some of the citrus tang remains.

Once the strips have been boiled 3 times, combine the 4 cups of sugar and 4 cups of water in a saucepan and bring it a boil, stirring occasionally until the sugar dissolves. Wipe the sides of the pan with a wet pastry brush to prevent sugar crystals from forming, then add the orange peels to the boiling syrup. Reduce the heat to medium-low and continue to simmer the peels for an hour. By the end of this time they should be very limp and start to look translucent.

Remove the pan from the heat, and let the strips cool in the syrup.

Take the peels from the syrup and place them on a wire cooling rack set over a baking sheet. Let them drip and dry for about 30 minutes, then roll them in granulated sugar. Place them back on the wire rack in a single layer, and let them dry overnight at room temperature. If you need to speed up this process, you can put them in the oven on the lowest setting for about 30 minutes


Stollen dough is a yeasted dough that is slowly raised under refrigeration. In addition to the candied peel and rummy raisins, I added shaved almonds and dried tart cherries. The tart cherries were instead of candied artificially red cherries, and I have to say they were delicious. I dipped some of the leftover cherries in the tempered chocolate, and they were great as well. They may have been nearly black instead of bright red, but they were better in my opinion. The things that bothered me most about my fruitcake were redeemed in using the best non-artificial fruits in my stollen.


Our instruction was to make one large stollen wreath, but I decided to cut the dough into fourths and make smaller versions that I could gift. Another great thing about stollen is that it stores well in either the freezer or the fridge, so I didn't feel bad about not knowing just whom I would gift them to. One went to my Mom, and then on to her freezer since we had entirely too many sweets at our Christmas feast. Another went to my in-Laws who shared it with another neighbor. The final 2 wreaths are here with me now, one partly eaten from visitors last week and the other waiting on his fate in the coldest part of my basement.


Out of the oven, the wreaths get a brushing of butter and confectioner's sugar. The more coatings of butter and sugar, the longer the preservation time. Since I was planning to consume them fairly quickly, I did two applications that Penny recommended. In storage for about 2 weeks, the sugar "disintegrated" into the top of the bread a little, and marred that pretty snowlike appearance. But, since the bread is best served toasted, this did not really matter and probably saved my toaster from a bit of melted sugar mess...


It's not so often that I completely follow instruction on the first go around, but this recipe I did. I used metric measure. This dough was masterfully written and tested, and turned out better than I imagined it would. It doesn't stick as it's rolled out, making it one of the easiest yeast dough recipes I've ever made. I am in Love.

Stollen (from Penny, of Sweet Sadie's Baking)
  • ¼ cup (60ml) lukewarm water (110º F / 43º C)
  • 2 packages (4 1/2 teaspoons) (22 ml) (14 grams) (1/2 oz) active dry yeast
  • 1 cup (240 ml) milk
  • 10 tablespoons (150 ml) (140 grams) unsalted butter (can use salted butter)
  • 5½ cups (1320 ml) (27 ozs) (770 grams) all-purpose (plain) flour (Measure flour first - then sift- plus extra for dusting)
  • ½ cup (120 ml) (115 gms) sugar
  • ¾ teaspoon (3 ¾ ml) (4 ½ grams) salt (if using salted butter there is no need to alter this salt measurement)
  • 1 teaspoon (5 ml) (6 grams) cinnamon (I used the spicy cassia)
  • 3 large eggs, lightly beaten
  • Grated zest of 1 lemon and 1 orange
  • 2 teaspoons (10 ml) (very good) vanilla extract
  • 1 teaspoon (5 ml) lemon extract or orange extract
  • ¾ cup (180 ml) (4 ¾ ozs) (135 grams) mixed peel (link below to make your own)
  • 1 cup (240 ml) (6 ozs) (170 gms) firmly packed raisins
  • 3 tablespoons (45ml) rum (I used 3 T. rum every day for three days, and the raisins soaked nearly all of it up! I added the raisins and any remaining rum to the dough.)
  • 12 red glacé cherries (roughly chopped) for the color and the taste. (optional) (I used dried, organic, tart cherries)
  • 1 cup (240 ml) (3 ½ ozs) (100 grams) flaked almonds
  • Melted unsalted butter for coating the wreath
  • Confectioners’ (icing) (powdered) sugar for dusting wreath

Note: If you don’t want to use alcohol, double the lemon or orange extract or you could use the juice from the zested orange.

Soak the raisins
In a small bowl, soak the raisins in the rum (or in the orange juice from the zested orange) and set aside. See Note under raisins.

To make the dough

Pour ¼ cup (60 ml) warm water into a small bowl, sprinkle with yeast and let stand 5 minutes. Stir to dissolve yeast completely.

In a small saucepan, combine 1 cup (240 ml) milk and 10 tablespoons (150 ml) butter over medium - low heat until butter is melted. Let stand until lukewarm, about 5 minutes.

Lightly beat eggs in a small bowl and add lemon and vanilla extracts.

In a large mixing bowl (4 qt) (4 liters) (or in the bowl of an electric mixer with paddle attachment), stir together the flour, sugar, salt, cinnamon, orange and lemon zests.

Then stir in (or mix on low speed with the paddle attachment) the yeast/water mixture, eggs and the lukewarm milk/butter mixture. This should take about 2 minutes. It should be a soft, but not sticky ball. When the dough comes together, cover the bowl with either plastic or a tea cloth and let rest for 10 minutes.

Add in the mixed peel, soaked fruit and almonds and mix with your hands or on low speed to incorporate. Here is where you can add the cherries if you would like. Be delicate with the cherries or all your dough will turn red!

Sprinkle flour on the counter, transfer the dough to the counter, and begin kneading (or mixing with the dough hook) to distribute the fruit evenly, adding additional flour if needed. The dough should be soft and satiny, tacky but not sticky. Knead for approximately 8 minutes (6 minutes by machine). The full six minutes of kneading is needed to distribute the dried fruit and other ingredients and to make the dough have a reasonable bread-dough consistency. You can tell when the dough is kneaded enough – a few raisins will start to fall off the dough onto the counter because at the beginning of the kneading process the dough is very sticky and the raisins will be held into the dough but when the dough is done it is tacky which isn't enough to bind the outside raisins onto the dough ball.

Lightly oil a large bowl and transfer the dough to the bowl, rolling around to coat it with the oil. Cover the bowl with plastic wrap.

Put it in the fridge overnight. The dough becomes very firm in the fridge (since the butter goes firm) but it does rise slowly… the raw dough can be kept in the refrigerator up to a week and then baked on the day you want.

Shaping the Dough and Baking the Wreath

1: Let the dough rest for 2 hours after taking out of the fridge in order to warm slightly.

2: Line a sheet pan with parchment paper.

3: Preheat oven to moderate 350°F/180°C/gas mark 4 with the oven rack on the middle shelf.

4: Punch dough down, roll into a rectangle about 16 x 24 inches (40 x 61 cms) and ¼ inch (6 mm) thick. Starting with a long side, roll up tightly, forming a long, thin cylinder.

Transfer the cylinder roll to the sheet pan. Join the ends together, trying to overlap the layers to make the seam stronger and pinch with your fingers to make it stick, forming a large circle. You can form it around a bowl to keep the shape.

Using kitchen scissors, make cuts along outside of circle, in 2-inch (5 cm) intervals, cutting 2/3 of the way through the dough.

Twist each segment outward, forming a wreath shape. Mist the dough with spray oil and cover loosely with plastic wrap.

Proof for approximately 2 hours at room temperature, or until about 1½ times its original size.
Bake the stollen for 20 minutes, then rotate the pan 180 degrees for even baking and continue to bake for 20 to 30 minutes. The bread will bake to a dark mahogany color, should register 190°F/88°C in the center of the loaf, and should sound hollow when thumped on the bottom.

Transfer to a cooling rack and brush the top with melted butter while still hot.
Immediately tap a layer of powdered sugar over the top through a sieve or sifter.
Wait for 1 minute, then tap another layer over the first.
The bread should be coated generously with the powdered sugar.
Let cool at least an hour before serving. Coat the stollen in butter and icing sugar three times, since this many coatings helps keeps the stollen fresh - especially if you intend on sending it in the mail as Christmas presents!

When completely cool, store in a plastic bag. Or leave it out uncovered overnight to dry out slightly, German style.

Storage:

The more rum and the more coatings of butter and sugar you use the longer it will store. The following is for the recipe as written and uses the 45 mls of rum and two coatings of butter and icing sugar.

Stollen freezes beautifully about 4 months. The baked stollen stores well for 2 weeks covered in foil and plastic wrap on the counter at room temperature and one month in the refrigerator well covered with foil and plastic wrap.


This is exactly the type of dessert I've been favoring lately: not too sweet and as good for breakfast as it is for after supper. I'm fairly certain that the longest time frame in my recent baking history was in the few hours I made myself wait to cut into the fresh stollen. The Boy-O ate the snowy white sugar from the top, but handed me the rest of the bread. I happily ate his portion. As if I thought this bread could get better, the next day, I tried some toasted. It reminded me of a waffle, toasted perfectly outwardly, but remaining a tad soft in the center.

Some stollens have marzipan middles, and I can scarcely imagine anything improving this bread, but I may try it with this variation sometime in the future. I'll bet I won't wait until next Christmas to try it, that's for sure. A huge thank you to Penny for selecting this fruitcake variation that I'd likely never have made otherwise. It will certainly be a part of my Christmas baking in years to come! Remember to check out other Daring Baker interpretations of stollen: the Daring Baker site has a re-vamped blogroll to aid you!


(this post has been Yeastspotted.)

Christmas Baking

Every year, I feel as if the last parts of December hurtle by at the speed of light. Each month brings it's own enjoyments, but December is a tricky one. He enters quietly, on the heels of the Thanksgiving feast, and the days quietly tick by until Christmas Eve.

Benevolent Christmas Day enters, that singular day when it seems the whole of the world is silent and reverent. Stores are closed, streets are empty. Families gather and some lonely souls feel lonelier than any other day of the year. Then, all too soon, collective breaths are released as the 26th dawns and the same harried consumers who wait all year for Black Friday are at it again: on line at countless stores stocking up on merchandise hideously discounted. The world returns to it's day-to-day life and I wish the time would slow down, that my Christmas present could somehow miraculously meet all of my Christmas pasts and that my memory was as clear as I will it to be.

The week between Christmas and New Years seems like a spare month, unrelated in all ways to December. In the past, when I held conventional jobs, I always took Christmas week off. The seven days separating holiest day of the year from the last day of the year hovers weightless and without expectation. There is not really much that needs to be done. The house is a mess, I enjoy the last week of my lighted Christmas tree, I inventory how many cookies are still left to be consumed.

Vowing a platform of homemade or consumable gifts for this year, I have 13 or 14 varieties of sweets as of the 22nd of December, 2010. With each batch that left the oven, I thought of the people that would most like each varietal. A single batch never seems like that much work, or that many cookies and then suddenly, I view the stores in the basement hiding spots and it's overwhelming how much sugar I have pack-ratted away.


mint chocolate crackles.

I never follow the good advice of making the same tried and true cookies that I've made for years. There are a few that are old friends of course, but my Christmas season of baking is generally made up of new recruits, cookies that have piqued my interest from other blogs, my kitchen library, or from rented cookbooks.

One such rented cookbook was Crazy About Cookies by Krystina Castella . I had actually bookmarked three varietals to try out this year, but only got to two of them. The first was a delicious cross between date bars and fig "newton" type bars. I have had these on the brain since Julia posted a picture of Linda Ziedrich's version! Krystina uses both dates and figs, reduced in pineapple juice. Being a proud VitaMix owner, I made fresh pineapple juice with ice and whole pineapple - core and all. I think it made the the filling pleasantly tropical. I have to make these again using some whole wheat flour.


Krystina's book also had a recipe for marzipan, which I have never made at home. I used almond meal that was not made from blanched almonds, so it was more "rustic" in appearance than I was prepared for. There is also a raw egg in the dough, so with these two "undesirables", I quickly searched for a way to make a baked marzipan cookie. Fortunately, I came upon this recipe from Chef Jeena. I was excited to try these little cloaked cookies, and I was not disappointed. They were surprisingly light, perfect with coffee or tea, and intriguing due to their shape. They will go on the save list.

Because I used two sources, you may have a little more marzipan than cookie batter. Marzipan freezes well, and can be added to all kinds of baked goods. I want to try dropping some in to the center of a muffin...


Marzipan Cookies (adapted from Krystina Castella and Chef Jeena)

For the marzipan:
  • 2 1/4 c. almond meal (finely ground almonds) - use blanched almonds for the whitest result
  • 1 c. powdered sugar
  • 1 c. superfine sugar
  • 1 t. lemon juice (pretty sure I used a tablespoon by accident...)
  • 1/2 t. or more almond extract (I can never have too much almond extract)
  • 1 egg, beaten
Combine almond meal and powdered and superfine sugars together in a bowl and mix well. Add the rest of the ingredients, and mix until a dough forms. Taste to see if you added enough almond extract. Using about a tablespoon of dough, roll dough into balls.

For the Cookie Batter Topping:
  • 1/2 c. butter, room temperature
  • 1/2 c. granulated sugar
  • 2 T. milk
  • 1/2 t. vanilla extract
  • 1 egg
  • 2 egg whites
  • 1 1/2 c. ap flour
  • 1/2 t. baking soda
  • 1/2 t. baking powder
  • pinch of salt
  • 1 t. "mixed sweet spice", I used combination of cinnamon, nutmeg, ginger and cloves
Preheat oven to 350.

Cream butter and sugar until fluffy. Add milk, vanilla, and whole egg and blend until well combined.

Sift flour together with baking soda, baking powder, salt and sweet spice. Add to butter mixture and mix briefly to combine.

Beat egg whites until frothy, but not forming peaks. Add into batter, mixing until well combined. (Try and be gentle, and not over beat.) Add a little additional milk if batter seems too dry. It will be sticky and rather thick.

To make the cookies, top a marzipan ball with a little "hat" of batter. It may take a few tries to get your method down, but I smashed the balls down slightly so there was a flat base that wouldn't topple over the weight of the "hats" (see photos). Leave plenty of space for expansion between cookies. Bake for 15-18 minutes, until the tops are lightly browned.


Chef Jeena recommended topping with powdered sugar or a drizzle of icing, but I liked them as is.

I also finally made some peanut butter cups. I have wanted to make these forever and never have. When I saw the pictures from Chicho's Kitchen this fall, I made it a point to bring an end to the procrastination. I didn't officially temper the chocolate, which may have been a mistake, but they are still tasty. I did temper the chocolate to dip some candied orange peel (leftover from my secret Daring Baker's Challenge, but more on that after Christmas...), and what a difference it made. I followed the instructions from the King Arthur's catalog that just happened to print it in their latest issue.


Glossy, gorgeous, tempered chocolate!

I now have one last batch of cookies to bake, the Kringle Cookies that won the Journal Sentinel's cookie contest. The sour cream and butter dough is resting now in the refrigerator, and later, I'll cut them and fill them with jam prior to baking. I'm thinking to use some of the last of my tart cherry jam and maybe some strawberry that is ample on the basement shelves.

As I approach the end of my baking, I realize that Christmas still holds every fascination for me that it did growing up. Every year, making cookies, I think of my Mom making hundreds of sugar cookies to give away. After they were baked and cooled, the whole family would stand around in the kitchen decorating them. Mom would spread the icing, and the rest of us would decorate with sanding sugars and red hots, silver dragees that would nearly break your teeth (you aren't actually supposed to eat them!). My brother's favorite cookies were church windows, made with colorful mini-marshmallows and coated in chocolate and coconut. Though none of us have made them in years, I can still taste them when I think about it - and that is all part of the magic of Christmas. The good and the not so good of all the years past come flooding in at Christmastime, and remind me in particular of the most important things given to me in life.

Giving cookies seems appropriate to me because of that. Something sweet and given with no strings attached: I hope my recipients gain just a touch of the joy that I've had making, baking and giving. It seems such a small gesture compared to what I've been given.

Merry Christmas!!!


A Gingerbread House: December 09 Daring Baker Challenge

The December 2009 Daring Bakers’ challenge was brought to you by Anna of Very Small Anna and Y of Lemonpi. They chose to challenge Daring Bakers’ everywhere to bake and assemble a gingerbread house from scratch. They chose recipes from Good Housekeeping and from The Great Scandinavian Baking Book as the challenge recipes.

I didn't procrastinate this month's challenge as much as I thought I would. Even though I was excited to try my creative hand at decorating a gingerbread house, and even with dreams of Hansel and Gretel-ish ideas populating my brain, I have never been overly excited at the idea of creating a gingerbread house. Usually, they look like things that I would never want to eat... and isn't that my whole point of baking? I decided that since it could turn out to be a "decoration" instead of sugary sustenance, I was going to do my best to be excited.


I'm doing things differently this month, and putting the end result picture first!

The only problem, was that the day I started my baking and decoration endeavor, my son was overtired and was being, what some parents like to say, "Difficult". The day before the baking began, I searched for patterns on the Internet, and settled on a very small house. Since I have never tried making such a concoction before, I figured smaller was better. I found this picture, and imagined myself making a whole tiny village of decorated on the inside gingerbread homes.


Reality set in, however, and I settled on a windowless house that was based on a 3 inch square: as seen below.


I kind of scared myself by reading the thread of comments concerning the gingerbread dough. Many people found it difficult to work with and much too dry. I settled on the Lemonpi recipe taken from The Great Scandinavian Baking Book, thinking that then this gingerbread would be something I'd love to eat. I think I cut back the amount of cloves slightly, (it called for a whopping 3 teaspoons!). I actually found that the dough wasn't too dry, and I could have rolled it without refrigeration right away. I think it was harder to roll because I left it in the icebox for 48 hours before I actually got around to rolling it out. I cut it into quarters, and bashed it with the rolling pin several, hard times before it succumbed to my wishes of a somewhat rectangular shape.

At this point, I momentarily lost sight of my decoration goals, and was upset that the dough did not knock my socks off. It seemed ok, but a little bland - not something I was too excited about. When I think of gingerbread I want to eat, I think of a fat, slightly chewy, gingerbread man that will run away out of my oven shouting "Run, run, as fast as you can, you can't catch me - I'm the Gingerbread Man!!!" at the top of his pudgy little lungs. Yes, overly spiced, cream cheese frosted, man-eating bliss.


I cut the pieces, and baked them, still unenthralled with the taste of this Scandinavian Baking Book delight. I rolled and cut about 4 houses, which was about as many as a whiny, overtired Boy-O would allow, and then cut a couple of extra sheets of holly, trees, shooting stars and the like.

Then, I began to build. I forgot a cardinal rule of 3-D construction - the walls have WIDTH! How could I forget something so silly? I was a whiz at non-CAD drafting in highschool, and though I now could not probably make a 3 view drawing of a cog wheel (by hand, with only my drafting arm as aid...) at one time I could. I started building and gluing with royal icing and the roof was much too short. One thing highschool drafting did not drill into my head, it appears, is that one of the three views is most certainly a width. I remedied (or so I thought) the problem by "gluing" together my holly to approximate a roof-like structure. As you can see, it wasn't going so well:


I set this one aside, and decided on starting over and putting the walls on the outside instead of the inside.

So far, so good. I made sure to use a lot of that royal icing on the inside, and really glued it well. I'm impatient, and have a still-whining Boy-O to attend to. I need a bath, and some sleep. So, obviously, I didn't take the time to let the walls set up too much before continuing.

It turned out so much better than I thought! I started feeling a bit happier, and more like a happy Gretel wanting to sink my teeth into the walls of my home.

I figured, since I had royal icing left over, I had to do something with my poor first attempt. So after my photo-op was complete, I attended to my sorry-looking, leaky roofed structure. That royal icing really is amazing stuff, and I do live in a snow region and was not trying to complete a Gingerbread Alamo like Homesick Texan. Snow, is seems, is my answer!

I loaded her up with gluttonous amounts of icing. The next morning, that structure was so strong I could have dropped it out of the window and it would have survived. I was able to take it and move it without fear of crumbling.

I actually like how it turned out. It looks homemade and childish, and like some thing I'd want to eat since there isn't a metric ton of candy attached to it.

I was even more excited to add it to my china cabinet:

where it blended in nicely, and didn't at all look as if it was a second place to my showpiece...except that I put it in the back corner.

This was another fun challenge, and another thing I never thought I'd actually make. My Mom has asked me, "Why do you do this? It's just so much stress." Sometimes, that's true. And more often than not, these tests of my baking prowess are much heavier in calories and fat than I normally go for. But I have to say that I must agree to the quote I recently read "A gourmet who thinks of calories is like a tart who looks at her watch. " — James Beard .

And, I'd like to add, nothing could be more true than my own mantra: "Everything in Moderation".

Tamales: Still a Work in Progress.

I'll admit that I really wasn't looking forward to making these this year. Not only do I tend to be messy in the kitchen sometimes, but this is tedious cooking. You can't obsessively check the iPod for email every five minutes or run after a 3 year old that decides to stick his tiny fingers into an oversized bell Christmas ornament only to get it stuck. I did the bulk of the work yesterday, so today I just had to assemble. I'm proud to say that I now have about 30 tamales, and that my kitchen is not a complete disaster area. I maintained a clean work space!

I used a Rick Bayless recipe for the filling. Basically, a sauce of Guajillo chiles, garlic and a few spices, pureed, strained and added with water to cubed pork shoulder. Rick has you simmer the open pot for about an hour, and then you are supposed to shred the meat with forks. Since I could not be bothered with that, I (*gasp*) employed my immersion blender. I actually did this last year on a whim after I was making a complete mess of things, and it worked so well I intentionally did it yesterday. It leaves you with a nice texture and uniformity that forks can not duplicate. If you are looking for a more rustic tamal, I wouldn't try it though.

My work area, above, is as clean at the start as at the end of my endeavor. It helped that I completely cleared my counter of flours and the KitchenAid. I appreciate minimalism, but it just is something I can not employ myself - especially in my kitchen.

The tamales were wrapped and in the steamer by 10:30! I was feeling so accomplished, but then I realized that the last times I've made tamales alone I made more than twice as many, was not as organized and was rushed by attending to a much younger Boy-O. Relatively speaking, this was a snap!

They did steam ALL day. This is one thing that I don't understand, Mr. Bayless. Every single tamal recipe I've ever seen says to steam them for about an hour to an hour and a half. At 4 p.m. today, I finally shut off the burner and called it a day. My house was a sauna, the heat hadn't run all day - even with the door cracked in the kitchen - and the little guys still felt a little soft in the centers. From past experiences, I find if I just cease and pop the whole steamer into the fridge overnight and start again the next day, it is just fine. Sometimes they even seem to firm up in the cold and don't have to steam as long.

Since so much of the day was monitoring, I was able to complete the Sparkling Cranberries that I started yesterday when I was talking to my Mom on the phone. I didn't think I'd get time to try this recipe from 101 Cookbooks before Christmas hit, but I'm glad I had a few extra minutes to do it. It really is simple, just soak 2 cups of cranberries in a simple syrup of 2 c. sugar to 2 c. water overnight, and then toss with coarse and granulated sugar.

The only thing that I would add, is to save the drained simple syrup! One of my most favorite things is to shake the juice of half a lime, a 1/16 of of t. of stevia powder, ice to fill and water to top off in my little "serves one" cocktail shaker to make Limeade. The pretty pink syrup stood in nicely for the more virtuous stevia today, and imbued my drink the loveliest shade of pink. The cranberries themselves are completely addicting as well. They are tart and sweet and pop and crunch upon contact with your teeth.

After a day spent steaming and working on that Rancho Gordo soup, I'm ready to go. But now I fear an impending snowstorm and a dreaded Winter Weather Advisory is going to prevent us from going 3 hours into the west to the home of my Parents on Wednesday afternoon. I never encountered this phenomenon of not making it home for Christmas until 3 years ago, when it was a sad surprise that we were snowboundedly staying put. I am ever thankful for my boys, but was so upset. That year, we couldn't all get together again until February.

There is this little pang in the pit of my heart even now that these Weatherpeople are actually telling the truth and I will yet again not make it home for Christmas. If this is indeed the case, I'm going to have to invite someones for supper on Christmas Eve! I'm still hopeful that it will all be in error, and that our Big Mexican Dinner will be enjoyed Christmas Eve as usual. Otherwise I may not have to cook until the New Year.