Of Wonder and Eggs.

On this Easter Eve, I find myself looking back over nearly a year of posts. My blog will be a year old on April 8th, and I can hardly believe that a year has gone so quickly. I was recently asked what made me start blogging. I've been doing what you faithful readers have been seeing here for the past 12 months, for a much longer time than I've been writing about it. I may not have been quite as prolific when I was working a job or multiple jobs, but I was still making my own noodles and chicken stock, and stockpiling quick homemade meals in my freezer, and reading as much (usually in the way of cookbooks or magazines back then) as I was able.

But what made me decide to start writing about the food I make was the sudden passing of my uncle a year ago. It really affected me. It made me stop and realize just how precious our day to day lives are, and on a grander scheme how the things I love are important to others. While food blogging could seem frivolous and lighthearted at times, I often draw so many correlations to the bigger picture, especially during this Easter season which is very important to me.

One of my favorite food ruminations is that of milk and honey. Nearly all life on our planet must be sustained by eating foods that first must die. This goes for people of all dining preference: vegetarian, carnivore, vegan. All diets contain that element of the brevity of life, be it a lamb or cow, or a stalk of wheat or a lowly legume. When God promised the Israelites the land of Milk and Honey, it confirms to me the amazing knowledge of life everlasting. Milk and honey are two of the only foods that are nutritionally valid and contain no death to produce. (I think an argument for maple syrup could be made, but to my knowledge, there were no maple trees in the desert...)

Food blogging has been a series of personal kitchen adventures for sure, but it has also changed the way I see this basic necessity for life. I've heard it said that there are two types of people, those that live to eat (*raising hand*) and those who eat to live. No matter your category, you can't escape the fact that everyone, everywhere, needs to eat to live. In this incredible era of computing, I can immediately have access to hundreds of thousands of ethnic recipes from cultures around the world. If it is edible, I'd wager it has been written about somewhere. And it's all because we have the amazing privilege, I believe by design, to eat.

Not only does eating sustain us physically, but it does mentally as well. Conversation that can be had over mealtime is often among the most memorable. And what you ate on a first date, or an anniversary, what kind of cake you dreamed of for your birthday, what foods are served after a funeral of a loved family member, these are all very powerful things that we carry around with us, intrinsic parts of especially our childhood memories. They are the things that unite food bloggers of all types, regardless of all the external things that hang up all of us humans in endless debate and argument.


I think the egg is an important part of Easter for me personally. Though I wrote a very inarticulate essay by comparison, in his book The Elements of Cooking, Michael Ruhlman's discussion of the egg is alone worth the cover price. I read this book for the first time a couple of months ago, and I really find myself thinking about it often. A sample of his passage on the egg:
My reverence for the egg borders on religious devotion. It is the perfect food - an inexpensive package, dense with nutrients and exquisitely flavored, that's both easily and simply prepared but that's also capable of unmatched capability in the kitchen. Yes, an egg is just an egg, but it is also ingredient, tool, and object, a natural construction of near mystical proportions..... Eggs are appropriate to serve at any time of day for any meal. They can be the main item or the garnish, they can be served simply in rustic preparations, but they are equally suited to four star cuisine. No other ingredient has so many uses and effects. The egg is a wonder.
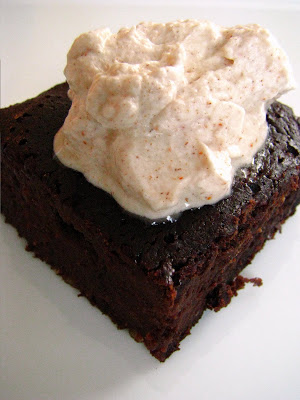
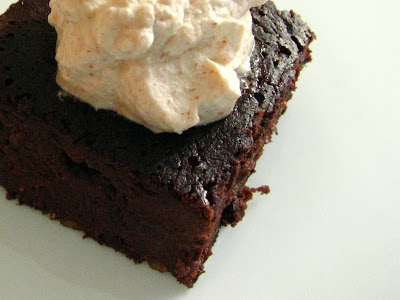
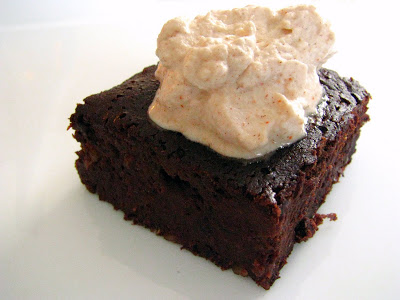
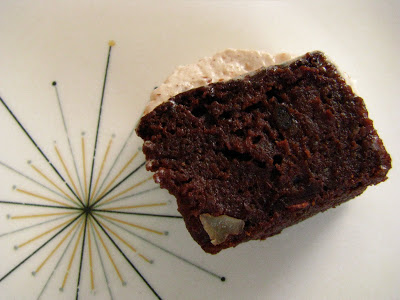
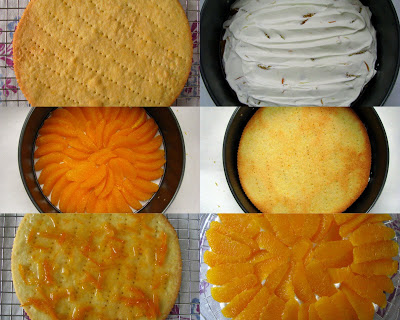
Easter in particular holds a special place for eggs. We dye and hunt for them. We make them out of chocolate. We fill plastic ones full of jelly beans. As I type, I'm waiting patiently for my Chocolate Schaum Torte (courtesy of Burp! Where Food Happens) to bake; it is full of the wonderful levity that egg whites produce. I'm glad I decided to make it, since this is my first ever Easter dinner at my house - with just my little family. A dessert appropriate for Easter in my 33rd year...

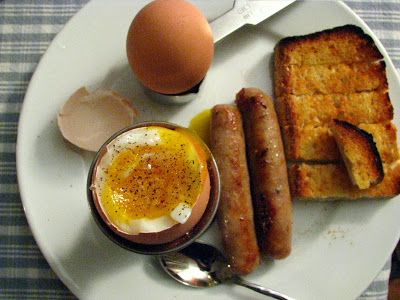
One night this past week, we had eggs for supper. My Husband: two fried, with runny yolks. I decided at the last minute that I had to have a soft boiled egg. I have never had one! I've eaten eggs all sorts of ways, including raw, but never have I soft boiled one. I remember Sasa telling me how she loved them as a child, and called her to ask how many minutes to boil them. She said 5 minutes without hesitation, and then Googled to be sure. Bring water to a boil, carefully lower eggs into water, and boil 5 minutes. That's it. Without a doubt, the best way I have ever eaten an egg - even if I had to improvise an egg cup by using my 1/8 cup measure and the 2 ounce side of a bar jigger. I am not sure I could eat two of these every day as Nigella Lawson does, but I can tell you I will be eating many more of them in the future.

As CakeWalk bravely enters year two, I have no idea what will be in store. I am frequently surprised even at the direction my thoughts take me as I type away, let alone what will be on the docket of food adventures. I do know that I am thankful for this opportunity to share what is important to me, and that I live in a place where I can sit here and type whatever comes to mind without fear. (I just recently read of a blogger who was visiting China, and had to post her food adventures when she returned because they do not allow blogging!) I enjoy being a small part in other people's lives, and in some cases discovering what that little part is. It's also quite contenting to know that I may never know some people who read about my little life, just as some others don't know that I read about theirs. A great mystery in this wonderful life.

Soda Crackers and the Mystery of Links

I have a serious link problem. I collect recipe links in three places: my iPod (recently updated to full-fledged iPhone), the little Netbook, which is my new kitchen friend, and the "big computer" which is up in the attic. I read so many different blogs, and find ideas in so many places, that the link list is seriously out of control. This is the same digital clutter that is taking over my hard drive in the form of food photos, and it's almost something I don't know how to tackle.

The digital age has presented a whole host of problems for people who love to cook. A decade ago, I had real clutter. Towers of paper clutter in the guise of magazine recipes that were too great to discard. Sometimes I cut the pages into smaller sizes, just the recipe, so that more of them were floating around until making their way into semi-organized manila envelopes, and some that were whole issues of magazines - too chock full of ideas to toss away. One good thing about moving occasionally is that I can take stock of real clutter and ditch it without thinking twice because suddenly a few crates full of "must make" recipes seems too heavy to be carrying up and down rental apartment stairs, into moving vehicles, and off to new, clean and uncluttered spaces.

The digital age enables me to mysteriously, and secretively, collect and earmark things that I have to make. Sure I don't have the physical clutter, but since there is just so much information around and so many people making amazing things, sadly many recipes go forgotten under the weight of the bookmarking itself.


Recently, I've actually been pretty successful in my attempts to stop bookmarking. Things look good to me as I'm perusing around, but I mentally note it (unless it is something too good to pass up, and that does happen) instead of adding another folder to the favorites. I do have a preternatural ability to remember such facts about which Merguez sausage recipe I wanted to try (this one from Sassy Radish) and which baked donuts I need an excuse to try (these applesauce ones from Twin Tables), just two of many examples.

Lately, I've tried to stick to making things as I find them, which is what happened when I read this post from King Arthur Flour's Baking Banter blog the other day. I got done reading, and promptly mixed up some dough. I love finding recipes for things that are kind of ordinary, but that most of us don't think of making for ourselves. Crackers are certainly on the top of that list, and it's a shame since homemade are always better, even if they aren't perfect.


I find King Arthur Flour recipes to be pretty fail-safe. They run an extremely well thought out test kitchen, in my opinion, and even have help lines for you to call. People this passionate about home baking are always going to be tops in my book.

This original recipe called for Italian-Style flour, which of course is not normally stocked in my well-stocked flours. I may have ample amounts of semolina, AP, white whole wheat, whole wheat, coarse corn meal, buckwheat, bread flour and all manners of coarse brans, but Italian-Style escapes me. I have a cart going on the King Arthur website (I need this to make innBrooklyn's pancake mix, and this to mix quickbreads with since I've wanted it for a really long time), so I think I'll order a bit of Italian flour and make these according to their published recipe. My version was good, and passable as a cracker, though perhaps not as a soda cracker which is their intended purpose.


Sometimes I think it's a sickness I have that I just can not follow instructions! Usually I have pretty good luck, and these were no exception. The dough is mixed and rested in the refrigerator for 18 hours (or more than 24 in my case, since I was gone for part of the day today), and then rolled thin. Echoing the methods used in puff pastry making, the dough is folded in thirds, and re-rolled thinly which creates layers in the finished cracker. Letting the cracker cool on the sheet pans in the oven adds crispness:


I like to keep things fairly uniform, but detest waste, so I baked up the little ends separately to have little "avant garde" crackers:


In fact, I may use my same (altered) recipe again and make the pieces smaller. They got very crunchy due to their diminutive size, and they were very addicting.

If you too are lacking in Italian flour, you can give the Rcakewalk version a try while you are waiting for your King Arthur Flour order!

Part Wheat Soda Crackers (adapted from King Arthur Flour)
  • 1/2 c. whole wheat flour (KAF)
  • 1 c. AP flour (KAF)
  • 1/4 t. salt
  • 1/4 t. baking soda
  • 1/4 t. cream of tartar
  • 1 t. sugar
  • 6 T. water
  • 2 T. butter
  • 2 T. olive oil
Mix the dry ingredients in the bowl of a stand mixer. Heat the water with butter and oil until the butter melts, then let it cool until the mixture is about 120 degrees (they mention that it should feel a little cooler than your hottest tap water). Add the liquid to the dry ingredients while mixer is on low. Once the liquid is added, increase speed to medium and beat about 90 seconds until a soft, smooth dough is formed. Put into a lidded container, and refrigerate "overnight and up to 18 hours". The dough will not rise too much, so you can use a smaller container.

Remove dough from fridge, and let sit for 15 minutes. Heat oven to 425 degrees, and line 2 sheet pans with parchment.

On a well floured surface, roll dough to about a 13x15 inch rectangle. Starting with the shorter side fold in thirds (like a letter) and roll again to about an 11x19 rectangle. Sprinkle with salt of your choice (after yesterday's post in which I ranted about salt usage, I used just a light sprinkle of kosher salt), and lightly roll over it with the rolling pin to press it into the dough. Using a knife or pizza cutter, cut into 2 inch squares and transfer to the waiting sheet pans. Poke each one a few times with the tines of a fork.

Bake for 10 minutes, maybe a shade longer, until the crackers are golden brown. Turn off the oven, and open the door wide, and let them cool on the racks until they come to room temperature. I'm thinking this would be a good project for when the weather is a bit chilly, but you don't have the heat on, since it will make your kitchen nice and warm (but perhaps a bit hazardous for small children).

I did follow the instructions from the original recipe, accidentally increasing the cold rest time since I was gone. The only difference, is that since there is higher protein content in the flours I used, the dough was much more difficult to roll out. On closer evaluation, I think I could have increased the water by a Tablespoon or so, since I used the wheat flour. This is definitely a work in progress, so if you do take up the challenge, I hope you will report back to me!


Please be sure to check out the tutorial and the original recipe over at Baker's Banter. If ever you need just one more blog to follow (and you love to bake) it is a great resource! Meanwhile, I'm mentally adding up all the things I'd like to try, and adding another lifetime to the 8 I already need to accomplish what I'd like to get done. Recipes like the one above confirm to me that I really would love to have a home-based test kitchen... one properly stocked with the right ingredients (and while I'm daydreaming, one with 3 foot deep, concrete countertops, and an extra well-lit counter for photographing!). I'll try to remember to let you know how the original recipe turns out when my flour shows up...

Vegan Black Bean Brownies, Redux.


Lately, I have no idea what kitchen adventures are in store for me as I begin my day. Today ended up being warm enough to venture around town and do some errands in a t-shirt, certainly not the weather that conjures up the making of brownies...

But in my supermarket stupor, which does happen when I don't go shopping very often, I found myself wandering around just looking for things to spend money on. And, I did it. I spent money on something I said I would never spend money on again: canned beans.


But really, I did it for the greater good. Last December I made these Vegan Black Bean Brownies and they were alright, even tasty, but not perfection. I've been meaning to make them again ever since. Last time, I overcooked my beans in the pressure cooker, and used an amount that I had weighed and mentally noted to be an equivalent to a 15 oz. can. So when I paid hard earned cash on a can of Goya beans today, I deconstructed their weights and contents thoroughly, in relationship to the original recipe posted at No Meat Athlete, so I can slip this recipe into my uses for beanery in the future.

My Findings:

1 15.5 oz. (439 g.) can of Goya black beans contains:
  • 7 3/4 oz. or 220 g. of actual beans (a scant 2 cups)
  • a can of liquid equals 14 oz. or a scant 1 3/4 cups by liquid volume
  • 1610 mg. of sodium!
Enter the soapbox, please, since I did not realize that there is so much salt in a simple whole food like beans. I'm sure the amount varies by brand, and I know there is a canned bean market for "low sodium" audiences. When I checked out the U.S. Dry Bean Council website (yes, there is such a thing), dry beans are virtually nil in the sodium department. When I read Michael Rulman's book The Elements of Cooking a couple months back, I recall reading a passage about the usage of salt in home cooking. In essence, he advocates using salt to flavor food to your taste, and now I can see that if I add a pinch of salt (probably less than 500 mg.), it is an unbelievable low amount if compared to a processed food of the same type. If you are a home cook and rarely eat processed foods, sodium consumption truly is of no issue to you - unless of course you have a medical condition requiring you to eat extremely low amounts of sodium. Just think, if a can of supermarket black beans is that salty, think of what is in other more "processed" foods, and how as a nation, we are training our tongues to look for this substitute for flavor in everything. OK, I'm done.

I'm by no means the most virtuous of eaters, mind you, I am obsessively deconstructing a brownie recipe after all. And with the subplot of trying to sneak in some non-cereal nutrition for the Boy-O, I cut the sugar back more than I did before. I think these articles that I've been reading about sugar being more addictive than cocaine (thanks, Mike G.) are absolutely true, and the more I read about the questionable refining processes of supposedly healthy sugar alternatives like agave syrup, the more I feel like just eating plain old sugar (or honey), and just eating less of it.

So, without further delay, here is the Vegan Black Bean Brownie, served with non-vegan (but perfectly worth it) Cayenne-Cinnamon Whipped Cream!


Vegan Black Bean Brownies with Cayenne-Cinnamon Whipped Cream (adapted from Christine at No Meat Athlete)

Makes a 9x13 pan (notations in parenthesis for a half recipe: 9x9 pan)
  • 1 1/2 cups whole wheat flour (3/4 c.)
  • 1 t. salt if using unsalted beans (1/2 t.)
  • 1 t. baking powder (1/2 t.)
  • 1 1/2 c. sugar, raw or granulated (3/4 c.)
  • 1 1/4 c. cocoa powder (1/2 c. + 2 Tablespoons)
  • 4 t. espresso powder (2 t.)
  • 1 1/2 c. chopped walnuts (3/4 c.)
  • 1 can black beans, drained and rinsed well or substitution as listed above: scant 2 c. (scant 1 c. or half a can of beans)
  • 14 oz. or scant 1 3/4 c. water (7 oz. or scant 1/2 c. + 6 Tablespoons)
  • additional 1 c. water (1/2 c.)
  • 1 t. vanilla extract (1/2 t. )
Preheat oven to 350. Lightly grease a 9x13 baking dish (9x9 for the 1/2 amount). Mix dry ingredients together in a large mixing bowl. Puree beans in water using a food pro or blender. Add to the dry ingredients along with the additional water and the vanilla extract, and mix until well combined. Fold in walnuts, and spread into a pan. Bake for 25-30 minutes until edges pull away slightly, and middle is set. Tester should come out mostly clean, but this is a judgment call on how well done you like your brownies.

When they are cooling, make the whipped cream: Beat an amount of heavy cream, an amount suitable to your needs, for 1 minute. Add a Tablespoon or two of confectioner's sugar, and as much cayenne as you like. I like mine pretty spicy, so to about a 1/2 c. of cream, I added a 1/2 t. cayenne. Cinnamon to taste, as well, I used about 3/4 t. for my amount of cream. Continue beating on high until cream is whipped and fluffy.


Now, I'm betting you could add a whole host of chocolate complements to the whipping cream if spicy with chocolate isn't really your thing. And if it is, and you aren't trying to inundate your child with hidden beans, you could add the spice right into the batter. I'm going to get some chipotle powder during my next Spice House trip, and maybe try that in my next batch. If you find that you need even more chocolate, you can also add in a cup or so of bittersweet chips - I used mint chocolate chips in the one I made last year, and that wasn't a bad choice either.

This is exactly the kind of dessert I get excited about (even if I may be the only one around here...), since it is dessert, but it is healthy enough that I don't feel too guilty about eating it every day until it's gone. Fortunately, I'm going to see R1 tomorrow, and half of my 9x13 pan will make its way over to her hungry and non-picky brood. I wish I could give it to them straight out of the oven, which is how I would serve it at a party. The middle was like a fudgy, thick English Pudding, and the spicy whipped cream melted into the top. In fact, I thought I'd just take some pictures and save it for later, but that wasn't going to happen after I took a bite... I ate my dessert at 4 p.m. today.

If you prefer sweeter desserts, or more traditional tasting brownies, I'd urge you to use the full amount of sugar from the original recipe: 2 1/4 cups. With or without any of the variations, I hope that if you do try these, you will be as enamored as I am.


ginger-cacao nib granola


ginger-cacao nib granola, originally uploaded by Rcakewalk.

If you like ginger, you must make this granola straight away. You will be as addicted as I am...

I adapted this recipe from Burp! since I was out of a few ingredients, but the results were still stellar. To their recipe, I added a cup of chopped walnuts, omitted the brown sugar and vanilla powder, and added 1 tablespoon of vanilla extract and a pinch of salt. Go on and start your ovens! You won't be sorry!

Orange Madness: March 2010 Daring Baker Challenge Orange Tian!

The 2010 March Daring Baker’s challenge was hosted by Jennifer of Chocolate Shavings. She chose Orange Tian as the challenge for this month, a dessert based on a recipe from Alain Ducasse’s Cooking School in Paris.

I can't really say that citrus desserts are high on my list when it comes to baking in my home. I like citrus well enough, but for some reason, things made with chocolate tend to win over my family of non-dessert eaters a bit more. Not surprisingly, chocolate concoctions are also the easiest to give away, as there is most likely a chocolate lover not too far away. Citrus desserts are usually met with terms like "interesting" or "intriguing", not more ravishing language like "decadent" or in my case, "obsessive". Usually, I prefer to eat a worthy specimen as is, rather than by gilding the lily so to speak.


A mostly sunny Wisconsin March, and a really delicious citrus season despite the frigid Floridian temperatures, did excite me for this month's challenge (which in typical fashion, I left until the last moment to complete). A canning date with fellow food blogger Lo, only served to further excite. We had planned, and prior to my knowledge of this challenge, to make Three Citrus Marmalade from Food in Jars on the 18th. Not only did we get to cement our new friendship a bit more, but we made some fantastic marmalade. Twice.

There was no added pectin in our jam, and after our morning canning session we broke for lunch. On our return, we found that our sealed jam was as liquid as a heavy syrup. Fortunately, Marisa is the nicest person in the world, and emailed us that it was ok to unseal, reboil, add a bit of pectin and reprocess. We did as instructed and were pleased with our resulting marmalade.

Our first tastes of the little bit of extra were perfect in flavor and texture, but I noticed after I opened the canned jars, that it was still a bit on the thin side. I do think that despite its thinness, it is just perfect on toast. It really does have a remarkable balance of sweet and tart, and just a pleasant amount of bitterness in the back of your throat as you swallow. It was also a good lesson in citrus supreming: the process by which you segment an orange. You can view a few more marmalading adventure pics here on flickr.


This dessert required 8 oranges, the amount in one bag of organic, California naval oranges I picked up from Outpost this week. Since I had so much citrus, and it was organic, I borrowed a trick from my Mom and zested the whole lot first. I am really surprised at how nicely it keeps in the freezer, and at how it even retains its vivid color. I currently have a little jar of lemon and orange zest going, and it is quite handy when you need to pack a bit of citrus punch into a baked good, or add zing to a quick muffin topping. I like to freeze it first on wax paper or parchment, and then transfer it to a small, glass jar to store.


Orange Tian is a layered dessert, built upside down, so that the orange segments can be arranged artfully on the top. The middle layer is a whipped cream, stabilized with gelatine, and lightly enhanced with marmalade -and a glug of Cointreau, since I figured why not go all out orangy! The base is a pre-baked pastry dough round, brushed with additional marmalade.

I used this Pate Sablee recipe from Dorie Greenspan instead of the one recommended for the challenge. I fortunately found it on Sweet Bites, a fellow Daring Baker's site, since I do not have Dorie's Baking book. Yes, I know you may think that I do since I go on making recipes from it often, but I seriously rent it for months at a time from my library., and I just returned it after a two cycle rental run. I'm sorry Dorie, I really am going to buy it, and soon. I opted to add some of that reserved orange zest. That Dorie really knows her doughs!


I made a "family size" Tian using my springform pan as a mold, and then rerolled the excess dough to get two smaller ones. I have to say, the larger was easier to make and assemble, and was much cleaner in the end result. The crust had just enough shrinkage, and I didn't overdo the whipped cream. I assembled on parchment paper, and let it rest in the freezer for about 15 minutes before overturning it onto a platter.


I was surprised at how firm the gelatinized whipped cream got, and was thankful for it, since there was no disaster in flipping it over.


You can see how the little one on the left below had compromised orange slice placement for the size of the mold! It's packaged up and waiting for a trip to Lo's tomorrow so she and Peef can give me their expert opinions. I tend to usually be biased with my own dessert eating, since I can eat a date and be as happy as if I spent 4 days assembling and baking something. After making and trying all of the components, I can have a bit of tunnel vision when it finally comes the time to indulge. I think this is the reason that people go out for dessert! Well, one reason, since the temptation to eat it in its entirety certainly looms over the household.


If you too are curious about Orange Tian, you can find the recipes here, but I would recommend making Dorie's Pate Sablee, since it was truly worth it. Another month elapses, another Daring Challenge under my belt, both figuratively and literally. I am surprised at how much I am learning from these challenges. From how to read and interpret the directions, to simple tips from other Daring Bakers, and little tricks like this stabilized whipped cream, which I will no doubt put into employment elsewhere. It also gives me an excuse to have Maeckel over for supper.

Maeckel, who is kind of becoming my monthly DB Challenge-eating partner, and I just split the sorry looking one in half. (My Husband sat this one out...) I drizzled it with a bit of the chocolate syrup I made, instead of additional orange "caramel" sauce, and we agreed it was pretty tasty. We wern't quite sure if the chocolate was the right sauce, I think due to the bitter marmalade notes, but on its own, I think it would be well served at a Springtime brunch. But what really stands out to me the most, is Dorie's crust.