Homemade: Raw Almond Milk

Yesterday, I got it in my head to make almond milk. I know I have serious problems with experimentation when a mere mention in a conversation with my Mom had me thinking that I could make it at home. In fact, most of today was consumed with kitchen experiments, some of which will have to wait until another day to be told.

It all began bright an early, or kind of dark and stormy, at 6:30, since that is what time my self has decided to wake up every single day regardless of what time I go to bed. Before bed I soaked my raw almonds, in filtered water under refrigeration, so I didn't even need my first cup of coffee fully ingested before beginning this project.

Almond milk is of course raw vegan, and really is another thing so easy to make that you will wonder why you would ever buy it again. One cup of almonds and 4 cups of water will produce nearly a quart, so very little effort produces a stellar result, and not to mention a more economical (and environmental, since you have no packaging) choice, and you can use a 1:4 ratio to make as much or as little as you like. I also like that I have complete control over the sweetness. I used a base recipe from Choosing Raw, but a number of others that Google turned up were similar if not exactly the same. You can also use just about any nut you feel like, if almonds are really your thing.


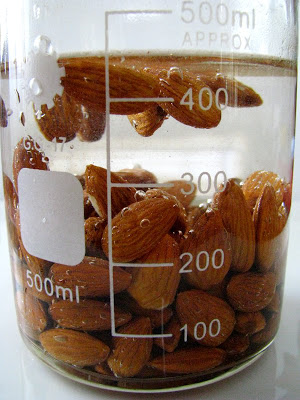
My very scientific looking soaking almonds.

Vanilla Almond Milk (from Choosing Raw)

1 cup raw almonds, soaked in cool water overnight (8 hours) under refrigeration
4 cups spring or filtered water
6 dates
1 t. vanilla (the extract I used technically renders this un-raw I think, but you can use vanilla pod seeds, scraped out as flavoring if you like)

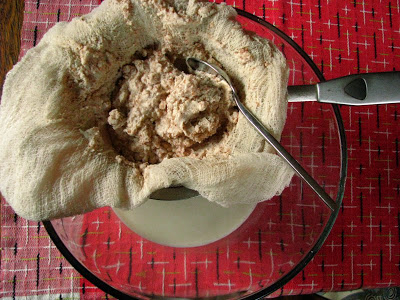
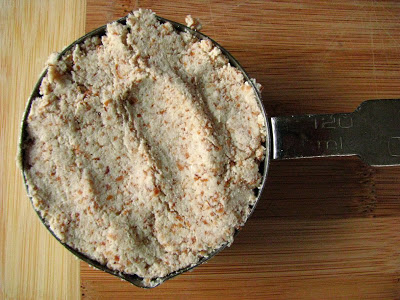
Drain the almonds, and then in a blender (or a VitaMix for you lucky owners), blend all ingredients until finely blended. I saved out the extract until the milk was done, but you can add it in right away if you like. I drained it through several layers of cheesecloth (see picture below), and when enough of the liquid seeped through, I twisted the cheesecloth into a bag-like shape and squeezed out as much liquid as I could. I added a sieve underneath to catch any stray particulate, but it probably would not have been necessary. I saved the almond "pulp" for another experiment, below. Milk will keep 3 days or a little more according to Choosing Raw, but I have a feeling it will be long gone by then.


I should take a moment to lament my lack of a "Real" blender. The blender I currently have, I bought when I was still in high school. Why I decided to buy a blender one day like 15 years ago, when I had no real use for a blender I'm not sure, but the thing just will not die. I wish it would, so I would have an excuse to buy a new one, but it is still hanging on. Tenacious as it may be, it is not very strong. The only thing it really has going for it is a glass pitcher. If the mixture I am trying to blend has the slightest semblance of a thick sauce, I use my food pro instead to save myself the frustration, but I know if I had tried to make this in a food processor, I would have had an even bigger frustration. Trust me, I know from experience. I really am considering a VitaMix savings fund to be placed on my counter in a Mason Jar. Maybe I'll do that today, and each time I am frustrated by lack of horsepower, I'll add some dough to the jar. Sounds like a good plan to me.


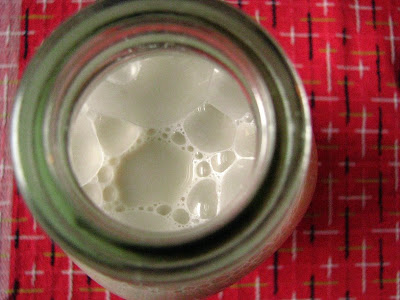
Real blender or not, my nut milk turned out perfect.

That said, I tried to take the almond pulp and process it into a raw nut butter. Besides making a crumbly mess for me to clean up, I learned that this, my friends, is a task that I don't think can be done in a food pro. It just does not have the horsepower to emulsify nuts into creaminess. That's okay, since I decided to alter a recipe from Dreena Burton's book Eat, Drink and Be Vegan.

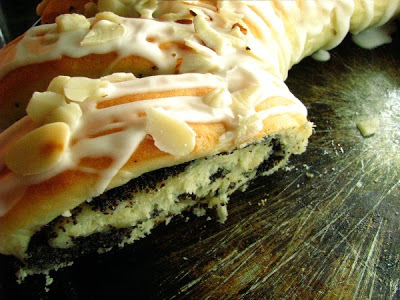
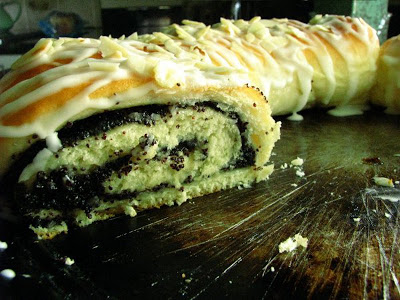
When I was with my Mom last week, we stopped in at the Viroqua Food Co-Op, a cousin to our Outpost here in Milwaukee. I usually am not in the habit of buying sweets when I shop... but when I'm with my Mom we like to try things just for fun. I saw this cookie, which happened to be gluten-free, and we had to try it.


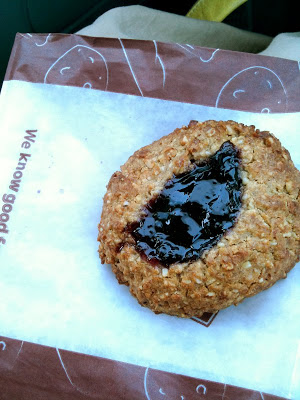
It was kind of the same feeling I had when I first had Outpost's Little Oatie sandwich cookie. I NEED to find a way to make this now! Our Wisconsin food co-ops are on to something not always providing a recipe (I did find the Midnight Madness cookies, another complete addiction, on the Outpost website one time, but last I checked, it was no longer there.) If I had the access to a recipe like this I'd probably never leave the home and become a complete hermit in the ways of new foodstuffs. Not having something exact to follow, I figured I could at least come close using Dreena's recipe and my new almond pulp...


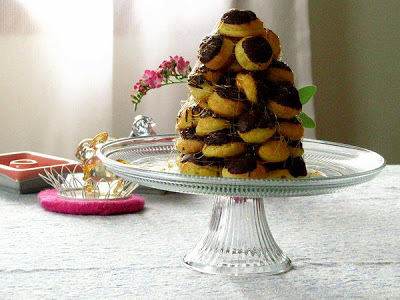
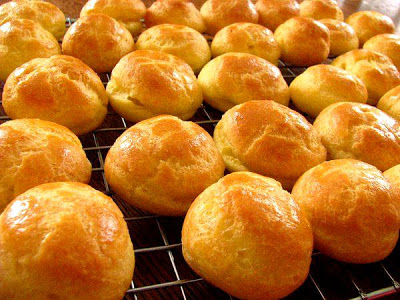
And, I did pretty well. Well, maybe better than well, since I couldn't stop eating them. I think this is a work in progress, since they didn't taste exactly like the Viroqua Food Co-Op's, but maybe that's a good thing. They would probably all be gone if they did.


Since these had additional moisture from the almond pulp, I had to add quite a bit of extra grain. Next time, I will most likely try using less oil. I still have another portion of almond pulp leftover, so I will be sure to update the recipe at the end of this post when I try again.

Jam Thumbprint Cookies (adapted from Dreena Burton)
  • 1/3 c. oat flour (rolled oats blended in a spice mill works great)
  • 2/3 c. steel cut oats
  • 3/4 c. barley flour
  • 1/2 c. almond pulp, leftover from making almond milk
  • 3 T. brown sugar
  • 1 t. baking powder
  • 1/4 t. cinnamon
  • 1/4 t. salt
  • 1/4 c. maple syrup
  • 2 T. brown rice syrup
  • 1 t. vanilla extract
  • 1/2 t. almond extract
  • 1/4 c. veg oil (or olive oil)
  • jam - to fill centers
Preheat oven to 350 degrees f. In a large bowl, combine flours, oats, almond pulp, sugar, baking powder, cinnamon, and salt and stir until combined. In a separate smaller bowl, combine maple syrup, brown rice syrup, extracts, and oil and stir well to combine. Add the wet ingredients to the dry ingredients and blend until just combined. (I used a hand mixer. Remember that if you let it sit for a few minutes, the oats will naturally absorb some of the moisture. If it still seems too moist, add a little additional oat flour - and if it is too dry, add a bit of oil.)

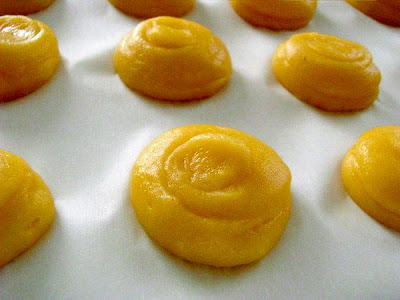
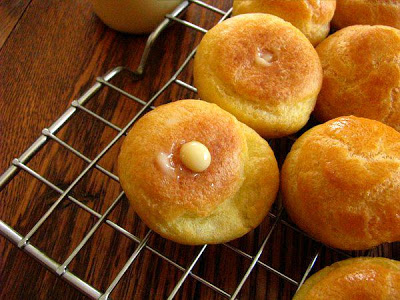
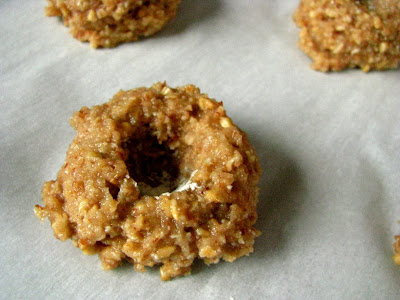
Using a small scoop or a spoon, scoop little mounds out onto a parchment lined sheet. Using a wooden spoon handle (or like me, my rolling pin handle) dipped in flour, make an indentation in the center. (Dreena spoons the jam into the indentations here prior to baking, but I cooked them 3/4 of the way and then removed them from the oven and added the jam. Since I had to increase the baking time quite a bit due to my extra moisture, I'm glad I did it this way!) Bake for 14-20 minutes, until the edges begin to turn brown. Let them cool on the sheets for a minute or two before moving them to a rack to cool completely.


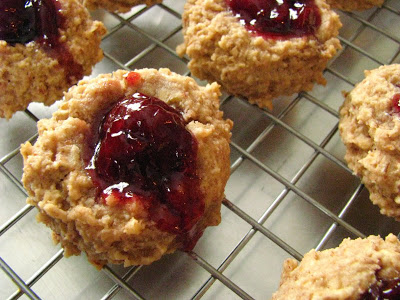
Marisa at Food in Jars is having a give-away for a Ball Blue Book and asked her participants to note what jam is their favorite. I love pretty much any type of jam, jelly, preserve, conserve or marmalade... but, hands down, my favorite is her recipe for Sour Cherry Jam. I have 3 little jars left on my shelf that I've been saving, why I do that I don't know! Cherry season will be here before I know it, so I cracked one open to fill my cookies, and I'm so glad I did. If you are a jam-maker, Marisa has great recipes for you to try, and top on your list should be this Sour Cherry one. Sour Cherry Jam may even make it's way into a vanilla almond milk smoothie of some sort...

If you are a kitchen experimenter like I am, and make this cookie recipe, please let me know how it turns out for you! I'll be playing around with it, since I am beguiled by it's toothsome earthiness, and I don't feel guilty eating a half dozen of them, either. I also know that if you are a nut milk drinker, you will be hooked on the simplicity of making it yourself. The only bad news is that it takes longer to clean up the kitchen afterward than it does to concoct. But, you can enjoy a glass of milk when you're doing it.

Elevenses: A Challenge I Didn't Even Have to Think About.

Last week, I read about the history in England of 'elevenses' thanks to Buttermilk Party Cake. I feel I'd fit right in over the pond, since eating 5 times a day - two of them containing a baked good of some sort - sounds pretty enticing to me. Personally, I love the Hobbit-ish ideal of "Second Breakfast", and if I have a sweet around, usually have it in the morning between breakfast and lunch.

Frequently when I visit my Parent's home, there are all sorts of wonderful things, indeed an array, of desserts to be sampled and enjoyed. Since my Mom knows I love any and all sweet notions, she bakes up a storm in anticipation of my arrival. Of course I would think it's all for me, but the truth is, I get my sweet tooth from both my Mom and Dad. They often have desserts (plural) around, even if they would be frozen when you happen to drop in.

Last week was no exception, and on the train ride over, I half expected this Poppy Seed Coffeecake to be on the counter when I got in. I wasn't disappointed. There it sat, in all it's fresh-baked glory, fat with a poppy seed middle and spiked on top with almond extract glaze. When I say that this could be my most favorite thing to eat in the baked category, I would not be far off. I almost could hate seeing it there, since I know full well on first glimpse that almost the whole pastry will end up in my belly. Here is the beautiful specimen she created:


My Dad, strangely, doesn't care for poppy seeds, so to my fortune, half the cake was all mine (well, and my Mom's). The other half was filled with apricot for him, and I carefully left it all for his enjoyment. This dessert is really best the day it is made, but I will still happily gobble it up with coffee as it "stales gracefully", to borrow a quote from Jim Lahey. It can please a number of people, since you can fill it with any kind of filling. My favorite is Solo Poppy Seed filling, but any homemade preserve or filling would also work.

Buttermilk Party Cake is hosting an "Elevenses Roundup" with favorite reader recipes to be posted on June 11th. When I saw my favorite baked good sitting there on my Mom's counter, I knew right away what I was going to submit to Stephfret. Do you have a favorite to submit to her by the 10th? The link above will lead you to a charming English world, another of my new favorite food blogs, and also tell you how to enter your dessert for elevenses viewing.

My Mom uses an old-fashioned bread roll dough as the "cake", which you could also decide to form into rolls if you like. The other fun thing about this recipe is that you can use any number of coffee cake forming methods. We like to make a ring and carefully slice most of the way through. To make it look a bit fancier, you can give each cut portion a half twist so that the spiral filling faces upward. However you fix it, it's not going to last long.


This is an enriched yeast dough, but is fairly forgiving. You can also store it in the refrigerator for up to 3 days, though my Mom prefers to use it straight away. Feel free to experiment with all manner of fillings: cinnamon-raisin rolls, or orange rolls, strawberry or raspberry filling, the possibilities are endless! Also keep in mind you can form it into a ring as I do, or any other traditional coffeecake shape, taking into account the thickness to which you roll it.

Poppy Seed Coffeecake (from the kitchens of Dolores Mendez and June Orlikowski)

makes enough dough for two coffeecake "rings" or 24 rolls
  • 1 cup skim milk, scalded
  • 1/4 c. sugar
  • 1/4 c. oil
  • 1 t. salt
  • 1 egg, beaten
  • 3 1/2 c. AP flour
  • 1 scant T. yeast (active dry, or instant)
  • 1/4 c. warm water
  • 1 can Solo Poppy Seed filling
In a small saucepan, scald milk. In the bowl of a stand mixer, add hot milk, oil, sugar, and salt and let the mixture cool until tepid, about 110 degrees f. Once mixture has cooled, add yeast and water mixture and beaten egg. Then, add 1 1/2 flour and beat well to incorporate ingredients using the mixer's paddle attachment. Then begin to add the rest of the flour. You may not need to add it all, you are just looking for a nice cohesive dough that is soft and not too sticky. Turn it out onto a floured surface, and knead by hand, added flour if necessary to create a nice soft dough that isn't sticky.

At this point, you can roll it out or store it in the refrigerator. If you are going to use it right away, place dough in a lightly oiled bowl, and let rise covered with a tea towel in a warm place until doubled, 1-2 hours. (If you are refrigerating the dough, let it come to room temperature and then proceed.) Cut the dough into two portions, and working one at a time, roll the dough into a large rectangle about 1/4 inch thick. Spread the filling evenly over the surface, leaving a 1/2 inch border all the way around. Roll up into a long log, and gently join the ends into a ring. Slice portions evenly around the ring starting at the outside edge, without cutting through the middle, at about 1 1/2 intervals.

Cover with a towel and let raise in a warm place until about doubled, about an hour depending on the room temperature.

Bake at 350 for 20-25 minutes until nicely browned. The time may vary based on your shape.

When it has cooled, you can glaze it with a simple powdered sugar glaze. My family doesn't use a recipe for this, so I will tell you our very uncomplicated method... The cornstarch in the powdered sugar acts as a thickener, requiring very little effort and a completely to taste recipe:

Coffeecake Glaze:
  • confectioner's sugar
  • milk
  • almond extract (or vanilla)
To an amount of confectioner's sugar, add as much almond extract as you like, I like a lot! - in fact I don't even measure, I just pour it in and keep tasting until the almond suits me. Then, while stirring with a spoon, add enough milk to make it glaze consistency. Drizzle it over your cooled coffeecake (or bundt cake, or any other cake needing a glaze... adding some cocoa powder to the powdered sugar if you'd like a chocolate glaze).

When storing any leftovers, just lay a sheet of waxed paper over the top - otherwise the glaze can become sticky.


You can garnish your coffeecake with nuts or seeds, whatever would complement your filling and look nice. And should you be a bit phobic about baking with a yeasted bread, don't be. This is a perfect dough for practicing, since it will no doubt be edible no matter your trepidation... If you have a favorite enriched dough, (or even a store-purchased one) I'm sure you will also have good results to enjoy with your tea or coffee for your next elevenses.


Raw Vegan Monday: Raw Chocolate Pudding Pie


I can't believe that this is already the 4th installment of Raw Vegan Monday. I'm having so much fun with this self-induced project, that I may just keep up with it indefinitely. Fresh back from a week in the country, I've recharged my internal battery and even re-set it a little. Fairly late to bed and still early to rise, I awoke before 6 this morning, completely rested and wondering what in the world I would make for my raw vegan self-challenge.

During my visit, I was perusing a magazine my Mom had picked up at the local co-op that happened to have a recipe for a raw apple pie. What was most interesting, is that the crust was comprised mostly of sunflower seeds. It was also a nice article written by Joy Hittner of Fountain City, another small Wisconsin town I've had the pleasure of living in. It was a small stint for me in Fountain City, but a nicely spent one, since I had a room in a house on a bluff, overlooking the frosty Mississippi in early spring. As the Winter gradually ended, the bald eagles appeared out of thin air, and as I walked around the nearly cliff-side town, they became almost commonplace visions. Living on the River has a special meaning for so many people. Life teems beneath the water, and on it, river traffic for both work and recreation abounds. It meanders the full height of our country, and is a force to be reckoned with when it overflows it's banks. So many people never get to see this Old Man, memorialized in our Americana thanks to Mark Twain and others, and I got to live steps from his edge and see his daily changes.

It's easy for me to get nostalgic about the many magical places in my state, but suppose I should get back to the pie, since you could have it made by picnic time this afternoon. After all, I even made a short trip down KK to Outpost and back, and still was done photographing my delicacy by 8:30 AM!


I made this recipe in a 8 inch, straight sided, tart tin. You could double the crust ingredients to accommodate a larger pan, and if it is a little too much, roll the rest into raw cookie balls (reminiscent of a Fudge Baby)...

Raw Vegan Chocolate Pudding Pie (adapted from Joy Hittner's crust and The Raw Table's pudding)

For the crust:
  • 3/4 c. raw sunflower seeds
  • 3 oz raisins (about 6 heaping tablespoons)
  • 4 large dates, pitted
  • 1 T. cocoa powder
  • 2 T. unsweetened, shredded coconut
  • 1/4 t. cinnamon
  • pinch of salt
Combine all ingredients in a food pro, and process (with the S-blade) until the mixture holds together when pinched. Be a bit patient, since it can take several minutes. If it doesn't seem moist enough, add another date or a few raisins and keep processing. Press into a pie or tart tin, and chill for 30 minutes or so to make it easier to un-mold from the tin.


For the pudding:
  • 2 small, ripe avocados
  • 1/2 cup agave nectar
  • heaping 1/4 c. cocoa powder
  • 2 T. coconut cream concentrate
  • pinch of salt
  • cinnamon to taste, optional
  • 1 t. vanilla extract or essence
  • espresso powder, about 1 t., optional
Blend everything in a good blender (I am jealous of all of you VitaMix owners...) or a food pro until very smooth. Pour into pie or tart shell, use as a frosting, or enjoy by itself as a pudding.


This chocolate pudding is so creamy, thick and decadent, you would never dream that it could be vegan. I'm also figuring that resting it in the freezer in some 'pop' molds would produce something quite wonderful. It passed the Boy-O taste test, that's for sure! I considered layering some bananas underneath, but decided that I'll slice some on top when I serve it, since I didn't want them to get too mushy in the refrigerator. Even though this is a vegan pie, it is still very rich and quite heavy on fat - albeit healthy fats. I'm hoping it will last me several days under refrigeration, so I can have small slices. In general, I like to get a week out of a dessert. On second thought, I may even try freezing a couple of small slices too. I don't know why it wouldn't work...


So, if you happen to be headed to a Memorial Day service or picnic or potluck, and you need something amazing that no one would guess has avocado in it (in the Milwaukee area, Outpost has organic avocados for 79 cents each today!), this is the pie for you. If you have a well-stocked pantry, you won't need much time, either.

I also can't help thinking that on Memorial Day, I have so much to be thankful for. Our armed forces are not something I think about on an everyday basis since no one in my immediate family is or was in the military. My Father-in-Law is retired Navy, and when I met him, it made me think about all of the families that at some point carried on their day to day lives, for a while or for longer, without a family member. No matter your political affiliation, you must be thankful for the freedoms these people have afforded us. I know when I passed a flag-lined Kinnickinnic this morning, I remembered to be.

Croquembouche: May 2010 Daring Baker Challenge

The May 2010 Daring Bakers’ challenge was hosted by Cat of Little Miss Cupcake. Cat challenged everyone to make a piece montée, or croquembouche, based on recipes from Peter Kump’s Baking School in Manhattan and Nick Malgieri.

This challenge was another in the long line of things I've always wanted to make. Pate a choux is one of the simplest yet most rewarding examples of kitchen alchemy. I remember my Mom making chocolate eclairs, filled with cream and I remember GOP making cream puffs cut in half and piled amazingly high with whipped cream. People I admire have piped out or dolloped this sticky "dough" and created beautiful and tasty desserts, yet I never have myself. And this is why I love the Daring Baker Challenge.


If there could be a downside to this dessert, it would be that it is best eaten straight away. We kept a bit leftover in the fridge and still ate every last morsel, but it was most satisfying as soon as it was completed. The great news about this, is that if you have the pastry cream made the day before, which I did, and make the puffs early in the day, which I did, the filling and assembly really takes very little time.

Another bonus for me this month is that my Husband loved it! I will surely be making this again when I have a dessert occasion, with more than just me and my boys here to clobber it.


Now, I'm not saying that I advocate eating little pate a choux puffs every day, mind you. They are laden with eggs and butter, and in general, are probably not very good for you. But just a bite of eggy, custardy puff would win over the staunchest of the health-conscious, and the ability to produce something so professional in a home kitchen makes this recipe all the more worthwhile.


I filled a squeeze bottle with the pastry cream, and over-filled for a plump middle. I was reminded of the time I made homemade "hostess cupcakes" for my Husband and Maeckel. I went through all the trouble of making a delicious marshmallowy filling, only to find that when I thought I was filling the chocolaty cupcake, no filling was going in. Of course, I didn't know this until after the little buggers were finished and glazed and the three of us were sadly looking for the cream in the centers. There was telltale cream in the bottom of the cupcakes, but it didn't occur to me that there was nowhere for the cream to go since it was, after all, a dense cupcake. (It was quickly remedied when I shook huge spoonfuls alongside them...we managed.)

That was a good lesson, and one that didn't really apply here, since the cavernous bellies of the puffs are by design happy homes for fat amounts of pastry cream:


With a nod to the chocolate eclairs of my youth, I dipped the tops in chocolate - gilding the lily so to say, since there certainly was enough sugar involved to do without it. When I made the hard caramel, and dipped the bottoms into it when it was still in a molten state, I thought that the chocolate would melt all over. I was pleasantly disproved, and the combination of crunchy caramel, dense bittersweet chocolate and creamy middles made for the closest thing to textural perfection in a dessert.


The only thing I can think of to make mention, is when making hard caramel (which is basically just sugar and a touch of lemon juice) resist at all costs stirring with a spoon. I did this time, and was rewarded whereas in the past, I was met with a lump of rock hard sugar. I cooled the caramel pan in another pan of ice water after it reached it's amber state, but should have removed it after it cooled enough to stop sizzling, since the caramel started to harden too quickly when I was assembling. I was able to reheat it over low heat and get the job done, but next time I will remember this.

It is more than fun to play with hard caramel, which hardens as soon as it threads out into the air. It kind of makes a mess of the kitchen, if you are anything like me, but sometimes I chalk that up to par for the course. It was a little humid that day, and in the 30 minutes or so I spent taking pictures of my creation, dewdrops started forming on the caramel threads that I spun around the entire tower. I imagine that the next time I make this will be close to Halloween when spider-webbed desserts are welcome.

I transcribed the recipes below, since I had to enable my future publisher because I am not at home today (the 27th) and I am nowhere near a computer (except for my iPhone) - the wonders of technology! After the posting date of the Daring Baker Challenge, you may also go to the Daring Kitchen website to find the recipes.


Pate a Choux (Yield: About 28)
  • ¾ cup (175 ml.) water
  • 6 Tbsp. (85 g.) unsalted butter
  • ¼ Tsp. salt
  • 1 Tbsp. sugar
  • 1 cup (125 g.) all-purpose flour
  • 4 large eggs
  • For Egg Wash: 1 egg and pinch of salt

Preheat oven to 425◦F/220◦C degrees. Line two baking sheets with parchment paper.

Combine water, butter, salt and sugar in a saucepan over medium heat. Bring to a boil and stir occasionally. At boil, remove from heat and sift in the flour, stirring to combine completely.

Return to heat and cook, stirring constantly until the batter dries slightly and begins to pull away from the sides of the pan.

Transfer to a bowl and stir with a wooden spoon 1 minute to cool slightly.

Add 1 egg. The batter will appear loose and shiny. As you stir, the batter will become dry-looking like lightly buttered mashed potatoes.

It is at this point that you will add in the next egg. Repeat until you have incorporated all the eggs.

Piping:

Transfer batter to a pastry bag fitted with a large open tip (I piped directly from the bag opening without a tip). Pipe choux about 1 inch-part in the baking sheets. Choux should be about 1 inch high about 1 inch wide.

Using a clean finger dipped in hot water, gently press down on any tips that have formed on the top of choux when piping. You want them to retain their ball shape, but be smoothly curved on top.

Brush tops with egg wash (1 egg lightly beaten with pinch of salt).

Bake the choux at 425◦F/220◦C degrees until well-puffed and turning lightly golden in color, about 10 minutes.

Lower the temperature to 350◦F/180◦C degrees and continue baking until well-colored and dry, about 20 minutes more. Remove to a rack and cool.

Hard Caramel Glaze:

  • 1 cup (225 g.) sugar
  • ½ teaspoon lemon juice

Combine sugar and lemon juice in a saucepan with a metal kitchen spoon stirring until the sugar resembles wet sand. Place on medium heat; heat without stirring until sugar starts to melt around the sides of the pan and the center begins to smoke. Begin to stir sugar. Continue heating, stirring occasionally until the sugar is a clear, amber color. Remove from heat immediately; place bottom of pan in ice water to stop the cooking. Use immediately.

Assembly of your Piece Montée or Croquembouche:

You may want to lay out your unfilled, unglazed choux in a practice design to get a feel for how to assemble the final dessert. For example, if making a conical shape, trace a circle (no bigger than 8 inches) on a piece of parchment to use as a pattern. Then take some of the larger choux and assemble them in the circle for the bottom layer. Practice seeing which pieces fit together best.

Once you are ready to assemble your piece montée, dip the top of each choux in your glaze (careful it may be still hot!), and start assembling on your cake board/plate/sheet. Continue dipping and adding choux in levels using the glaze to hold them together as you build up.

When you have finished the design of your piece montée, you may drizzle with remaining glaze or use ribbons, sugar cookie cut-outs, almonds, flowers, etc. to decorate.

I researched my project by watching Martha Stewart Assemble a Croquembouche, and I was glad I did. You can use a number of different fillings to fill the pate a choux puffs, but the caramel holding it together is what makes it the Croquembouch (crunch in the mouth).

Thank you to Little Miss Cupcake for a great challenge!

Raw Vegan Monday: Lasagna Roll-Ups with Raw Marinara


This may be kind of a cheat for my Raw Vegan Monday week 3 installment, since I had the Cashew Ricotta Cheese already made, but this was so delicious that it needs proper attention.

I know I am full of hypothesis when it comes to raw vegan diet... but I feel that I need to make special attention to photograph raw vegan foods since it is so effortless to prepare that I almost feel guilty. (Almost, since I'm really only "cooking" it for myself...) What I do find in photographing raw vegan food, however, is that since it has so little processing, the elements usually taste far better than they look. That is good news for eaters, as this food tastes so real and delicious that no matter it's looks you can be sure of it's health giving properties.


I know when I made the Cashew Ricotta Cheese the use by date was a week, so I was just inside of the recommendation when I made these roll-ups yesterday. But really, if it is refrigerated and doesn't have a strange smell, I can't imagine cashew cheese really going bad too quickly. I also should say that I like it even more as it sits. In fact, I ate one of my vegan cupcakes with the ricotta cheese frosting last night and thought it was even better several days later. (I stored the frosting separate and frost them just before eating, since I do not like to refrigerate cake, but did refrigerate the frosting.)

This recipe, then, was a perfect application for the remaining cashew cheese: Raw Lasagna. There are many stock raw vegan recipes for marinara and lasagna, but I altered a few to suit my on hand needs. If you don't have cashew cheese, take a look at this Gone Raw recipe for a filling made from almonds, macadamias, pecans and tahini. I think it looks like a great filling on it's own, and doesn't require expensive probiotic powder or a lengthy time to produce.


You can use this basic method to make any amount of lasagna roll-ups, or even layer the zucchini, cashew cheese and sauce to make a more traditional looking lasagna. I made 4 roll-ups for a lunch size portion (I ate a couple while I was assembling...), so I'm listing the approximate ingredients for 1 person, with leftover marinara. If you aren't vegan and thinking that this marinara is too strange, you have to make it to eat on proper egg pasta, since you will not be disappointed!

Raw Vegan Lasagna Roll-Ups with Marinara

for the Roll-Ups:
  • 1/3 c. cashew cheese (seasoned like I did here)
  • 4 zucchini strips, sliced thinly (I used a mandoline)
for the marinara:
  • 2 oz. crimini mushrooms (a large handful)
  • 1 tomato, chopped and drained if very juicy
  • 1 clove of garlic, minced
  • 6 sundried tomatoes, rehydrated in water for at least an hour until they are soft, and then chopped
  • 1 cubanelle pepper (or green pepper), chopped
  • a glug of extra virgin olive oil, about a tablespoon
  • salt and pepper to taste
  • fresh basil to taste and for garnish
Assemble the zucchini roll-ups by spreading them carefully with the cashew cheese and then rolling them up.

In a food pro with the S-blade, chop the mushrooms until finely chopped. Add the rest of the marinara ingredients and process as much or as little as you like. I let mine go until it was fairly uniform in a chunky smoothness.


You could, of course, add more veg to the sauce - red peppers or red pepper flake for a spicier version. I'm not exactly sure on spices for the raw vegan. It seems that some may not fit the bill as a "raw food" due to their processing. If you aren't following a truly strict diet, you could of course embellish the sauce with dried herbs of many sorts: oregano, basil or thyme. I can never resist pinching off the tops of my new plants nearly the second I get them home and planted, which is what I did, since I got some herbs on Saturday...

This sauce in particular took me back to raw sauces I used to make, but somehow haven't in a long while. Each summer, when I lived alone, I used to make a cherry tomato based sauce with just quartered tomatoes, garlic, olive oil and made non-vegan with bocconcini (mozzarella) and plenty of fresh basil, salt and pepper. This sauce on homemade egg pasta is akin to true summer eating perfection. I used to let the sauce sit at room temperature for several hours, and everything would marinate so nicely. I'd even used it as a pizza topping.

The Sweet Millions I planted on Saturday are the earliest cherry tomatoes I could find, 56 days I think. If my Husband's math is correct (he's good at this sort of thing) by July 18 I should be able to enjoy the first of this year's tomatoes! Isn't that a nice thought! The first thing I'll do with a pail full of those beauties is make a raw sauce. Maybe, I'll even leave out the cheese.