Vegan Monday: Strawberry Rhubarb Cake


I kind of think every once in a while there is a recipe so well constructed that you can do virtually anything to it and it still turns out wonderful. That is the case of Maya*Made's Grandmother's One Bowl Apple Cake. Ever since I first saw the recipe, I have made it every which way, this way being my favorite, and used pretty much every type of fruit I've had on hand. I think old-fashioned recipes such as this one really are gems, and deserve the highest place in the home kitchen. Without ingenious and industrious forebears, we likely wouldn't have pantry staple cakes such as this one, and it is something I am supremely grateful for.

When I unloaded the car yesterday afternoon after being self-bombarded with strawberries and a nice big bag of fresh rhubarb from my Parents' garden, I didn't really figure that I'd be making a vegan cake for myself in the midst of many other projects that brought me deep into the night before calling it a day.

But this cake is so gloriously simple, that you can in fact do it when you have 15 other things going on, and it will turn out. It is moist, reasonably healthy, and studded with fruit that bakes into even sweeter goodness. Since I added nutmeg, I could have sworn that there was pumpkin in the batter - a trick that could flummox even the most experienced foodie palate.


Vegan Strawberry Rhubarb Cake (adapted from Maya*Made's Grandmother's recipe)
  • 1 c. diced rhubarb
  • 1 c. chopped strawberries
  • 1/4 c. agave syrup, light or dark
  • 1/4 c. vegetable oil
  • 1 flax egg (1 T. flax meal mixed with 3 T. water)
  • 1 t. vanilla extract
  • 1 c. whole wheat flour
  • 1 t. baking soda
  • 1/4 t. cinnamon
  • 1/4 t. nutmeg, freshly grated if possible
  • pinch of salt
Preheat oven to 350. Coat an 8 inch baking tin with cooking spray, or coat lightly with oil.

Stir dry ingredients together in a small bowl. In a larger bowl, stir strawberries, rhubarb, vanilla, flax egg, oil and agave syrup together. Add the dry ingredients to the wet and mix to combine. It is a thick batter, so try to be gentle and not over mix.

Press into the cake tin. You may wish to wet your hands lightly with water and press it in gently this way. Bake for about 30 minutes, until cake tester comes out clean.

Let rest in the pan for 10 minutes before turning out onto a cooling rack and cooling completely.

Since it is a very moist cake, I would suggest storing any leftovers in the refrigerator - even though I am inherently against cake refrigeration...


A bite of cake doesn't seem like a world changing thing, but I love to imagine Maya*Made's Grandmother and how she happened upon this recipe. Each time I make it, I feel some strange connection to another family's traditions, even if I am tweaking it each and every time I make it. It will always be Maya*Made's Grandmother's Cake, and I will always be thankful for it.

Chocolate Pavlovas: June 2010 Daring Bakers Challenge


The June 2010 Daring Bakers’ challenge was hosted by Dawn of Doable and Delicious. Dawn challenged the Daring Bakers’ to make Chocolate Pavlovas and Chocolate Mascarpone Mousse. The challenge recipe is based on a recipe from the book Chocolate Epiphany by Francois Payard.

I was happy with this month's challenge, especially with the similarities to the most delicious dessert on earth: Burp!'s Chocolate Schaum Torte... but somehow I procrastinated until the last second, and then found myself out of town visiting the farm for the past 5 days. I decided to complete my challenge in my Mom's kitchen, and since I have already made mascarpone and other rich pastry creams, I took the liberty of altering this recipe to make it more health conscious.

My Dad has to be careful, as we all should, not to have too much saturated fat in his diet. Meringues, then, are the perfect dessert, since they only contain egg whites. I remembered a chocolate pudding recipe that was in The Healthy Kitchen Cookbook by Dr. Weil and Rosie Daley, and figured that while it wouldn't be mascarpone mousse, at least I could serve it guilt free to my Pop (and me)! I omitted even a trace of heavy cream by topping it all off with my homemade chocolate syrup.


What a view to bake to!

Baking in my Mom's kitchen is a pleasure, since she has a gorgeous and well appointed one with loads of counter space. It is also wonderfully quiet and clean, well - clean until I get busy in it. My Mom is a very neat person, and can cook and bake without making any mess whatsoever. I, on the other hand, seem to make twice as much mess as I do even in my own kitchen... My Mom is among the most gracious people I've ever had pleasure of knowing (and I'm so lucky, since she is also my Mom!), and she never minds that her kitchen needs cleaning after I visit. I try to do my best to clean up after myself, but I suspect she goes behind me, catching what I missed.

Unlike the famed Schaum Torte, these chocolate meringues are baked at 200 degrees f. until they are completely hard - so no soft, squoodgy middles in these guys. I piped the meringue into serving-sized nests:


After 2 1/2 hours in the oven, they were hard and hollow sounding when tapped. They cooled in no time, and I stored them in a lidded 9x13 metal cake tin to stop them from getting sticky in the very humid weather.


My Parents have a small raspberry patch, which was just starting to get a few ripe berries. It appears the jury is still out on if I do indeed have a raspberry allergy. If I do, I can't quite come to grips with it, and eat a couple of berries here and there to test myself. I know, I know, this can be extremely dangerous. But since the reaction I had more than a year ago now was do to the raspberry LEAF extract in some shampoo, I keep pushing the envelope. Chocolate and raspberry are two things that are just not meant to be kept apart, and they were absolutely worth any risk of anaphylactic shock that may have ensued.


Fortunately, the 4 or 5 berries I ate didn't cause me any reaction at all. I have never had a food allergy before, and thinking about avoiding something so wonderful as raspberries for the rest of my life is kind of a downer. As you may have already surmised, I do keep on checking to see if in fact I am allergic. I probably shouldn't do that, so please don't go out and eat things that make you allergic just because you have read about my foolhardy approach to food allergy here.

The truth is, I've never been officially diagnosed with the allergy; a dermatologist just suspected my reaction was to raspberry since when I stopped using the particular product that contained a lot of it, my symptoms improved dramatically. Hence, no more Octomom lips...


I think that my approach to dessert has changed since my interest in raw and vegan foods has been piqued. I'm happier now with some fruit or something lighter than I was a short while ago when I could hardly go a day without a slice of chocolate cake. Proof, I guess, that you can recondition yourself to enjoy a whole lot of things under the guise of dessert. I'm not saying that I don't eat dessert, since I usually do and usually once per day, but I do like lighting up a bit and it's a good feeling to be guilt-free when I do have a bite of something sweet.

As far as chocolate desserts go, this guilt-free version of the Daring Baker Challenge was truly delicious. I'd have to say that I think the raspberries made it perfect, and so did the scoop of vanilla ice cream that we ended up having alongside. If you are counting the calories, this one is probably up there, but saturated fat-wise, it is very low.

Thank you to Dawn for a delicious (and healthy) challenge, and remember to find all of the original recipes either on her site or at the Daring Kitchen website. If you would like to make some pretty tasty and low-fat chocolate pudding for the low-fat version I made, here you go:

Low-Fat Chocolate Pudding (adapted from a pie recipe from Dr. Andrew Weil and Rosie Daley)
  • 1/3 c. cornstarch
  • 1/3 c. sugar
  • 1/3 c. cocoa powder
  • 3 1/2 c. non-fat milk (I did use 2 % to make it a little richer)
  • 1 t. vanilla extract
  • pinch of salt
  • pinch of espresso powder if desired
Sift together cornstarch, sugar and cocoa powder into a medium saucepan. Whisk in milk gradually. Place over medium heat, and cook until mixture thickens and boils, whisking constantly, about 7 minutes. When mixture boils, reduce heat to medium low, and continue to cook for 2 minutes stirring constantly.

Remove from heat. Taste, and add salt and espresso powder if desired, and add vanilla extract. Stir to combine, then pour into a clean, glass bowl. Cover with plastic wrap, and allow the wrap to sit directly on top of the pudding to prevent a skin from forming.

Cool for about 30 minutes, then transfer to refrigerator until cold, about 2 hours.

Footnote:
I am just remembering that Alton Brown made meringue as a pie crust in one of his books. He baked it in a 9 inch pie plate, then let it cool. He suggested filling it with pudding and topping with whipped cream, and I'm figuring that this could be pretty delicious finished off with a few raspberries as well. That Alton, he really is on to something... Next time, I'll try this dessert in Alton Brown Pie Form. Stay Tuned.

Fermentation Paradiso


Last Sunday, I bottled my second batch of kombucha. Following a couple of suggestions on a website that 
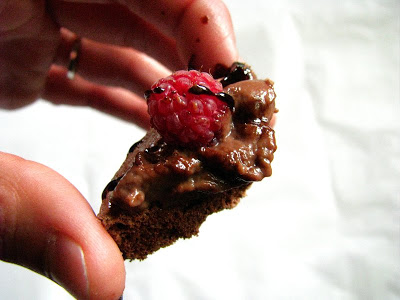
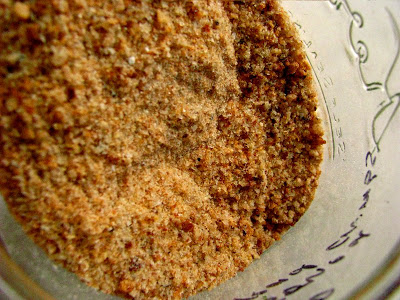
Lo had suggested to me, I finished the bottles with about a tablespoon each of different fruit, including the blueberry, ginger and strawberry teas seen above. I filled the swing-top bottles as full as I could, and left them on the counter to continue their bottle fermentation. Early this morning, I cracked open a strawberry-blueberry bottle and actually had to hold the lid down due to the overwhelming carbonation. I was excited since my first bottling was tasty but fairly flat. I decided to put them all in the fridge, and got ready for my tutorial in homebrewing with R1's husband, Mr. Mork.


Boy-O and I drove out to the House of Mork around 9 this morning, and I couldn't wait to witness the whole process of homebrewing. Mr. Mork chose a kit from Northern Brewer called Tongue Splitter Ale, a west coast style ale with plenty of hops. He has been brewing at home for more than 10 years, so the process is second nature to him. His explanation to me of the brewing process was concise, and I couldn't help but think of the Northern Brewer employee who spent so much time talking with me last week. He was mentioning to a new homebrewer about the journey of brewing, not the end product - but the means to the end. That is exactly the process I got to see today, and it made me appreciate the craft of fermentation even more.


Mr. Mork purchased a kit to brew this beer, and explained that a kit allows a tried and true formula to be reproduced with a consistent result. A lot of trial and guesswork is removed when you go with a kit, and companies like Northern Brewer seem to have very detailed descriptions of the end result. Much the same way as a chef would publish a recipe for a home cook to follow, beer kits take a basic formula and let a homebrewer tweak the flavoring components. This can be done a little or a lot, and like pretty much anything food and flavor related, the possibilities are endless.

I was actually pretty surprised at how easy the entire process is. I mean, brewing a beer seems like something that you should leave the professionals, right? But like anything worth enjoying to the fullest, doing (or in my case, witnessing) the work yourself helps you appreciate the entire experience all the more.


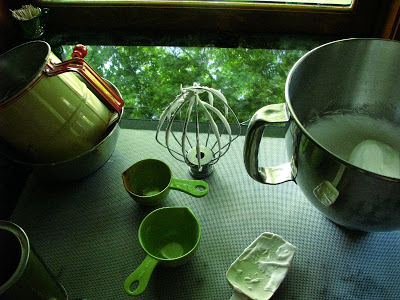
The standard amount for homebrewing is 5 gallons, and that is exactly what I saw today. 2 gallons of pure, un-softened water went into the stainless brewing pot, and needed to come to a boil. Around 100 degrees, the grains went in, and the grain "tea" steeped until the water heated to the 170 degree mark.


After the grains come out, barley malt extract goes in. Mr. Mork lets the container sit in a sink full of warm water to help it pour easier:


After the extract goes in, the mixture returns to a boil, and you officially have a wort: the brewer's term for unfermented beer. After this point, the mixture boils for 60 minutes, with various variety of hops added at different times in the duration of the boiling. When I saw the sealed packets of hops, I was envisioning the actual hop blossom. I was surprised to open it and find this:


Chopped and pelletized hops! If you have ever smelled an ale, the characteristic hop bite that comes to your olfactories is nothing like the pure hop bite I smelled today. The fermentation process tempers the strong and almost metallic floral aromas. Each package had an alpha acid percentage, a different one on each of the 4 types used. The higher alpha content hops were added earlier in the boil. According to Homebrewing for Dummies, at harvest time, hops are measured for this acid content which is related to their bitterness. The alpha acid content percentage is a ratio of the acid's weight in relation to the weight of the whole flower, the higher the content, the higher the bitterness of the hop.

After our 60 minutes of boiling, I asked if I could taste the wort. It was thickened and syrupy, and surprisingly sweet from the addition of barley malt extract. It was delicious, and not at all as bitter as I thought it would be after smelling the hops as they boiled along.


After the wort was cooled using a wort chiller, the mixture was poured into a 5 gallon carboy to continue on it's journey to complete fermentation. The wort went in, followed by enough water to equal 5 gallons. Yeast is finally added, 100 billion yeast cells ready to work their magic on the humble wort. It now graduates into a growing and living thing, and active fermentation will begin in Mr. Mork's basement sometime within the next 24-48 hours. 7-14 days from now, second fermentation will begin, and 2-4 weeks after that, bottling will commence.


The whole process of brewing beer is strangely similar to the process of brewing kombucha, only instead of a SCOBY, the yeast is added as a liquid and no symbiotic union of bacteria is present (and, of course, more alcohol is produced as a result of the fermentation). Indeed, fermentation of most fermentable things is similar, and that is really amazing. I don't know why I thought there would be some complicated steps in the process, but really it is just an ancient technique, only modernized slightly by good hygiene practices and more intricate knowledge of flavor. I love to think about how imaginative people figured out how to brew, culture and ferment foods as a method of preservation. Mr. Mork relayed this story of the real King Midas, and a beer that was made based on the remains of the funeral feast found in his tomb. Here is the story of how a 2700 year old beer was recreated!

My copy of Wild Fermentation (recently recommended to me by E in Maine...) just came in from the library, and will be the perfect thing to read when I'm out of town for the next few days. I hope that I don't lose any of the memory of smells from today, since every one of the components of the Tongue Splitter were very distinct. I'm looking forward to trying the finished product and matching them to what I remember.

The whole idea of flavor profiling and taste memory is very fascinating to me. It is what makes a great cup of coffee, a stellar glass of wine, or even a cup of milk taste exactly like where it came from; it is what will help me find a good flavor for my kombucha experiments, and it is something that I am increasingly conscious of. Almost as if the more attention I pay to every component of the foods and drinks I consume, the more I appreciate them - an action of gratitude through consumption.


I have a flickr set of annotated brewing pictures, that you may peruse to see more of Mr. Mork's homebrewing process today, and I will update it as I continue to watch to progress of this batch. I'd like to encourage any curious and adventurous readers to get out there and try and brew something! Be it tea or beer or even a cup of joe, try really tasting what it is that makes you happy on a day to day basis and really appreciate the work that was involved to produce it. I promise you, you will taste it in a whole new light.

I have a bit of work to do in the kombucha fermentation field, since it seems that my natural carbonation dissipates through refrigeration. When I popped a few bottles to take some pictures this afternoon, all of the amazing fizziness that I was so excited about earlier this morning had vanished. Just a trace of that lid-popping effervescence remained, but it was enough to make me curious about what I'm doing wrong. Sunday evening, I'll likely bottle another batch, and tweak the process yet again, in the same manner of curious brewers from ages past. I could be frustrated, but I am not at all. Getting to the final destination is really half of the enjoyment!

Vegan Monday: Almond Almond Granola


This Monday's post isn't flashy and sophisticated, but I accomplished my goal: to use up the almond pulp that is leftover from making almond milk. I have been making and drinking more almond milk since I discovered how easy it is, and it is a versatile and tasty milk alternative, that I find addicting. The only thing bothering me is the leftover almonds, finely ground, which just seem too viable to me to toss away.

I have been thinking that my homemade by-product would work well in granola, and have been waiting until I needed to actually make more to give it a try. In the name of experimentation, this is sometimes hard for me to do, and then I find myself with too much to eat up. It seems like it's been a while, but I finally ran out, and am happy to announce that I found a good and serviceable way to use up almond pulp (you could substitute almond meal, or ground almonds, if you wish), and a way to maybe somewhat satiate my complete addiction to almond extract flavoring.


This recipe could easily be transformed to Raw Vegan Muesli. Instead of baking the ingredients, just combine the ingredients raw (without the oil and maple syrup) and soak them overnight in almond milk before eating. Then I guess it would have to be called Almond Almond Almond Muesli, because of the triple almond punch of extract, milk and pulp. I would probably recommend storing it in the fridge if you make the muesli out of almond pulp, since it has a higher moisture content. Either way you try it, if you are an almond fiend, this is a nice almondy way to get your fix!

Vegan Almond Almond Granola
  • 3 c. rolled oats
  • 1/2 c. dried, unsweetened coconut
  • 3/4 c. almond pulp (or almond meal)
  • 1 t. cinnamon
  • 2 T. vegetable oil
  • 1/4 c. maple syrup
  • 1 t. (or more) almond extract
Mix dry ingredients in a large bowl. Lightly beat oil, maple syrup and almond extract in the measuring cup to combine, then add to the dry ingredients and mix well.

Spread onto a parchment lined baking sheet, and bake at 300 degrees for 40-50 minutes, stirring every 10 minutes until it is as brown as you like it. I think mine took longer than usual, since I used the leftover almond pulp, and it isn't as dry as an almond meal would be.


Feel free to add additional nuts or seeds prior to baking, or chopped dried fruit(s) after to change the flavors up a bit. It isn't the most complicated granola, and is better served as a cereal instead of eating out of hand, but I love it's soft and gentle flavor. So many granolas I experiment with are full of fruits and crunchy nuts, which I love, but this one is kind of the polar opposite. I like something a little basic for breakfast once in a while, and this is the perfect, basic, nutritious breakfast in my book, since it has no refined sweetener, a good amount of protein, and is full of my favorite almond flavor.

Happy Vegan Monday to you, and hopefully you will find this an easy granola (or muesli) to slip into your breakfasting!

Tiny Beets: First CSA meal of the season.


Yesterday, I got my first ever CSA box. I decided to join a CSA last fall, when I was both frustrated with my shade-filled garden and impressed with Highcross Farm produce at the farmer's market. I did follow through on filling some raised beds in the middle of my sunny backyard, and have tomatoes, eggplants, peas, lots of peppers and assorted herbs finally doing very well so far thanks to unobstructed views of the sun and all of the rain we have been getting lately. I know I've mentioned before that when I first moved to the city, I used to feel strange getting my summer produce from strangers at markets. Growing up, we always had a huge garden, and it was something I never realized was so precious until moving away from home. I've always had some sort of little garden going, but not really a big enough one to eat a whole season through.


I think I'm really going to enjoy my CSA. I know I was already impressed with what arrived in my small box yesterday: pac choi, green lettuce, chives and oregano, 4 stalks of rhubarb, and a bunch of tiny beets along with another basil and tomato plant for the back yard.

It is early in the season, so when I say "tiny beets" I mean really tiny. There were three little beets in the above bundle, weighing in at just over 2 ounces without their tops. I decided that 2 oz. of beets plus their greens would be a good amount for my lunch, so I decided to veganize a recipe I saw on innBrooklyn: Beet Chops.

I kind of thought I would save the recipe for my Vegan Monday post, but I just can't since it was so tasty. I used a slightly higher proportion of russet potato to beet, and altered Indira's cooking methods just a little, but the effect was truly great. And lest you think I'd toss the gorgeous beet greens, I sauteed them quickly in olive oil to make a bed for the chops.

The result is a pretty, pink dish, glamorous enough for a dinner party, and elegant enough to make me feel special for cooking it just for myself. I recently read Judith Jones' book The Pleasures of Cooking for One. I have to say, it is probably one of the best reads I've had in a long while. There are many reasons one can be driven to cook for the self, some are sad and lonely reasons, and some are fueled by experimentation and curiosity. Weather I am sad or lonely, curious, or am the only beet lover in my household, I certainly love to cook and don't need much prodding to make a mess of my kitchen for no other reason than to just please myself. It is only an added joy to be able to sit at the table and think to myself, "This is REALLY good".


The original recipe calls for equal parts beet and potato, but I had very tiny beets, so I upped the russet ratio. Indria also dredges the chop in egg to help the bread crumbs to stick, but since I was making a vegan version, I omitted this and just lightly pressed the bread crumbs into the sides. I make my own bread crumbs from my leftover bread, so I know that they are vegan. You could experiment with panko crumbs, or even corn flakes, and discover a tasty variation.

Beet Chops (adapted from Indria on innBrooklyn)

Serves one, but proportional enough to easily accommodate more servings.
  • 2 oz. beets, boiled and mashed
  • 5 oz. russet potato, boiled and mashed
  • 1 small onion, minced
  • 1 clove garlic, minced
  • 1/8 t. turmeric
  • 1/8 t. garam masala
  • 1/8 t. chili powder
  • 1/4 t. cumin powder
  • salt and pepper to taste
  • bread crumbs for dredging
  • vegetable oil for frying
  • beet greens from the beets, coarsely chopped
  • olive oil
Boil the beets and potatoes separately since they cook at different rates. (Reserve some of the cooking liquid just in case.) I mashed them together in the same bowl. Meanwhile, saute onion and garlic in a bit of olive oil until translucent, about 5 minutes. Then add spices, salt and pepper, reduce heat, and stir until onions are soft, another 3-5 minutes.

Add onions to mashed potato/beet mixture and stir together well, adding a bit of reserved liquid if the mixture is too dry. Form the mixture into 6 "chops", I made mine rectangles. The mixture is soft, like a fragile play dough, so work carefully.

Press the chops into the bread crumbs gently, so that all sides and ends are evenly coated. Heat some vegetable oil, about 2 tablespoons, in a non-stick skillet over medium high heat. When oil is hot, carefully add chops, and cook about 1 minute per side until all 4 sides are lightly browned and crusted. (I actually used my hands to add them to the pan and flip them, since they are pretty delicate, just be careful of the heat.) When the last side is done, turn off the heat and saute the beet greens.

Heat a little olive oil over medium heat, until hot but not smoking, and add beet greens. Toss with a bit of salt and pepper and saute until cooked to your liking, about 2 minutes for me. Serve the beet chops on top of the beet greens.


Homemade bread crumbs: I seasoned these with salt, pepper and a bit of onion and garlic granules - but I usually leave them plain.


I had tasted the beet/potato mixture prior to pan frying, and knew that I loved the flavor, but I was pleasantly surprised at just how delicious the hot beet chops were. I really love Indian spices, and it really works with beets - I don't know if I'd ever had anything similar before! They almost melted under the weight of the fork, and were amazingly "beety" for only having a mere 2 ounces of beets. They were also a cheerful color:


The best surprise of all, is that while I chose the 3 chops that were most "photogenic" to plate up first, it was the 3 that got slightly charred that tasted the best. It was accidental to be sure, since I have an electric stove, and the "Genuine CalRod" coils always tilt my pans slightly to one side no matter my rigging it seems. I guess, if I had a deeper coating of oil, all my chops would have been rendered more blackened and crispy. However you choose to alter the recipe, I'm sure you will enjoy your result...


...provided you love beets, of course. If you do, and find yourself in the position of cooking for only yourself, whatever the circumstance rejoice in the fact that there is no right or wrong, there is no one you need to impress, there is just the simple joy of standing over your stove and tinkering with a dish that will no doubt bring you the greatest reward.