Sprouted Grain Flour

I have wanted to sprout grains and make flour for quite awhile. I tend to read a lot of different things around the Internet and in books, and then mentally compile them into a rational reason for doing something. Certainly, it's easier to open a bag of flour and make a baked good, but the more I read about flours, chemicals, digestion, and nutrition, the more sprouting seems to make good sense to me.

Obviously, I am the type who often makes more work for herself than needed - and the truth of that is that I have the time and I enjoy it. As I read frequently by electronic means, I consider how I'd make a good Amishwoman excepting of this technology thing. Oh, and the dresses - not too sure I could swing that either. A few things withstanding, the Amish way of life is close to what I'd like if I could choose anything. The idea of making whatever I need, bartering with others, and country living all appeal to me greatly. I may lose a Husband if I ever felt I needed to act on this urge, but truly I am happy being urban-ish "amish" for now. Especially if I can make, barter, and discover on a whim, and with the aid of a computer.
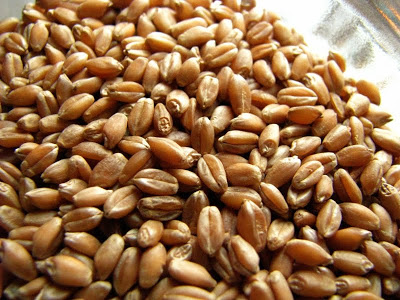
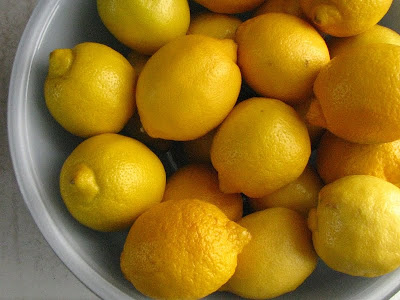
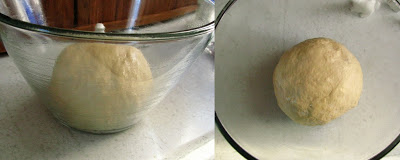

soft wheat berries.

The Amish are in a time freeze somewhere around 1860, probably before the smooth mechanization and distribution of flour. From all of my readings on sprouting wheat (and other grains), I take away that sprouting wheat increases both digestibility and food enzymes and decreases phytic acid: the acid found in nuts, seeds, and grains that is undigestible to humans. When the grain is soaked and allowed to begin germination, the phytic acid breaks down, allowing the nutrition in the grain itself to enter our systems.

I think of the Amish, because every Fall, I witness the sheaves of corn and occasionally wheat dotting the countryside near my Parent's farm. I figure that even though most of that grain is likely going to livestock and is not for human consumption, it is most likely healthier for those ruminants because essentially it is sprouted. The sheaves are left standing in the elements, even the rain, and then allowed to dry - the way our ancestors likely treated their grains by necessity. When demand and modernization caught up with us, the grains and flours were able to be processed quickly, more efficiently. The once nutritional flour powerhouse we are left with is basically plain and white, devoid of life-giving, healthful properties.
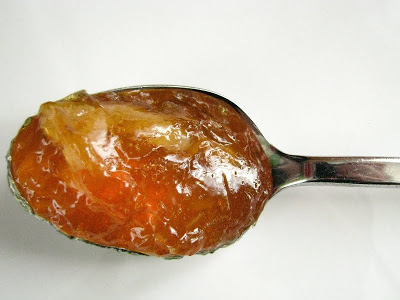

soaking.

I won't lie. It takes time to sprout. Largely unattended time, but time nonetheless. Purchasing sprouted flour is costly, and really I have never considered it. My curiosity for most things culinary, and my new VitaMix that can actually grind wheat into flour, led me down the road of sprouted flour. I have to say it will be hard to turn around. After my first batch of soft wheat berries was ground up into flour, it bore no resemblance to anything I ever thought of as flour.


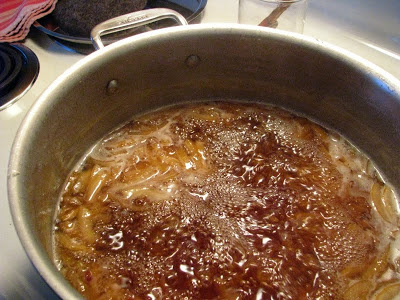
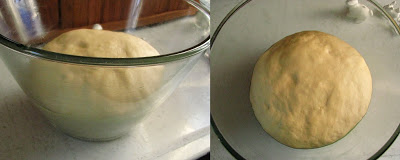
sprouted to tiniest tails.

The smell, and taste for that matter, of the freshly ground, sprouted and dried grain is incredible. I can't describe it, it's just wholesome and clean. I have no dehydrator so I dried the sprouted berries in the oven at my lowest temperature, 170 degrees. I left the oven door open with a wooden spoon, and frequently put my hands in to toss the grains around on the baking sheet. It took about 3 hours until the grains were dried, a much shorter time than I was expecting after reading around... but I chomped on a few and confirmed that they were fully dried.

After they cooled, I stored them in the freezer until yesterday when I decided I couldn't wait anymore to grind them. Since I sprouted the only wheat berries I had on hand, I didn't know if they were hard wheat (suitable for bread making) or soft. Yesterday when I visited the bulk bins at my co-op, I knew by sight that they were soft wheat, probably purchased for salad making. My dreams of making my first homemade, sprouted wheat flour into bread was gone, but a healthy baked good could result. I picked up some more hard wheat berries and some spelt berries to experiment with and headed home to figure out what to make.


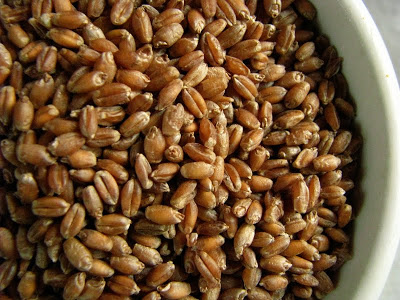
sprouted, dehydrated wheat berries.


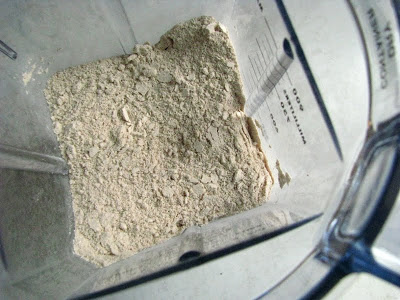
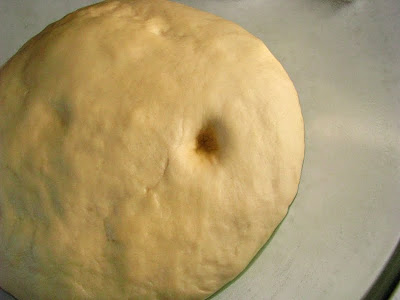
sprouted wheat flour.

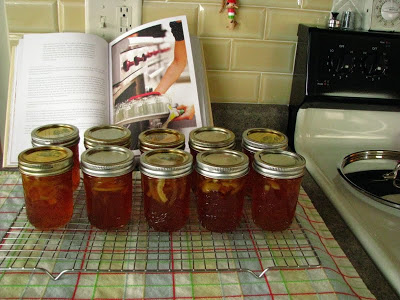
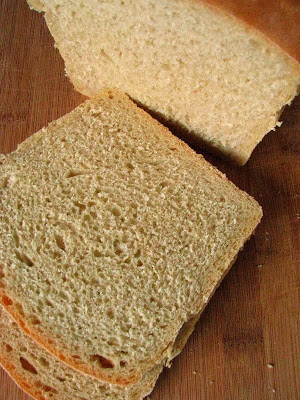
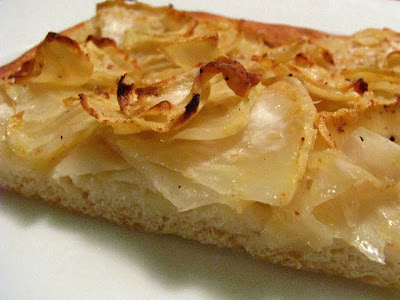
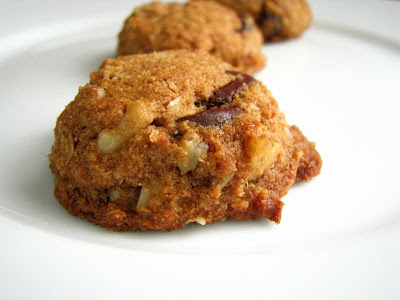
I have to gear up to make my Daring Baker challenge, so I didn't want to make a cake. I settled quickly on making some cookies, which are wholesome enough to showcase the brilliance of this new sprouted flour. (And, the Boy-O devoured them too!) They were delicious, and I should have made a whole batch instead of a half... since these aren't going to last too long. For the half batch, I used 2 eggs, which worked out fine.

Sprouted Wheat Cookies (from GNOWFLINS)

(this is the whole batch amount, about 4 1/2 - 5 dozen)
  • 1 cup unrefined, virgin coconut oil, softened
  • 1/2 cup raw honey
  • 3 eggs (or they recommend 1/4 cup flax seed meal + 3/4 cup pure water)
  • 1 teaspoon vanilla
  • 1 teaspoon baking soda
  • 1 teaspoon sea salt
  • 2-1/4 cups sprouted wheat flour
  • 1/2 cup chocolate chips
  • 1/2 cup raisins
  • 1/2 cup chopped nuts (I used walnuts)
  • 1/2 cup unsweetened coconut
  • 1/2 cup rolled oats (soaking recommended, but I did not do that)

Cream together room temperature coconut oil and honey in large mixing bowl.

Add eggs to mixing bowl (or the flax seed/water mixture that has been mixed and allowed to stand for 5 minutes) along with vanilla and beat.

Sift flour, baking soda and salt in a medium size bowl, and add to wet ingredients in mixing bowl. Mix until just combined.

Add chocolate chips, nuts, coconut, and oats to mixing bowl. Mix gently until just incorporated.

Drop by tablespoons full onto parchment lined baking sheet. Bake at 350 degrees for 12 to 15 minutes, rotating pans halfway through.

Be sure to drop by the GNOWFGLINS website, as there is an enormous amount of information and great looking "traditional foods" recipes!


We do live in a "gluten-centric" culture here in America, and I have to wonder if that may account for the seeming increase in gluten allergy. My Husband's box of highly colored and sugared cereal even touts "whole grain" and "high in vitamin D", the buzz words that cause and reinforce consumer purchase. But what is whole grain? From now on, my whole grain is going to be an actual whole grain berry if I can swing it. The cost differential isn't that great, and if I am half as happy with the bread as I was with my cookies, it will be well worth it.

I'm sure this will not be the end of my sprouted grain tinkering. Here is a (partial) list of things I've been reading lately on sprouting:

Lemon (Daydream) Marmalade

I'd feel funny saying that I worked for 3 days on this lemon marmalade only because it didn't seem at all like work. My house has been transformed into a lemony clean paradise as the skies above are overcast and sun is scarce. In the world of preserves, marmalades are a bit famous for being fussy and time consuming. They are also a paradox of flavor, being sweet, sour, and bitter most of the time. That could be why they are some of my favorites to eat. I've read lately of some people dipping their spoons again and again into their various nut butters and homemade versions of "Nutella", but I'm certain that my future sneaky spoonfuls will contain fat dollops of this lemon marmalade instead.


I actually didn't plan on making any marmalade this year, since I have one jar left over from my canning party with Lo and a fully stocked preserves shelf in the basement. When my hold on the Blue Chair Jam Cookbook by Rachel Saunders came in at the library (and I was as impressed both with the weight and size of it as I was the photography), I set out scheming to make this lemon version shortly after reading about it. One particularly interesting thing about Rachel's method is that she uses the oven both to sterilize the jars and lids and to can the finished product. I wasn't sure about that, but decided (after a brief consultation with Julia) to give it a shot.

I'm pretty sure I had two different kinds of lemons, some were thinner skinned and smooth, and some thicker and dimply. I can't claim to know much about lemon varietals, since they don't grow in Wisconsin, unfortunately. I love reading things like this where lucky people have things that I can only imagine growing myself dropped in their laps. It's curious that I recall such instances as if they happened to me. I know I had *wished* that I could make Deena's lemon thyme marmalade last summer when I read about it. But like most things, I forgot about it when "lemon season" has hit me here, right now, in the broadest part of the Winter.

How do I know it's lemon season? I make an assumption based on when my co-op has specials on citrus; I got my 6 lbs of fruit for around $8.50, which works out to about 65 cents per jar for organic marmalade (if you don't include the sugar price).


Rachel's method is easy. The work is shared with three days, but each day's work is rather light. Day 1: soak cut half of the lemons overnight, Day 2: boil soaked lemons to make lemon juice and strain overnight and cut more lemons into thinly sliced eighths and let them soak overnight, then Day 3: add sugar and a touch of fresh lemon juice to the past 2 day's labors and boil until you reach marmalade.

I will say that I admire canners who develop recipes. It seems to be a highly specialized art. I can follow instructions (and in the event of canning, follow them without addition or subtraction which is usually hard for me), but I'm not sure I would be cut from the cloth of precision as canning writers are. This recipe delivers what she says it will, it is very pretty and hard to improve upon. I'll say that it is a miraculous balance of flavor that stems from the patience in 2 days worth of various soaking periods. There is bitter, there is sour, and there is sweetness. And, when you catch a piece of peel and bite into it, it is pure summertime even in the depths of snowy winter.


perfectly gelled.


I've actually only made marmalade one other time, with the aforementioned Lo. While the flavor was really good, the set was not. We did not, however, employ the method of spoons. Prior to making the marmalade, stick 5 spoons in the freezer to get good and cold. When the time comes to test for the gelling, you can pour a little onto the spoon and put it back into the freezer for 2-3 minutes. If properly set, it should not run off the spoon. I liked this step immensely, especially since I got to eat the spoonful after the check. It took me 3 spoonfuls to determine the set, and a full hour and (almost) a half to get to that step.


the method of the spoons.

Cooking down marmalade when the snow was falling was especially enjoyable. I made my coffee and pulled up a stool to lazily keep an eye on it, stirring every so often. I thought about the Italian tradition of serving espresso with lemon peel on the side of the cup. I took hipstamatics using my new free film in the app upgrade I downloaded this morning. I took apart and cut hearts out of an Alterra coffee bag, that I intend to string up and hang somewhere. I in general gave thanks that I am a stay-at-home mami that can do what she pleases, so long as the house is clean and so forth. And, I daydreamed of Summer and it's business of growing and walking and playing: those things I love that prevent me from sitting down at the counter for a couple of hours and tinkering with a jam that I don't even know will work.


thankful for cameras.

The recipe as written did not give an exact amount of lemon juice liquid that should have been extracted from the fruit during the process leading up to the boil. I think that the water just needs to evaporate to the proper stage, and so no exact amount is probably needed. My liquid level decreased by a good 3 inches in my stockpot. Because I kept testing with the spoon method, and because I had pulled up a chair to properly observe, I could actually tell when the boil changed from aggressive bubbling to more subdued activity.

All the while, I had my 10 clean jars with lids in a 250 degree oven. This technique of sterilization and canning I have never done. It actually seemed like something that was too good to be true. No boiling water turning my fan-less kitchen (and the rest of my smallish house) into a sauna? I love this method! I had only one that didn't seal, and I added it to the extra three I had, so I have some to devour straight away. Obviously, I have a couple unsealed to give away as well. This is the time I break out my favorite strange canning jars that I can't really use to preserve in - one triangular jam jar that Sasa gave me is my favorite:


It originally contained a Croatian fig and chocolate jam. Next time I see her, I'll give her this unsealed jar of lemon marmalade knowing I'll get it back again to fill with more surplus jams or jellies. I'm telling you, it's the simple things in life that give me the most joy.


peels seemed to rise to the top, but the gel is set so no matter.

I confess, that so far I've only read through the beginning and "Winter Through Early Spring" sections of the Blue Chair Jam Cookbook. I was smitten, my heart at first purchased with luxe paper and pictures, but now also with a sound recipe written very well. Now, I busily page through the rest of the book and drop it into my bottomless Amazon cart. I daydream of warm weather, thankful for California and it's bounty that provides me lemons in January.

I pause, and suddenly shutter at my thoughts: at the end of this summer, I will have officially hit my mid-thirties and I daydream some more that I'm still 23. But then I lighten at the hope that my first ever knit sweater should be complete by that time (I cast on yesterday!). This is what happens to me in the winter. Roller coasters of retrospect and expectation move in when I have time on my hands. I try to remember not to dream it all away and be thankful for each second.

Here it is: Beer Sourdough!

After the recent success of the commercial yeast beer bread, I knew I had to try using beer in my sourdough. It not only works, but it works efficiently, rising and baking in a mere 6 hours start to finish. Oh, and it is delicious.


The quickest Google search ever at the end of my last post led me to this recipe from Elizabeth Yetter. Yesterday afternoon, I mixed up a half batch using half a Sam Adams I found in our basement fridge. Her original recipe calls for a whole 12 oz. beer for 2 loaves, but I decided to half it - not knowing that the outcome would be so great. It made a smallish loaf that I decided to bake in a free-formed oblong shape in my cast iron pot. Since it was smaller, I altered the temperature and baking time from my normal "bread-in-a-pot" methods. Happily, all the bread forces were working with me! When the rest of the world celebrated the end of the workweek, I was happily geeking out in my kitchen over the successes of another sourdough bread...


This particular beer is far less assertive than the IPA in my last bread, but nonetheless apparent in the rising dough. I warmed the sealed bottle in warm water like I did previously, and in 15 minutes or so, the chill was completely off. Mixing is fast, and the dough was risen and ready for it's shaping and second rise in about 3 hours. Meanwhile, I keep an eye on the dough, noting how fresh and yeasty it smelled. My Husband declared that it smelled good, like a Brewer's game, so I knew that he'd happily eat it once baked.

I let it rise on my "proofing cloth", a cotton/linen towel that is properly seasoned with flour and a bit of wheat bran. Next time, I'll probably cover it first with a damp cloth and then wrap it up with the rest of the proofing cloth - the top of the rising loaf dried out just a bit. I don't think it mattered so much, since I turned it over when it came time to bake. I also gave it three little slashes across the belly to aid in expansion.


hipstamatic beer bread.

This bread has a malty undertone once baked that doesn't read so much as "beery". It also has sweetener, something I would have liked in the beer sandwich bread. I cut back on the sugar called for, and next time, will cut back again. It was just slightly too sweet for my tastes, which tend to be on the lower side. You could easily double the recipe (using the whole beer), and make one large loaf, or two smaller ones. If making a larger loaf, you may need to adjust the baking time accordingly.

Beer Sourdough Bread (adapted from Elizabeth Yetter)
makes 1 small loaf
  • 6 oz. room temperature beer, I used Sam Adams lager
  • 1/2 c. sourdough starter (well fed)
  • 2 T. sugar (next time I'll use 1 T.)
  • 3/4 t. salt
  • 2 1/2 c. bread flour
Mix beer and sourdough starter in a large bowl. The beer will foam up. Add sugar, salt and bread flour, and mix to form a soft dough. I left mine a little on the wet side, and kneaded lazily for about 3 minutes in the bowl. I also let it rise in the same bowl. Leave in a warmish room-temperature place to rise until doubled, about 2 1/2-3 hours (depending on the activity of your starter).

After 1st rise, gently knead dough for a couple minutes, and form into a loaf shape of your choosing. Leave to rise, covered in a floured towel, for 2 - 2 1/2 hours until risen (I like to poke my finger in and make sure the indentation stays rather than bounces back.) Towards the end of the 2nd rise, preheat oven to 450 f. with covered cast iron pot on the middle rack.

Bake for 20 minutes, then remove lid of cast iron pot and continue baking 10-15 more minutes until crust is a deep golden brown. Loaf should feel light for it's size, and sound hollow when tapped on the bottom. Leave to cool completely before slicing.


The finished, baked bread smelled intoxicating (pun, possibly intended). It was just about 10:30 when it came out of the oven, and I knew I'd wait until morning to cut into it. It was a nice site to see a fresh loaf of bread on the counter when I entered the kitchen this morning. I had a guest for breakfast, and we ate half of it with smoked cheese from the Netherlands: the sweet, malty bread perfect with the smoked, herby cheese. Upon cutting into the loaf, I noticed large holes throughout. I didn't knead the dough as directed in the original recipe before forming into a loaf. I just held it in my hands, and turned it over on itself several times... and made everyone nearby smell and touch it for good luck. I'll try kneading it longer next time and see if that will distribute the holes a bit more evenly, even though I was more than happy with my results.

Please remember, that if you are in the Milwaukee area, I have sourdough starter for you if you need it! Just drop me an email, and you can start some experiments of your own!


(the post has been yeastspotted.)

Test Driving Yeasted Beer Bread

I was more than excited when Jeremy at Northern Brewer asked me to try making his yeasted beer bread recipe. Lately, I have been so obsessed with Christmas baking and one-pot meals that I feel that I haven't been overly creative when it comes to kitchen experiments. This experiment confirmed that not only do I love a challenge, I love to document the challenge and I love the feeling of usefulness that comes from helping out a fellow experimenter. I was also secretly glad that the dough was vegan, since I haven't posted anything vegan in a while!


Using beer to make yeast bread seems to be a natural fit. After all, the exact same type of fermentation is taking place to develop each. The recipe Jeremy provided me was pretty bare bones: flour, yeast, salt, a touch of oil, and beer. I used a spare IPA that has been in the far back of the fridge for awhile. It's certainly not my most favorite IPA, (I'd probably give that award to Three Floyds or Lagunita's) but for the purpose of carbonation and moisture in bread, it did just fine.


I have to preface this whole experiment by saying that in all of the breads I've made over the years, I have had none that had this much rise, and such a perfect interior crumb. It was soft, and golden brown. The dough felt smooth to work with and actually felt like it was carbonated. I could tell when I worked with it that it was going to be light, but wouldn't have suspected that it would be feather-light...

I used a basic method of straight-dough breadmaking, taking a few tricks from Cook's Illustrated. When I first started baking yeast breads regularly, I began with their American Sandwich Bread, which is just that: a standard, slightly sweet and fortified, white loaf bread. Applying the same technique to this dough seemed to work just fine.

The first thing I had to do with an ice-cold, refrigerated beer though, is warm it up. I didn't want to heat it on the stove or in in the microwave, hoping to preserve those carbonating bubbles. Instead, I ran some super hot tap water, and put the sealed bottle in a bowl of it for about an hour. The bottle felt warm to the touch, as did the beer when I poured it out.

I altered the recipe slightly to include a little more liquid and salt, and I mixed it in a stand mixer. You could easily mix it by hand, just increase the kneading time slightly. Basically, you want a smooth dough that isn't sticky to the touch. The finished bread has a bitter edge from using the IPA; even though I really liked it, I think I may add a tablespoon or two of honey next time to counteract. This bread makes a killer grilled cheese.

IPA Bread (a.k.a. Jeremy King's Beer Bread)
  • 4 c. bread flour (I use King Arthur bread flour)
  • 1 1/4 t. kosher salt
  • 2 1/4 t. active dry yeast (or 1 packet)
  • 1 T. vegetable oil (I used olive oil, and eyeballed it)
  • 1 1/4 c. warmish beer, as described above
  • up to 1/2 c. additional water or beer if needed
Preheat oven to 200 degrees. When the oven comes up to temperature, leave it on for 10 minutes, then turn it off.

Meanwhile, place flour and salt in the bowl of a stand mixer fitted with dough hook, and stir to combine. Open beer, and pour carefully (to avoid a "head") into a large measuring cup. Add oil to measuring cup. Have the additional water or beer ready at the side of the mixer.

With the mixer running, add yeast to the beer and oil in the measuring cup. It's going to foam up vigorously, so work quickly. Stir to combine and immediately pour into the running stand mixer. You should be able to tell within a minute or so if you need additional liquid, I used about 1/2 c. extra water. Continue kneading for about 5 minutes until a smooth, cohesive dough is formed.

Turn dough out onto a lightly floured surface, and knead by hand for a minute or so to shape into a tight ball. Place dough into an oiled bowl, turn to coat, and cover with plastic wrap. Place in preheated oven (which has been turned off), and let rise until doubled in size, 40-50 minutes.

When dough is finished with the first rise, turn it out onto a lightly floured surface and gently press air out. Aim to make a rectangle about 1 1/2 inches thick, that you can roll up into a loaf shape (so no longer than about 9 inches on one side). Tightly roll dough up into a loaf shape, and pinch the seam closed. Place dough in an oiled loaf pan with seam side down, and gently press dough into all the corners of the pan. Cover with plastic wrap (you can use the same piece that you used for the first rise), and place pan in a warm place to let rise for 20-30 minutes until dough almost doubles in size (this was about an inch over the top of my loaf pan).

Preheat oven to 350 when this is happening. (I typically put the loaf pan to rise on top of the stove, since it is pretty warm with residual heat from the oven.)

Bake for 35-45 minutes, until the bread is golden brown, and sound rather hollow when tipped out of the pan and tapped on the bottom. Temperature, if you choose to check it this way, should read at least 190 when thermometer is inserted in the bottom of the loaf.


Prior to first rise.


End of first rise.


At the end of the second rise, a finger poked into the dough should remain...


I let the dough rise in the pan to about an inch above the rim.


...and I took it's temperature to double check my done-ness. It was 192.7 f.


So there it is: a perfectly tall and domed yeasted beer bread. It was hard to wait for it to cool, but I was able to endure the time to confirm that the interior was tightly knit and perfectly uniform. I ate the heel straight away, unadorned, so I could get an unbiased taste. It was great, and it was actually beery - something that surprised me. It was great alongside the soup I made for supper last night, and toasts extremely well. I may have a new favorite loaf pan bread recipe...


I'm not sure if this technique would work with my sourdough method. I am curious if the beer would ferment happily along with the starter for 18-24 hours before becoming bread, or if it would become too alcoholic and kill off the balance of the sourdough culture. The only way for me to know would be to try (or Google, I found one already here)... I'm also wondering how the flavor would change if I used different beers, weiss beers may make a fruitier loaf, and syrupy stouts perhaps a more molasses-y one. More complex home brews are going to have more interesting results, no doubt.

Now that the newness of January is almost a week old, I can start to see where my new year is heading. While I don't envision myself becoming a full-fledged brewer this year, I can see myself tinkering around with more beer-based recipes. I like thinking that in times past it was probably the women of the households that were culturing, brewing, and fermenting things to feed and nourish their families. In our modern American world, the craft of home brewing is usually dominated by men. Where and when did this shift take place? Man, have I got a lot of reading to do... good thing it will still be Winter for a few more months.

The more I experiment with and read about, the more I realize just how connected all foodstuffs are. The people curious in general with food and drink tend to overlap, making us all better rounded in the long run. Good things to remember in the New Year!

On and Around New Year...

New Year's Eve and Day have both come and gone, and now I'm surrounded by leftovers from the past several days. Not that I'm complaining. It was fun turning my house into the central hub of girlie conversation for a few days, punctuating our jabbering with as many sweets as we could hold. I rarely do as much visiting as I have done in the past few days, and now that the house is quiet, I miss it greatly.

On the sweets front, I already had quite an impressive amount of leftover Christmas cookies, and more added to me from my Mom. But an email from Northern Brewer convinced me to bite the bullet and add even more. You may remember the beginning of my obsession with them back in June when I started brewing kombucha. Though I haven't been there for a visit in a pretty long time, just the thought of their store still excites me. It's like a well organized and stocked pantry of laboratory supplies for obsessive fermenters like myself. If you are of the curious type and just walk in the front door, you immediately find inspiration and 20 new things you feel as if you must try. No surprise then that the mere mention of a New Year's Champagne Cake led me to yet more sugar.


I decided to turn a half recipe into 18 cupcakes. They are simple, yes, but actually quite elegant and complex. I topped them generously with an orange cream cheese frosting, which proved to be the perfect complement. I think I ate 4 of them all by myself on New Year's Eve... and I'll be the first to admit that I'm not the least bit sorry. I tried them both cold and at room temperature (since some people like refrigerated cake, and I usually do not), and I couldn't really decide which way I liked them best. At room temperature, the frosting was soft and droopy, from the fridge it was a bit more sturdy.

The room temperature cake tasted surprisingly like the inexpensive, yet delicious, Cristalino Brut Cava. This Spanish sparkling wine is actually a really great match for many different food types. (I once memorably served it with a Portuguese fish stew.) It has aggressive bubbles, and a semi-sweet flavor that believe it or not actually makes a simple butter cake recipe taste beautifully like champagne.

Plus, how much fun is it to say Champagne Cupcake?

Champagne Cupcakes (slightly adapted from the Northern Brewer blog)

makes 18
  • 1/2 c. (1 stick) butter, room temperature
  • 1 1/4 c. granulated white sugar
  • 2 eggs
  • 1 t. vanilla extract
  • 1 1/4 c. champagne or sparking wine
  • 1 1/2 c. plus 3/8 c. (6 T.) AP flour
  • 1 1/8 t. baking powder
  • 1 1/4 t. baking soda
  • 1/4 t. salt
Preheat oven to 350.

In a medium sized bowl, sift (or stir) together flour, baking powder, baking soda and salt.

In a large bowl, cream butter together with sugar until light and fluffy, at least 5 minutes. Beat in eggs, one at a time, beating a full minutes after each. Beat in vanilla.

Add flour alternately with champagne (or sparkling wine). (Add flour in three additions and the wine in two, beginning and ending with the flour.) Mix until well incorporated, but do not over mix.

Portion batter into 18 cupcake liners and bake for 20 minutes, or until toothpick inserted in the middle comes out cleanly.

Cool completely before topping with Orange Cream Cheese Frosting. (recipe follows)


This frosting makes a little more than you probably want to use on a batch of 18 cupcakes (or, maybe not!). This frosting is so good, I have an overwhelming urge to make some vanilla ice cream to use up the rest. I've never added leftover frosting to an ice cream before, so I'll let you know how that works out for me.

Orange Cream Cheese Frosting
(adapted from Epicurious)
  • 8 oz. cream cheese, room temperature
  • 4 T. unsalted butter, room temperature
  • grated peel of 1 orange (preferably organic, about 2 t.)
  • 1/2 t. vanilla extract
  • pinch of salt
  • 2 1/2 - 3 c. powdered sugar
  • 1/3 c. sour cream, cold from fridge
With a hand mixer, beat butter and cream cheese until very soft and well combined, then add orange peel and vanilla. Add about half of the powdered sugar, and continue mixing. After the powdered sugar is incorporated, add about half of the remaining amount. Mix well, then taste and add a pinch of salt if you feel it needs it. Mix in sour cream, and beat well. If the consistency is too soft, add a bit more powdered sugar. Refrigerate for a half hour or longer (to firm up a bit more) before using a knife to top cupcakes.


Prior to the overindulgence of sugar, we actually attempted to be quite virtuous by making pizza. Any time I have company, I use the excuse to knock out another of the veg heavy Lahey pizzas on my Lahey Project list. This delicious specimen was the Pizza Radici de Sedano, or celery root pizza.


I'd have to say, that this is the variety that I was looking forward to the least, and the one that is probably my favorite so far. The celery root turns soft and nearly potato-like in some parts, while still retaining the trace of celery flavor. Another of the cheese-less pizzas in My Bread, I decided that being from Wisconsin entitled me to add just a little bit of Parmesan during the last few minutes of baking. We can't see it floating on the top, but are convinced that the salinity of the cheese is a good addition to an already perfect recipe. I can't help but say it again: You have to get a copy of My Bread for yourself!

Though we could have easily survived on leftovers and sugar well into the new year, I decided to make a New Year's Eve Gumbo on December 31, 2010. I had proudly made a stock from shrimp peels that my Husband peeled for me (his only kitchen task, and one he enjoyed!) last month using the method that Sally Fallon outlined in Nourishing Traditions. I'm actually a "take it or leave it" type when it comes to shrimp, and this stock smelled so delicious when I was simmering it that I could hardly wait to use some up in something. I only ended up using a cup in this gumbo recipe from Paula Deen, but I'm convinced that it made a difference.


I took back my vow of "no chicken parts" for one day, and used 3 chicken breasts along with andouille sausage and a half pound of shrimp for this southern stew. I have never made this before, and am so thankful for leftovers and the promise that it will be made again. I hate the description, but I'll use it anyway that the broth was actually silk-like, since the pot was thickened with a whole half cup of flour. A fair amount of veg was present for all of that meat: a large green pepper, onion, okra and home canned tomatoes. We served the gumbo on plain white rice, and garnished with slices of sourdough bread. I was actually surprised that the meal wasn't as heavy as I anticipated. Well, at least not until I continued eating Champagne Cupcakes on into the wee hours of the morning.

Gumbo (adapted from Paula Deen, via Food Network)

serves 8-10
  • 3 large boneless, skinless chicken breast halves
  • salt and pepper
  • 1/4 cup coconut oil
  • 12 oz. andouille sausage, cut into 1/4-inch slices on the bias
  • 1/2 cup AP flour
  • 5 tablespoons butter
  • 1 large onion, chopped
  • 5-6 cloves garlic, minced
  • 1 green bell pepper, seeded and chopped
  • 3 stalks celery chopped
  • 1/4 c. Worcestershire Sauce
  • 1 smallish bunch of parsley (flat leaf)
  • 1 c. shrimp stock (could use chicken or beef stock to equal the 4 cups of liquid, we agreed that 4 cups of the shrimp stock may have been too "shrimpy".)
  • 3 c. water
  • 14 oz. "stewed tomatoes" (1 can, or equivalent home-canned)
  • 2 cups frozen, sliced okra
  • 4 green onions, sliced, white and green parts
  • 1/2 pound small shrimp (25-30 size), peeled and deveined

Season the chicken with salt and pepper. Heat the oil in a non-reactive (enameled) dutch oven over medium-high heat. Cook the chicken until browned on both sides and remove. Add the sausage and cook until browned, then remove. Sprinkle the flour over the oil, add 2 tablespoons of butter and cook over medium heat, stirring constantly, until brown, about 10 minutes. Let the roux cool slightly.

Return the Dutch oven to low heat and melt the remaining 3 tablespoons butter. Add the onion, garlic, green pepper and celery and cook for 10 minutes. Add Worcestershire sauce, salt and pepper to taste and 1/4 bunch chopped parsley. Cook, while stirring frequently, for 10 minutes.

Add 4 cups liquid (shrimp stock/water or other stock), whisking constantly. Add the chicken and sausage. Bring to a boil, then reduce the heat, cover, and simmer for 45 minutes.

Add tomatoes and okra. Cover and simmer for 1 hour. Just before serving add the green onions and shrimp. Cover and cook until shrimp is opaque and cooked through about 3 minutes. Add additional chopped parsley, and serve over rice.


I reheated the last of the celery root pizza for lunch today, and look forward to a little bowl of gumbo for supper later tonight. Meanwhile, I'm sitting around in a clean-ish house after having taken my tree down yesterday. It's always a bittersweet time of year for me, I love Christmas and it's joy, the remembrance of the deepest things of life. A year ends, another notch indelibly marked into our lives, and January begins as a clean slate with nothing on the horizon.

The days seem immediately to lengthen, and the circle of seasons and life continue on. Being the homebody I am, I wonder what I can get myself into for the next few months before all I want to do is be outside, and I have a few ideas. If you have any suggestions, send them my way. Meanwhile, I'm off to read about sprouting grains...

Happy New Year!!