World Nutella Day? I'm In.


In the last "real" job I had, I worked odd hours at the airport. During this time, I worked with a guy who had two full time jobs, one for us and the other at a foundry. I know for a fact, he was working 80 hours a week, and still had time to play soccer and stock up on the cherry Luden's cough drops for which he was famous for offering out of his shirt pocket. "When do you sleep?" I asked him. "Oh, mi hija, I sleep four hours a night. That's all I need."

Four hours seems a bit on the shy side, but I do think of him whenever I hit my 6-7 hour mark and wake up bright eyed and completely rested before 4:00 AM. If I am tired and decide to turn in early, as I did last night, sure enough the morning comes much earlier than usual. Try as I might, I can not get back to sleep. Fortunately, I have the palm sized Internet to keep me from getting up and waking the boys before their time.

I'm not a huge Facebooker. I wish I could be a social network guru, but to be honest, I don't really care. I do find it useful to weed through potentially interesting information and blog posts that I may not get to if I didn't have the reminder. Generally, in the early hours, the few European contacts I follow are most active - in the case of this morning, David Leibovitz. He informed me today was World Nutella Day, and continued with a blog post about making it yourself. He opened with a story about one of his past co-workers, which I found fitting as I lay reading in the dark of nearly 4 AM...


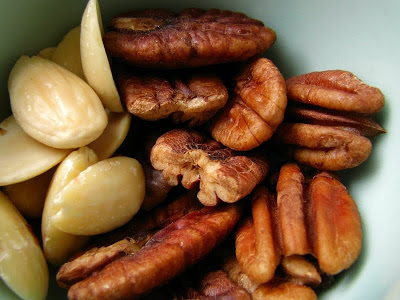
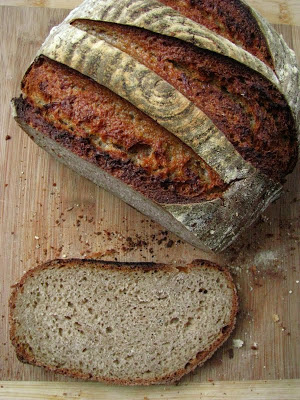
This was just the early morning convincing I needed to use up some hazelnuts that have been hiding out in the pantry since before Christmas. Hazelnuts are one of the nuts that I don't tend to eat out of hand as often as pecans or almonds, or pretty much any other nut. I had planned awhile back on making the recipe that the LA Times had published. But after Googling around for a half hour or so, and remembering about Sally Fallon's nut butters (she uses coconut oil and brined nuts...), I altered a bunch of methods to what I had. As soon as 7 o'clock rolled around (I did fall back to sleep somewhere around 6ish), I got up and toasted some hazelnuts.

Nutella is one thing that I can accurately remember the first time I tried. It was 1996, and I had recently met my soon-to-be-best-friend who had foreign jars of this Italian chocolate hazelnut spread. Sasa had told me that she actually didn't like peanut butter, since she was raised on Nutella. After a taste, I could hardly blame her. When I visited Croatia in the Summer of 1997, whole meals consisted of Nutella on crusty bread, the particular combination that appeals to most aficionados. It was a few years later, but eventually Nutella could be found in almost every common supermarket - probably just around the time that I began reading labels and noticing that although delicious, it was full of hydrogenated fat.

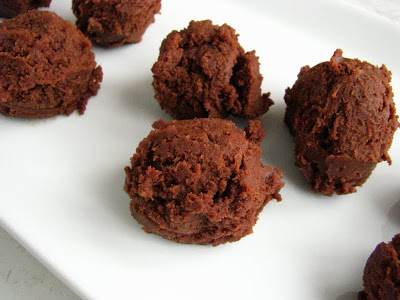
Until I made some this morning, I think it had seriously been years since I indulged in Nutella. This is a tragedy! Of all the things I've made at home to approximate their store-bought counterparts, this chocolate hazelnut spread is the closest to accurate. Knowing it is much more healthful, it can be an indulgence worthy of World Nutella Day and every day.

The recipe David Leibovitz posted looked great, but contained things not on hand like dry milk. As I'm not Parisian, and cannot toss on a coat and walk to the nearest market (well, I could but it would have taken me a few hours before I could have continued), I settled for blending a few different recipes. My package of hazelnuts was 8 ounces, shy of the 2 cups most recipes required. Many people mix this in their food processors with good results. I used the Vita-Mix, which produced an exceptionally smooth spread. It hardened in the fridge over the course of the morning, but softened when allowed to come back to room temperature in time for "lunch".


Chocolate-Hazelnut Spread (adapted from the LA Times, Su Good Sweets, and a few other perusals...)
  • 8 oz. raw hazelnuts
  • 3/4 c. powdered sugar
  • heaping 1/4 c. Omehene cocoa powder
  • 1 t. vanilla extract
  • pinch of salt
  • up to 1/4 c. coconut oil, melted
Toast hazelnuts on a sheet pan in a 350 degree oven for about 15 minutes - until they begin to smell toasted. Remove as many loose skins as you are able without being too particular. Unless you like being particular, then knock yourself out.

Blend the hazelnuts in the Vita-Mix (or food pro, it will take about 5 minutes according to most sources). When about half blended, add powdered sugar and cocoa powder and continue mixing until somewhat smooth. (It's probably not going to move through the blades until the oil is added.) Taste, and add vanilla and salt to your liking.

Then with machine running again, pour in the melted oil and process until it forms a smooth paste.

Makes a heaping cup or so of spread.


I am fairly certain this spread will not stick around for long. When I make it again, I may try brining my nuts overnight in salted water, then dehydrating them before continuing (and likely omitting the salt in the recipe). Many recipes also called for using honey as a sweetener, which appeals to me as well, even if it might change the flavor a little.


Do I think something as simple as chocolate and hazelnuts warrants it's own Day? Yes, I do. There are plenty of lesser things that we celebrate in life, that's for sure. One thing I know is if I wake up far too early again tomorrow, I'll hop quietly into the kitchen and get out a spoon... You will do the same if you make this stuff. It is perfectly addicting.

Sprouted Wheat Cookies, or In Which I Try Not to Really Want to be Driving a Luxury Car.


I can not tell you how often I think of George Costanza, specifically this quote: "I wish I was a Civil War buff". I guess, I don't care much to think about wars in general, but I frequently wish I was a buff about other things. Unlike Costanza, whenever I hear the "I wish" ringing proverbially in my ears, I do something about it. I may not have the credentials, but thanks in great part to my local library, the Internet, and my Husband (who affords me the luxury of my unemployed life), I can learn at my own pace about a whole mountain range of things. Lately, this predominately includes grains and sprouting grains.


Sprouted, and dried, spelt.

It took me awhile to actually set out learning about it, I won't lie. I do procrastinate, and get interested in goofy stuff that is time consuming outside of the food world. But, when finally I am properly obsessed, and armed with a plethora of information, I turn into a health food force to be reckoned with. For something as simple as cracking open a book or two, or spending a few unadulterated minutes with the computer, I can glean all I need to be a buff of sorts. A grain buff. That's right.

Whenever I feel a little broke and sad that I can't afford the things I'd like to have and maybe the things I'd maybe like to do if I was independently wealthy, I remember that I have one of the most marvelous pieces of machinery to be built on American soil: the Vita-Mix. I may daydream of German engineering, but I have a pretty well-designed, and tough-as-nails appliance at my disposal. I have nothing to wear to a 4 star restaurant, but man, I can grind grain in my own kitchen and that is amazing.

A few days ago, I sprouted some spelt to grind into flour. What is spelt? I actually never knew, despite my years of health-foodie shopping. Spelt is an ancient form of wheat, that is sometimes even tolerated by those with wheat allergies. It still contains gluten, allowing it to be used in bread making and in other baked goods. It may have also made a "comeback" because it requires less fertilizing than other grain. It has been cultivated in America since the 1890's, and interestingly (at least to me), the Germans have enjoyed it as Grünkern - unripened grain that is dried and eaten as is. Now, if I could be a R8-driving, Grünkern snacking, health food aficionado, I'd really have it made... A girl can only dream.


While I may have to daydream into the oblivion for the wheels, I'm probably closer to that Grünkern than I think. One thing that impressed me about the sprouted, then dried, spelt is that it was dramatically less tooth-breaking than it's wheat cousins. I actually chomped on quite a few of them in the process of checking it's dryness- and I also burned my left hand twice, since I've been doing my "dehydrating" in the oven for lack of a dehydrator. It was a bit less sweet than wheat in my opinion, but tasty. When ground into flour, it had all of the miraculousness of the other types of wheat I sprouted and ground: a blend of what I would call healthy and otherworldly sweet toothsome-ness. It is safe to say that I've never experienced anything like sprouted grain, and that I like it a whole lot.

There appears to be two camps when it comes to the nutrition in grain. One camp firmly believes that the phytic acid in grains is reduced only when the whole grain is left to begin it's enzymatic change via sprouting. The other camp affirms that already ground grains that are left to soak also are equally nutritious. I'm not sure which camp I belong to. I think that my sourdough bread is actually a bit better when using non-sprouted grains, and I have to think that the whole lot of it is cultured since it sits for nearly a day before I bake it. It is far less dense this way than when made with the sprouted flour. But on the other hand, sprouted flour is an entity to be reckoned with. It's almost too precious to be used on something for daily consumption.

Rather than be stuck in the middle of an unwinnable grain battle, I think I'm firmly Switzerland in that I will use the bulk of my sprouted grain flours in sweet baked goods. The flavor really shines, and I have no doubts that they are better for me than their conventional relatives. The first cookies I made used coconut oil and they were good. The second batch however, I used butter. They were fantastic.


After looking over a number of recipes, most are really very similar. About a half cup of butter or coconut oil and about a cup of sprouted grain flour is the common denominator in scores of cookies. If you start experimenting sprouted flour as I have, you will quickly find what appeals to you. What appeals to me is lightly sweetened, grainy tasting sweets, with a bit of chocolate to make me feel like I've eaten some dessert and not another piece of bread. I adapted today's version from Cheeseslave.

Sprouted Spelt Chocolate Chip Cookies (adapted from Cheeseslave)
makes 29 cookies with my small disher (about 1 1/2 T. balls)
  • 1/2 cup unsalted butter, room temperature
  • scant 1/4 cup raw sugar (I am working toward a better sugar option, but haven't gotten obsessed with that yet...)
  • 1 egg
  • 1/2 teaspoon vanilla
  • 1 cup sprouted spelt flour
  • 1/2 teaspoon baking soda
  • 1/2 teaspoon sea salt
  • 5 ounces tiny chocolate chips from Outpost (or your food co-op)
Preheat oven to 375.

Cream butter together with sugar until lightened, a minute or two.

Add egg and vanilla, and blend well.

Set a sifter over the bowl, and add the flour, baking soda and salt. Fold in with a spatula until combined, then add chocolate chips and fold until evenly dispersed.

Scoop out onto parchment lined baking sheet, and bake 10-12 minutes, rotating sheets half way through the baking time.


If you have ever had a little package of cookies from a vending machine and envied the texture, these are the healthful version for you. They are crumbly and buttery, slightly sweet and the teeny tiny chocolate chips really make it feel "processed" in all the best ways. Not to mention, I think the chips I can get in my co-op's bulk bins are organic to boot. Not bad for a little something sweet after supper!


As the wind and snow howl and we hunker down for the evening, and likely the bulk of tomorrow, I'll have slowly sprouting grain to keep me company. The garage, however, will likely pine for the dream car for years to come. A cupful or two of grain can easily keep my enthusiasm forever, and well within my meager means.

My Dad always says that I have "Champagne taste on a beer budget", and I really wouldn't have it any other way. I really wish I could say that I was a car buff, an "enthusiast" if you will, that had the USD's to take driving tours of Europe, but if I did I've never be crazy about grain or likely any foodstuff that enriches my life abundantly. I'll decide instead to be content, to settle for being a grain buff for now, eyes forward, looking for that next impossible infatuation - one that can be mine since I am not George Costanza.

Ahhh, Weekend Breakfast.

Saturday is a leisurely day for many people, although I feel privileged to lead a life mostly comprised of Saturdays so to speak. Lo mentioned something about sourdough English muffins yesterday, and here on my table for a shared Saturday breakfast are gorgeous sourdough English muffins. Let me tell you, sourdough fiends, they are amazing.


Food classified under the terms of traditional food, nutrient rich diet, or the Nourishing Traditions diet seems to be my reading and obsession focus as of late. Tiny whispers of things like brined nuts that entered my thoughts via Food 52 this week spurred me to delve into yet another section of Sally Fallon's book on soaking nuts and seeds. Sproutman's Kitchen Garden, on my shelf since summer, has received a thorough perusal. No more Maseca to make tortillas, instead I can sprout popcorn? Can my Vita-Mix even handle this after 5 days of waiting and watching and then an hour's worth of boiling pebble-like, jaw-breaking popcorn? Just to make tortillas? It is a good thing I live mostly in the extra time of Saturdays with all of the things that I have on the list of things to do. This ever-growing curiosity that so easily overtakes me without my consent, it's unrelenting.

Fortunately for me, most traditional foods are not complex or expensive, just a bit time-consuming. Usually unattended time, as I've mentioned before. Last night I decided that I had to have the English muffins, so I mixed up the batter and let it ferment until morning. The breaking of dawn, and I rushed to my kitchen to add minuscule amounts of salt, baking soda and honey, then made a complete mess of my counter by pouring olive oil over it in attempt to ward off sticking. But for a first attempt at naturally leavened English muffins, I am already in love.

I knew from making English muffins before that the dough is unruly. Sticky and stubborn, it has to be on the wet side to properly form the famous nooks and crannies. The oil-covered counter did work, but really I think that my method of making these beauties is only going to improve over time. Even by the time I griddled my last muffin, I had improved my method - finding that overlapping the edges of the risen dough to the center, then quickly transferring to the hot cast iron skillet on a well-oiled metal spatula gave me the best raise and the roundest muffin. But, as with most things homemade, I take delight in the notion that they are imperfectly beautiful.


Sourdough English Muffins (Erin, via GNOWFLINS - a really great pictorial tutorial, so click over there!)
  • 1/2 c. sourdough starter
  • 1 c. liquid (pretty much anything, but I used water... could use whey, milk, yogurt, coconut milk . . .)
  • 2 c. flour, any kind or combination (I used half AP flour and half wheat)
  • 1 T. honey
  • 3/4 t. salt
  • 1 t. baking soda
12-24 hours before you want to make the muffins, mix the starter, liquid, and flour. The batter will be very wet, but it will depend on the hydration of your starter. In my opinion, it can't really be too wet, though it makes it a tad hard to work with.

An hour before you want to make the muffins, sprinkle the honey, salt and baking soda over the top and stir in. Pour a tablespoon or so of olive oil on a clean counter top (I'm guessing that a smooth surface is going to prevent sticking more than a wooden surface), spread it around, oiling your hands in the process, and pour the batter out onto the slick counter. Knead with oiled/floured hands to make sure that the honey, salt and soda are well incorporated.

Divide into 8 pieces, and form into loose "patty" shaped mounds, using flour on your hands to help prevent sticking. Let the muffins rest on cornmeal covered silicone mat, or similar, for about an hour.

Griddle on medium to medium-low heat, preferable on cast iron. (I don't have a huge cast iron griddle, so I used 3 different cast iron pans. I found that I had to keep decreasing the temperature as I griddled, since cast iron holds the heat so well. I also have well-seasoned pans, so I didn't need to grease them at all). Griddle side one for 5 minutes, then flip and griddle 5 minutes on the other side. Moderate the temperature so that the interior will bake fully and the exterior doesn't burn in the time allotted each side. After 2 or 3 muffins, you'll have it down.

Erin, via GNOWFLINS, said that these will last a week covered at room temperature, and will freeze well. This first batch is nearly gone, so I'll likely have no reporting to do on the shelf life for awhile...


I wasn't even going to go all out and make a full breakfast, but as soon as I smelled these, I ran down to the basement freezer and grabbed a package of pork sausage from last year's pig. I still have a few packages left before I can make room for this year's... which makes me think that I should have shared weekend breakfasts more often. I never seem to fuss when it is just for me, or even just for me and my Husband - but given the opportunity to cook for someone who loves to eat as much as I do, I quickly change my disposition. Sasa ate hers mopping up her sunny-side-up yolks, and I doused mine in lemon marmalade and grape jelly. We both agreed that these English Muffins are the best.


After breakfast, I attended to my growing kitchen responsibilities, which now include rinsing grains along with feeding that thriving sourdough starter. What kitchen miracles are unlocked each day when nutrition is enhanced by doing simple tasks! I swear, I've never tasted a nut or grain in it's full glory before brining it and then slow-roasting it, hovering and tasting my progress along the way as if I have another newborn child. This stuff actually tastes different: sweeter, healthier! I'm sure it is in part in my mind, but I don't even care. It's cheap thrills over here at casa rcakewalk... the kind that aren't bad for you in any way.


I've never even had spelt, let alone sprouted it...


Sally Fallon's "Crispy Nuts": forever ruining me from roasted...

I'm now looking forward even more to "borrowing" my Mom's dehydrator, so I don't have to attend to the oven, it's door ajar for hours when I monitor the drying of various things. And next time I go up to visit, I'll likely be packing some of these delicious English muffins as a trade.


UPDATE:
I have found that I can totally skip the oiled countertops and wrestling with super sticky dough! Just sprinkle the honey, salt and baking soda over the top, and stir to combine. Then, let it sit for an hour. When it's time to griddle, just fill a pint glass with water, and dip a disher (I use 1/2 c. size) in it. (Water prevents the sticky dough from collecting on the disher.) Then, scoop up the scoop of dough and deposit it on the hot griddle. Quickly dip your fingertips in the water, and briefly flatten the muffin into a nice round shape. That's it! Continue as described above, and enjoy less kitchen clean-up!!

Daring Bakers January 2011: Jaconde Imprime Entremets

The January 2011 Daring Bakers’ challenge was hosted by Astheroshe of the blog accro. She chose to challenge everyone to make a Biscuit Joconde Imprime to wrap around an Entremets dessert.


I had never heard of this month's challenge. Essentially, it is a French sponge cake that has a pattern baked into it, and then it is cut and used in a mold to encase something delicious. Usually, this deliciousness is a pastry cream, mousse, or other similarly creamy concoction, perhaps sandwiched between layers of cake and topped off with whipped cream. Our challenge was to make the jaconde imprime (patterned cake), make it into a mold of our choosing, and to fill it with whatever we desired.

The cake itself is made from almond meal, a touch of flour and eggs, and is not particularly sweet. The imprime batter, or the dense foodstuff that is what forms the pattern, could have been made either with the cocoa powder as I did, or left plain and colored with food coloring. Since I am not in the food coloring camp, I decided on the chocolate version first. Then, I spent part of the month thinking about what to fill it with.

The jaconde (sponge cake) has 3 egg whites, and 3 eggs in it and the imprime batter has 6 or 7 (I used weight measurements) egg whites in it. I couldn't bear the thought of making an egg-heavy cream to fill the petite desserts, especially since it may be awhile until I get back to my egg supplier. I could, however get behind the thought of the leftover orange cream cheese frosting from the cupcakes I made for New Year's Eve...

It would not be a lie to say that I figured that an ice cream made from this frosting would be the best one I've ever made. The frosting was on the sweet side, and my favorite (non-custard) ice cream base I usually leave less sweet. The marriage of the two would be one for the record books, I naturally assumed, and I assumed correctly. It took a couple of days to get truly hardened in the freezer, but still maintains the softness and creaminess that this ice cream base is usually lacking due to it's absence of egg yolks. What better to fill a cake with than icy-creamy orange and walnuts?


It bears noting that I would most certainly make a batch of this frosting just to use in this ice cream. I am famous for having all sorts of leftover frostings in my fridge, after all they nearly never go bad with all of the sugar they contain. If you would make the frosting solely for the purpose of the ice cream (and not to indulge first in Champagne Cupcakes), I would probably make a half batch. Unless you are thinking ahead and would like leftovers.

Orange Cream Cheese and Walnut Ice Cream (adapted from David Leibovitz via Burp!, Epicurious, and rcakewalk)
  • 2 c. heavy cream
  • 1 c. milk (I use 2%)
  • scant 1/2 c. sugar (I use raw)
  • pinch of kosher salt
  • 1/2 t. vanilla extract
  • about 1 - 1 1/2 c. Orange Cream Cheese Frosting
  • 1/2 c. walnuts, toasted and chopped into medium sized bits
In a small pan, heat 1 c. of the heavy cream with sugar and salt over medium heat, stirring until all the sugar has dissolved. Remove from heat and pour into a clean bowl.

Pour remaining 1 c. heavy cream, milk, and vanilla extract into heated milk mixture and stir to combine. Place in refrigerator, and chill until well chilled. (This can be up to two days, or as quickly as an hour or two.)

Churn ice cream in machine according to manufacturer's instruction. I have this model, and it takes about 20-25 minutes to get fairly firm. (The ice cream will harden in the freezer, essentially the machine is churning air into it.)

When the ice cream is nearly done, add the cream cheese frosting in dollops, and continue churning about 10 minutes for it to fully incorporate and get a bit firmer. (Even though I used leftover frosting that was cold from the refrigerator, it still brought the temperature of the ice cream down, and looked at first like it was not going to freeze into a hard ice cream.) Just before transferring to a freezer safe bowl, add in the nuts and let them disperse evenly. Don't worry if it seems very soft.

Freeze for at least a day for best results. If you are eating it as is, it can be soft set in several hours.


A day or two after making (and trying not to sneak spoonfuls of) the ice cream, I commenced with the rest of the challenge. The imprime batter that would become the pattern of the cake was very thick, and also not too sweet. I decided that I would pipe a haphazard design onto my silicone mat, including my rcakewalk signature... can you see it?


I let it sit in the freezer for 30 minutes when I prepared the sponge. The sponge was easy, and tasty enough if not highly flavorful. The batter, however, seemed very loose and I wasn't sure it would bake properly. I have made other sponges, and when making this again I would probably go with a batter that is a bit more dry. It did bake at a higher temperature, so perhaps baking at lower heat would have solved my problem?


sponge over the design.


baked about 9 minutes.

Even though I had high hopes, I already knew that the sponge was kind of uncooked in the middle. It felt soft and springy, and was properly browned, but after I let it cool about 5 minutes and tried to carefully peel off the silicone:


It was damp - even falling apart - in the middle, but the edges were baked perfectly dry and fairly flexible. I considered trying to re-bake it, but it was already sticking to my confectioner sugar covered parchment paper so I decided to salvage what I could for the challenge's sake and move along with my life.


cooked edge, nice and sponge-like.

From the entire sheet pan, I was able to use just the edges to get two small desserts. I figured this was fine with me, since I've come to realize that the challenges are more of a learning process for me and that usually it's a bonus when something is tasty and works well. I also knew that given my flavor choices, my boys wouldn't be knocking me over to get to it either. Two little desserts that can be stored in my freezer, out of temptation's way, sounded just about right to me...


I prepared my egg rings into molds.

Carefully, I was able to cut the sides of my fragile cake. I also pieced together a bottom, and pressed it firmly to form a base. I froze the cake rings overnight, and the next day "molded" the cake into submission a little more. Then, I took scoops of ice cream, softened it in my hands, and molded it into the centers. I mounded more ice cream up over the top, relying on the parchment that extended above my rings to keep it in place. When the ice cream froze hard, I smoothed the top with a hot knife and popped it back into the freezer. Meanwhile, I used some leftover tempered chocolate from my Christmas baking to make squiggly designs for the tops.


When it was finally time to taste all of the components working together, I realized the cake is a decorative, supporting member of this union. Further, I noticed that my tempered chocolate garnish was not just artistic, it actually lent a much needed chocolate note to my finished dessert. The walnuts added crunch to the middles, and the cake is so thin that it defrosts quickly when removed from the freezer. Surprisingly, this is probably one of the best desserts I've ever made! I'm actually looking forward to trying to find a better way to bake the sponge; maybe I will be able to learn more after looking at more Daring Baker results!

One last "problem" I had was that the joconde imprime batter (the chocolate decoration part) made a huge amount. I could have tried to make another sponge, but truthfully, I just wanted to clean up the kitchen and be done with it. I put it in the fridge to think about what could be done.


Then I thought of my boys, who would most definitely appreciate chocolate cupcakes a little more than sophisticated French entremets. Using one of my favorite chocolate cake recipes from the Moosewood Restaurant's Book of Desserts that I amped up with a bit of cinnamon, I dropped truffle-sized balls into the middles of the cupcakes. They baked their normal 20 minutes, and then I let them cool down before examining and tasting them. The chocolate middles sank to the bottom, turning into an almost brownie base. I'm thinking if I would add some cayenne to them prior to rolling, I may have been happier with the flavor, and maybe I can try this since I froze the remaining imprime in balls.

But actually, when I tried a cupcake later in the day with a scoop of Orange Cream Cheese and Walnut Ice Cream I was really on to something. Cinnamon, chocolate and orange: my new trinity of benevolent flavors. A pinch of cinnamon (spicy Saigon Cassia) may just find it's way into my next batch of orange ice cream...


Even though I was totally procrastinating the challenge this month, I am so happy with my results. They may not have been perfect, but I feel like I really learned a lot. If you are interested in exploring the recipes yourself, you can find them in the Daring Kitchen recipe archives. Thank you to Astheroshe for hosting a great challenge, and I can't wait to see what some of my favorite Daring Bakers have come up with!

Sprouted Wheat Sourdough, or a Lesson In Patience.

This is the loaf of bread that took 4 days to make.

After my first taste of sprouted flour, I sprouted a couple cups of hard Winter wheat berries I had picked up from my co-op. They sprouted easily in 2 days, and I dried them in the oven with the door cracked open for about 3 hours. I let the wheat berries cool, then ground them into flour. Then, I didn't hesitate to mix up a dough with the entire amount I had just sprouted and ground.


While my end result is amazing and complex, it has little to do with me. My dough was so dense after the mixing, that I could already envision a brick emerging from the oven. And, I even broke down and added a little bit of white bread flour. Needless to say, when the dough rose for more than 24 hours and still looked like this:


I decided that I didn't have to waste this somewhat puffy wheat dough. I have a preserved magazine article from Bon Appetit, many years old in which Pamela Fitzpatrick (protegee of Nancy Silverton) uses a biga to start ciabatta bread. Walnut size chunks of dough are broken up and added to more flour after vacationing overnight in the refrigerator. Yesterday morning, about 7:30, I broke my dough into bits. I added another 1/2 cup of starter and enough water to get everything saturated. Then, I added a good amount of that dreaded white flour, along with a little extra salt. In hindsight, I probably didn't need to add more starter... and the addition of it may have contributed a bit of extra sourness.


After this doctoring, my dough came together nicely. It felt like it would no longer bake up into a nearly inedible piece of health food, but may have some character all it's own. I let it rise again, wrapped in towels and perched on my Bose Acoustimass module somewhat near a heat source in the living room until just after noon, when I transferred it to the brotform.


End of the 1st rise.


As 5:00 approached, I stuck my fingers into the dough to see how I progressed. This is the point in which I should have waited a bit longer, but was just plain tired of waiting. I started the oven, and figured an additional half hour waiting on the oven heat would be good enough. Well after 6:00, the bread emerged from the oven. Split decoratively along the fault lines I cut, I could tell it was a much heavier loaf than I normally make. It did sound hollow on the bottom, and smelled enticingly of nutty wheat. While I couldn't wait for it to raise a little longer, I could wait to cut into it. In fact I waited until after 10:00.

And so another Friday night spent at home, tinkering with bread. I know that I'll likely be the only one to eat this loaf, but I have the biggest smirk on my face while doing so. It's delicious. It's wheaty and dense, but has all of the character of a well written novel. It's complex and not just "healthy tasting". I had some for breakfast this morning with orange marmalade, which may or may not have been the correct choice. The layers of sourness were more pronounced. But, served with cheese I know it will transcend the trappings of the mortal world.


The delicate taste of the sprouted wheat may be clouded by the more assertive sourdough culture, but I'll likely make this type of bread again. This is the bread I imagine my European immigrant side of the family coming to America with. Another thing that is completely amazing to me about all of the sourdoughs I have experimented with so far is that I have not seen one trace of mold. Even after a week or more on the counter (I keep my bread on a bamboo cutting board, covered with my glass cake dome), the worst that can be said is that it is a little dry. That is something that the toaster can easily take care of.

I may have gotten a little more loft if I had been more patient, and I need to remember that next time. But impatient or not, it has been a good bread week.