Strawberries. With Chiles.

Strawberry jam has never really been one of my favorite things, though the strawberry itself is. I I feel that not much can improve the natural sweetness of early Summer berries, and adding a boatload of sugar to jam boosts that sweetness to a level that almost makes my teeth hurt just thinking about it. Nevertheless, I make strawberry jam every year.

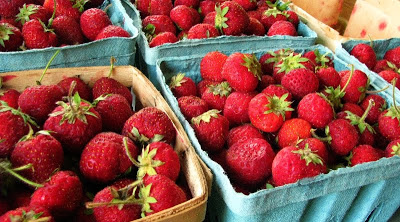
My strawberry season is late this year. My 16 quarts of Amish grown and picked berries were delivered to me last weekend by my Parents, who came to celebrate the Kiddo's birthday. The berries were close to the final picking, and were smaller than the first pickings, but they were sweet and delicious and I was thankful for them.


In the past, my strawberry jam was always made with boxed pectin, but as a recent convert to pectin-free jams I may just find that my stigma against strawberry jam is over. Although the sugar is still high, the soft set of the jam is much more desirable to me - and deciding to add some chiles to the jam pot tempers the too-sweet phenomenon with a deep earthy undertone.

I've seen a number of strawberry-chile recipes around, and originally thought I'd make this one: Tigress's Strawberry Chipotle jam. I do love chipotle, but thought that making a batch may limit my consumption and gifting options. Chipotle is a strong chile flavor, and although I love it, I wanted a soft, what-is-that? flavor. Ever remembering Rick Bayless's words declaring the stately Guajillo chile the "workhorse", I dipped into my large bagful and chose two brick red specimens to include.


I based the recipe on Linda Zeidrich's Strawberry Orange Jam in The Joy of Jams, Jellies, and Other Sweet Preserves. I altered her method a little, since I combined all the ingredients and let them sit at room temperature for about 24 hours. I think 12 hours would have sufficed. I didn't mash the berries until I began to cook them down. Curious as I am, I lifted the lid on the pot several times when the berries were relaxing. I knew orange and guajillo worked well on pork, and figured they could only improve berries too - but the seductiveness of strawberry-guajillo jam was too interesting for words. Spoons dipped in, I followed the mellowing process to discover the chiles adding the mildest bit of heat, but the strongest undertone of warmth. Indeed, the finished jam coated the back of my throat in coziness, a nice departure from the tongue-stinging bite I usually demand from chile. This is one recipe that I'll be making for a long time I think.


Strawberry Guajillo Jam with Orange (adapted from Linda Zeidrich)
my yield was 6 half pints
  • 3 lbs. strawberries, hulled
  • 1 medium sized orange
  • 2 dried guajillo chiles, stemmed (use the seeds as well)
  • 4 1/2 c. sugar
Remove the zest of the orange with a peeler, and slice into thin shreds. Squeeze out the orange juice and add to the berries in a non-reactive preserving pot. Chop the guajillo chiles into small pieces and add to the pot. Add sugar, stir carefully to combine, and let the pot sit covered at room temperature for 8-12 hours, or longer if you have to.

When ready to make the jam, heat the pot over medium heat and stir gently to fully dissolve the sugar. Raise the heat, continue cooking until the jam boils, mashing with a masher to break up the fruit as desired and skimming off the foam, until a drop of jam mounds slightly in a dish. (I had a number of dishes in the freezer to use as testers, but didn't use them at all. You can really feel when the consistency of the jam changes as you stir.)

Ladle the jam into sterilized jars, add lids and rings, and process for 10 minutes in a hot water bath.

(I have not made my own pectin, which I plan on trying. This can be done with high-pectin fruit such as green apple or gooseberry. My jams boiled away for quite a while before reaching the jam point, the added pectin would reduce that. But like I've said before, if I'm rich in anything, it's time...)


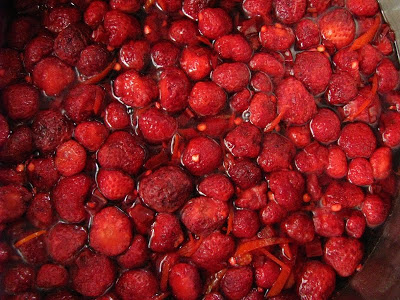
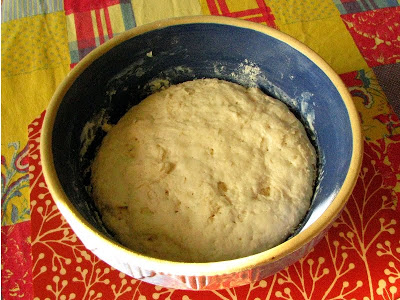
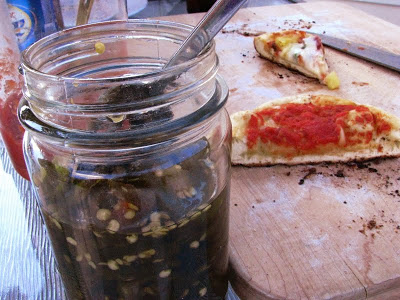
after sitting overnight.


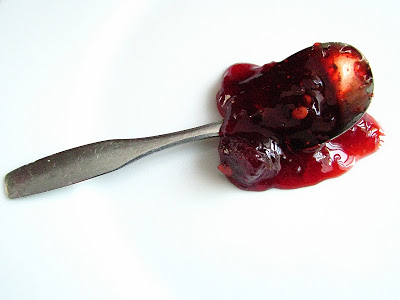
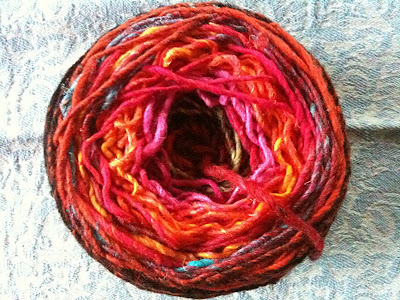
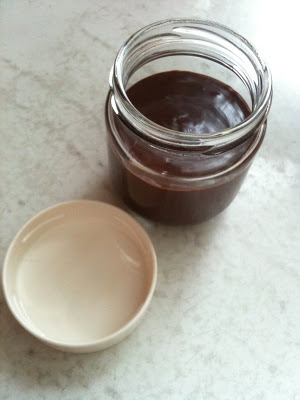
the finished jam. softly set, perfectly gorgeous.

I actually bought the Linda Ziedrich book I mentioned above for my Mom this past Mother's Day. I had rented and read it from the library, and figured that she and I both would enjoy the use of it in our own shared library. She brought it down when she came, and I hungrily reread the opening "Preserver's Primer" where Linda gives an overview of the history of preserving and the tables of pectin and acid contents of fruits. Then, I happily skipped to the recipes on strawberries, figuring to choose 2. Thinking of shrunken heads and whole fruit preserves, I made the extremely high sugar strawberry preserve recipe. I didn't add anything to her recipe, though next time I may like a little diversity. The berries did turn out well, very sweet, and I think this will be a case where I use the preserve in something else that tames the sweetness rather than to slather it heavily on jam.
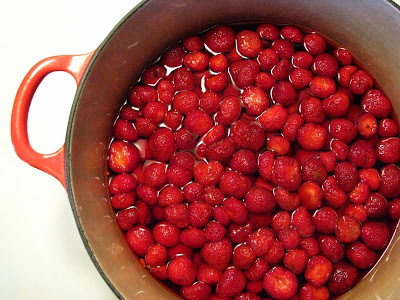
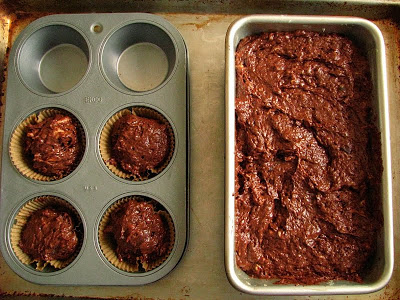

resting.


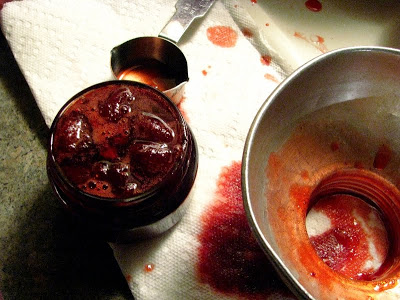
I had just a little 2 oz. jar leftover that I could taste when fully cool, and it was still super sweet. the berries were a great texture, however.

Now 10 jars of jam are resting on the shelf, but my favorite strawberry preservation method is just to hull, wash, dry and pack the whole berries into quart jars and then freeze them. Of my more than 16 lbs of berries, 5 1/2 were made into jam, a pound or two disappeared in fresh eating, and the rest are frozen in the deep freeze. I can usually finagle a few frozen berries out with a butter knife for smoothies, or better, I defrost a whole quart. When the berries are still half frozen, I cut them in half or quarters, and sprinkle them with just a bit of sugar. Then, they taste like their true strawberry selves, even if not able to be spread thickly upon bread. (Though if the bread has cream cheese on it first, it will work in a pinch!)


It seems I can never appropriately judge the volume of a container; I can't tell you how much extra dish washing I have done because of this. I suspect I've lost a week of my time to poor judgement, but I find it kind of funny. Frequently I can be overheard talking to myself - congratulating myself on my great spacial handicap, but fortunately the errors in my judgement usually only pertain to volume.

When I add chiles to sweets or savories, it always proves to be good judgement, and makes up for any disheartening times I've had meanwhile. I'm imagining even now that a spoonful of strawberry-guajillo jam stirred into hot chocolate may be transcendent, though I will wait until Fall for that. Meanwhile, I'll wonder if there is anything that the Guajillo can't do. I'm not sure I love any other chile more.

Sourdough CocoNana Bread (or Just Another Reason Why I Love Dorie Greenspan)

I'm sure that it's no secret that I love Dorie Greenspan. I don't really know of anyone who loves to bake who doesn't, and I think it's because in addition to her very likable personality, she also writes impeccable recipes. I consult her Baking book often, another in the stack of cookbooks that I have whole passages memorized from. Every recipe I've ever made from it has been a success: from the "adult" chocolate ganache cupcakes (gracing my CakeWalk banner above) to the Corniest Corn Muffins, each has been an instant favorite, and I'm hardly exaggerating. If you have been reading for awhile, you'll know that I don't actually own this favorite baking book of all time, instead I trek three quarters of a mile down the road and pick it up from the library every time I need it. The date due stamps are adding up over the years, and every time I check it out I wonder when I will finally break down and buy a copy of my very own.


For my Kiddo's birthday party on Saturday, I made a slew of chocolate cupcakes, and then a variation of her Perfect White Party Cake layered with Chocolate Malt Buttercream frosting for our family party later in the day. As if I would enter panic mode from not having enough chocolate to celebrate the momentous occasion of 5 years of my pride and joy, I decided to also "sourdoughize" a quick bread of Dorie's that I'd never actually tried in it's unaltered version: Coco-Nana bread.

It could be because my Parents came down to spend a couple of days (and we do love our quick breads with the morning coffee), or maybe it's because I was growing my starter bigger to be sure to have enough for plenty of pancake batter, but making this sourdough morning bread wasn't a mistake. I used a whole cup of starter and let it rise overnight until it was billowy and sweetly sour. I decided to scoop out 4 muffin-sized lumps from the rather full loaf pan after remembering my debacle with a recent cake and I'm fairly sure that proved to be a good decision. One muffin went (warm) directly into the Birthday Boy's mouth, where he promptly declared it delicious and I had no additional mess to attend to.


sourdough, overnighted.


If you plan the night before for this bread, it can be on the breakfast table in a little more than an hour. If you are in a rush, pop all of the batter into muffin papers, and they bake in roughly half the time. Either way the bread ages gracefully, gaining chocolaty depth and brownie points with children. You can easily pretend that you are having dessert for breakfast, which Dorie says is perfectly acceptable. She also says of her "coal dark morning loaf": "At first bite (it) is chocolate-chocolate, and then the banana flavor kicks in - it's altogether winning and, while it may feel decadent to have it at breakfast, it would be just as winning, if a little less racy, as a p.m. treat."

Agreed. And, seeing as my folks brought down my order of local strawberries, I'll add that sliced berries make a pretty great topping to a poundcake-sized portion as well.

Sourdough CocoNana Bread (adapted for sourdough from Dorie Greenspan - Baking From my Home to Yours)
  • 1 c. sourdough starter (100% hydration), fed somewhat recently
  • 1 3/4 c. AP flour
  • 1/2 c. buttermilk (I use my yogurt that is quite thin)
  • 1 c. cocoa powder (I used natural process)
  • 1/2 t. salt
  • 1 t. baking powder
  • 3/4 t. baking soda
  • 4 oz. (1 stick) butter
  • 3/4 c. granulated sugar
  • 1/2 c. brown sugar
  • 2 eggs
  • 2 large bananas, slightly mashed
  • 1/2 c. chocolate chips, or 3 oz. chopped chocolate (bittersweet recommended)
Combine the starter, flour and buttermilk in a large bowl and mix well. Cover and let stand at room temperature until risen and puffy, or until you are ready to bake, but preferably at least 8 hours.

Preheat oven to 350 and set the oven rack in the center of the oven. Prepare a loaf pan by buttering it well. Have ready some muffin tins if you deem you have too much batter to contend with for a single loaf.

Sift together the cocoa, salt, baking powder, and baking soda in a medium bowl.

In a large bowl, or bowl of a standing mixer fitted with a paddle attachment, beat butter at medium speed for a minute or two until softened. Add the sugars and beat for 2 minutes. Add the eggs one at a time, and beat for 1 minute after each addition. (The batter may look curdled at this time, and that's normal.)

Reduce mixer speed to low, and mix in the mashed bananas. Mix in the cocoa mixture until just combined, then add the sourdough starter mixture. Mix well by machine, and if the starter is too sticky and unruly, wet your clean hands and knead the whole lot together by hand to evenly distribute the sourdough. I try to do this quickly, gently yet firmly and I use my hands since it they seem to have one up on the KitchenAid. Stir in chocolate chips or chopped chocolate if using and mix to distribute evenly.

Spread the mixture into the loaf pan/muffin tins, and place the pan/tins on a baking sheet for some extra insulation. Bake loaf for about 60-70 minutes, and muffins for 30-35 minutes, until a tester comes out clean. Let cool in pans for 5 minutes, then turn out to cool completely.


This is some seriously chocolaty bread. Near black, or "coal black" as Dorie aptly says, is the best description, and it tastes it as well. I may try to cut back on the sugar next time, but it's so good, I may totally decide not to bother. After all, I've already tricked myself into thinking it's better for me since I used sourdough...


No matter how I vary my method of mixing, whenever I make sourdough quick breads I always have telltale streaks of unruly batter. Honestly, I couldn't tell at all (taste or texture wise) in this bread. In some breads I've made, the streaks taste a little chewy - the first attempts were worse and were almost hard, little pebbles of sourdough nearly inedible.

I'm convinced that the more I work with sourdough in quick bread the better I become at incorporating it, and anyway this bread is so decadent that it draws attention away from what almost appears to be just nuts studded throughout. Maybe it's all the butter than softens it up, and maybe that's just another reason to love Dorie Greenspan and her marvelous recipes. My breakfasts are all the better for butter laden quick breads, my life enriched by Dorie and her attention to details.

This post has been Yeastspotted.

Pie in the Sky July.

So it's July. What a strange year this has been in the Midwest. It seems everything is taking it's time to ramp up into full fledged Summer, and a turn of the calender recently only first brought some seriously hot weather. I know I'm a bit young for a midlife crisis, but I find myself in a crisis of sorts: why didn't my re-seeded radishes sprout? Why does the day seem to evaporate in 20 minutes? Why am I procrastinating a ton of kitchen projects? Why can't I find any tart cherries anywhere without driving half a day away? If you are wondering where I've been, it's probably because I'm too busy knitting myself a shawl for my complete transformation into "older adulthood". Granted it's a crazy color Noro shawl, but still...


The start of July also brings birthdays for both of my boys, my Husband on the 1st, and my soon-to-be 5 year old on the 9th. Both are good excuses to make cake, and this year I tried a recipe from The Art and Soul of Baking. The book is a Sur la Table book, and since the first Sur la Table opened recently in Wisconsin and I saw this book at the library, I figured I'd make a masterpiece and then have something fitting to gush over. Things never happen the way you figure however, and though the cakes tasted great, they totally lacked in the visual department.

This is partially because I used chocolate chips to make the ganache and they contain a stabilizer to prevent total melting, but it's also in part because cake knows that when I want it to rise extra high it needs to rise not quite so high. I cut out the centers of the cake to fill with whipping cream, and you can see the disks of replaced cake underneath the lumpy ganache glaze. The good news is that when refrigerated, they turned into a dense, heavy-handed chocolate punch in the face, so I was happy. And, happy that I also made full 5 egg yolk vanilla ice cream to go alongside.


I glazed them over a pan, and collected all the run-over ganache into a bowl and ran it through a strainer, something I should have done to begin with. A little jar of perfectly silky ganache is my reward, though I've been doing little but eating it by the spoonful...


I've enjoyed a string of unusual lunches recently. My Husband has been working later in the evenings lately, which cause me to feel even more like a diner's short-order cook. I hardly mind that, but instead mind that when we don't eat together my picky Kiddo (I think at 5 years old he's graduated to an older moniker) gets off easier in the trying something new department. I do usually get a bite or two of something new in him without too much fuss, but I tell you I am perplexed with his eating habits. For a kid who from birth was introduced to everything under the sun, I have no idea where it comes from. When I made the blackberry jam and insisted that he try a spoonful, he screamed and ran to his room. Jam! I have serious troubles.

While at dinner I am more demanding that we eat the same thing, lunches are a different story and we eat "leftovers" - whatever is already made or can be made from stuff already made. Here are a few of my favorites. They were also posted on my facebook page, if some of you think they sound familiar.


Eugenia Bone's recommend of omelet topped with pickled radishes. The pickled radishes are some of my favorite things in a long time, and I feel like this year I have given them my personal press that I did the candied jalapenos in the past. Amazingly, they are good on almost everything, and the leftover vinegar in the jar is great on salad. I use Bragg's cider vinegar, and hope sincerely that this Fall I can start my own cider vinegar. I think I'll have an apple press to get me on my way if I'm lucky.


Burnt-bottom pizza crust topped with hummus, bolted cilantro and well-fermented cortido. When I grilled pizza and the Kiddo didn't immediately devour his dough I knew something was amiss - it was that the bottom of his small dough was black. Not black in spots, but completely black. I actually stood with the half of leftover black-bottom crust (his idea of pizza is dough and sauce only, nothing else) in my hand over the garbage for a full minute before deciding to save it, and I was so glad I did. The black burnt bottom was surprisingly tasty when combined with cortido, and as I bonus, I remembered that I should eat the cortido that I lacto-fermented last August.


This one was actually supper, since it was an evening without all of us. I fried 3 pieces of bacon, "bacon ham" being one of the meats that my Kiddo happily eats, and used most of the fat to cook some red onion and a bunch of rainbow chard that I had got at the farmer's market last Saturday and then piled it on top of some scrambled eggs. I forget how much I love chard, and forget why I don't make it more often, since greens of any kind are something my Husband loves. When I ate it, I actually topped it with the other half of the sourdough English muffin - still one of my favorite things. English muffins are my Summer Bread Saviors since I always have them in the freezer, a good thing when I don't feel like heating up the kitchen.

It's not like I'm not cooking or eating or enjoying both cooking and eating lately, but it seems like I've not a lot to report. We're spending a whole lot of time outside and eating and cooking comes usually without too much planning. I spend more and more time away from the computer, am dreadfully behind at keeping up with my Internet friends. Part of this Summer weighs heavy on me since my boy is growing right before my eyes. I find myself just staring at him, wondering how he grew so fast, and in an instant I feel older. He will go to school this Fall all day. All Day! When he first nestled into my arms at 20 inches long, I never could have imagined that a big part of my day wouldn't contain him at some point, yet that is the barrel I'm staring down. I'm not that glowing new mother with a beautiful baby anymore. I'm the one that looks a little frazzled from repeatedly asking her wild kid to behave in public.

What time I feel I don't have to freely explore the worlds of cheese (and vinegar - I just had to dump my developing once-gorgeous wine version when I discovered black mold across the mat), I know I'll have in spades when I'm drinking my morning coffee in silence in a couple of months. Meanwhile, I fight back against this new feeling of "oldness", that my naturally night-owled self is transformed to an early to bed, early to rise self due to a Kiddo that can't wait to play himself into an early supper, bath, reading, and sleep regimen. If I seem a bit sparse this Summer, you may now know the reason why.


Sourdough Hybrid Pizza Dough.

Is it terribly American of me to feel like I could eat pizza at least once a week, if not more often? I'm not talking about frozen or delivery pizza mind you, but pizzas of my own concoction, made usually with leftovers on all accounts. For the past month, I dove more in depth into sourdough pizza dough, playing on variations of Peter Reinhart's non-sourdough version in Crust and Crumb.


early June (sourdough) pizza, baked in oven.

You'd think that Peter had asked me personally to run P.R. for that cookbook, but I can not help how excited I get when ratios seem to be perfect no matter what you do to vary them. So far, each loaf I've tried has been stellar: my results only failing when my patience for the rising wanes or when I suspect my starter isn't vigorous enough. Not once, however, has a loaf emerged that was inedible... and the same can be said of this pizza dough.

I have had a few hard and fast rules of pizza. I always bake at 500 or higher, and on a stone. I always topped with cheese after the pizza was mostly cooked. This endearing dough has me changing my once cemented pizza ideals. I've lowered my temps a bit to cater to it and pop the entire pizza into the oven with cheese and all. In exactly 10 minutes, I'm ready to eat pizza - and usually the dishes are done meanwhile. It's also a thicker crust, blistered outside with plenty of tunneling holes submerged within the outer crust. It's a pleasant escape from super thin (and nonetheless addicting) Lahey crust, and I love that it's fast, freezes well, and bakes directly from the fridge.


It's hard to get an idea of the weight of dough from a photograph. This dough is not at all dense, it's appearance is shocking to the actual weight of the dough - it feels airy, light. Because it contains both sourdough and active dry yeasts (what I affectionately call "hybrid dough"), it seems to have the best of both worlds when considering flavor and time spent.

It does it's second rise in the dark, cold privacy of the refrigerator and finally the time comes to bake: reaching in for a pleasantly plump, well risen orb is always a surprise - the dough is resilient, not prone to deflation without some coercion. It's the dough dreams are made of, and since I'm so addicted to Reinhart's bread that requests me to have a firm starter (rather than the 100% hydration that sits on the counter) going most of the time in the fridge, if I even have an inkling that I want pizza for supper it can be done in fairly short order.


Reinhart's dough uses a poolish, a pre-ferment starter made the day before from instant yeast. Instead, I use firm starter (also the base of the Reinhart Pain Au Levain that I love so well). With a little feel for the dough, you can probably use any type of starter if you also alter slightly the amount of liquid in the recipe.

Reinhart's recipe also calls for buttermilk. I make a viili style yogurt which is much more runny than commercial yogurt and substitute it often. I've also used whey, or whey mixed with some strained (Greek-style) yogurt. The dough should feel "soft, stretchy, and tacky, somewhat like baguette dough", but poolish starter is likely a bit higher in hydration. This dough is not so sticky, but more satiny, like the feel of an under-inflated balloon. A bit of practice will guide you to the correct feel, so long as you don't stray too far from the ratio.

(To make firm starter enough for this recipe: combine 1 c. 100% hydration sourdough starter with 1 c. bread flour and about 2 T. water, just enough to form the dough into a ball. Knead it lightly for a minute, and let it ferment at room temperature for 4 hours. Transfer to the refrigerator for at least 8 hours and up to 3 days. This starter is very sticky, using wet fingers will help. Let the firm starter sit at room temperature for an hour before using if you can, although I have used it right from the fridge in a pinch. The rising time for the pizza dough may be slightly longer if you do that.)

Sourdough Hybrid Pizza Dough (adapted from Peter Reinhart)
  • 1 lb. (3 1/2 c.) bread flour
  • 1 1/2 t. salt
  • 1 T. instant yeast
  • 1 T. honey or sugar
  • 2 T. olive oil
  • 3/4 c. buttermilk (Reinhart says to use it at room temp, but I never remember to take it out and cold seems to be fine, first rise time may increase a tad...)
  • 8 oz. firm starter
  • (additional room temperature water - as needed, about 1/4 c.)
Combine everything in a stand mixer. (You may also do this by hand). Mix with dough hook on low speed for 1 minute, then increase speed to medium and continue mixing 10-12 minutes. (If kneading by hand, mix in bowl until dough forms, then transfer to floured board and knead 12-15 minutes.) I usually have to add a little water to get the dough up to the right consistency. Dough is ready when it passes the windowpane test, and feels neutral in temperature.

Place in a clean bowl, cover, and let rise until it "swells noticeably", about an hour.

On a floured surface, divide dough. (You can make anywhere from 3-6 pizzas, I usually make 4.) Roll the pieces into balls (This is a good video to see how to form the balls: Peter Reinhart visits a LaBrea bakery which is using huge portions and is somewhat mechanized, but you can see how the dough is shaped by hand. This is how I "rolled" dough when I worked at a bakery.)

Place shaped balls on a lightly floured baking sheet that has first been lined with a silpat or parchment paper. Enclose the whole pan inside a plastic bag, and transfer to the fridge. Let it rise at least one hour, and up to 48 hours. You can also freeze the dough after this second rise, it will retain it's lift for up to 3 weeks. (I freeze the balls on the baking sheet until hard, then transfer to a zip top plastic bag with a date on it.)

To bake in oven, heat to 475 (Reinhart says 550, I've done 500 - depends on my mood) with a baking stone in the lower third of the oven. Press dough to deflate, and stretch using hands, knuckles, rolling pin if you like, to desired thickness. Leave a thicker amount of dough around the outside edge. Transfer dough to a peel that has been sprinkled well with cornmeal, top and bake until the top is golden.


I decided, since I'm newly addicted to baking on my grill, to grill pizza tonight. Having never done it before, I'd say I have some learning to do. I had the heat pretty high, and the bottom was "nicely caramelized" (a.k.a. kinda burnt). It didn't stop us from eating the whole thing, but next time, I have to remember to throw some unglazed quarry tiles down to temper the heat. The top didn't brown, but everything was cooked through, and even though the bottom was a bit blackened and extra crisp, it wasn't really unpleasant. There was still a good amount of chew to the outside edge, and I have to put yet another mention out there for the candied jalapeno, which is the crown jewel of my homemade pantry. Every bite tastes better with a candied pepper.


grilled pizza.


oven pizza. so far, I'd say the oven version is better - but I'll still try grilling one again.

I think I need something hot on every pizza I've ever eaten because of my Mom. As long as I can remember she eats pizza with peppers alongside, either her own pickled jalapenos in oil and vinegar, or as a last resort purchased pepperoncinis. She orders them on the side if we happen to eat pizza out, but also like my Mom, we tend to make our pizzas at home rather than do that. We may not have the ovens of the professionals, but we do our best - and this crust makes me feel one little step closer to the unattainable Perfection of Pizza.


This post has been Yeastspotted.

Baklava: Daring Baker Challenge June 2011

Erica of Erica’s Edibles was our host for the Daring Baker’s June challenge. Erica challenged us to be truly DARING by making homemade phyllo dough and then to use that homemade dough to make Baklava.


I kind of cheated this month. As you may have noticed, I sat last month out: the marquise dessert was just too rich for a personal dessert, and I had no excuse to make it to share with others. When I read this month's challenge was to make phyllo dough, I felt a little crushed. I had recently tried making it for the April Daring Baker Challenge, and determined that to even try to make it well I would need another pair of hands to help me stretch it. Not being overly organized in planning such a helping party, I decided not to try it at this time.

But I have never made baklava at home, so I figured I would do so using the organic phyllo dough that I recently spotted at my co-op. Cheating? Maybe. But so delicious was this version of baklava that I'm glad I didn't sit out another month just because I didn't want to try my hand at making the dough again.


Baklava is one of my most favorite sweets. When I worked second shift, I'd occasionally stop by a 24-hour Greek restaurant on my way home to sit at the counter and get a coffee and a thick syrupy square that I'd eat painstakingly slow while reading on the side and watching the Greek boys cooking through the pass thru window. The combination of flaky, crisp dough and dense sugar soaked nuts still makes me excited, even though it very nearly makes my teeth hurt to eat it. Why I've never made it before, I have no idea. Oh wait - I do know why. It's because I would have a hard time rationing myself of it's overwhelming allure to my palate.

I do not watch a whole lot of cooking t.v., in fact never unless I DVR it first. But for some reason, not too long ago I watched an old episode of Alton Brown's Good Eats in which he made baklava. I was so impressed with his approach. Had I decided to make this dessert before the 25th (for the 27th posting deadline), I would have also made my own rose water as he did.

I made the nut combination of almond, pistachio and walnut from his recipe for the April challenge and it was so great that I couldn't wait to try it layered between phyllo and saturated with thick honey syrup. But this time, I did not use the "crispy nuts" technique, and used raw nuts blended with Jamaican allspice and cassia cinnamon. I like this particular combination of nuts so well, I think it would be a good substitute in lots of nutty things.


The result was a perfect combination of sweet spice and flowers - heavy, heady and tasting of far away. I almost thought I'd liked to have added some black pepper to the filling, playing up the bitterness of the allspice a bit more. Maybe next time... I also used regular melted butter instead of clarified, being short of time. (I know that is not a good excuse. There is also no good excuse I didn't grind my own spices either, but I only had powdered allspice on hand. It was fresh from the Spice House as was the Cassia cinnamon, so I'll stand by my conversion. I tasted the nut mixture on a fingertip until I was satisfied of the flavor, you could do the same.

I realized after that I also forgot the sugar in the filling, and to be honest I didn't even miss it. The honey syrup makes the finished dessert plenty sweet. I used half of the amounts of Alton's original recipe, it fit well in a 8x8 square glass baking dish.

Baklava (slightly altered from Alton Brown)

Filling:
  • 2 t. ground cinnamon
  • 1/2 t. (plus) ground allspice
  • 3 oz. blanched almonds
  • 3 oz. raw walnuts
  • 3 oz. raw pistachios
  • 1/8 cup water
  • 1/2 t. rose water
  • 8 oz. phyllo dough, thawed
  • 4 oz. melted butter
For the syrup:
  • 1/2 + 1/8 c. honey
  • 1/2 + 1/8 c. water
  • 1/2 + 1/8 c. sugar
  • 1 small cinnamon stick
  • 1 (2-inch) piece fresh orange peel
Heat the oven to 350 degrees F.
Place the almonds, walnuts, pistachios, and spices into the bowl of a food pro and pulse until finely chopped, but not pasty or powdery, approximately 15 quick pulses. Set aside.
Combine the water and rose water in a small spray bottle bottle and set aside.
Trim the sheets of phyllo to fit the bottom of the pan (mine was 8x8, glass). Brush the bottom and sides of the pan with butter; lay down a sheet of phyllo and brush with butter. Repeat this step 9 more times for a total of 10 sheets of phyllo. Top with 1/3 of the nut mixture and spread thinly. Spritz thoroughly with the rose water. Layer 6 more sheets of phyllo with butter in between each of them, followed by another third of the nuts and spritz with rose water. Repeat with another 6 sheets of phyllo, butter, remaining nuts, and rose water. Top with 8 sheets of phyllo brushing with butter in between each sheet. Brush the top generously with butter. Place in the oven and bake for 30 minutes. Remove pan from the oven and cut into 28 squares. Return pan to the oven and continue to bake for another 30 minutes. Remove pan from the oven to a cooling rack and cool for 2 hours before adding the syrup.
Make the syrup during the last 30 minutes of cooling. Combine the honey, water, sugar, cinnamon stick and orange peel in a small saucepan and set over high heat. Stir occasionally until the sugar has dissolved. Once boiling, boil for 10 minutes, stirring occasionally. Remove from the heat and discard the peel and cinnamon stick.
After the baklava has cooled for 2 hours, re-cut the entire pan following the same lines as before. Pour the hot syrup evenly over the top of the baklava, allowing it to run into the cuts and around the edges of the pan. Allow the pan to sit, uncovered until completely cool. Alton says to cover and store at room temperature for at least 8 hours and up to overnight before serving and to store, covered at room temperature for up to 5 days, but I like my baklava cold, straight from the fridge, just like they serve it at Greek restaurants.


This was a great dessert, that's really all I can say. If you like baklava anyway, this version is likely to become a fast favorite. And as for homemade phyllo dough: I'm all for homemade everything, but some things are just meant to be purchased I think. Machine made phyllo is consistent and thinner than I could ever hope my own to be... I hope one day I can unravel the mystery of Homemade Phyllo Dough, but for now, I'm content with my accomplishments.

Thanks to Erica for choosing a great dessert this month!