northwest sourdough

A good, old-fashioned bread post...

NW sourdough

I mentioned recently that I was actually disgusted by bread for a good many weeks.  I couldn't think about it, or even have it in my line of sight.  I purchased the first bread I've bought in years just to get my boys through, and I had to make sure it was hidden in a cabinet.  I swear, I could smell it through the plastic packaging.  Fortunately, that wave of nausea and bread phobia has passed, and I have felt like I'm making up for lost time: reading new-to-me bread books with vigor and back with a vengeance for playing with dough.

Halfway through the levain recipe section of Ken Forkish's Flour, Water, Salt, Yeast, it dawned on me just how much I have to learn about bread.  Going to bed each night now, calculating mentally (which is difficult for a math-challenged person like me) how to convert my "liquid levain" 100% hydration starter successfully into a 80% hydration starter so I can start on his formulas, wondering if keeping two separate starters is smart or economical, wondering if instead I can figure out the formulas to convert his 80% recipes to fit my 100% lifestyle.

In a way, I wish I was 20 again and could just enroll heart and soul in a baking program - but that time for me has passed.  I'm at the mercy of baking once or twice a week, learning as much from those few loaves as possible and hopefully snowballing it into future successes.  The comforting thing is that I learn best from experimenting, and even without notes I seem to have a preternatural ability to remember every single baking experience, as if they are all children birthed to me in a unique way.

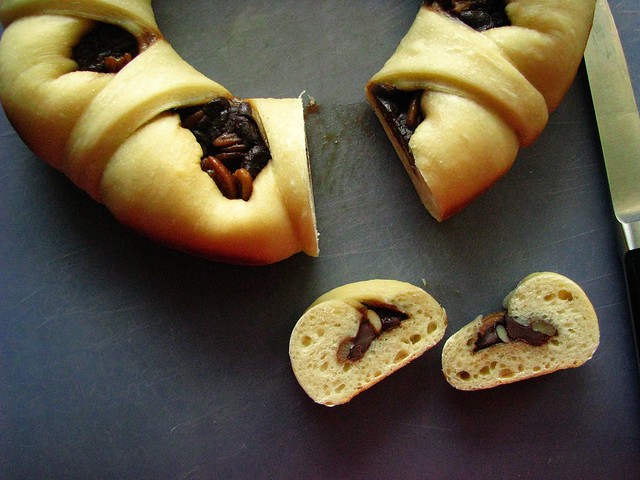
As good as the bread is around here, I have serious envy of those serious bread bloggers, Susan over at Wild Yeast, and Teresa at Northwest Sourdough for example.  Loaves that seems to always work with their careful calculations.  This past week and a half, I've been obsessed with the Northwest Sourdough "Blond Wig" bread.  It's a bread that Teresa developed for a friend with cancer, and it's not totally unlike the Peter Reinhart bread I used to have such great success with.  Just after my bread obsession returned, I tried a "Wisconsin Sourdough" for old time's sake and had terrible results.  Not inedible, but a bread that was lacking in the character of my previous successes.  When Teresa's version popped up on Facebook, I could think of nothing else.

Varying slightly from the flour, water, salt, yeast basic sourdough, this bread also has a touch of dairy.  I think it makes the finished bread stale slightly quicker, but we've eaten every morsel so I can't count that much as a negative.  As always, the true test of a good bread (in my opinion) is how good is the toast on days 2, 3, and if I'm lucky, day 4.  It is exceptional toast.  So good, that I was almost tempted to buy a little bunch of overpriced fresh basil and some imported Mexican tomatoes and pretend I was basking in the heat of Summer.  Instead I started a Winter-hearty minestrone soup, anticipating toasted bread in the bottoms of the bowls.

lunch.

I had kind of settled into a rhythm with the Tartine bread method, higher hydration bread that is folded every 30 minutes for 4 hours or so, not requiring the use of my (sometimes compromised) stand mixer or my sensitively skinned hands.  I can now make that bread in my sleep, and sometimes I do, when I start too late in the day and then pull myself groggy from deep, REM sleep to attend to it in the middle of the night.

But this Blond Wig bread has me beguiled.  I mix it in my stand mixer for several minutes and then it lazes about on the counter for 6 hours, only being folded 3 times before bench resting.  I've autolysed and not autolysed with similar results, I wouldn't say the extra time spent on the autolyse is even worth it.  I've made the motherdough (60% hydration firm starter) and let it cure at room temperature for 4 hours before putting it into the fridge, and I've made it and popped it right into the cold.  Both methods seem fine to me depending on my time frame.  Without refreshing, the motherdough holds for at least 3 days in the fridge.  I made my breads when it was 2 days old, and when my 100% hydration starter was well fed (and floated in water like Chad Robertson recommends), in the morning before I mix.

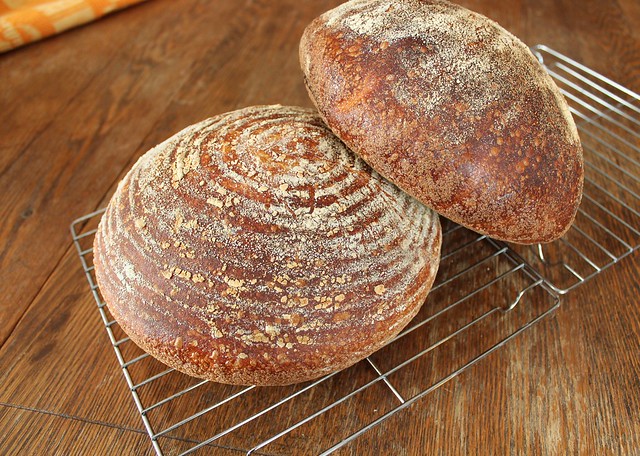
Ken Forkish wrote somewhere in that book I'm reading that when the proportion of already fermented dough is high, autolyse isn't really necessary, and I'm suspecting that the small addition of milk makes the gluten break down in a really labor-free way for a home baker.  At any rate, this loaf of bread has a sweet tang that comes from the refrigerated motherdough, a creamy texture and a cracking, brittle crust since I bake in a pot... all with the benefit of not so much work.

NW sourdough

I'll let you pull up the recipe from Northwest Sourdough, but I'll give you my notes for my last loaves, which I had the foresight to scribble on a scrap of paper:

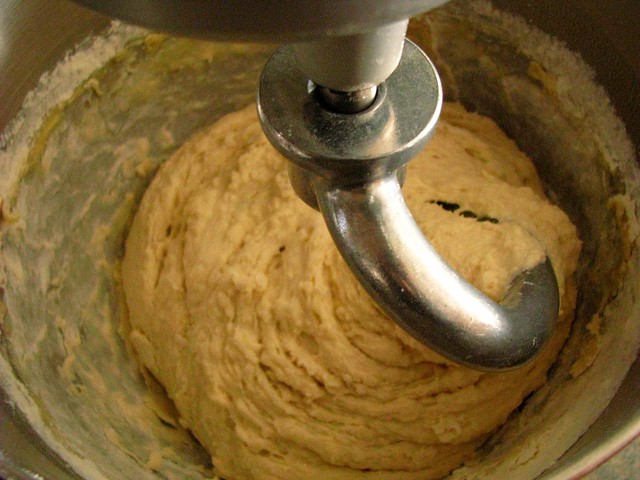
12:45  Mixed dough, no autolyse, using stand mixer.  I let it mix with the dough hook until it pulled away from the sides of the bowl and formed a ball.
13:00  Covered the mixing bowl with a towel and then a stainless lid.  Bulk rise until 19:00, with folds at 15:45, 17:00, and 18:00.
19:00  Preform dough into loaf and bench rest.  I didn't mean for it to rest for a whole hour but it was before-bed reading time.
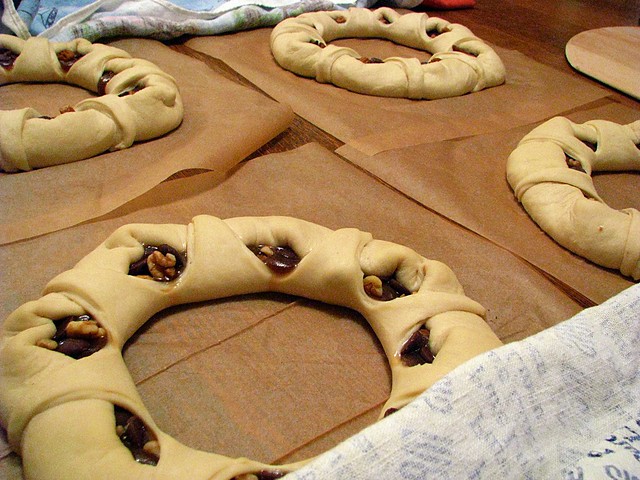
20:00  Form into loaves.  I only have one brotform but need another, so one went into the basket and another into flour dusted cloth tucked into a colander.  (The bread that rises in the cane basket always looks nicer, and seems to rise better.)  I covered each of the baskets with a plastic bag and put them immediately into the fridge.
06:30  Took loaves out of the fridge.
06:45  Jury rigged my oven into a proofing box (boiling water in a bowl on the lowest shelf, breads still wrapped in plastic, on the shelf above) and let the loaves proof for 3 hours.
09:45  Breads out of the proofer and onto the counter.  Took off the plastic bags and let them sit open to the air while the oven preheated to 500 f.

I baked the loaves in cast iron pots at 450 f. (reduce heat as soon as the breads are put into the oven), for 30 minutes with the lids on.  After removing the lids, let them bake until deep brown, another 10-15 minutes or so.

 NW sourdough

Last week, I let the loaves rise at room temperature for about 4 hours before refrigerating, then put them into the cold for 6 hours before letting them proof for only 1 hour in my oven.  I feel like the loaves last week had slightly better oven spring, but it could be that I should have left today's loaves to proof a little longer.  Truth be told, I was aiming for a loaf that would be cool enough to slice by lunchtime...  I need continual reminding that rushing the bread is never a good idea.

I also didn't slash today's bread, thinking that it would break apart naturally, like the Forkish (and Lahey) bread, at the seams that I placed into the bottoms of the proofing baskets.  It didn't rise enough in the oven to split, another clue that I should have let it proof longer.  I knew I should have gotten up earlier to attend to it...

NW sourdough

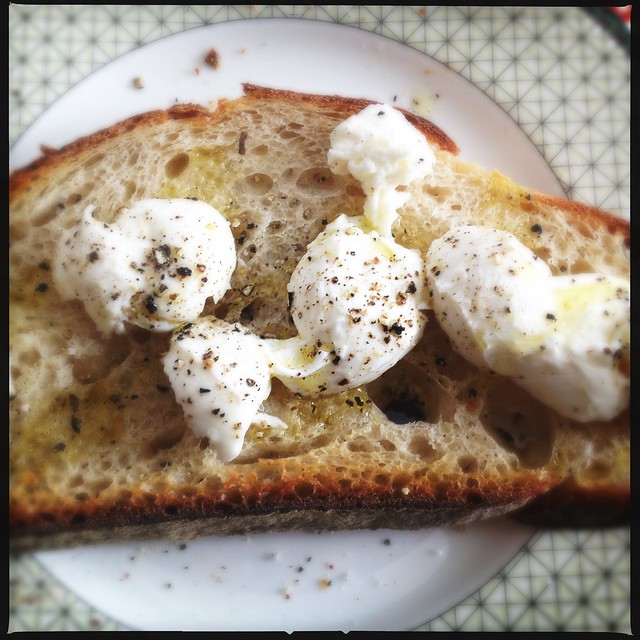
But alone with some cheese, it was the perfect lunch, an extra half hour a proofing time hard to imagine being much of an improvement. 

Today is a day of Spring-like warmth, before we wake tomorrow to tackle a cold and desolate Winter once again.  When sitting in my dining room with the windows open to properly enjoy such wintertime luck, this bread is my companion, a reminder of birth and rebirth, and living, breathing dough.  It's enough reason for me to never want to leave my kitchen, to come close to perfection, or at least perfection for now.  I know better than anyone that there is always a new bread to be obsessed with.

It feels so good to be back to my old self.

Daring Baker Challenge January 2012: Biscuits.

Audax Artifex was our January 2012 Daring Bakers’ host. Aud worked tirelessly to master light and fluffy scones (a/k/a biscuits) to help us create delicious and perfect batches in our own kitchens!

sourdough biscuits

Tireless is probably a more than apt description of our host this month. Since I have joined the Daring Bakers, I've looked forward each month to Audax Artifex's take on our challenges, his lightening fast completion times, and the phenomenally articulate recipe notes that he shares nearly immediately. For his hosting of a challenge, I would have expected something wildly complex, but instead he chose biscuits (called scones in Australia), and he really mastered them. Go have a look!

I started my testing of biscuits near the beginning of the month, and only did 6 batches, 10 short of Audax's 16. I fully intended on making his recipe at least once, but I got so sidetracked by sourdough that I never made it that far. In fact, I did my last full dessert biscuit application yesterday, not leaving myself any time to get to his original recipe. Maybe I was just so inspired by Audax's tireless approach to mastering a recipe that I figured I'd adapt a single recipe until I had it nearly foolproof myself.Link

sourdough biscuits
this batch didn't rise so high because I patted the dough thinner, about 1/2 inch.

I have made baking powder biscuits in the past. I know that you are supposed to be careful with the dough, not to beat it up, treat it with a lick and a promise and make sure that they touch each other when you pack them lightly onto a baking sheet. I have never made sourdough biscuits however, which I have to assume are the predecessor to the more modern baking powder version. The base recipe I found tasted so good on the first go (except that I used butter right out of the box... I would not be found messing around with butter flavored vegetable oil), that I varied my fats, baking temperature and roll-out method and found my favorite combination fairly quickly in only 6 batches.

The base recipe (by Phil Mahan) I used was designed for a camp cooking experince. It is extraordinarily simple, and it's very easy to make half batches of which is good when you can polish off a whole batch warm from the oven. I found it best to use sourdough starter (100% hydration) that I had fed about 4 hours prior. I also tried adding baking powder along with the natural leaven of the sourdough, and found no real discernible taste difference. The rise took about half as long, which was maybe convenient, but my personal feeling is to let the biscuit be naturally leavened. I think I am just still intrigued that the jar on my counter can lift dough, and if given the time, it does a stellar job of it.

ham and juusto

In my first trials, I mixed room temperature soft butter with sourdough starter, added my flour/salt/sugar mixture and basically "kneaded" it in a large bowl by folding it over onto itself until it formed a ball. I tried to do this purposefully, so I wouldn't beat up the dough, but with a sturdy hand so that the dough would come together somewhat swiftly. Then, I simply patted the dough out into a rough block about 1 inch thick. (I also tried patting it thinner, and they didn't rise as high.) Using a round cutter, I used the classic method of pressing straight through the dough and then twisting to cut out the biscuit. I gently pressed my scraps together, and even though they were not quite as pretty and didn't rise quite as high, they still tasted great - lightly sweet and still a little sourdoughy. They are a perfect match for sweet or savory, I don't think I'd change a thing to turn them into strawberry shortcake or drown them in gravy.

The original recipe I used for sourdough biscuits didn't call for traditional biscuit cutting, it called for forming the dough into balls. Not only is this faster, I found that they rose better too. After forming a batch of biscuit balls, I decided that something could easily make its way into the middles of round biscuits and stay put. The month wasn't long enough to try all of the ideas that popped into my head.

round sourdough biscuits

The first combination I tried was ham and a slow melting "baked" cheese called Juusto. I love this cheese, and it's actually made just down the road from my Parents. Not knowing if the biscuit balls would pop open on me, I was a little stingy with filling them. I remedied that yesterday when I decided on making a chocolate and tart cherry version. I packed them with as much filling as they could hold, pinched the dough firmly to keep it in place, then rolled it lightly between my palms.

homecanned sour cherries

This was the first jar of tart cherries I opened from last Summer. I got 27 lbs. of already pitted fruit from Cherryland's Best with a group of area food bloggers. I canned my whole cherries in an light syrup (1 part sugar to 4 parts water), and they tasted so good when I popped a few into my mouth, as good as they did the day I got them, reminding me exactly why canning appeals to me so much.

chocolate cherry biscuit forming

While the mixture of wrung-dry cherry and chopped chocolate doesn't look the prettiest, it makes up for it in flavor. The cherries are undeniably good, but I have to believe that part of the reason is also that I was gifted a block of Callebaut bittersweet baking chocolate. That chocolate gift was better than if someone gave me a piece of Stueben, though I treat it the same way by often admiring it's heft and smoothness. I do this for a positively certifiable amount of time. I then mixed a little cherry syrup with powdered sugar to make a pale pink glaze, and I could feel the pangs of sugar guilt running through my veins. I ended up eating 2 of them, hot out of the oven, glazed and sprinkled with cacao nibs. I didn't feel guilty at all. Well, maybe I did just a little.

chocolate cherry biscuit

I would venture to say that sourdough biscuits do taste best the second they come out of the oven, even though the unfilled biscuits I made were very good when toasted the next day. There are few things better than devouring something right after it comes from the oven, so I'd encourage you to plan it that way. When using well fed starter, I found 2 hours of rising time to be plenty. I also find it hard to get good color on these, even when I baked them longer they still barely blushed golden. It doesn't affect the eating though. Remember the recipe is easily cut in half.

Sourdough Biscuits (with Cherry Chocolate Middles) (adapted from Phil Mahan)
makes 12
  • 2 c. well fed starter
  • 1/4 c. soft butter, warm room temperature
  • 2 c. AP flour
  • 3 T. granulated sugar
  • 1 t. salt

Stir to combine flour, sugar and salt in a medium sized bowl. Butter a cast iron skillet large enough to fit your batch (a 5 or an 8 worked for me for half and whole batches respectively).

Measure starter into a large bowl and add butter. Using a spatula or the back of a spoon, mash the butter into the starter until it is no longer visible. Add the flour mixture, stirring with spatula or spoon for a few strokes to help it begin to combine. Then using one hand, begin to fold the batter onto itself until it begins to form a dough. Work quickly, gently, and thoroughly. Stop as soon as all the dried parts of the flour are incorporated, and the dough feels like a dough. (If you can tell it is too dry, add a tablespoon or two of water before you have worked the dough to completion. If the dough comes together and there is still some flour in the bottom of the bowl that didn't get worked in, just discard it and the batch will be slightly less in volume.)

Press the dough out to a uniform thickness, about 1/2 inch (aim for 1 inch if you are going to cut biscuits using the method described above). Cut into 6 pieces. Working with one piece at a time, put a good amount of tart cherry and chocolate filling (recipe below) in the center of the dough and fold up the dough around it. Pinch it tightly to completely enclose the filling, then gently roll the dough to form a ball. Place the biscuits, just barely touching each other, in the prepared skillet.

Let rise (covered with a towel) until nearly doubled in bulk, about 2 hours depending on the warmth of the room. Towards the end of the rise, preheat the oven to 375.

Bake for 20-25 minutes until tops are lightly browned. (You can brush the biscuits with butter about half way through the baking time, or upon removing them from the oven if you like.)

Tart Cherry and Chocolate Filling

  • 2 heaping cups of canned tart cherries (250 g.) drained, and pressed mostly dry, juices reserved for glaze if desired
  • 4 oz. (120 g.) excellent bittersweet chocolate, chopped finely

Mix to combine. That's it. Here's a picture of what it will look like. And you will probably have a little leftover, which you should eat right away because you can't stand waiting on the oven to produce your sourdough biscuits with cherry chocolate middles...

chocolate cherry biscuit interior

So, I'm just days away now from my month free of sugar - or really it was my month almost free of sugar. What little splurging I did do was definitely worth it. My goal of feeling committed to less sugar on a daily basis is going to stick I think. I have gotten out of the daily routine of dessert, which some may argue is heresy, but I feel great so I'll continue it. At least until my next Daring Baker Challenge.

Thanks again to Audax for his amazing effort and choice in a challenge this month. I promise I will try his non-sourdough biscuits, but I am so happy that I got obsessed with this version! I would never have considered sourdough biscuits, and now they are just another of the sourdough things that I can't live without. If you're coming to dinner and I forgot to plan a bread, you're getting sourdough biscuits, and you are going to love them.

biscuit test brunch

Daring Baker Challenge December 2011: Sourdough.

Our Daring Bakers Host for December 2011 was Jessica of My Recipe Project and she showed us how fun it is to create Sour Dough bread in our own kitchens! She provided us with Sour Dough recipes from Bread Matters by Andrew Whitley as well as delicious recipes to use our Sour Dough bread in from Tonia George’s Things on Toast and Canteen’s Great British Food!

sourdough wreath

I guess if I'm honest, at first I was a bit disappointed that our December challenge wasn't panettone, fruitcake, or something else more seasonally suited. But even if personally I questioned the seasonality of the challenge, I was more than excited that the gospel of sourdough was about to be tackled by a wide audience of Daring Bakers! It also gave me a chance to read a little more about other methods of sourdough starters, and re-kindled my excitement for all things bread.

I did not grow an additional starter as outlined in the recipes we were provided since I had already grown my own, and I didn't craft a plain sourdough bread since I have been regularly practicing this now for more than a year. I did feel once again that I fulfilled the spirit of the Daring Baker by challenging myself to make a sweet dough with my sourdough starter - something that outside of pancakes and waffles, I've never done before. My results were visually stunning, but lacking a little in the softness of traditional sweet yeasted breads. I am not about to give up on the quest to transform my sourdough starter into a softer, kinder being... this journey is only just begun.

cinnamon caramel sauce
cinnamon-carmel sauce.

I decided rather last minute before Christmas to make a sourdough wreath using Teresa's (from Northwest Sourdough) recipe. With components like sour cream in the dough and a gorgeous cinnamon scented (and easy) caramel sauce, I knew the flavors couldn't be beat. It also was shaped in a way I had never seen any bread shaped before. Just a little patience and staggered forming times, and 4 near-identical wreaths were resting on my dining room table.

sourdough, sweet
soft dough, a little sticky, but really lovely to work with.

shaping wreathsourdough wreaths

I used Teresa's method of baking the wreaths under a cast iron "lid" of sorts, my overturned 5qt. Dutch oven base. In order for them to fit, I needed to make 4 smaller wreaths, which I weighed out at just over a pound each before forming. I started around 11 am on Christmas Eve, and my first completed wreath was out of the oven to cool just after 8 pm. I had first considered some refrigerated proofing time and setting my alarm to do the Midnight Baker thing, but thought that since it was Christmas after all, I shouldn't tax myself too much. I was also leaving pretty early in the morning on Christmas Day, and didn't want to feel sleepy at the wheel, which can occasionally happen to me when I get too little of solid sleep the day before.

When they came out of the oven, I brushed them with butter, and let them cool about a half hour each (nearly all the way) before tucking them into plastic wrappings to try to preserve a little of the softness that I had already figured would be elusive. I gave two away, and took two with me out to "the farm", and a day later when I finally was able to try a slice, they were a little tough. I wasn't really surprised. The flavor was really good, the dough a little sour, and the cinnamon caramel with chocolate and walnuts or pecans was really a good match. But I've still a lot to learn about wild yeast, and how to coax it into soft breads is not far from the top of the list. I wouldn't say it was a failure, it was just a stronger dough than I would have liked, and that my family was expecting.

packaged wreaths

I have been mentally obsessed with this post from another of my favorite bread blogs, Wild Yeast. In it, Susan describes the special treatment of wild yeast starter prior to baking a panettone. Several days of balmy 85 degree atmosphere and more frequent (every 4 hours) feedings may be the ticket to softer, more "traditionally textured" sweet bread dough. I am considering a personal, month-long, sugar-free zone for January, but I may have to make an exception for the sake of experimentation... that or I'll have to give it all away. That works for me too.

sourdough wreath, cut

I am sure you have not read the last from me on the quest for the perfect soft sourdough. Meanwhile, please have a look at the original recipe from Northwest Sourdough that I used for these sourdough wreaths. If I were to eat one hot from the oven, I have a feeling my textural complaints would have been far fewer. Why not reduce the recipe and give it a go yourself!

If you are looking to start a sourdough starter of your very own, this month's Daring Baker Challenge recipe has some starters (made with rye and whole wheat flours) to get you started. (There is also a gluten-free starter and an interesting rice, Brazil nut and flax seed bread to make with it.) I made mine using grapes, and the process took me much longer to get going that the DB instructions suggest. It was well over 2 months before my starter was in any condition to raise a loaf of bread, but that is only my experience. The miraculous thing about wild yeast is that your location and atmosphere and a whole host of other factors will determine your successes and failures. You have only to dive in and start experimenting. If you ask me, it's a good New Year's Resolution to pursue!

If I don't get a chance to post any more kitchen adventures before the end of 2011, this Daring Baker Challenge was an excellent way to end my culinary year. It piqued my interest into a new facet of sourdough baking, and it allowed me to check out other bakers who may have never used a wild yeast starter before. There is always something to learn with wild yeast, and I look forward to a new year full of new experiments with it!

Happy New Year!!

(Oh and one last thing: if you live in the Milwaukee, Wisconsin area and would like some sourdough starter, just email me! I am more than willing to give you a starter to work with. I am also open to dehydrating some and mailing it to you, provided you live in the US (since I'm unsure of international wild yeast shipping laws...). It should rehydrate with a bit of care and build up much more quickly than starting completely from scratch.)

Three batches of sourdough English muffins later...


About 6:00 last night, I finally got the English muffins I was looking for: a bit thicker and a little more uniform. I posted my crazy muffins addiction pictures here on flickr. But, a huge thank you to Teresa at Northwest Sourdough for commenting on my post. This is her recipe that I eventually followed exactly, and had stellar results. If you have extra starter fed and ready for action, why not give these a go over the weekend? You won't be sorry!