
I somehow feel like it's my personal goal to bake gluten-free treats that taste so good no one has any clue they are gluten-free. It's not because I have trouble with gluten, and it's not because I'm vying for blog clicks and cashing in on a trend: it's purely because baking is an adventure and gluten-free baking is the biggest adventure of all.
It's been awhile since I tried my first experiments with GF baking. It began when I realized that my Vita-Mix could easily turn any whole grain into flour. Since I run a fairly "whole food" kitchen, I already had tons of raw material to work with - and the only thing standing in my way were a few minutes of prep time and the mess involved when grinding up lots of miscellaneous grains at once.
I've gotten a little smarter since I've discovered I love baking with GF ingredients, and I made a shelf in my pantry for all of my supplies. Instead of grinding what I need when I need it, I can usually reach for a quart jar and then only occasionally run into the need to refill it.
I've gotten a little smarter since I've discovered I love baking with GF ingredients, and I made a shelf in my pantry for all of my supplies. Instead of grinding what I need when I need it, I can usually reach for a quart jar and then only occasionally run into the need to refill it.
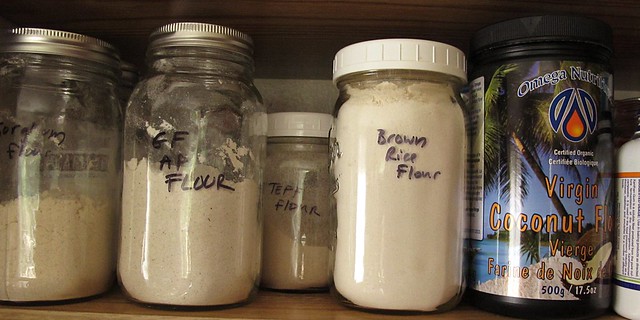
What exactly is on the shelf? I keep jars of sorghum flour, brown rice flour, teff flour, tapioca flour (also called starch), potato flour, xanthan gum, a gluten-free AP mix that I make up according to this recipe, and a canister of coconut flour that a friend gave me and I haven't tried it in anything yet. I personally have not yet found much difference between brown rice flour and white rice flour, so I only keep brown rice - and a nice bonus is that it is available in bulk at my co-op without being prohibitively expensive. (Purchased rice flour is also much more finely ground than what I can produce in my Vita-Mix.) Now that I've got a basic GF pantry going, it's easy to keep things in stock - and grind things from my other whole food staples like quinoa, millet, and oats on an as needed basis.
And, can I add that sorghum flour is my most favorite flour ever? It's absolutely worth the expense, and I adore the texture and flavor it gives baked goods. In fact, there was a whole cup of it in the blueberry muffins I decided to make yesterday...
And, can I add that sorghum flour is my most favorite flour ever? It's absolutely worth the expense, and I adore the texture and flavor it gives baked goods. In fact, there was a whole cup of it in the blueberry muffins I decided to make yesterday...
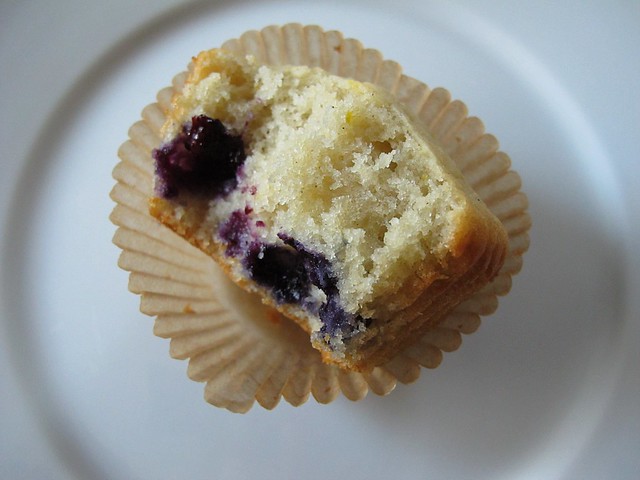
These muffins, admittedly, were best fresh from the oven. In fact, all of my tasters didn't suspect they were GF at all, and the texture was exactly like that of a regular blueberry muffin. When I tried one this morning, the texture had changed a little, but was still very good - especially with a cup of coffee. I should have tossed the frozen berries with a tablespoon or two of the floury mix to keep them from congregating towards the bottom of the muffins... I'll remember next time.
When I want muffins, I usually decide last minute - so waiting on butter to come to that magical room temperature isn't always an option. I used coconut oil to great effect, it's 10 tablespoons by weight (the weight of butter), I've given you the gram measurement.
Gluten-Free Blueberry Muffins (adapted from Gluten-Free Girl)
- 142 g. coconut oil, soft room temperature
- 1 c. white sugar
- zest of one orange
- 2 eggs
- 1 c. brown rice flour
- 1 c. sorghum flour
- 1 c. tapioca flour (also called tapioca starch)
- 1 1/2 t. baking powder
- 1/2 t. baking soda
- 1/2 t. kosher salt
- 1 c. + 2 T. plain yogurt (I used full-fat)
- 1 c. blueberries, not defrosted if frozen
Mix the brown rice, sorghum and tapioca flours, the baking powder, baking soda and salt together in a medium sized bowl and set aside. (Toss the frozen berries with a tablespoon of the flour to keep them from sinking to the bottoms of the muffins.)
In a large bowl, mix the coconut oil, sugar, and orange zest with a hand mixer until just well combined. Add the eggs, one at a time, mixing well after each. Add half of the flour mixture, and mix until just combined. Add 1/2 c. of yogurt and mix until just combined. Add the rest of the flour mixture, then the rest of the yogurt, mixing after each addition as previously described, taking care not to overmix.
Fold in the blueberries. Portion into the muffin liners, about 2/3's full, and bake for 20-25 minutes. They should just be starting to brown around the edges, and a tester should come out clean from the centers.
I considered juicing the orange I used for zest and mixing it with enough powdered sugar to make a glaze. They didn't need it, but would be pretty and perhaps more dessert worthy if you do it.

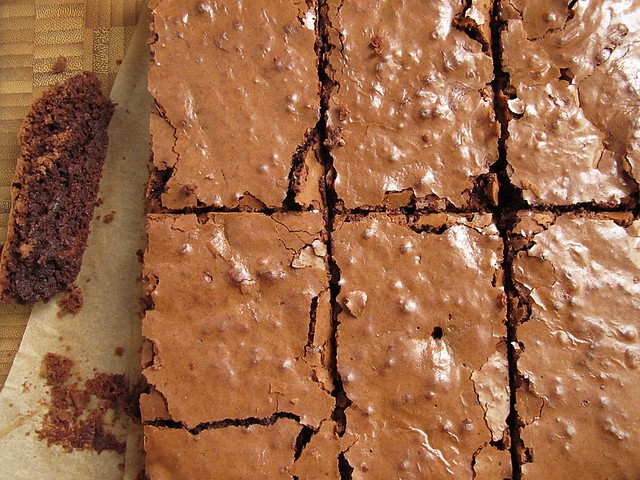
For a picnic last Sunday, I baked up some GF brownies - and I have to say they were better than any brownies I've ever made before. They were also adapted from a Gluten-Free Girl recipe taken from Alice Mendrich, so I knew before I even began that they would be amazing. What I didn't know is that they would age well. I saved one a full 4 days to test this theory, and they were even better than when fresh. I didn't bother with a double boiler to melt the butter and chocolate, and I didn't bother with the cold soak to stop cooking either - I just made sure to heat the chocolate over low heat and watched not to over bake.
Gluten-Free Brownies (adapted from Gluten-Free Girl/Alice Mendrich)
- 8 T. butter (1 stick), cut into 8 pieces
- 4 oz. dark chocolate (I used Callebaut), chopped
- 1/2 c. white sugar
- 1/2 c. raw sugar
- 2 eggs
- 1 t. vanilla extract
- 1/4 t. kosher salt
- 1/4 c. brown rice flour
- 1/4 c. tapioca flour
- large handful of raw walnuts, broken by hand over the batter
Preheat oven to 400.
In a small, heavy saucepan, melt the butter together with the chocolate. Remove from heat and let cool slightly.
Line an 8x8 square pan with parchment paper (I use 2 pieces that overlap in a criss cross, so that I can lift them out easily). In a medium sized bowl, blend the sugar and eggs for a full 3 minutes - until the sugar starts to break down a little and the mixture looks thickened. Add the vanilla and salt and blend in well.
Add the flours, and use a spatula to blend in thoroughly. Scrape in the melted chocolate and butter mixture, and fold in well until no streaks remain. Crumble some walnuts over the batter and fold them in too. Then, spread the mixture into the prepared pan and bake until the pan isn't jiggly when tapped, and fudgy crumbs cling to a tester inserted into the middle of the pan. I started checking at 20 minutes - and they were perfect within 24 minutes. Remove pan from oven to a cooling rack, and let cool completely in the pan until room temperature before slicing.
Store any leftovers tightly wrapped (I used foil, since we were picnic-ing). They will remain very good for several days.
Like all alternative kitchen adventures, GF bakery can have the connotation of being healthier. These two examples of baking are not necessarily healthier for you, but they are proof that GF bakery can taste amazing and fool anyone who may have the predisposition to think that by their very nature, GF bakery tastes rubbery and awful.
In general, I'm baking a lot more thoughtfully these days. I'm not baking just for the joy of baking as I usually do; I have successfully stopped eating so many baked goods personally. So I'm making the most of each opportunity I have at my oven: taking care to ensure that no matter your dietary need, there can be a quality, homemade baked good made to amaze you. If you happen to have a GF challenge for me, let me know... maybe it will be my next gluten-free kitchen adventure!