blueberry

Apple Hazelnut Blueberry Muffins. And, organization.

2015 is off to a good start.  Late last year, I read Marie Kondo's bestselling book on organization after David Lebovitz mentioned it online.  It's the kind of book that repeats itself for emphasis, but I didn't mind it.  I took away a lot of good advice, and have taken to paring down tons of worldly possessions that aren't doing me any good and might do someone else better.

Harder than getting rid of paper and toy clutter is getting rid of clothes.  I HATE shopping for clothes, and really it's not a stretch to say I can't recall the last time I shopped for clothes (not counting the desperation trips to the super thrift right down the street), so I tend to packrat them even if I don't figure I'll ever wear them again.  Inspired, I did get rid of some clothes but, it's harder still for me to part with t-shirts.  Some upwards of 20 years old, t-shirts are my fashion life.  At least most of them are now filed in an orderly fashion in my drawers, folded just one more time in half than my previous t-shirt fold has saved me tons of space in my dresser - I have room in my dresser that I never knew existed.  Thank you David Lebovitz.  Your power of suggestion has saved my (organizational) life.

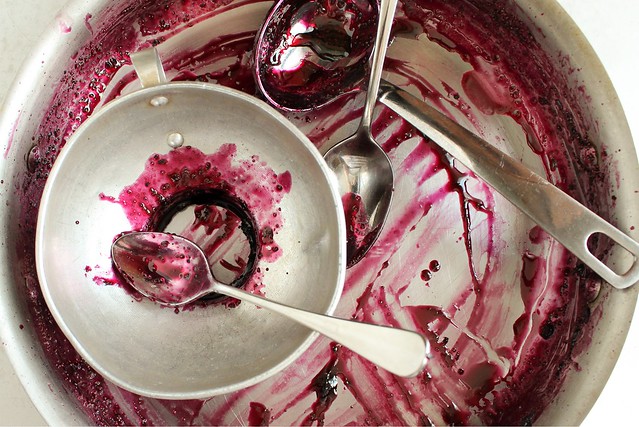
In addition to well organized sock and t-shirt drawers, I took another organized cue and started my new year with a solemn vow to make sure my kitchen  is completely tidied up before going to bed.  The kitchen is my domain; I spend almost my whole day in it, or the attached dining room where my son is doing his schooling work.  It's a pleasant, south-facing space that has good light and is generally fairly clean.  But I am of the ilk that does not dry her dishes but rather waits for them to dry.  I do other things when they dry, but I do not take out a towel and dry them.  I'm stubborn that way.  I realized that having to empty the dish rack in the morning and then tidy the rest of the kitchen/dining area was causing me stress before our school day even began.  

After a week of spotlessness before bed, I can attest that I feel better coming into my space in the morning.  It makes for more peaceful breakfasts, and helps the day get off to a good start.  It just makes me happy in general not to be thinking about how I should scrub out the sink as my kid is trying to do his math.  (I also let the breakfast dishes dry in the rack, but before starting on lunch, I start with a clean space again.  I find I'm doing less dishes this way too - just 3 times a day instead of what seemed like endlessly.)

Other things making me happy in general are muffins.  Muffins are not usually something I get overly excited about - they are utilitarian and something I usually make out of necessity (even though that never stops me from trying to find really good ones).  Ordinarily I'd rather make tea cakes or quick breads, anything in a loaf pan really and I'm not sure why.  Muffins have a good place in a kitchen with kids, that's for sure.  And having a supply of them for the inevitable snack request is just good thinking as a parent I guess.

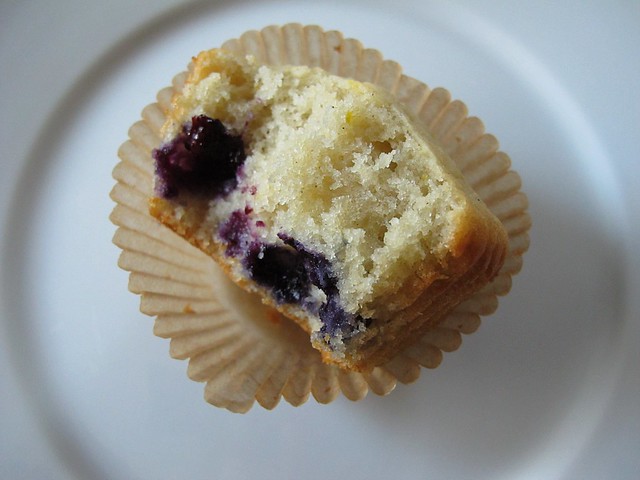
I've been enjoying the recipes in Whole Grain Mornings (Megan Gordon) for weeks now.  It's a great book of breakfasty inspiration, which I kind of need in the box-cereal free environment that I've created for ourselves.  We eat plenty of oatmeal and other porridge, but I don't break out of my smoothie mold easily, and I've that one particular son that is so picky.  The book is arranged by season, and the winter season is where I began, making Morning Glory Oatmeal (steel cut oats, carrot, raisins, coconut, why didn't I think of that??) and Pear Hazelnut Oat Muffins.  Those muffins!  I first made them in my clean kitchen before bed, getting the ingredients measured (the whole book has metric weights!  YES!) for quick morning assembly.  I got 15 muffins instead of 12, and we ate them by the multiples.  When warm, like a portable bowl of comforting oatmeal and when cool like moist slices of cake.  Like any quick-bready recipe, I cut the sugar in half and didn't miss it at all.  And then I started playing around with the flavors.  I'm fairly certain anything you add to these muffins will be a good idea.

apple blueberry hazelnut muffins.

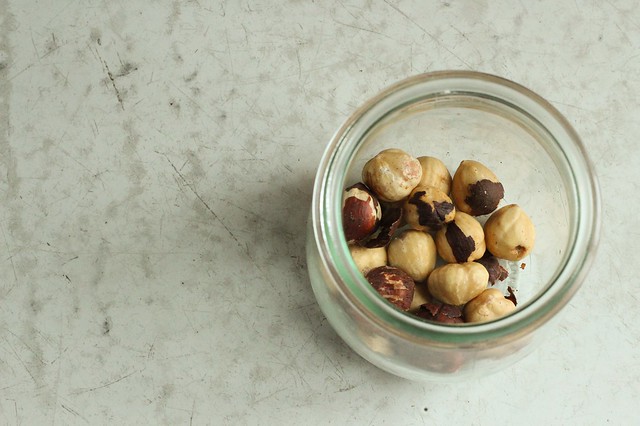
I actually only topped some of my muffins with nuts instead of baking them inside as Megan suggests.  The baby likes nuts and isn't allergic, but I'm not too fussy with chopping so I then have to pick through the whole muffin as he eats it.  My older boy doesn't care for hazelnuts (I know, right?  More for me.) so I put them only on the top of some of them as a solution for us all.  I like how they get all naturally toasted, and it's like staking a claim to as many muffins as I like.  Or as many muffin tops as I like.

Megan reduces the oven heat immediately after adding the muffins to the oven.  I didn't do this, and in several batches the muffins were all fine.  You may choose to lower to 375 after the muffins hit the oven if you want.

Apple Hazelnut Blueberry Muffins (adapted from Megan Gordon)
makes about 15 muffins
  • 75 g. (3/4 c.) rolled oats
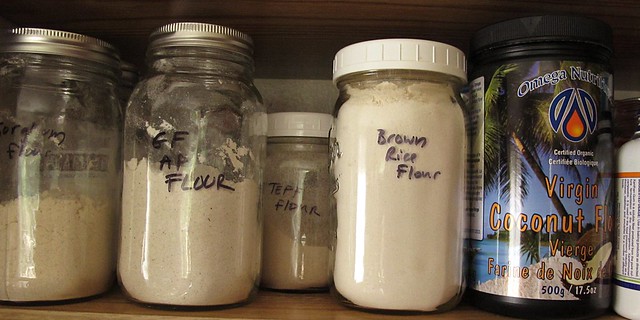
  • 120 g. (1 c.) AP flour (I used wheatier Lonesome Stone AP, which is like a white whole wheat)
  • 60 g. (1/2 c.) whole wheat pastry flour
  • 3/4 t. baking soda
  • 2 t. baking powder
  • 1/2 t. cardamom
  • 1/2 t. freshly ground nutmeg
  • 3/4 t. kosher salt
  • 215 g. (1 c.) peeled and shredded apple - 1-2 apples (do the shredding just before assembling to prevent browning)
  • 62 g. (1/3 c.) granulated sugar
  • 85 g. (6 T.) unsalted butter
  • 240 ml. (1 c.) yogurt/milk mixture (she calls for buttermilk, I make the milk about the thickness of buttermilk)
  • 2 eggs
  • 1 1/2 t. vanilla
  • 1 c. blueberries fresh or frozen (add frozen still frozen and not defrosted)
  • hazelnuts enough to top muffins, about 2 T. chopped nuts per muffin
 Preheat the oven to 425, line muffin tin with liners or butter them well if you prefer.

In a small bowl, combine oats, flours, baking soda, baking powder, spices and salt.  Mix well to combine. 

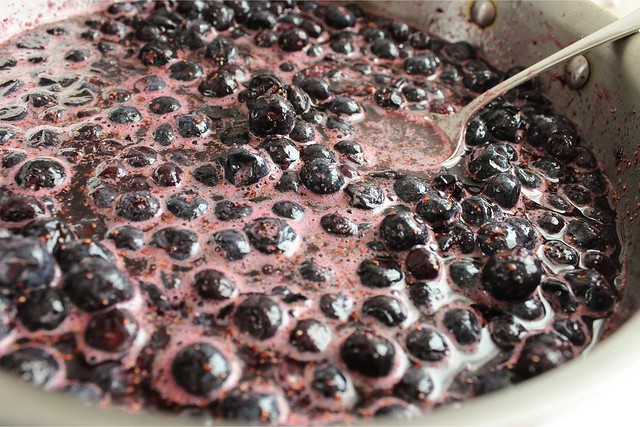
Melt the butter over low heat, and shred the apple.  Put the sugar in a large bowl that will become your mixing bowl.  Add the butter, and stir well to combine and start to dissolve the sugar.  Then, whisk in the yogurt/milk (or buttermilk), eggs, vanilla, and shredded apple.  Add the dry ingredients and fold/stir it in gently.  Finally fold in the blueberries.

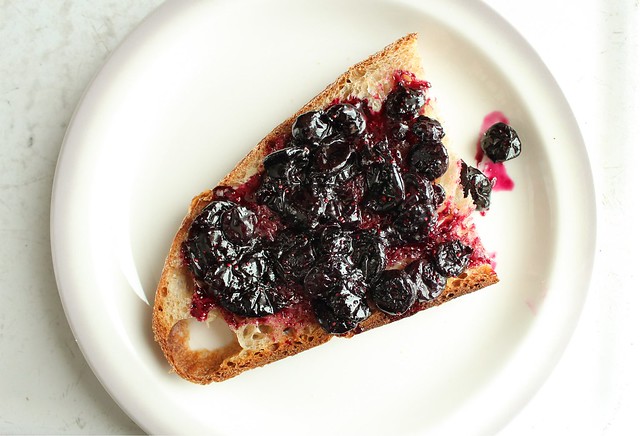
Fill the muffin tins almost to the top.  Top with coarsely chopped nuts if desired, and bake 22-25 minutes or until a tester comes out clean.  Cool the muffins in the pan for 10 minutes, then remove them to a wire rack to cool completely.  The texture of the muffin changes as it cools - it sets up more as it gets cooler.  I've had good luck keeping them in an airtight container at room temperature up to 4 days.

hazelnuts.

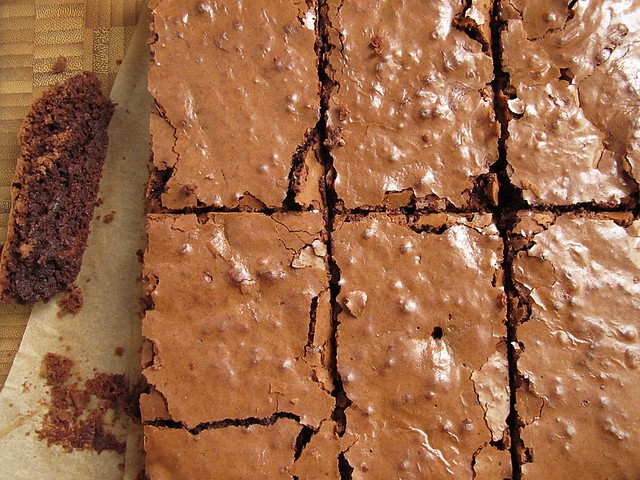
In a way, this recipe reminds me of Dorie Greenspan's Breakfast Bread, which includes applesauce and oats (and I also make it with half the sugar, and just a nut topping).  She calls the bread "almost puddinglike" inside and these muffins, at least while warm, would remind you of that description.  I would expect you could use fruit sauces instead of the shredded fruit, especially if baking by weight.  I'll probably try using applesauce or pearsauce or maybe even pureed mango or something.  I do know for certain that I'm not done with these muffins.

Can a muffin make you more organized?  I like to think so.  Having that little, generally nutritious something to pop in a hungry mouth on a whim is pretty nice.  I might make a point of more muffins, and maybe even stashing some in the freezer.  I got away from muffin freezing because I tended not to grab them and then months would pass and I'd discard my labors.  But with muffins this good, there's no need to freeze.  For breakfast, snack, or even as a dessert, they have helped my year get off the ground in a very nice way.  A nicely, organized way!

Book Review: Preserving by the Pint


Preserving by the Pint

When I got my review copy of Marisa McClellan's latest book a few weeks back, time seemed to stand still for the moment and I almost immediately read the entire thing cover to cover.  I had been looking forward to cracking open this one since I had the pleasure of testing a few of the recipes for it last year, and it truly is a lovely addition to the growing canning book section of my kitchen library.

I couldn't help but think as I turned page after page that Marisa is going to be writing new books for years.  She has the magic trifecta in her cookery books: timeless recipes, succinct instructions, and simple inspirations.  She is passionate about her craft, and eager to share with everyone - which I think is the underlying theme of Preserving by the Pint.  Organized by season, this book encourages everyone to make small batches using local and seasonal foods.  It tempts us to branch out and try something maybe we haven't considered before, even to source special ingredients that might not be cost efficient if making a more traditionally sized amount.

small batch preserving.

Personally I like to can for my storage shelves, but with my ongoing quest for sugar reduction, having a jar or two of a really stellar preserves is an excellent idea - especially since I can tend towards the hoarding jams and jellies even when I've made 8 or 9 jars of them.  After finishing the book, I immediate found some Meyer lemons at my co-op to make Candied Meyer Lemon Slices.  Only needing a pound for the recipe made it feel doable for me when I didn't have the foresight to get on the Lemon Ladies list for bulk fruit like Marisa did.  (And, she had made a beautiful Meyer Lemon Syrup on her blog not long before, and I was feeling especially bad for missing the lemon season...) 

candied meyer lemon

I really loved these candied lemons, they had a nice marmalade texture and trademark Meyer lemon astrengency.  I was glad I had a little bit of the syrup leftover which set into a little lemon jelly to enjoy right away on morning toast.  I intend to make a pound cake for my birthday in September and crown it with a jar of them, and I should be able to save a jar that long since the 2 jar yield leaves me one to enjoy before then.

Spring in my neck of the woods also signals maple syruping time and for a while my family had planned to make it to an Amish neighbor's sugaring operation to reacquaint ourselves with the small miracle that is maple syrup.  Last weekend, a small group of family members went to see Daniel Hochstetler's rustic sugar shack.  We arrived just as he was getting the fire going underneath a stainless vat of sap.  Already, he had harvested over 100 gallons of finished syrup and he was hoping for another good week of syruping weather.  (Last year was a perfect year for syrup; they harvested more than 300 gallons and still had some leftover before starting this year.  If boiled to the proper temperature, maple syrup never really spoils.  The two past seasons make up for the strangely warm spring two years ago when there was no syrup to be found.)  My Mom and Dad generously sent me home with 2 gallons, which usually can last us the whole year if we watch our pancake breakfasts...

sugar shack (#2)
I respect the Amish desire not to have their faces photographed, but was able to capture a photo of Daniel and his sugar shack from a distance...

As I stood there breathing in the sauna of maple scented sap, I was dreaming of a recipe Marisa included in the book for Blueberry Maple Jam - thankful for my hoarding of a gallon bagful of blueberries in my freezer from last year, and thankful for a new harvest of syrup to replenish my waning stores. When I got back home, I started the jam right away but got busy.  Fortunately, letting the fruit macerate overnight with the syrup and brown sugar is an acceptable practice.  My yield was a little less than the 2 half-pints, but I suspect it is because I used frozen fruit.  I haven't had blueberry jam in ages - in part because of the amount of berries it requires - and this one was so good.  I was actually glad I was a little shy of a second half pint so I had some to enjoy right away.

blueberry jam maceration

I made this jam with frozen berries and using the metric weights.  As I mentioned above, I think I lost a little volume due to the frozen fruit - but this is so good I probably wouldn't have needed to can it!  If canning, be sure to use the bottled lemon juice.  As Marisa explains, maple syrup is lower in acidity than sugar and the bottled lemon juice ensures a safe acid level.

Blueberry Maple Jam (Marisa McClellan, Preserving by the Pint)
Yields 2 half-pints
  • 1 dry quart fresh blueberries, rinsed, pickedd over, and mashed (about 1 1/2 lbs. / 680 g.)
  • 3/4 c. / 175 g. packed light brown sugar
  • 1/2 c. / 120 ml pure maple syrup
  • 2 T. bottled lemon juice
Prepare a boiling water bath and 2 half-pint jars.  Place 2 lids in a small sauce pan of water and bring to a gentle simmer.

Combine the blueberries, sugar, maple syrup, and lemon juice in a large skillet.  (I used this 3-quart one, which was a perfect size.) Stir to help the sugar dissolve and to integrate the maple syrup.  Once the mixture has begun to look syrupy, place the skillet over medium-high heat and bring to a boil.

Stirring regularly, bring the fruit to a boil and cook until it bubbles and looks quite thick, 10-12 minutes.  It's done when you pull a spatula through the jam and it doesn't immediately rush in to fill the space you've cleared.

When the jam is finished cooking, remove the pot from the heat and pour into the prepared jars.  Wipe the rims, apply the lids and rings, and process in a boiling water bath for 10 minutes.

blueberry maple jam

I can't say I've ever used my 3 quart saucepan to make jam before, and that is a great tip for small batches in particular.  The surface area helps evaporate the liquid faster; I really couldn't believe the small batch was finished cooking in just 10 minutes. 

Another great thing about this book is that if you make just a few jars of something, you wouldn't necessarily have to can it if you didn't want to.  Save yourself a jar, and share another with a neighbor or two and save yourself a hot water bath and the canning time.  But I am looking forward to a little patchwork of fully preserved jars on the shelf by the first frost of fall, new preserves from this beautiful book to take me through the winter and help me wait out the time until Marisa's next book.

You can catch more glimpses of Preserving by the Pint at The Preserved Life, Well Preserved, Hip Girls Guide to Homemaking (still a couple of days left to enter their giveaway), and of course at Food in Jars where you can also find Marisa's upcoming appearances.

blueberry jam pot

DISCLOSURE: I received a copy of this book for review, but as always all of my thoughts and opinions are my own.

More Adventures in Gluten-Free Baking

I somehow feel like it's my personal goal to bake gluten-free treats that taste so good no one has any clue they are gluten-free.  It's not because I have trouble with gluten, and it's not because I'm vying for blog clicks and cashing in on a trend:  it's purely because baking is an adventure and gluten-free baking is the biggest adventure of all.

It's been awhile since I tried my first experiments with GF baking.  It began when I realized that my Vita-Mix could easily turn any whole grain into flour.  Since I run a fairly "whole food" kitchen, I already had tons of  raw material to work with - and the only thing standing in my way were a few minutes of prep time and the mess involved when grinding up lots of miscellaneous grains at once.

I've gotten a little smarter since I've discovered I love baking with GF ingredients, and I made a shelf in my pantry for all of my supplies.  Instead of grinding what I need when I need it, I can usually reach for a quart jar and then only occasionally run into the need to refill it.

GF baking pantry shelf

What exactly is on the shelf?  I keep jars of sorghum flour, brown rice flour, teff flour, tapioca flour (also called starch), potato flour, xanthan gum, a gluten-free AP mix that I make up according to this recipe, and a canister of coconut flour that a friend gave me and I haven't tried it in anything yet.  I personally have not yet found much difference between brown rice flour and white rice flour, so I only keep brown rice - and a nice bonus is that it is available in bulk at my co-op without being prohibitively expensive.  (Purchased rice flour is also much more finely ground than what I can produce in my Vita-Mix.)  Now that I've got a basic GF pantry going, it's easy to keep things in stock - and grind things from my other whole food staples like quinoa, millet, and oats on an as needed basis.

And, can I add that sorghum flour is my most favorite flour ever?  It's absolutely worth the expense, and I adore the texture and flavor it gives baked goods.  In fact, there was a whole cup of it in the blueberry muffins I decided to make yesterday...

GF blueberry muffin

These muffins, admittedly, were best fresh from the oven.  In fact, all of my tasters didn't suspect they were GF at all, and the texture was exactly like that of a regular blueberry muffin.  When I tried one this morning, the texture had changed a little, but was still very good - especially with a cup of coffee.  I should have tossed the frozen berries with a tablespoon or two of the floury mix to keep them from congregating towards the bottom of the muffins... I'll remember next time.

When I want muffins, I usually decide last minute - so waiting on butter to come to that magical room temperature isn't always an option.  I used coconut oil to great effect, it's 10 tablespoons by weight (the weight of butter),  I've given you the gram measurement.

Gluten-Free Blueberry Muffins (adapted from Gluten-Free Girl)
  • 142 g. coconut oil, soft room temperature
  • 1 c. white sugar
  • zest of one orange
  • 2 eggs
  • 1 c. brown rice flour
  • 1 c. sorghum flour
  • 1 c. tapioca flour (also called tapioca starch)
  • 1 1/2 t. baking powder
  • 1/2 t. baking soda
  • 1/2 t. kosher salt
  • 1 c. + 2 T. plain yogurt (I used full-fat)
  • 1 c. blueberries, not defrosted if frozen
Preheat oven to 350.  Ready 18 muffin liners in muffin tins.

Mix the brown rice, sorghum and tapioca flours, the baking powder, baking soda and salt together in a medium sized bowl and set aside.  (Toss the frozen berries with a tablespoon of the flour to keep them from sinking to the bottoms of the muffins.)

In a large bowl, mix the coconut oil, sugar, and orange zest with a hand mixer until just well combined.  Add the eggs, one at a time, mixing well after each.  Add half of the flour mixture, and mix until just combined.  Add 1/2 c. of yogurt and mix until just combined.  Add the rest of the flour mixture, then the rest of the yogurt, mixing after each addition as previously described, taking care not to overmix.

Fold in the blueberries.  Portion into the muffin liners, about 2/3's full, and bake for 20-25 minutes.  They should just be starting to brown around the edges, and a tester should come out clean from the centers.

I considered juicing the orange I used for zest and mixing it with enough powdered sugar to make a glaze.  They didn't need it, but would be pretty and perhaps more dessert worthy if you do it.

GF blueberry muffins.

For a picnic last Sunday, I baked up some GF brownies - and I have to say they were better than any brownies I've ever made before.  They were also adapted from a Gluten-Free Girl recipe taken from Alice Mendrich, so I knew before I even began that they would be amazing.  What I didn't know is that they would age well.  I saved one a full 4 days to test this theory, and they were even better than when fresh.  I didn't bother with a double boiler to melt the butter and chocolate, and I didn't bother with the cold soak to stop cooking either - I just made sure to heat the chocolate over low heat and watched not to over bake.

Gluten-Free Brownies (adapted from Gluten-Free Girl/Alice Mendrich)
  • 8 T. butter (1 stick), cut into 8 pieces
  • 4 oz. dark chocolate (I used Callebaut), chopped
  • 1/2 c. white sugar
  • 1/2 c. raw sugar
  • 2 eggs
  • 1 t. vanilla extract
  • 1/4 t. kosher salt
  • 1/4 c. brown rice flour
  • 1/4 c. tapioca flour
  • large handful of raw walnuts, broken by hand over the batter
Preheat oven to 400.

In a small, heavy saucepan, melt the butter together with the chocolate.  Remove from heat and let cool slightly.

Line an 8x8 square pan with parchment paper (I use 2 pieces that overlap in a criss cross, so that I can lift them out easily).  In a medium sized bowl, blend the sugar and eggs for a full 3 minutes - until the sugar starts to break down a little and the mixture looks thickened.  Add the vanilla and salt and blend in well.

Add the flours, and use a spatula to blend in thoroughly.  Scrape in the melted chocolate and butter mixture, and fold in well until no streaks remain.  Crumble some walnuts over the batter and fold them in too.  Then, spread the mixture into the prepared pan and bake until the pan isn't jiggly when tapped, and fudgy crumbs cling to a tester inserted into the middle of the pan.  I started checking at 20 minutes - and they were perfect within 24 minutes.  Remove pan from oven to a cooling rack, and let cool completely in the pan until room temperature before slicing.

Store any leftovers tightly wrapped (I used foil, since we were picnic-ing).  They will remain very good for several days.

gluten free brownies

Like all alternative kitchen adventures, GF bakery can have the connotation of being healthier.  These two examples of baking are not necessarily healthier for you, but they are proof that GF bakery can taste amazing and fool anyone who may have the predisposition to think that by their very nature, GF bakery tastes rubbery and awful.

In general, I'm baking a lot more thoughtfully these days.  I'm not baking just for the joy of baking as I usually do;  I have successfully stopped eating so many baked goods personally.  So I'm making the most of each opportunity I have at my oven: taking care to ensure that no matter your dietary need, there can be a quality, homemade baked good made to amaze you.  If you happen to have a GF challenge for me, let me know... maybe it will be my next gluten-free kitchen adventure!


Orange Blueberry Muffins

I really haven't made many quick breads lately due to Summer, I think. But when I made these yesterday, I remember how much I missed them.

Really, it was due to soon going out of town, and having a basket of blueberries to use that caused me to make these. And R1 was coming for lunch...enough reason for me to turn on my oven...

I think I had clipped this recipe out of a Florida's Natural Orange Juice ad in the Sunday paper more than 3 years ago, always figuring I'd try it, but never really setting out to do so. What a shame! So delicious, and not too overwhelmingly orangy - although I don't mind that. Easily enough, I think you could lemonize the recipe if so desired. Originally it was a loaf pan recipe, but I prefer 12 of something to one... That and I have instant portion control, which when it comes to quick bread, sometimes I need.

So here it is: but I added coarse sanding sugar to the tops before I baked, you could also use turbinado sugar or probably even plain sugar (maybe even mixed with a bit of cinnamon if you love that).

Orange Blueberry Muffins

  • 1/2 c. orange juice
  • 1 c. blueberries
  • 2 T. ap flour
  • 1 3/4 c. ap flour
  • 1/4 c. cornmeal (I like coarse here)
  • 1 1/2 t. baking powder
  • 1/2 t. baking soda
  • 1/2 t. salt (omit if using salted butter)
  • 6 T. room temp butter
  • 3/4 c. sugar
  • 1 egg
  • 2 t. orange peel, grated

Preheat oven to 350.

Line muffin tins with papers. Toss blueberries with 2 T. flour to coat them and prevent them from sinking in your batter. Sift together: 1 3/4 c. flour, cornmeal, powder, soda and salt in a medium bowl

In a large bowl, beat butter and sugar on high for 3 minutes until light and fluffy. I really do set a timer here. Add egg and beat well, then beat in orange juice and peel. Add flour mixture and beat on low until well mixed, but don't overbeat. Stir in blueberries.

Portion into muffin tin, and sprinkle with coarse sugar.

Bake for 25 minutes or so for 12 muffins. If you must make a loaf, butter and flour your loaf pan well, then bake it for 55-65 minutes. In both cases, test with a pick to make sure they are done.

If it is not nearly 100 degrees where you live, and is a very pleasant and manageable mid 70's like it's been here the past few days, give quick breads a try in the summer - or earmark it for a few years until you rediscover it and wish you made it earlier. If you're like me, you'll have to give away some, but that only can add to your popularity! If not, you could always hoard them in the freezer.

On a non-food note: Why am I obsessed with this chair from B&B Italia?

http://www.bebitalia.com/beb-italia/sofas-and-armchairs/serie-up-2000_1_648_1_1.html#BEBITALIA/SOFASANDARMCHAIRS/SERIEUP2000_1_648_1_1

I can envision myself sitting in this thing for hours, even though it is completely unlike anything I would ever buy... It's reminiscent of a lady in a stripy swimsuit, who wouldn't want that in their living room?