A Short, but Complete, Story.

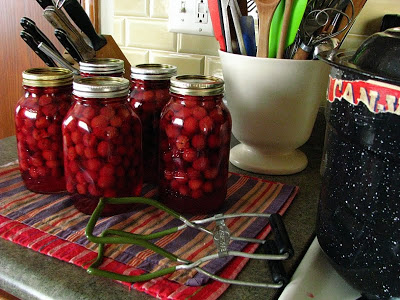
Every cook must have stories, tales that pop into mind during mundane kitchen tasks. These instances usually attack me when I'm least expecting it, flooding my mind with moving pictures of things that happened long before my birth - but things that have woven their magic into my psyche. The stories become my stories, I become a child of the Great Depression stretching the last of the sauce, weaving the fabric of the tales and changing the pattern into my own.


I have not a stitch of Italian ancestry, but this afternoon when I transferred what red sauce I made to a storage jar I thought of all the stories that I claim as mine. I heated my red pot with the olive oil in it, thin slivers of garlic heating up with the oil as Marcella Hazan recommends. Nearly every time I start a sauce, I do it her way to coax a silkier, less bitter hot garlic into being. I feel like I came to this country with my Husband and did not speak a word of English. That I stood in the supermarket looking at packaged chickens in plastic wrap and wondered at the lack of connection between these Americans and their food.

When I grated a peeled carrot into the pot, I remembered my longtime ex-boyfriend's mother, a tremendous cook and baker. She was not Italian either, but sweetened her sauce with carrots, and tamed the sweetness with a splash of red wine which bubbled up vinegary before she added her tomatoes. No matter what vegetables I try to sneak into my sauces these days, I add the carrot and red wine for her, thinking of all the meals that she shared with me over the years, the implements in my kitchen that came from her endless rummaging and thrifting, her generosity that still holds fast in my heart even though things were not to be with her son.

My sauce finished, I sliced and fried some eggplants cut into circles, wondering all the while if I could convince my Kiddo to eat it. I was not a picky eater, and neither were my two brothers. When one brother and I visited my Grandparents in the "city" (now, Stevens Point does not really seem so urban...) as small children, my Grandpa would try to coax us into finishing our breakfasts by telling us of the park bench in our bellies. I still see this cartoon bench deep in my stomach, a full glass of orange juice sitting there with a smile on it's face just next to a strip of wavy bacon, also smiling. Yes, the pancake is there too, the same silly smile plastered on his face. Hardly a breakfast goes by when I don't think of that time when I honestly believed that there was such a thing as a park bench in my belly, and that I shouldn't waste what is on my plate since the food already waiting on the bench will be lonely without company. I have already employed the story of the park bench, and I wonder if little eggplants with smiles on their faces will join the glass of milk and corn on the cob in my Kiddo's stomach when dinner emerges from the oven...

After assembling my Eggplant Parmesan, I used the ladle already in the pot to transfer the leftover sauce to a jar. After scraping most of the sauce in, a brief thought of washing the pot without scraping every last bit out crossed my mind. Did I really want to dirty a spatula to get those last tablespoons? The story that immediately came to mind was one that was told to me second hand by my Mom. When my Gram was newly married and living in Chicago, she went on a picnic lunch with my Grandfather. They brought hard cooked eggs, didn't eat them all and rather than pack them up, they left them in the woods. A day passed and they were hungry and remembered those eggs. They went back to see if they could find them. Now, my details of this story are fuzzy, but when it was first told to me I wondered, "Who goes to look for eggs that were left outside a day later?" "They were hungry, I guess..." I remember my Mom telling me.

I grabbed my spatula and scraped the pot, nearly a quarter cup of sauce appearing magically from the bottom and sides. A quarter cup I imagine my Depression Era Gram stretching into a meal somehow, and the portion I now remember to be thankful for.

Preserving Sour Cherries.

I really never got addicted to sour cherries until 2 years ago. I popped a couple into my mouth at the West Allis Farmer's market, and my life was forever changed. I'm not really sure why I never ate them before, or sought to look for them. They were something rare, something I never grew up eating.

Last year, I missed the fleeting season altogether - in part because I didn't go to many farmer's markets because I joined a CSA, and in part because the season was not prolific due to our extremely rainy Spring. I made my last jar of tart cherry jam last longer than I should have but by the time July rolled around, I started perusing the Wisconsin Cherry Grower's site nearly daily, paranoid that I was going to miss them again and my memory of tart cherry jam was going to have to hold me for another year.


All of a sudden, there was a cherry explosion. I first saw tiny crates at the Farmer's market last Tuesday, little ruby drops of North Star and Montmorency varieties - gems that put Wisconsin on the gourmet foods map. There really is nothing like a sour cherry, nothing that approximates it's piquant sweetness, and popping the first handfuls into my mouth fueled my growing cherry appetite even more.

When Peef and Lo asked if I'd be interested in getting a substantial amount of cherries from Cherryland's Best, I originally thought I'd split some with another food blogger. But the longer our discussions went, the more we all decided that we could each manage to make 27 lbs. of cherries into something. The way I downed my first little basket, I wondered if 27 lbs. would actually be enough. I imagined myself to sleep by pitting cherries until my fingers hurt, waking early so excited for Wisconsin sour cherries and the task to preserve them all.

I was more than surprised when my cherries came in and they were "processed". A food grade, white pail heavy with already pitted fruits in their own natural, accumulated juices. I drove my haul back home, cracked open the pail, shoveled a handful of tart cherries into my mouth. I was so happy, and I didn't have to pit anything! As soon as I gave my Kiddo lunch, I portioned off my plan of attack. In less than 24 hours, here is what became of the 27 lbs. of cherries:

3 lbs. for the Sour Cherry Jam
2 1/2 lbs. for Limey Rum Sour Cherry Preserves (inspired by Linda Ziedrich, recipe below)
1 lb. for the Bachelor's Jam
3 lbs. for dehydration
2 1/4 lbs. for vinegar
7 1/2 lbs. for quarts canned in light syrup, one jar lost to explosion :(
2 lbs. for cherry crisp
1 lb for fresh eating
just shy of 2 quarts of accumulated cherry juice


dehydration.
I haven't done too much fruit dehydration, and I knew I would be shocked at how much moisture is lost in the process. Of the 3 lbs. of fresh cherries, the finished weight of dried cherries was under a half pound. They are sweeter, and would remind me of a dried cranberry if I didn't know better. After drying them, I put them in the freezer just to make sure any extra moisture doesn't cause them to mold on me. I'll likely use some in my Stollen this year.


bachelor's jam.
I first read about bachelor's jam last year, and was fascinated with the idea of it. Fruit is layered as it comes into season with sugar and kept submerged in alcohol (I used brandy) until ready to use. The "jam" comes from stirring up the boozy fruits and straining them out of the alcohol - each to be used as a separate component to holiday entertaining I'd imagine. I can't wait to make cakes topped with the fruit, to taste the finished alcohol that right now I can only imagine as being extremely sweet.


vinegar.

I feel like flavoring purchased vinegar is totally cheating. I also feel like I have failed miserably at making vinegars, the only success being the blueberry apple variety. The beautiful vat of Lemberger wine that was gifted to me became plagued with black mold, the rhubarb version met the same demise. I still love the flavor of vinegar, especially Bragg's cider vinegar, and put the fruit to steep as recommended in Pam Corbin's River Cottage Preserves Handbook. Next week, I'll strain it, sugar it, and reduce it - where it will be a clever addition to pan sauces and maybe even yogurt. (Note: I decided not to heat the vinegar past the warming point, just enough to dissolve the sugar. This way, the Bragg's vinegar remains raw and healthful despite all of the sugar. It is delicious mixed with ice and seltzer as a shrub.)


the beginning of Limey Rum Cherry Preserves.

Inspired to make more boxed-pectin-free jams this year, I have been devouring the recipes in Linda Zeidrich's The Joys of Jams Jellies and Other Sweet Preserves. Sweet Preserves are something that I never really understood: too thin to be considered a jam, they sit clumsily on toast or pared up with nut butters. They are achingly sweet. I made a strawberry preserves not too long ago that seemed good, but on the sweet side. I felt that when the heat of Summer subsided, they would taste better. But then I made this sour cherry version of preserves - and now my opinions have changed.

Yes, it is sweet. But the texture and viscosity is so lovely that I think it has sold me on the idea of preserves. I used (by weight) raw sugar, which when I smelled in in tandem with the sour cherry, made me think it needed rum. And lime. Instead of lemon, I switched to lime, and in short order, my first tweaked preserves were born.


after boiling 5 minutes, and sitting 12 hours. or maybe a tad longer...

This preserves starts 8-12 hours before the canning process takes place. The sugar combines with the fruit and coaxes the gorgeous juices into being.

Limey Rum Sour Cherry Preserves (adapted from Linda Zeidrich)
my yield: 5 half pints
  • 2 1/2 pounds sour cherries, pitted, any juices saved
  • 5 c. sugar (I used 958 g. of raw sugar, converted by this site)
  • zest of one lime (I use the small, "true" limes)
  • 2 T. lime juice, from the zested lime)
  • 1/4 c. dark, spiced rum
In a large, non-reactive pot, combine the cherries, lime zest, and sugar and let sit covered for at least 1 hour. The sugar should have drawn out some of the juice.

Heat the mixture over medium heat, stirring gently and occasionally, until sugar dissolves completely. Raise heat to medium high, and boil for 5 minutes, stirring occasionally. Remove pan from heat, and cover with a cloth. Let the pan stand at room temperature for 8-12 hours.

Set the pan over medium heat and add lime juice. Bring to a boil, and raise heat to medium high. Boil, stirring often (skimming any foam) until the syrup thickens a little. (I tested by using frozen plates - I boiled away for at least 35 minutes until I was happy with the thickness.) Remove the pan from the heat and carefully stir in the rum.

Ladle into half-pint jars. Add lids and rings, and process in hot water bath for 10 minutes.


Since I made these preserves early this morning, I used the skimmed foam (there wasn't much) with an equal part maple syrup for this morning's pancakes. For some reason, I still am not cherried out:


After breakfast, I debated what to do with most of the remaining cherries. I wavered between canning in extra light syrup or freezing, and the canning won out. There's something about seeing quarts of cherries on the shelf, I guess - and the bonus of having some light cherry syrup to contend with...


6 went in, 5 came out...

I talked to my Mom for a good amount of time today, and she was surprised I wasn't making any desserts. "No cherry pies?" I have a serious weakness when it comes to sweets. If I make them, I eat them, if I don't make them, I don't even really crave them. I asked my Husband if he would eat a crisp. "Like, an apple crisp?" he asked, oblivious of the huge white pail that was still sitting on the counter... "No, like cherry crisp," I stated, maybe just a tad annoyed. He said he probably would eat it, so that was the only extra push I needed to make it.

I forgot that I should never NEVER use tapioca flour to thicken pies/tarts/crisps and the like, since I absolutely detest the flavor it imparts. After the crisp baked the first time, I dismembered it crisp from filling and cooked the filling on the stovetop with more sugar to mask the flavor. I also added probably too much cinnamon. Then, I reassembled the crisp into a new, shallower pan, topped with additional crumble (I had only used half the amount the first time, and froze the rest), and re-baked for a half hour. I was much happier.


Have I eaten my fill of cherries yet? I'm not sure. I'm so thankful I have such beautiful preserves to take me through the winter, to give as gifts. And, I'm surprised that it didn't seem like so much work to get it all done in less than a day. Thank you Peef and Lo for thinking of me, and thank you Cherryland's Best for amazing fruit, and less work!

Daring Baker Challenge July 2011: Fraisier.

Jana of Cherry Tea Cakes was our July Daring Bakers’ host and she challenges us to make Fresh Frasiers inspired by recipes written by Elisabeth M. Prueitt and Chad Robertson in the beautiful cookbook Tartine.


I was excited for this challenge because I had a cause to share my dessert. If I'm honest, the Daring Baker Challenges are starting to wear on me if only because I don't know enough people to share them with. On occasions like last month's baklava, I had no trouble polishing up most of the dessert myself in a full week's time, but this month's choice of fraisier is not what I'd call a "good keeper". Depending on next month's challenge choice, I may put a declaration on my Facebook page for any Milwaukee area readers to come share the dessert, like a pie social for the 21st century. If that sounds right up your alley, keep an eye out!

I had never heard of a fraisier before. Essentially, it is sponge cake soaked with simple syrup, layered with fruit and a gelatinized pastry cream. It was supposed to be topped with a final layer of rolled almond paste, but I spread a thin layer of orange spiked whipped cream instead.

My whole flavor scheme this month was really inspired by the success of my strawberry guajillo jam. Just after making it earlier in the week, I made a thin sauce of strawberry, guajillo peppers, and a touch of cayenne powder. Then I flavored the other components along the way with little whispers of my orange liqueur. The finished dessert was light, and not at all too sweet, the perfect thing for a hot summer evening spent with friends.


The sauce wasn't a true simple syrup, but did sink into the layers pretty well and lent that little bit of heat that I was looking for. I also brought along a little bottle to use on top for those who wanted a little more strawberry heat. I think it would also be an excellent component to drinks, to drizzle on ice cream (basil ice cream perhaps?), to add to milk and stir - enjoying far more than you did as an 8-year-old pigtailed girl slurping slowly (quickly?) out of a Nesquik Rabbit cup...

Stawberry Guajillo Cayenne "Sauce"
  • 3/4 c. crushed strawberries
  • scant 3/4 c. raw sugar
  • 1 dried guajillo pepper, stemmed and finely chopped (I used the seeds as well)
  • 1/4 - 1/2 t. cayenne pepper powder (to taste)
Combine strawberries, sugar and guajillo pepper, and let sit at room temperature for 6-8 hours (I did this in a non-reactive pot seen above, then used the same pot to bring it up to a boil). Bring the mixture to a boil, let simmer one minute, then remove from heat. Transfer to a blender and blend until completely smooth. Pass it through a fine sieve, saving any pulp to use as jam. Add cayenne to taste.


unbaked, the batter reached the top of the tin...

When I first read over the recipes for the challenge, two things caught my eye straight away. The first were the implicit instruction that this dessert should be a free-standing cake and not a trifle. The second was that the pastry cream recipe had only a single egg.

The sponge cake, a true chiffon, was supposed to be baked in an ungreased 8 inch springform tin, which I dutifully did after confirming several times that it was an 8 inch pan. I figured if the cake stuck miserably and I would break instruction and just make a trifle since judging from the batter I could tell the cake was delicious. The chiffon cake needs no pan greasing because the batter needs to "climb" the sides. Once completely cool, a knife run between the cake and the sides of the pan breaks the seal, and the cake pops out. Even though the cake mushroomed out over the top of the pan, once cooled it did remove easily. I was quickly able to remove the domed top with a serrated knife.

(There was no height on the pan size, and since my pan was 2 1/2 inches high, I can only assume that the cake tin size should be taller or that the cake should be baked in a 9 inch tin and be slightly less high when finished. Next time I make this cake, I will either use a taller 8 inch springform, or maybe 2 8 inch cake pans and divide the batter. To make a quicker version, I'd also be unopposed to making it as a sheet pan cake.)

I used the metric weigh measurements, and frozen egg whites. I also found (probably due to the height of the cake) that my cake baked almost 20 minutes longer that the suggested baking time. I covered the top lightly with aluminum foil for the last 20 minutes so that the top didn't continue browning and it baked perfectly. Just make sure a long skewer inserted into the center of the cake comes out clean. The only other addition I made to the recipe was to add the zest of one orange, and substitute 2 t. of orange liqueur for the vanilla extract.

Chiffon Cake (Elisabeth M. Prueitt and Chad Robertson, Tartine cookbook via The Daring Kitchen)
  • 1 cup + 2 tablespoons (270 ml) (5Β½ oz/155 gm) all-purpose flour
  • 1 teaspoon (5 ml) (4 gm) baking powder
  • 3/4 cups (180 ml) (6 oz /170 gm) sugar
  • 1/2 teaspoon (2Β½ ml) (1Β½ gm) salt, preferably kosher
  • 1/4 cup (2 fl oz/60 ml) vegetable oil
  • 3 large egg yolks
  • β…“ cup + 1 tablespoon (3.17 fl oz/95 ml) water
  • 2 t. orange liqueur
  • zest of one orange, grated
  • 5 large egg whites
  • ΒΌ teaspoon (1ΒΌ ml) (1 gm) cream of tartar
Preheat the oven to 325Β°F (160Β°C/gas mark 3). Line the bottom of an 8-inch (20 cm) spring form pan with parchment paper, and do not grease the sides of the pan.

In a large mixing bowl, stir together the flour and baking powder. Add in all but 3 tablespoons (45 ml.) of sugar, and all of the salt. Stir to combine.

In a small bowl combine the oil, egg yolks, water, vanilla and zest. Whisk thoroughly. Combine with the dry ingredients and mix thoroughly for about one minute, or until very smooth.

Put the egg whites into a stand mixer, and beat on medium speed using a whisk attachment on a medium speed, until frothy. Add cream of tartar and beat on a medium speed until the whites hold soft peaks. Slowly add the remaining sugar and beat on a medium-high speed until the whites hold firm and form shiny peaks. Using a grease free rubber spatula, scoop about β…“ of the whites into the yolk mixture and fold in gently. Gently fold in the remaining whites just until combined.

Pour the batter into the prepared pan. Bake for 45 to 55 minutes or until toothpick inserted into the center comes out clean. Removed the cake from the oven and allow to cool in the pan on a wire rack.

To unmold, run a knife around the sides to loosen the cake from the pan and remove the spring form sides. Invert the cake and peel off the parchment paper. Refrigerate for up to four days.


mushroom?

My next battle was the pastry cream filling, which I made when the chiffon cake was cooling. I have never seen a recipe for a pastry cream that has a single whole egg in it. I suspect I didn't cook it long enough, and it never did set past the "slightly beaten whipped cream" stage. I saved it to make into ice cream, and made a second, more reliable batch of Dorie Greenspan's pastry cream which uses 6 egg yolks. (I froze the remaining egg whites, (6, plus the 3 from the earlier cake) and I'm well on my way to making an angel food cake!) Because I made Dorie's recipe for the pastry cream, I had to approximate the amount to mix with the gelatinized whipped cream to make the filling as written. I just eyeballed it, but it worked well and was fairly stable when assembled. You can find the pastry cream recipe on The Daring Kitchen website, but I made this version:

Dorie Greenspan's Pastry Cream (plus gelatinized whipped cream for Frasier Filling from Elisabeth M. Prueitt tand Chad Robertson, Tartine cookbook via The Daring Kitchen)

for the Pastry Cream:

  • 2 c. milk (Dorie says whole milk, I used 2 %)
  • 6 large egg yolks
  • 1/2 c. sugar
  • 1/3 c. cornstarch, sifted
  • 2 t. orange liqueur (originally 1 1/2 t. vanilla)
  • 3 1/2 T. unsalted butter at room temperature, cut into small pieces
Bring milk to a boil in a small saucepan.

Meanwhile in a heavy-bottomed saucepan, whisk egg yolks with sugar and cornstarch until thick, and lightened yellow in color. When still whisking, slowly add about 1/4 c. of the hot milk to temper. While continuing to whisk, add in the rest of the hot milk.

Put the pan over medium heat and whisk "constantly and thoroughly", bring the mixture to boiling. Boil for 1-2 minutes, whisking all the while, until thick. Remove the pan from heat.

Whisk in orange liqueur, and let cool for 4 minutes. Whisk in small bits of butter, stirring until they are fully incorporated and pastry cream is smooth.

Transfer to a clean, glass bowl and press a piece of plastic wrap on the surface to prevent a skin from forming. Transfer to the fridge until chilled. (Finished pastry cream will last 3 days.)

to make the Pastry Cream into Fraisier Filling:
(from the source listed above)
  • 3/4 teaspoon (3ΒΎ ml) (4 gm) gelatin
  • 1/2 tablespoon (7Β½ ml) water
  • 1 cup (8 fl oz/250 ml) heavy cream
In a small dish, sprinkle the gelatin over the water and let stand for a few minutes to soften.

Put two inches (55 mm) of water into a small sauce pan and bring to a simmer over a medium heat.

Measure 1/4 cup (2 oz/60 ml) of the chilled pastry cream into a small stainless steel bowl that will sit across the sauce pan with the simmering water, without touching the water. Heat the pastry cream until it is 120 F (48.8 C). Add the gelatin and whisk until smooth.

Remove from the water bath, and whisk the remaining cold pastry cream in to incorporate in two batches (because I made another recipe for the pastry cream, I approximated the amount of pastry cream to use, about 2/3 of the whole recipe of Dorie's).

In a stand mixer, fitted with the whisk attachment (I used a hand mixer to blend the whipping cream since is was a small amount), whip the cream until it holds medium-stiff peaks. Immediately fold the whipped cream into the pastry cream with a rubber spatula. Refrigerate until fully chilled.


To Assemble:

Since the components can be made over the course of a day or two, the cake is actually easy to assemble, the sponge is a dream to cut hardly losing any crumbs at all. Line the sides, but not the bottom of the 8 inch springform pan with plastic wrap. The easiest way I found to do that was to fit the bottom on top of the wrap, then cut off the excess from underneath. I used tape to fix the bottom of the pan to a glass serving platter.

Place one half of the sponge into the bottom of the pan, and brush heavily with the syrup (sauce). Fit the strawberries decoratively around the sides of the pan. Help keep them in place by piping the pastry cream in around them, and then piping a thin layer of pastry cream across the bottom. Smooth, and fill with a layer of sliced strawberry and then top with the remaining pastry cream filling. (This should bring you to the top of the springform pan.) Top with the remaining sponge cake layer, and brush heavily with syrup (sauce). See pictures below.

Just before leaving with my cake, I whipped another half cup of heavy cream with just a tablespoon of confectioner's sugar and 2 t. more orange liqueur. I spread it across the top in a thin layer and garnished with a strawberry. I cut off additional plastic wrap from the top of the springform pan, so all I'd have to do to unmold it is open the springform and peel away the sides. Even though my layers were not perfectly even, the cake was neat in appearance and stayed together well. I refrigerated it as recommended, at least 4 hours before transporting it. It cut much easier than I expected, and the slices held their shape.


Even though my finished recipe wasn't quite as pretty as our host's, I was still happy with the result. It really is an elegant cake for Summer, which could be easily adapted to any fruit and liqueur combination. I look forward to having an excuse to make it again! Even though it seems a touch time consuming, the work can be split over a day or two and the finished cake assembly time is nominal - a half hour at best.

Thank you to Jana for an interesting challenge!


**Note to Self:

I did make the failed pastry cream and the leftover Dorie Greenspan pastry cream into strawberry ice cream. I blended the pastry creams with a cup of yogurt and 1/4 c. of leftover strawberry jam/syrup runover in a blender and got it nice and cold. It tasted exactly like frozen strawberry cheesecake, I think because the yogurt added a bit of a sour tang. I'd make it again, actually - and definitely won't be too sad if I ever have failed pastry cream again.

Dehydrated Granola.

Last week, I happened to notice a bookmark and comment I left on a recipe more than a year ago. It's shouldn't be so surprising when time passes so quickly, but it always is. Little glimpses into my thought patterns from a while back are kind of strange. Who was that person who commented then? What was I eating and obsessing over? When the comment is left on a staple like granola, it isn't too hard to remember the reason why I bookmarked it - but it is easy to see why I forgot about it, since I only inherited a dehydrator somewhat recently.


Now a granola recipe from a blog entitled Roasting Rambler has to be great, right? And, it is - that's for sure. I actually made it without tweaking (the last photo on this post), well, I barely tweaked it, for the first time last week, all those months after I had forgotten that the idea of drying out a paste granola was absolutely brilliant. I wasn't disappointed either. It was super crunchy and delicious, my hand and both of my Kiddo's hands both made swift work of the rather small batch over the course of the week.

Yesterday after breakfast, I was hit by the urge to organize my spice cupboard. It's actually one of my favorite things about my kitchen, and contains a lot more than just spices. The top shelf appropriately holds my modest liquor cabinet. The next down, canning jars of bulk grains, nuts and seeds. Then, my shelves of spices: one shelf holds jars contained in a wooden filing box I found at a rummage, and another two baskets of miscellaneous must haves from Spice House wanderings (and things that I use in close proximity like extracts, brown sugar, cocoa powder, cornstarch. The bottom shelf is for oils, molasses, honey, sugar jar.

In the late 40's when my house was built, I assume that having such a convenient nook for cooking and baking essentials was still prerequisite for the modern housewife. I like considering myself a modern housewife who appreciates it still. I do not like that it frequently needs going through, as I tend to toss things in there despite my constantly renewed vows that I will keep it organized and faced, beautiful to look at when the shuttered door swings open.


With the success of dehydrated granola still implanted, I consolidated my jars. I discovered dried dates that were almost brittle with age, dried figs that were surprisingly soft enough to tear in two, several cranberries that were past their eating-out-of-hand prime. Using the same proportions as the Roasting Rambler's original recipe, I concocted another dehydrated granola - excited that the possibilities for this were endless.


The base of the granola is dried fruit mixed with lemon juice and enough water to make it run easily through the food processor blade. I found both times I've made it that I didn't need the full amount of water, just add it until the mixture is homogeneous and moves freely. I also found that the double batch amount that I've listed below has no trouble being mixed in the food processor. If you would double my amounts listed, it's possibly you may run into some blending trouble depending on the age of your dried fruits...

Dehydrated Granola (original recipe from the Roasting Rambler, adapted)
  • 12 mixed dried fruit (I used about half dates, then figs and cranberries)
  • 14 oz. total nuts and/or seeds (I used a 12 oz. mixture of crispy almonds, walnuts and peanuts, and 2 oz. sesame seed)
  • 1 lemon, juiced
  • 1 t. salt (you may wish to use a tad less)
  • 1 t. cinnamon
  • 1 t. vanilla
  • 1 c. water
  • 2 oz. unsweetened coconut (I use a brand like this)
  • 1 oz. cacao nibs
In a food pro, pulse the nuts (I leave the sesame seeds out, since they are so small anyway) until they are a uniform consistency that you would prefer in your granola, about 15 one second pulses. Empty them into a large bowl.

Add dried fruit to food pro, and pulse to chop. Add the lemon juice, salt, cinnamon and vanilla, and run the processor to blend the mixture well. With the motor running, add the water through the top until the mixture is like a runny paste. (I'm imagining I will add cocoa powder to the mixture at this point sometime...)

Scrape the dried fruit paste into the bowl with the nuts and add in the sesame seeds (if you didn't add them to the nut mixture), the coconut and the cacao nibs. Stir well to combine.

Spread the mixture on two dehydrator trays lined with parchment paper. Try to spread it as thin and as even as possible, without worrying about it too much. Dehydrate (I used 147 degrees) for 8-12 hours, longer if it still isn't brittle when you check it.

Break into pieces and store in glass jars. I like to keep excess of all granola in the freezer if I have the space, since I feel that it stays crunchier - but it's not necessary I'm sure.


fruit paste.


the granola mixture prior to dehydration.


spread as thin as possible.


after dehydrating.

I got 2 1/2 quart jars full of dehydrated granola. I keep my dehydrator in the basement, and when I ran busily up and downstairs, trekking clean laundry to the clotheslines I kept peeking in to look at it. Laundry complete, I then forgot all about it until this morning, when the machine had turned itself off, and it was done: crunchy, brittle shards just waiting to be broken in my hands.


I want to more fully embrace my dehydrator this year. Since it came to live with me, I don't feel I've given it the usage it deserves. I have quite a lot of tart cherries on the way, and think I'll enter the world of fruit leathers as well as dried fruit. We made fruit leathers when I was a kid, but I don't think I've had one since. I'm fairly excited to puree something cherry and apricotish in the VitaMix to try out. Come Fall, I may even try candying my own cranberries, if I can get past the tradition of just making and then eating a whole batch of these instead.


It seems like I'm starting to feel like I can barely keep up. I remember often my Mom telling me that it felt like her 30's came in "clumps", the time just flew with the business of child raising, food prep and preservation, gardening and yard work. I like to think that I have unending stamina, that I can work until my hands positively bleed, sleep 3 hours and then get up and work some more. But today I'm tired. I slept on the couch this afternoon in full sight of a basket of unfolded laundry. I didn't do the lunch dishes until after 7 pm, after a nighttime library nature program where my son was transformed into the cutest ant ever. I refuse to admit that I need sleep, and I do - though now it's getting late and that nap is beginning to make me feel like I could go all night. I probably should since I have 4 pounds of dilly beans to pickle...

I suppose they will still be there in the morning, when a handful of this new granola makes itself my breakfast with a few tart cherries that I had to buy from a favorite orchard owner today. It could be disheartening to think of all the things I've forgotten out there that are likely as great as this granola. It's disheartening to think that my memory isn't quite as sharp as it used to be. For now, I remember what I need when I need it I guess.

When Slaw Becomes Kraut...

Time flies. I can't believe it was an entire year ago that I first met Annie Wegner LeFort at a cooking class she taught at the Bay View Community Center. I also can't believe how that chance meeting has impacted my cooking life ever since. Yesterday I took another of her classes, this one on allergy-free vegetarian cooking, and I find myself inspired all over again.


Jicama Apple Cumin Kraut.

While I have my doubts in organized education, I love learning. I especially love learning from people who are naturally great teachers. Now that I'm not required by society to be educating myself, I enjoy immensely sitting in a classroom surrounded by people of wildly different backgrounds, and learning for the sake of learning.

I have only known a handful of people with food allergies, including some in my family. Usually, it was a peanut allergy or "milk intolerance", allergies that seemed ordinary compared to today's onslaught of wheat and egg allergies. When he was younger, my Dad developed an allergy to shrimp, and I've had my own brushes with reactions to specific foodstuffs (raspberries, oysters) that thankfully seem to have subsided. There are many ideas floating around as to why food allergies of all kinds are increasing, and rather than debate the cause I find it more entertaining to explore the cooking and baking resulting from it.

I think if I was ever diagnosed with a serious, life changing food allergy, I would choose to look at all of the amazing things I could still eat. (I would count it beneficial if I could possibly be allergic to sugar, in fact.) One of the recipes that Annie made for us last night was a cabbage slaw with jicama, green apple and a good amount of cumin, something delicious everyone should eat regardless of allergy issues. I knew straight away I would have to make this myself, and to lacto-ferment it since it does use cabbage after all.


There are not many more humble or healthy things than cabbages, and today at the farmer's market, I got a rather large one for $1.00.

Strangely, Annie was the one who unknowingly inspired me to play around with lacto-fermentation. Several years ago, I got a copy of Nourishing Traditions gifted to me in a round about way. I opened and perused, dismissed most of it as "a little out there", and went on eating a relatively low-fat, skim milk diet that I assumed was healthy. I would definitely say that after discovering the Raisin-Cilantro Chutney that Annie made last year, my eyes were opened. I really began to read in many different sources, including Nourishing Traditions, about nutrient rich and real foods, fermented foods, and why they were better for me. More importantly, these types of foods required me to dote on them, conjure them into existence where they change before my eyes and taste buds. This was the kind of food I was born to make, and maybe I would never have discovered if it weren't for her.

One of the most interesting things about lacto-fermentation in particular, is that nearly anything can be given the inoculation of whey (and if you are dairy-free, salt can usually stand in unless fruit is present) and be transformed into bubbling, probiotic goodness. The slaw from our class Monday night was delicious right away, but in three day's time, I suspect it will be even more complex.


When lacto-fermenting cabbage, I use a large, food service bucket. It keeps everything nicely inside since it's 8 quarts deep, and the markings help me judge how much it has reduced and what size jar I'll likely need to pack it into. I altered the amounts of Annie's original Marinated Cabbage Salad, and adapted it for lacto-fermenting by adding whey. In my understanding, since the slaw contains fruit, you should use whey to introduce the lactobacillus and not rely solely on the salt.

Lacto-Fermented Jicama Apple Cumin Kraut (adapted from Annie Wegner Lefort)
  • half of a good size cabbage, cored
  • 2/3 of a softball sized jicama
  • half of a medium sized sweet onion
  • 1 large green apple
  • 1 1/2 t. sea salt
  • juice of half a lemon
  • 2 T. whey
  • 2 t. cumin powder (to taste)
  • 1/4 - 1/2 t. cayenne powder (to taste)
  • handful of basil leaves, chopped
Prepare the vegetables: using a food pro or by hand, shred the cabbage and jicama. Thinly slice the apple and onion.

Place vegetables, salt, lemon juice, whey, and spices in a large bowl or bucket and beat with a sturdy wooden spoon for about 10 minutes. The mixture will release quite a lot of liquid (see the pictures below.) Add basil leaves and chop for about a minute to disperse evenly. Taste to adjust spices.

Pack the kraut into clean glass jars with very little headspace. Tightly seal, and let sit at room temperature for 3 days before transferring to cold storage.


half a good sized cabbage was greater than 2 quarts.


entire amount of veg and apple was about 4 quarts.


finished amount was about 1 1/2 quarts kraut.

This slaw has become a kraut. And, I'm too excited to wait three days to let you know just how good it has become! I promise I will update the post when I crack open a jar on Friday or Saturday. And meanwhile if you don't want to lacto-ferment it, you can wilt the cabbage and onion with salt for a few hours, pour off the liquid, add in the rest of the ingredients (except the whey) with a 1/3 c. melted coconut oil and a little bit of honey or stevia and you'll have Annie's original recipe. (She does make a dressing with the oil, lemon juice, spices and sweetener and then adds to the vegetables.)


this is the same jar when pressed lightly with a spoon. when lacto-fermenting, you want the liquid to rise above the vegetables.

The only thing I could dislike about making lacto-ferment vegetables is the mess. I had all of my counters clean when I started, and no matter my attentiveness, I had cabbage everywhere. Luckily it's easy enough to clean up, and the jars handsomely resting on the counters in plain sight are reward enough.


I hope I never tire of taking classes. My Gram took classes well into her 60's on different things, and she certainly never stopped reading and learning on her own. I hope that will be me: that I never lose the incentive to read and that I continue to run into great teachers and inspiration from unlikely sources.

You can find a list of Annie's upcoming classes here, and while you're at it, take a look around her blog for just some of the reasons she is so inspiring!