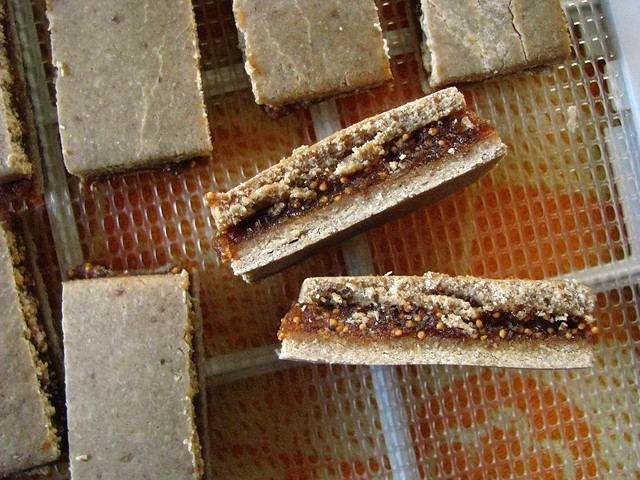
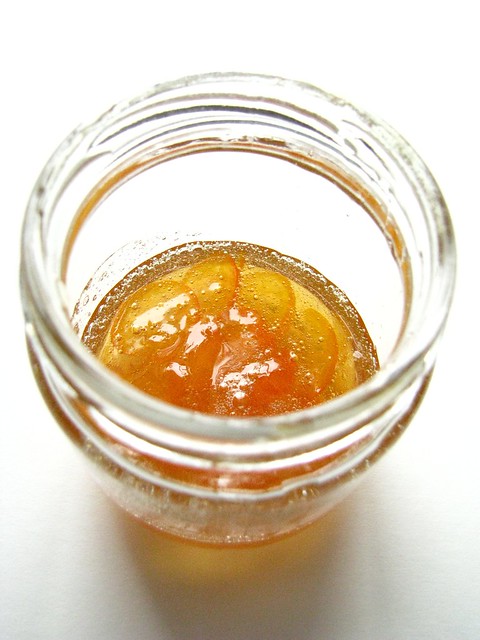
(Raw) Vegan Fig Bars.

There is a gentle hum in my house. For a whole week now. I hear it if the radio happens to be off, and when if I'm drifting off to sleep. It's the relaxing white noise belonging to my dehydrator, that in my mid-century home I can hear perfectly well even though I've given it a proper set-up and privacy in the basement.

On the heels of recent wheat sprouting, I rented a new raw food cookbook from the library: Living Raw Food by Sarma Melngailis. I read the whole thing nearly immediately, and even though I am not raw or vegan (or both simultaneously), I took particular delight in the array of foods presented, and the quality of the desserts and snacks and their lack of refined sugars.

Raw "cooking" is just plain fascinating to me. Not only does it require a few technical, specialty appliances that I actually now have, it is thought provoked, true slow food that begs days of waiting, monitoring, peeking and tasting. It is all about the end products that taste better than you hoped for, and are worth each moment of anticipation - and it's pure excitement in the knowing that what came from the long wait is probably at least a little healthier for you in the long run.
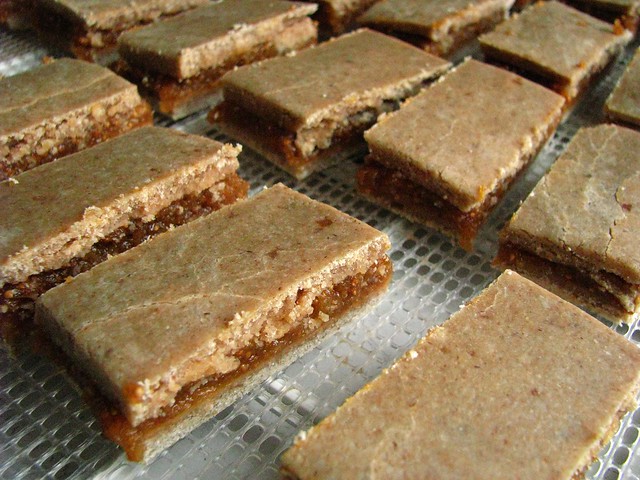
raw vegan fig bars

Part of my obsessing with grain-spouting lately is the Kiddo. I know I'm a food person and concentrate on such things, but I worry about his diet. He likes fruit, but not many vegetables, he prefers all starchy carbohydrates and snacky-type foods to proper meals if given the choice, and sometimes stubbornly just refuses to eat dinner if it contains something he doesn't like. I guess I figure that I have time in this bleak part of the year to do such things as sprout wheat, dehydrate it, and then grind it fresh before using it. It tastes better, and the Kiddo's digestion is probably helped out a little bit too.

When I came to the fig bars in Sarma's book, I immediately set out to sprout some oats - not realizing that most oats are not sproutable since the outer hulls are usually removed. I was attempting it on co-op bulk bin oats groats, so I gave them three days of monitoring and rinsing before I gave in and just dehydrated them. (Sarma instructs to just soak them for 6 hours or longer at room temp before dehydrating them and grinding them into flour.) That turned these little Fig Newton-type bars into a 5 or 6 day process from start to finish.

These beauty bars are sweetened only with date and fig pastes easily made by soaking dried fruit in water to fatten it up, and then sending it on a trip through the food pro with enough soaking water to approximate jam consistency. I also learned something about figs, that they are essentially inverted flowers and they have the highest mineral content of all common fruits. According to Sarma, they are high in potassium, calcium and iron, as well as having a good amount of vitamin C and fiber. More good reasons to hope my Kiddo liked them!

figs

Now, when it came time to assemble these, I won't lie that my kitchen did not erupt into a mess of godzillic proportion, but that definitely would not stop me from making these again. I did half the recipe too since I was unsure of what I was doing and if it would be appreciated - but next time I'll make the full amount. These are dried out after all, and when storing them air-tight, I think they'll have a fairly long shelf life.

Sarma also calls for an ingredient I've never used before, maple syrup powder. I think it would be possible to dehydrate maple syrup and arrive at a usable result, but frankly I didn't have time for all of that. (Maple syrup is arguably not raw either if you are keeping track.) I substituted it with a little actual maple syrup, and everything turned out just fine. This was the first dehydrated adventure of such proportion for me, and I just went ahead and substituted as if I've been raw "baking" forever. It worked for me.
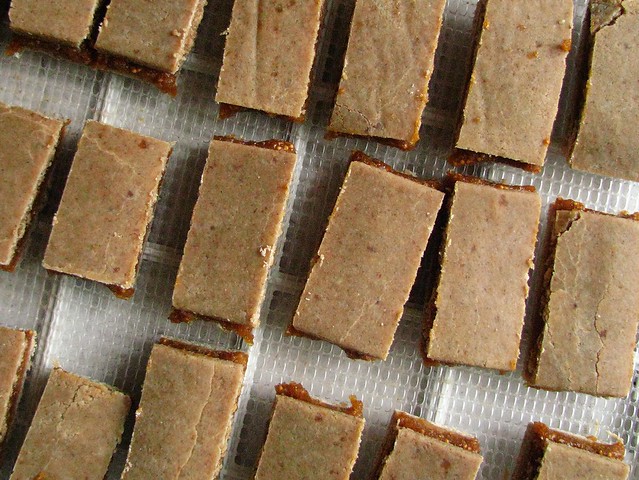
raw vegan fig bars.

Before I started these, I read through quite a few message boards concerning raw vegan desserts and discovered that most people feel that these types of desserts are on the sweet side. I took that into consideration when reducing the amounts of dried fruit that I used for the filling. The amounts listed are for 32 bars, double everything for 64 bars. Have all of the ingredients ready before beginning. Soaking the dried fruits and turning them into pastes can be done a day or two in advance, and the oats soaked, dehydrated and turned to flour at your convenience. Trust me, all the advance work is worth it.

Raw Vegan Fig Bars (adapted from Sarma Melngailis)
  • 4 c. oat flour (see note below)
  • 1/2 t. RealSalt (fine salt)
  • 1/4 c. coconut oil, warmed to soften
  • 1/2 c. maple syrup
  • 1 T. vanilla
  • 3/4 c. date paste (see note below), divided
  • 2 c. fig paste (see note below) (use the recommended 3 c. of fig paste for figgier bars)

To make the dough, mix oat flour and salt in a large bowl. Mix the coconut oil, maple syrup, vanilla, and 1/2 c. of the date paste together, and add to the flour/salt mixture. Mix thoroughly, it will feel like a soft dough, like a pie dough. If it is too dry, add water to correct.

To make filling, in a separate bowl, mix remaining date paste with fig paste. (Sarma calls to add 1/4 c. of agave to the filling, but I found the consistency to be ok with just a little water, and I didn't want to add any additional sweetener since I feel dates and figs are both pretty sweet. You can add some honey or agave if you like - and include a pinch of salt to taste.) It should have a jam-like consistency, not liquidy at all.

Cut two pieces of parchment paper that are about the size of your dehydrator screens. Divide the dough into 2 pieces, and press/roll each into an even layer. Make each sheet as close to the same size as possible. With a knife, cut one of the dough layers into 4 uniform rectangles. (This will be the top layer, cutting makes it easier to pick up without breaking.) Sarma says to freeze for 10 minutes to make it easier to handle, but I had no trouble using it right away.

Spread the fig mixture evenly over the dough layer that is not cut. Carefully place the 4 rectangles you cut from the top piece of dough over the top. Place the whole thing, on the parchment paper, on a dehydrator screen and dehydrate at 115 or less for 6 hours.

Remove from dehydrator, carefully flip the whole thing onto another piece of parchment-lined screen and peel off the bottom layer of parchment. Put it back into the dehydrator and keep dehydrating for another 6 hours.

Remove from the dehydrator, (move the parchment off of the dehydrator screen), and cut the dough into bars. Cut each quarter into 8 bars, to equal the 32 bars. Carefully transfer the bars individually to the dehydrator screens, and dehydrate for 10-12 hours longer until done.

NOTES:

To make oat flour, soak oat groats in water for at least 6 hours, drain and rinse well, dehydrate and grind in a VitaMix or grain mill.

To make date and fig pastes, soak the dried fruits for at least 2 hours in water at room temperature. (Separately, of course.) In the case of the figs, first cut off the hard stems. Drain and reserve the soaking water. Transfer to a food processor and mix, adding back the soaking liquid 1 T. at a time until it is the consistency of thick jam or butter.

raw vegan fig bars..

This was the type of project that had more than one opportunity for me to wake up in the night and attend to it. I didn't choose to do this. I just let the bars sit until I woke up naturally to continue attending to them. You can of course, plan ahead to adjust for timing - but I don't think it's crucial. The fig bars are really done when you are happy with the texture, since all of the ingredients are able to be eaten in their raw states. You can't mess them up!

We loved these bars. My picky kid loved these bars! He was lobbying eating his whole dinner to have one for dessert afterwards, so I think they more than fit the criteria I was hoping for. They taste better than Fig Newtons, and better than the butter laden homemade versions of fig bars I've made in the past. I was so excited, I bought a couple pounds of buckwheat, sprouted and dehydrated it, to get started immediately on my next raw vegan dessert.

sprouted buckwheat

As I write on this cold, sunny, Saturday afternoon, the gentle hum of the dehydrator keeps me company as a wholesome buckwheat Rice Krispie variation makes its way to done. I had never had a buckwheat berry before, let alone a sprouted and dehydrated one. It is better than a Krispie for sure, and so is the marshmallow-reminiscent binder of young Thai coconuts, coconut oil and other things that I tweaked so much I'm glad I wrote them down. I could have just eaten it by the bowlful, but I'm glad I formed them into bars and have the patience to wait until another day. I'll have the fig bars as company until they are ready.

buckwheat <span class=

Apologies to Sarma for substituting up her awesome recipes. Great Big Thanks to the Milwaukee Public Library for their continual purchase of stellar cookbooks. This is a book that I'll have to purchase, if only for the desserts alone. Not that I won't be trying many other things in the savory veins. I'll stop myself from immediately running out to look for oyster mushrooms, but probably not for long. Then a long-planned dinner may be arriving on my table, at home in the din of dehydrating grains, percolating sourdough starter, and all the other things that somehow easily become obsessions to me.

Breakfast is the Most Important Meal of the Day

I am, and always have been, a breakfast eater. Most of the time, I'm actually hungry come morning, but even if I'm not I eat a little something. This isn't something I've adopted solely because I was interested in food, but more because my body actually needs to eat pretty quickly upon awakening, otherwise I get indescribably grumpy. No matter my circumstances, I've eaten breakfast; I used to crawl out of bed at 3:30 AM, drag myself across the room (to my strategically placed alarm clock), and then stumble in the dark to the kitchen and heat a pot of water to a boil. My rolled oats would be cooked with residual heat by the time I was showered, dressed, and fully awake.

The 3:30 AM has since been replaced with 6:30, but breakfast is still first in my mind when my feet hit the floor. I don't claim to have cornered the market on parenting, but one thing I insist upon for my only child is a good breakfast. He may be one of the pickiest children (in my eyes) on Earth, but I can get him to eat breakfast - and we eat it together every morning. After repeatedly reading about the "horrors of breakfast cereals", the grain-heavy diets that will be the doom of us all, and lots of other worthy but somewhat daunting topics relating to a nourished diet, I have long ago ditched the cereal boxes and cook real breakfast foods to start our day.

We eat eggs, toast and fruit, sourdough pancakes (which my Kiddo likes to mix himself) and "bear mush" which is essentially brown rice mixed up in the VitaMix, then cooked in my oatmeal pot. Just recently, he discovered he loves French toast, and now asks if I've got the "right kind" of leftover bread to make it with... But one of our favorite breakfasts is made up of just waffles and I've been making variations of the same recipe for more than 2 years. It's never failed once yet!

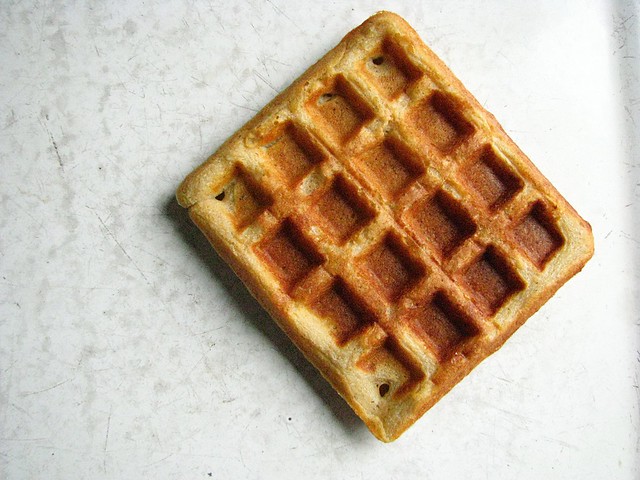
sprouted waffle

I guess it's my goal: if my picky kid likes something I keep trying to make it the best I can, and in the healthiest way possible. With renewed zeal for sprouting grains recently, I started grinding up different flours to use in our favorite waffle recipe, unsure if he would go for them. This is the child, after all, that told me on Christmas Morning that my sourdough waffles I'd specially started the day before weren't very good. (He was sweet enough to say that the other waffles I make are better, but I still felt pretty bad...) Sprouted flour waffles have won his heart however, and it seems whatever variation I've tried have been met with equal enthusiasm.

sprouted waffle.

I have made these with a combination of sprouted flours, with a variety of conventional flours, (they even work with 100% whole wheat) and most recently with nixtamalized corn masa (which is supposedly easier to digest, but I just love the flavor). The base recipe is one of my favorite recipes ever, from Burp! Where Food Happens.

Spouted Waffles (adapted from Burp!)
whole batch: yield about 12 4 inch square waffles in my waffler
  • 1 1/4 c. sprouted flour (oat, wheat, spelt)
  • 3/4 c. corn masa flour (or corn meal)
  • 2 t. baking powder
  • 1 t. baking soda
  • 1 T. sweetener (honey, maple syrup, sugar)
  • 1/2 t. salt
  • 2 eggs
  • 2 cups of thin yogurt or buttermilk
  • 2 T. (more or less, I never measure) melted butter, coconut oil or olive oil

Sift or stir dry ingredients together in a bowl. Mix wet ingredients together in a large measuring cup until they are well combined. Pour over dry ingredients, mixing just enough to make sure everything is incorporated.

Bake, as you do waffles, in a waffle iron until done.

Half-Batch ingredient list:
makes about 6 4 inch square waffles on my waffler
  • 1/2 c. + 2 T. sprouted flour
  • 3/8 c. (6 T.) corn masa or cornmeal
  • 1 t. baking powder
  • 1/2 t. baking soda
  • 1 1/2 t. sweetener
  • 1/4 t. salt
  • 1 egg
  • 1 c. thin yogurt or buttermilk
  • 1 T. or so oil of choice or butter
waffles.

These waffles are maybe not as sturdy as conventional flour waffles, but are surprisingly easy to get from waffler to plate without much trouble. They're even easier to get from plate to mouth. Some flours hold up better than others I've found, but the recipe has good bones so I doubt there is much you could do to ruin it!

Considering cooking breakfast generates dishes, it bears noting that even though I make breakfast every day, I seem have everything cleaned up afterwards in no time too. We need to leave our house for school by 8:05, and we rarely eat before 7. Some mornings, I wonder how it is that I've made something nutritious in short order, eaten it and have done all the dishes inside of a half hour. I can't deny that I'm efficient, but I also acknowledge that sometimes we have leftovers that make homemade breakfast a breeze.

Both waffles and pancakes keep well for a day or two in the fridge, and I even prefer them after a run through the toaster oven. Oatmeals and "bear mushes" take only one pot, and the egg pan just gets wiped clean thanks to the miracle that is cast iron. Toast needs only slicing (and a quick brushing off of the counter if the loaf is crusty sourdough), and fruit only to be washed and sliced. All of these are as therapeutic as an extra ten minutes of sleep, I think.

Have I made my case yet for banishing the box of quick and easy cereal? Breakfast really is one of my favorite meals of the day, and I'm confident that my picky eater loves it too. I hope it sets him up for a lifelong love of beginning the day with food. Breaking the overnight fast with nutritious things will hopefully also remind him throughout each day of eating to take care with food choices.

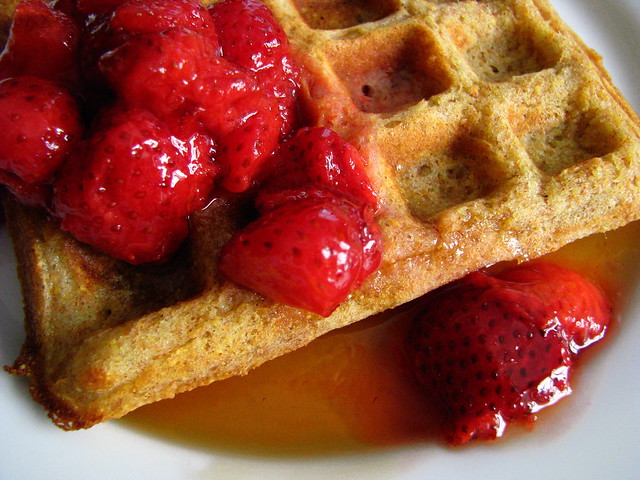
cornmeal waffle
an older pic of a "conventional flour" waffle.

Sprouted Wheat Flour Quick Bread.

My month of without refined sugar has ended. However, with a flip of the calender I still don't feel liberated enough to dive headfirst back into my previous affair with sugar. I feel better without him, and the trial separation only cements what I knew in my head but not in my heart to be true: that refined sugar is a devious addiction, one that is full of false happiness and is incredibly hard to break.

So then, what is a habitual baker to do? Last week, my Parents visited and I made a chocolate sourdough cake in honor of their arrival. I also made a quick bread for the first time in a month. I could sing the praises of quick breads all day, but usually they are riddled with sugar and frequently they contain more than one type. Sugar in quick bread appears solid but is treated as liquid, and it adds moisture even if you are off thinking about his devilish ways.

As with all things that I've done so many times that they have become reliable, I have a hard time just swapping a major part of a recipe out entirely. I'm afraid of the result becoming inedible, wasting perfectly great ingredients simply because I'm curious. I have reduced sugar by small percentages, but never just removed it entirely and replaced it. I actually said "no guts, no glory" as I poured into a favorite quick bread recipe what I figured would be an appropriate amount of maple syrup. And with the gamble, came a wonderful result - a bread that was moist, not too sweet and surprisingly devoid of any real maple flavor.

cranberry bread (AP flour)
unsure of the maple flavor, I omitted the citrus zest - but I wouldn't have needed to.

The gently domed loaf, the frozen cranberries that turned tender and sweet, this bread was guilt free, and perfect with our morning coffee. Had I made this bread without the company of my folks, it would have lingered for a week. My picky boys have nothing to do with cranberries. But the demise of the loaf just after my Parents' departure had me thinking about even more healthful quick breads. Could I use sprouted wheat flour and come up with something even more virtuous?

Over the weekend, I sprouted and dehydrated about a pound and half of soft wheat berries. Monday morning, I turned some into flour and made my favorite waffles. The kiddo declared them the best I've ever made, and I had to agree. There is something naturally sweet about sprouted flour, and something ridiculously fragile. Airy cross-sections of waffle practically melted under a gaze. This could be because the gluten in sprouted flour is drastically changed and reduced by the act of sprouting. (I'm assuming this based on trial and error, and this fascinating graph. If you know something about the science of sprouted grains and how composition changes, please leave me a comment!)

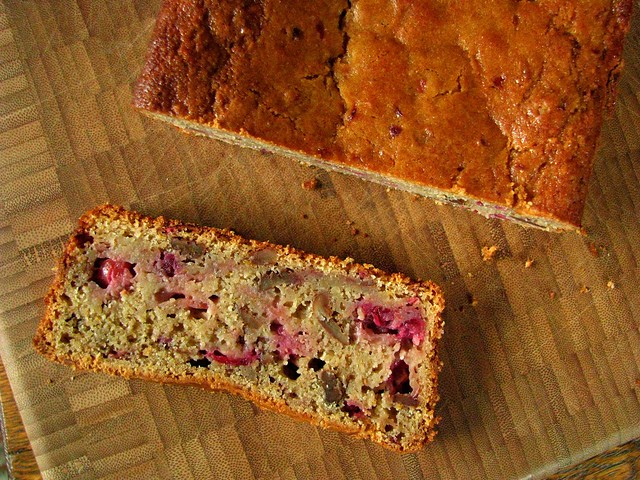
Last night, I couldn't shake the feeling that I had to know if I could bake the same loaf of quick bread using my previous maple syrup substitution AND augmenting it with sprouted soft wheat flour. My result was not too far from perfect. The middle did not raise much and fell as it cooled, the bread took longer to bake, and then it still felt "wet" in the middle even after cooling completely. But the flavor was so good, and the texture compelling, that I'm not giving up on this recipe. It had the texture of steamed British pudding, the cranberries even more soft and downright pudding-like themselves, but yet the edges were fully dried out and just a whisper sends it breaking into crumbly bits.

It's good with the morning coffee. And it was good before bedtime as well. I may have a hard time making it last a week.

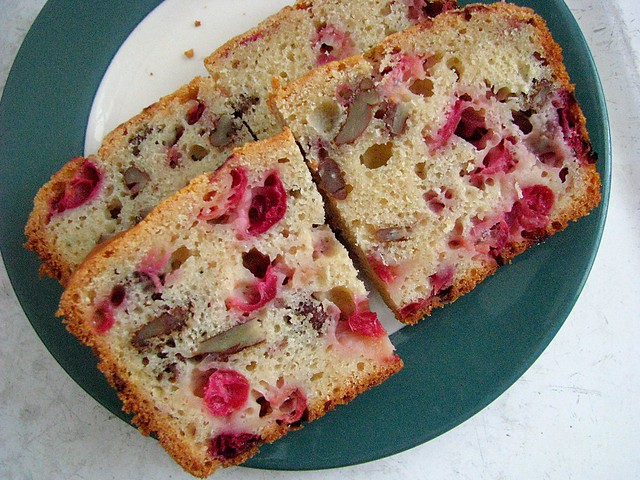
cranberry bread (sprouted flour)

If you don't use the sprouted wheat flour, the loaf will rise higher and probably not need as long to bake. I will update this post at the bottom as I continue to work through this recipe.

Sprouted Wheat Cranberry Bread (adapted from Cook's Illustrated)
  • 2/3 c. thin yogurt (or buttermilk)
  • 6 T. butter, melted and cooled slightly
  • 3/4 c. maple syrup
  • zest of one orange (or lemon)
  • 1 egg, lightly beaten
  • 2 c. sprouted soft wheat flour
  • 1 t. baking powder
  • 1/2 t. baking soda
  • 1 t. kosher salt
  • 6 oz. cranberries (about 1 1 /2 c.), coarsely chopped (I use a food processor)
  • 1/2 c. toasted pecans or walnuts

Preheat oven to 375. Dip a pastry brush in the melted butter, and coat the inside of a standard size loaf pan.

Stir together yogurt (or buttermilk), maple syrup, orange zest, melted butter, and egg.

In a large bowl, whisk together the flour, baking powder, baking soda, salt. Add the wet ingredients, and stir gently just to combine using a rubber spatula. Fold in the cranberries and nuts, and spread into prepared pan - being sure to spread it well into the corners.

Bake at 375 for 15 minutes, then lower the heat to 350 and continue baking for 45-55 minutes until the top is deep golden brown and a tester comes out mostly clean. (I'll try baking this next time at a lower temperature throughout the whole baking time.) If the loaf appears to be darkening too fast during baking, tent it with foil.

Remove from oven, let stand in the pan on a wire rack for 10 minutes before removing from pan to cool completely before slicing.

sprouted wheat quickbread

It could be that the cranberries gave off a little too much moisture, preventing the center from drying enough, but strangely this bread is not heavy or leaden. A dried fruit addition could cure that perhaps. What I do know is that the Internet seems strangely devoid of recipes for sprouted wheat quick breads, and I may just make it my mission to remedy that. If you have any tips or ideas, send them my way. Meanwhile, I'll be sprouting more wheat berries.

Daring Baker Challenge January 2012: Biscuits.

Audax Artifex was our January 2012 Daring Bakers’ host. Aud worked tirelessly to master light and fluffy scones (a/k/a biscuits) to help us create delicious and perfect batches in our own kitchens!

sourdough biscuits

Tireless is probably a more than apt description of our host this month. Since I have joined the Daring Bakers, I've looked forward each month to Audax Artifex's take on our challenges, his lightening fast completion times, and the phenomenally articulate recipe notes that he shares nearly immediately. For his hosting of a challenge, I would have expected something wildly complex, but instead he chose biscuits (called scones in Australia), and he really mastered them. Go have a look!

I started my testing of biscuits near the beginning of the month, and only did 6 batches, 10 short of Audax's 16. I fully intended on making his recipe at least once, but I got so sidetracked by sourdough that I never made it that far. In fact, I did my last full dessert biscuit application yesterday, not leaving myself any time to get to his original recipe. Maybe I was just so inspired by Audax's tireless approach to mastering a recipe that I figured I'd adapt a single recipe until I had it nearly foolproof myself.Link

sourdough biscuits
this batch didn't rise so high because I patted the dough thinner, about 1/2 inch.

I have made baking powder biscuits in the past. I know that you are supposed to be careful with the dough, not to beat it up, treat it with a lick and a promise and make sure that they touch each other when you pack them lightly onto a baking sheet. I have never made sourdough biscuits however, which I have to assume are the predecessor to the more modern baking powder version. The base recipe I found tasted so good on the first go (except that I used butter right out of the box... I would not be found messing around with butter flavored vegetable oil), that I varied my fats, baking temperature and roll-out method and found my favorite combination fairly quickly in only 6 batches.

The base recipe (by Phil Mahan) I used was designed for a camp cooking experince. It is extraordinarily simple, and it's very easy to make half batches of which is good when you can polish off a whole batch warm from the oven. I found it best to use sourdough starter (100% hydration) that I had fed about 4 hours prior. I also tried adding baking powder along with the natural leaven of the sourdough, and found no real discernible taste difference. The rise took about half as long, which was maybe convenient, but my personal feeling is to let the biscuit be naturally leavened. I think I am just still intrigued that the jar on my counter can lift dough, and if given the time, it does a stellar job of it.

ham and juusto

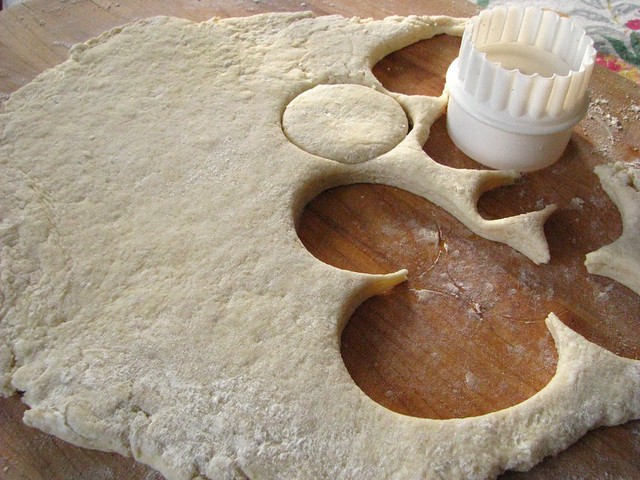
In my first trials, I mixed room temperature soft butter with sourdough starter, added my flour/salt/sugar mixture and basically "kneaded" it in a large bowl by folding it over onto itself until it formed a ball. I tried to do this purposefully, so I wouldn't beat up the dough, but with a sturdy hand so that the dough would come together somewhat swiftly. Then, I simply patted the dough out into a rough block about 1 inch thick. (I also tried patting it thinner, and they didn't rise as high.) Using a round cutter, I used the classic method of pressing straight through the dough and then twisting to cut out the biscuit. I gently pressed my scraps together, and even though they were not quite as pretty and didn't rise quite as high, they still tasted great - lightly sweet and still a little sourdoughy. They are a perfect match for sweet or savory, I don't think I'd change a thing to turn them into strawberry shortcake or drown them in gravy.

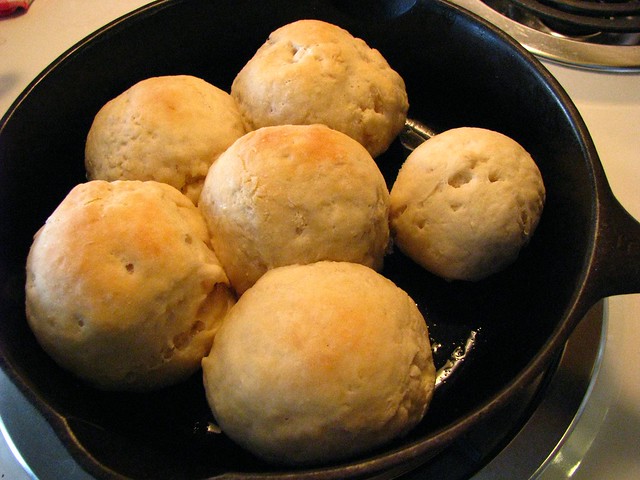
The original recipe I used for sourdough biscuits didn't call for traditional biscuit cutting, it called for forming the dough into balls. Not only is this faster, I found that they rose better too. After forming a batch of biscuit balls, I decided that something could easily make its way into the middles of round biscuits and stay put. The month wasn't long enough to try all of the ideas that popped into my head.

round sourdough biscuits

The first combination I tried was ham and a slow melting "baked" cheese called Juusto. I love this cheese, and it's actually made just down the road from my Parents. Not knowing if the biscuit balls would pop open on me, I was a little stingy with filling them. I remedied that yesterday when I decided on making a chocolate and tart cherry version. I packed them with as much filling as they could hold, pinched the dough firmly to keep it in place, then rolled it lightly between my palms.

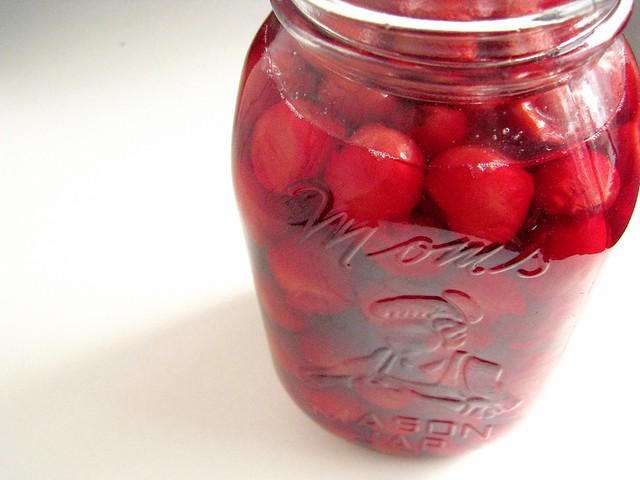
homecanned sour cherries

This was the first jar of tart cherries I opened from last Summer. I got 27 lbs. of already pitted fruit from Cherryland's Best with a group of area food bloggers. I canned my whole cherries in an light syrup (1 part sugar to 4 parts water), and they tasted so good when I popped a few into my mouth, as good as they did the day I got them, reminding me exactly why canning appeals to me so much.

chocolate cherry biscuit forming

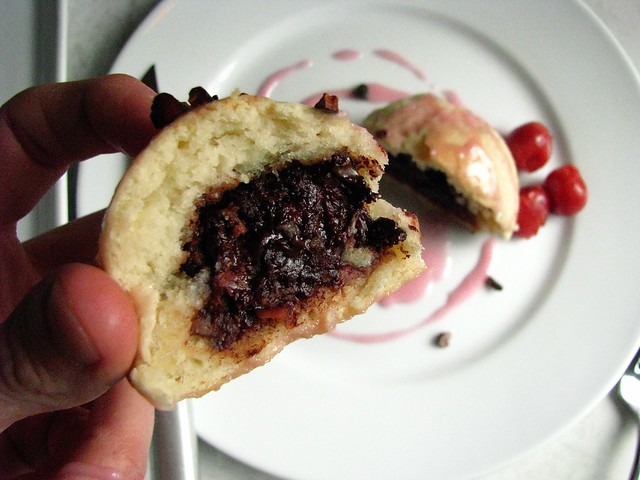
While the mixture of wrung-dry cherry and chopped chocolate doesn't look the prettiest, it makes up for it in flavor. The cherries are undeniably good, but I have to believe that part of the reason is also that I was gifted a block of Callebaut bittersweet baking chocolate. That chocolate gift was better than if someone gave me a piece of Stueben, though I treat it the same way by often admiring it's heft and smoothness. I do this for a positively certifiable amount of time. I then mixed a little cherry syrup with powdered sugar to make a pale pink glaze, and I could feel the pangs of sugar guilt running through my veins. I ended up eating 2 of them, hot out of the oven, glazed and sprinkled with cacao nibs. I didn't feel guilty at all. Well, maybe I did just a little.

chocolate cherry biscuit

I would venture to say that sourdough biscuits do taste best the second they come out of the oven, even though the unfilled biscuits I made were very good when toasted the next day. There are few things better than devouring something right after it comes from the oven, so I'd encourage you to plan it that way. When using well fed starter, I found 2 hours of rising time to be plenty. I also find it hard to get good color on these, even when I baked them longer they still barely blushed golden. It doesn't affect the eating though. Remember the recipe is easily cut in half.

Sourdough Biscuits (with Cherry Chocolate Middles) (adapted from Phil Mahan)
makes 12
  • 2 c. well fed starter
  • 1/4 c. soft butter, warm room temperature
  • 2 c. AP flour
  • 3 T. granulated sugar
  • 1 t. salt

Stir to combine flour, sugar and salt in a medium sized bowl. Butter a cast iron skillet large enough to fit your batch (a 5 or an 8 worked for me for half and whole batches respectively).

Measure starter into a large bowl and add butter. Using a spatula or the back of a spoon, mash the butter into the starter until it is no longer visible. Add the flour mixture, stirring with spatula or spoon for a few strokes to help it begin to combine. Then using one hand, begin to fold the batter onto itself until it begins to form a dough. Work quickly, gently, and thoroughly. Stop as soon as all the dried parts of the flour are incorporated, and the dough feels like a dough. (If you can tell it is too dry, add a tablespoon or two of water before you have worked the dough to completion. If the dough comes together and there is still some flour in the bottom of the bowl that didn't get worked in, just discard it and the batch will be slightly less in volume.)

Press the dough out to a uniform thickness, about 1/2 inch (aim for 1 inch if you are going to cut biscuits using the method described above). Cut into 6 pieces. Working with one piece at a time, put a good amount of tart cherry and chocolate filling (recipe below) in the center of the dough and fold up the dough around it. Pinch it tightly to completely enclose the filling, then gently roll the dough to form a ball. Place the biscuits, just barely touching each other, in the prepared skillet.

Let rise (covered with a towel) until nearly doubled in bulk, about 2 hours depending on the warmth of the room. Towards the end of the rise, preheat the oven to 375.

Bake for 20-25 minutes until tops are lightly browned. (You can brush the biscuits with butter about half way through the baking time, or upon removing them from the oven if you like.)

Tart Cherry and Chocolate Filling

  • 2 heaping cups of canned tart cherries (250 g.) drained, and pressed mostly dry, juices reserved for glaze if desired
  • 4 oz. (120 g.) excellent bittersweet chocolate, chopped finely

Mix to combine. That's it. Here's a picture of what it will look like. And you will probably have a little leftover, which you should eat right away because you can't stand waiting on the oven to produce your sourdough biscuits with cherry chocolate middles...

chocolate cherry biscuit interior

So, I'm just days away now from my month free of sugar - or really it was my month almost free of sugar. What little splurging I did do was definitely worth it. My goal of feeling committed to less sugar on a daily basis is going to stick I think. I have gotten out of the daily routine of dessert, which some may argue is heresy, but I feel great so I'll continue it. At least until my next Daring Baker Challenge.

Thanks again to Audax for his amazing effort and choice in a challenge this month. I promise I will try his non-sourdough biscuits, but I am so happy that I got obsessed with this version! I would never have considered sourdough biscuits, and now they are just another of the sourdough things that I can't live without. If you're coming to dinner and I forgot to plan a bread, you're getting sourdough biscuits, and you are going to love them.

biscuit test brunch

Kumquat-Habanero Marmalade.

At the half-way point of my sugar-free month, I find that I've already made jam four times. Twice I made some for a friend, but twice I made it just for my jam shelf. Even though I dutifully allowed myself just a spoonful or two to check for flavor, I have come to the conclusion that if I add some kind of chile to something sweet, I can hardly keep it off of my mind or out of my mouth. That is exactly what happened when I decided to pair the bright orange habanero pepper with similarly orange kumquats.

kumquat-<span class=

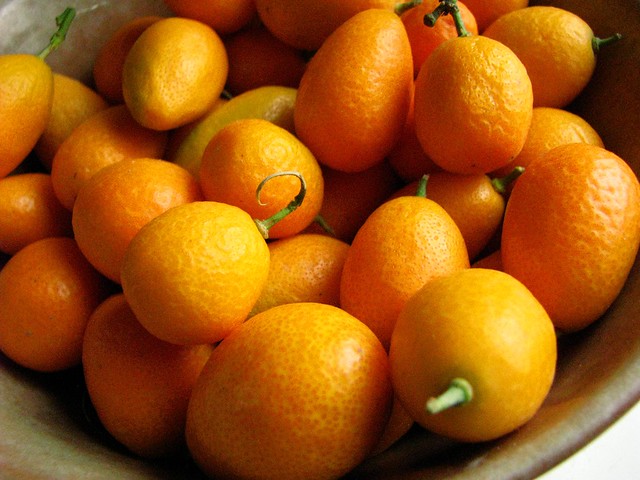
Kumquats are a tiny, cheerful things that I've never tried before last week. I bought a few on impulse when I saw them in a rather neglected bin at my co-op. The second I got in the door, I washed one up and bit into it, the flood of vibrant flavor hitting me stronger than I anticipated. It tasted like every type of citrus I've ever had, held together by tropical, under-ripe undertones of mango. It felt so rebellious to simply bite into it, stippled peel and all - and in the midst of my sugar-freedom, it tasted sweeter than eating a plain sugarcube. The resinous aftertaste was just as rewarding, and just like that I knew my first marmalade of the new year would be made of kumquats.

kumquats.

After I decided to preserve them, I garnered even more excitement by reading about Marisa's kumquat experience, but I had already settled in on a recipe form from Linda Ziedrich - a longer, wait-around method similar to the lemon marmalade that I made last year, and one requiring only 12 oz. of fruit. When I decided to add a habanero, I knew right away that this one was going to be a keeper. I picked up more fruit, and then I waited for our first snowfall, since there isn't anything better than standing over a pot of bubbling citrus when the snow is flying...

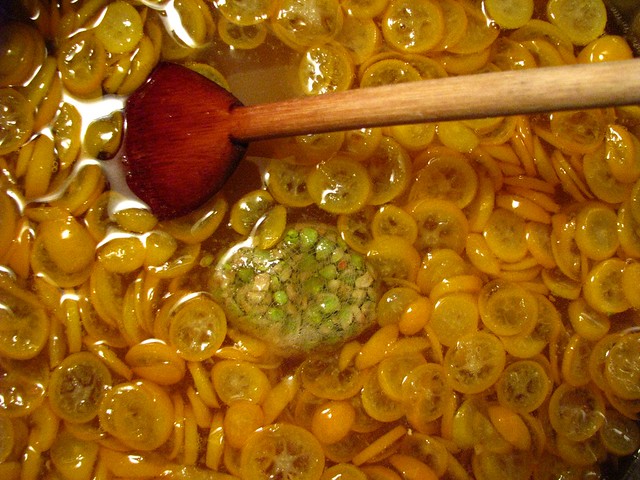
kumquat marmalade making

Kumquat-Habanero Marmalade (adapted from Linda Ziedrich)
yield 2 pints (I made two half pints and 4 quarter pints)
  • 12 oz. kumquats, sliced thinly into rounds, seeds removed and saved
  • 1/2 of a habanero pepper, stemmed and seeded
  • 5 c. water (filtered is best)
  • 4 c. sugar (I used raw cane sugar)

Place the kumquat seeds into a spice bag, or tie them up into a small piece of cheesecloth. Put the kumquat slices, water, and bag of reserved seeds into a large preserving pot along with the chile pepper. Bring to a boil, and boil uncovered for 15 minutes skimming off any foam that may form. Remove the pan from the heat and cover with a towel. Let it stand at room temperature for 8-12 hours.

After standing, fish out the habanero pepper (but leave the bag of seeds in), add sugar to the pan and place over medium heat, stirring until sugar dissolves. Then, increase the heat to medium-high and bring to a boil. Boil for one minute, then remove the pan from the heat, cover again with the cloth, and let sit for another 8-12 hours.

Prepare jars, lids and rings as well as a hot water bath. Bring the kumquat mixture to a boil slowly, then raise the heat and continue boiling until it passes the spoon test, jells when dropped on a chilled plate, or until the mixture heats to at least 220 degrees.

Remove the pan from the heat, remove the bag of seeds, and skim off any foam. Let the mixture rest for 5 minutes. Ladle into pint, half-pint or quarter pint jars and process for 10 minutes in hot water bath.

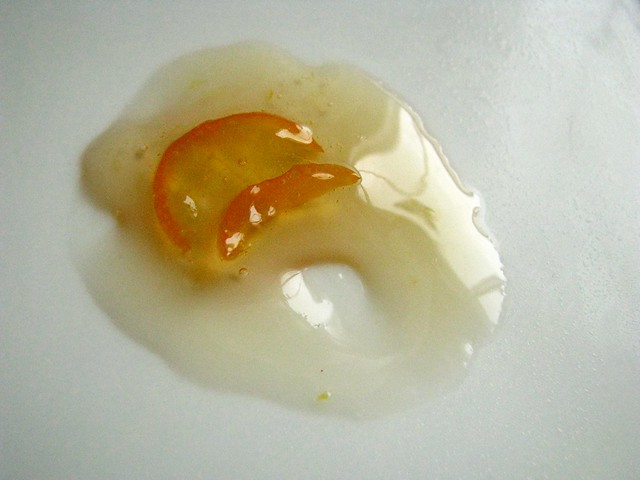
marmalade set test

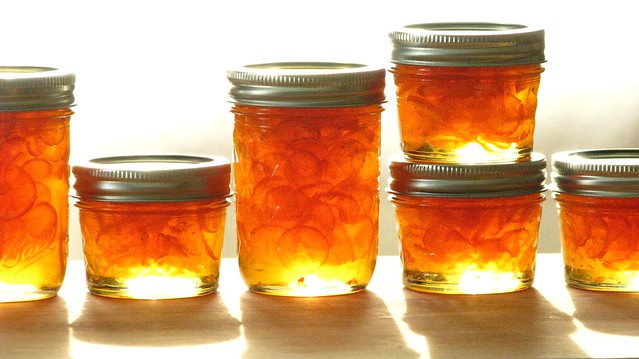
The result of this marmalade is truly addicting. Honestly, I tried not to eat any just because I am bound my my resolution... but I did eat one little Daring Baker trial with a spoonful and it was worth any cheating. It has such a clean flavor and underlying heat, which is the best type in my opinion. Hot on the tongue and then departing quickly, that's actually how I always think of the often misunderstood habanero. Yes, his heat is brutal, but it also dissipates faster than other chile. When coupled with sugar, that effect seems hurried and creates easy addiction because you want to keep feeling that embracing heat loll about in your mouth. At least I do!

kumquat-<span class=

In a way, I'm looking forward to February, when I can be guilt-free in trying more sugary combinations. I love chile preserves in particular paired with cheeses and other savory and salty things. I wonder how it would taste if I made a hard boiled egg and mixed the yolk with jam before filling the silky egg white hull. But I know that is just the allure of sugar tugging at my heartstrings, just making sure that I haven't left him for good. Even with these tempting jars of this marmalade close at hand, I am surprised at my resolve, and I actually think quite often of the Sally Fallon quote in Nourishing Traditions: "Don't forget to enlist the power of prayer in your battle against the sweet tooth". It is a battle, but one that with each passing day I feel more like the victor instead of the victim. In the middle of a sugar-free month I'm able to resist this irresistible jam, I must be doing something right!