Bread in Every Meal.

You would think I'm not eating much, what with the infrequency of my writing life lately.  I can assure you that is not the case.  In fact, I've come to blissful (re)discovery that indeed almost every meal can be improved with bread.  Relatedly, I'm increasingly grateful that my old bread appetites are fully back and ever since that brief, pregnancy induced repulsion, I have renewed appreciation for the staff of life.

sourdoughs.
(Little Goat Bread's apple and pistachio loaf on the left, my Forkish-style sourdough on the right.)

It may have actually started a few weeks back when Deena and I were chatting online and she mentioned that her Basque country friends revere bread so much that they incorporate it into nearly every eating experience.  Intrigued, for days I imagined my stale bread crumbled into some strong coffee laced with milk as she described...  I didn't go so far (yet) as to actually drinking my bread, but increasingly I have been using every last crumb of my loaves.

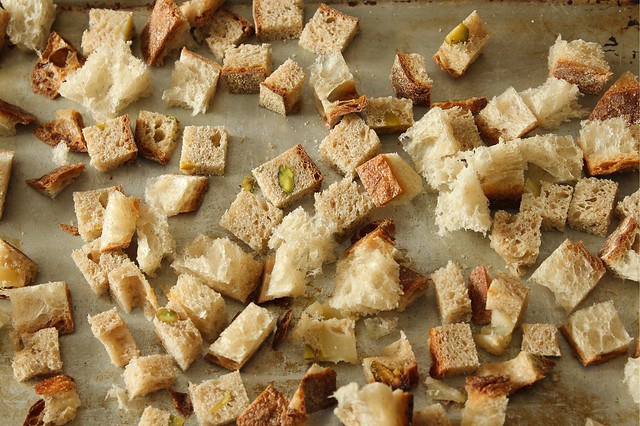
Not that I ever wasted old bread.  I usually dried the last several slices and ground them up into breadcrumbs, which somehow always seem to come in handy.  But more recently, I make my eating schedule up around these gorgeous loaves that seem to have graced me with their abundant presence.  Like I am not any sort of real baker, like they arrive mysteriously overnight and fill my little kitchen with shear wealth of kitchen alchemy, they are too good to have come from my hands:  reminders that good bread is as much a product of the elements as intuitive know-how.

sourdoughs, cubed.

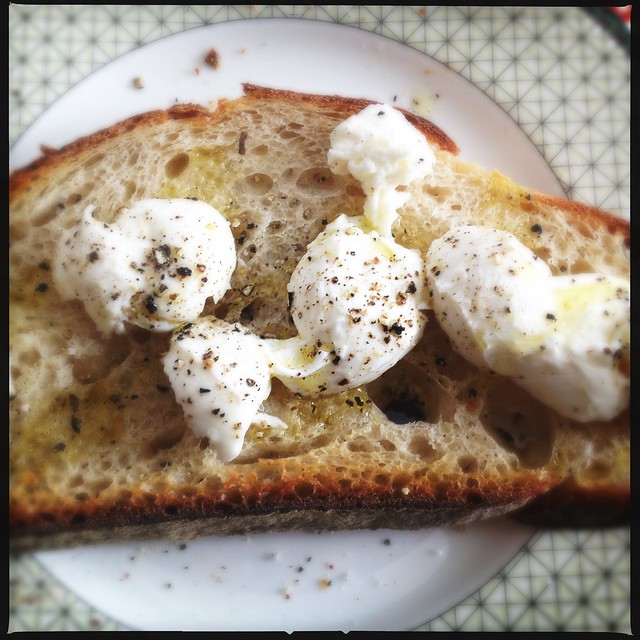
I'm also reminded of the electronic age in which I live.  I hate it.  But then, with so much food inspiration running into me on a daily basis, it's hard to deny myself the pleasures of the Internet.  This morning, Autumn Makes and Does posted about a Kale Panzanella she made, and just after clearing the breakfast dishes, I was toasting up the last of the old bread in really (really) good olive oil to start my lunch.  Cooking lunch for myself is such a pleasure, I need almost to be coaxed not to eat at home.  Of course, when lunchtime came around, I was more than pleased with my altered version of her recipe:  garlicky, massaged raw kale, tossed with those Outpost chile olives that I am obsessed with for years, a handful of raisins, more olive oil, lemon juice, and some of the chile olive brine for good measure.  It was so good, I'm looking forward to having the same thing for lunch tomorrow.

kale sourdough panzanella

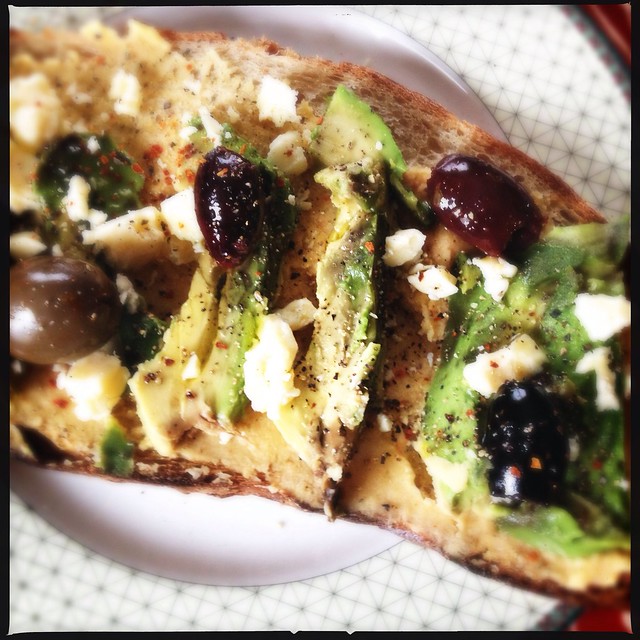
Since I'm a pregnant lady, I added a poached egg and some avocado.  I need the protein, and I wanted to try out the Serious Eats method of egg poaching that David Leibovitz posted on Facebook last week...  I learned that the strainer method does make for a pretty perfect looking poached egg, but also that my superfresh farm eggs have virtually no runny white to fall through the strainer - so if I'm not too picky about the pursuit of perfection, I can skip that part.

kale sourdough panzanella
"Autumn" inspired lunch

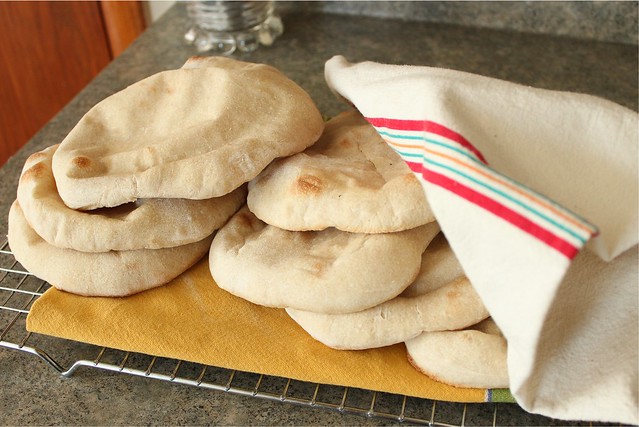
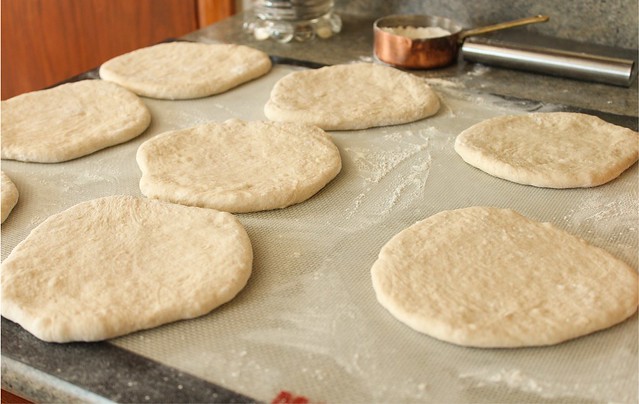
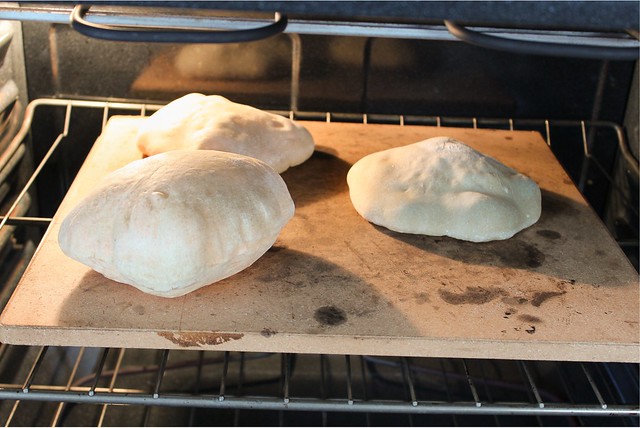
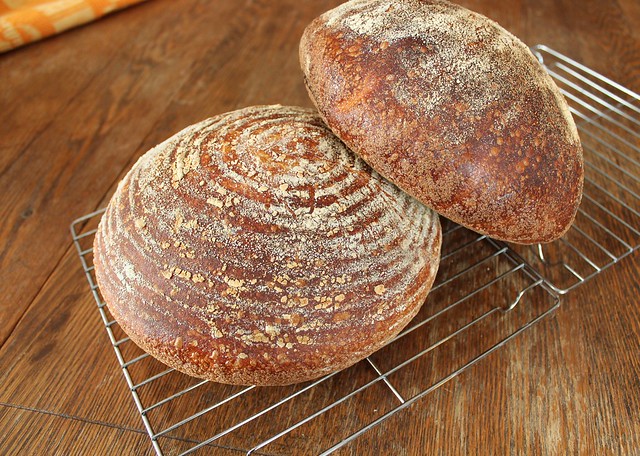
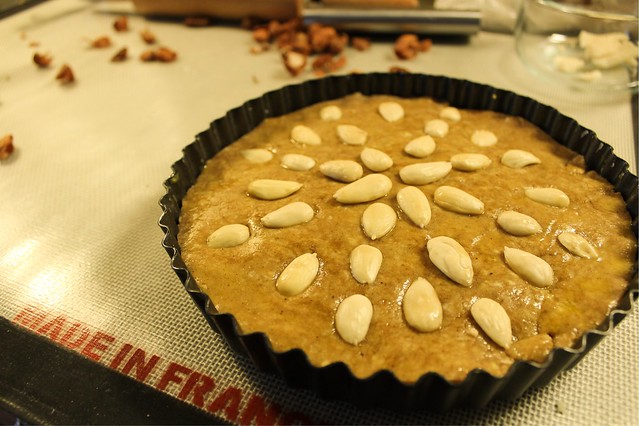
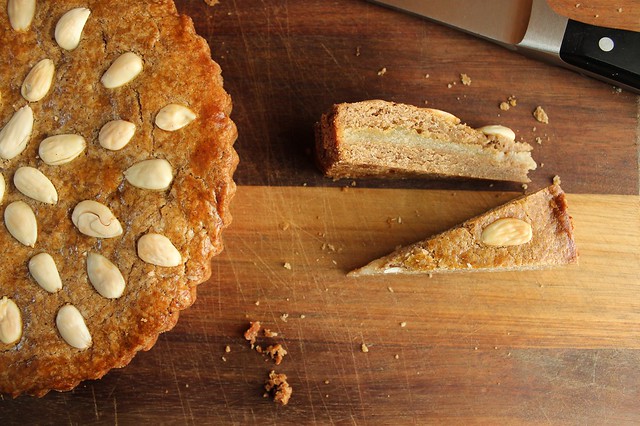
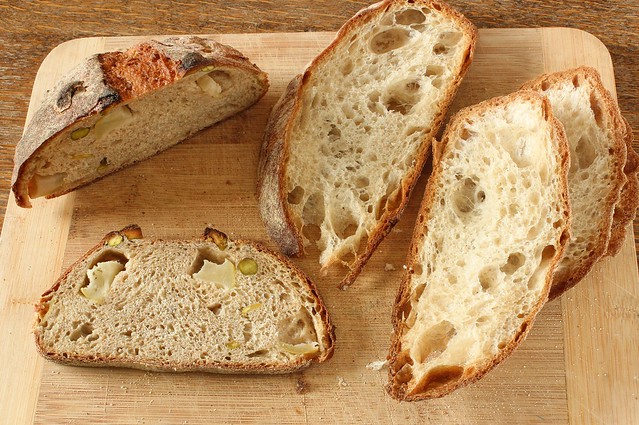
As for the Ken Forkish bread that I am still thrilled with:  click on the photo below for my baker notes.  I love that this bread proofs entirely in the fridge with hardly a second thought from me.  I'm patiently rereading the formulas, and am convinced that I have to try some of his other loaves - if only this first one I tried wasn't already so perfect.  4 weeks in now, and I've yet to produce a faulty loaf.

Forkish!

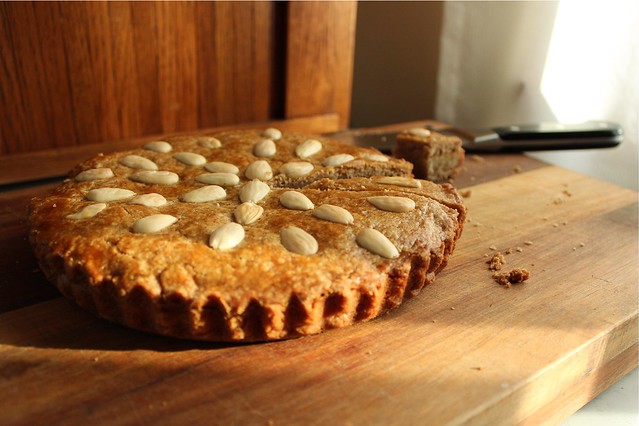
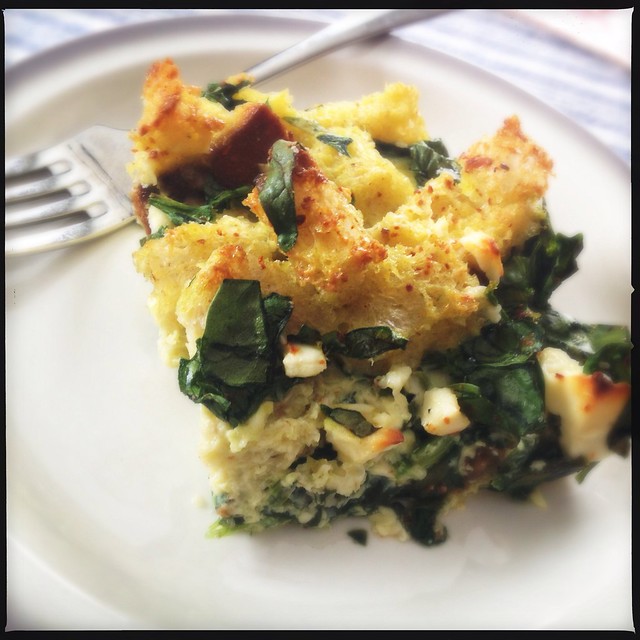
So other inspirational lunches from breads lately?  A savory feta and spinach bread "pudding" that was based on Heidi Swanson's Food and Wine post.

savory bread pudding

A stellar homemade hummus (courtesy of Alton Brown) that employed effortlessly creamy garbanzos cooked in a slow cooker (with more of those Outpost chile olives).

"Forkish" tartine

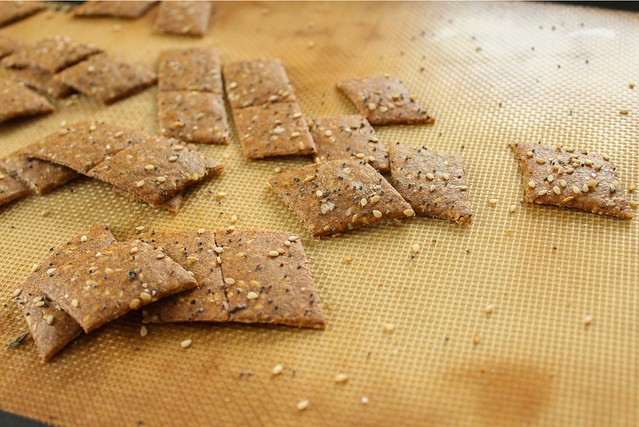
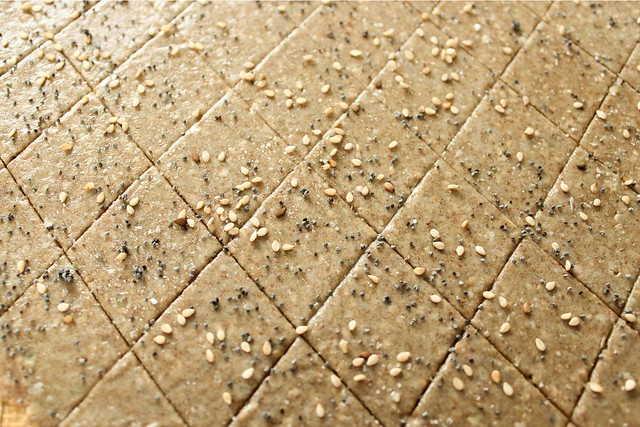
There were probably more instances, definitely there were.  But saving you from a post of 30 photos taken on an iPhone and the manic ravings of a bread obsessed supergeek shows my genuine concern for keeping up my small readership.  Today anyway, I am the Queen of Restraint.

Perhaps I'll close with a thought from Ken Forkish (in his book, Flour Water Salt Yeast) that I can't seem to get out of my mind.  Giant loaves of bread were baked in Europe years ago because families didn't have access to home ovens.  The community oven was fired once or twice a week and bakers would bring their risen loaves to bake.  The bread had to last until the next time an oven was fired - rationed appropriately and the weekly meal planning surrounded it.  Of the 3-kilo (6+ pounds) loaves his bakery produces, he feels those giants taste best around the 3-day mark, having a sufficient time to age and accustom to their environment.

He also goes on to say that his patrons don't eat that much bread, so they need to sell those monster breads in half or quarter loaves.  How sad, I've been thinking for the past week, that we have become so afraid of the carbohydrate (even though properly prepared sourdough breads pose none of the threats of common supermarket loaves, "wholegrain" or not) that this old-country tradition of bread with every meal is all but erased from our collective knowledge.

My bread isn't 6 pounds, but it is around 2 pounds, and I can get by baking just one a week being creative to use every morsel of it to the best of my ability.  This translates to strings of beautiful lunches, sometimes baking day breakfasts of week old French toast which we devour with true appreciation.  Never yet have I had a loaf of my bread mold.  This is the stuff that sustains, the realness of life and the centerpiece of my kitchen.  This is the staff that I can make into every meal.

Daring Baker Challenge February 2013: Crispy Rye Crackers

Sarah from All Our Fingers in the Pie was our February 2013 Daring Bakers’ host and she challenges us to use our creativity in making our own Crisp Flatbreads and Crackers!

 Reinhart crackers.

Crackers are kind of near and dear to my heart.  Over the recent years, I've made more of them than ever before, in part because I was honored to be a part of recipe testing for a cookbook all about them!  The book Ivy Manning wrote called Crackers & Dips, is available now for preorder (the release is scheduled for early May), and you should definitely drop it into your cart right away, because I can tell you that the recipes are all solid additions to your kitchen DIY repertoire. 

More than a year ago I wrote about testing for Ivy, and my post included a recipe for crisp rye crackers that didn't make the cookbook cut.  I also mentioned that of all the things made at home, crackers are some of the things that impress people most.  For not a lot of effort, you have truly extraordinary (indeed nearly professional) results - results that don't include ridiculous amounts of fake ingredients or preservatives, and that keep a surprisingly long time if baked crisp and stored airtight.

Already a seasoned cracker producer, I decided to make a recipe straightforward that I'd never made before for the challenge this month, one that belongs to Peter Reinhart and also includes rye flour.  They are wholesome and slightly sweet, with good amounts of pumpkin and sunflower seeds.  I meant to get around to making a version with a bit of sourdough starter, but that will have to be on the future docket as time got away from me.

Reinhart crackers.

Reinhart gave both weight and conventional measurements, I haphazardly threw these together a couple of days before I baked using a combination of the two methods.  Resting in the fridge makes the dough easier to handle, and deepens the flavor slightly.  I'd wager it is better treatment of the grains as well, akin to soaking them.

Crispy Rye Crackers (very slightly adapted from Peter Reinhart, Artisan Breads Every Day)
  •   1/4 c. (42.5 g.) sunflower seeds
  •   1/4 c. (42.5 g.) pumpkin seeds
  •   3 T. (28.5 g.) flaxseeds  (or use 28 g. flax meal)
  •   6 T. (56.5 g.) sesame seeds
  •   1 1/4 c. (227 g.) rye flour
  •   1/4 t. kosher salt
  •   2 T. olive oil
  •   1 T. honey (or agave nectar)
  •   3/4 c. (170 g.) water, room temperature
  •   egg white wash (1 egg white beaten with 2 t. water) (optional sweet wash, noted below)
  •   mixed seeds for garnish  (I used poppy seed)
  •   kosher salt for garnish
In a spice or coffee grinder, grind sunflower and pumpkin seeds in pulses to make a powder or "meal" of them.  Separately, grind the flaxseeds - unless using flax meal.

In a large bowl, combine the seed, powders with the sesame seeds, rye flour, salt, oil, honey, and water.  Stir with a sturdy spoon until a dough comes together, then turn out onto a lightly floured (rye floured) surface a knead a few times to incorporate everything well.  The dough should be a bit tacky but not sticky.  You can roll and bake them right away or put the dough into an airtight container and let it rest in the fridge for up to a week.  It can also be wrapped well and stored in the freezer for a few months.

When ready to bake, preheat the oven to 300 degrees.  Divide the dough into 3 or 4 parts.  Between sheets of parchment paper (or better, on a silicone baking mat), roll one part of dough as thin as you are able, about 1/16 inch thick.  (I like using a silicone mat with a pastry roller.  If using parchment or rolling conventionally, you may need to use a bit of flour to keep the dough from sticking.)

Using a pizza cutter, cut the crackers into your desired shape, I like diamonds that I don't bother to separate to eliminate any trace of waste.  Brush well with egg white wash (or sweet wash of 1 T. honey or agave beaten with 3 T. water), and sprinkle with a seed garnish and kosher salt.

Bake for 25-35 minutes, until the crackers are mostly crisp.  Remove the pan from the oven and let them cool for several minutes.  If you see some of the edge crackers done more thoroughly, remove them from the oven first and continue baking the rest until they are crisp.  (The crackers will firm up even more as they cool.)  If you bake the crackers, cool them, and then discover they are not quite crisp, return them to the oven for several minutes until they firm up.

Cool the crackers completely, then store airtight in glass jars where they will keep for at least a week, but probably longer.

Reinhart crackers.

I was surprised that both of my boys loved these and happily ate them with cheese.  I liked their nutty flavor, handsome appearance, wholesome snacking quality, and keeping power.  They are a great thing to reach for when packing a lunch or needing a snack.

Be sure to check out the Daring Baker website for more cracker recipes, and the Daring Baker Blogroll for more participating bakers and inspirational cracker ideas!

Sourdough Surprises: Flatbreads (Sourdough Pita)

Flatbreads were the item of the month for the Sourdough Surprises bake along... and I couldn't have been happier since I've been meaning to convert one of my favorite pita bread recipes into a true sourdough version for quite a while.

sourdough pita

Long before I ever baked a loaf of bread, I had started playing with flatbreads.  Something about them is much less intimidating than traditional loaf baking; they are smaller things that don't require as much time or effort, and usually they can be baked in mere minutes.  Part of this infatuation with pita in particular likely came from the bread-genius Mom of one of my friends.  I clearly remember standing in her kitchen as she rolled out small discs about the size of your palm, telling me that "you want the dough to be the same thickness as your earlobe, that's how you can be sure they'll puff in the oven."  Her oven was perpetually lined with blackened quarry tile (or maybe it was brick), and she'd deftly slap the pitas on there and we'd peer through the oven door as they rose.  I did the same thing with these, my growing belly all of a sudden requiring me to grab a step stool to sit on instead of crouching or sitting on the floor for the several minutes of baking time.

I think this could also be the first sourdough recipe that I've made up entirely myself, basing the proportions loosely on a fast, favorite food processor version of pita that Cook's Illustrated published more than a decade ago.  I used some pointers on Sourdough Home on how to go about converting, but instead of letting the dough ferment at room temperature, I let mine linger in the fridge until I was ready for it.  My result was a sturdy pocket bread with a good, not-too-sour sourdough flavor.  It's a keeper of a recipe for those times when sandwiches packed in bread need to travel well.

sourdough pita ('batter')

Part of the reason my bread was a bit more stable was that I recently read about pita on a Food52 post.  The baker suggested rolling out the dough and letting it sit for a while until puffy, resulting in a pocket that was more uniform on both sides.  Prior to this revelation, my pita was always thinner on one side, leading to leakage when the bread was stuffed.  Let them hang out only the length of time it takes the oven to heat, and you'll be surprised at how "professional" your breads turn out!

sourdough pita

sourdough pita

I divide this dough into 8 pieces, making pita that is pretty substantial in size - about 7-8 inces across.  Of course you can divide them into smaller portions to make more petite breads - just follow the rule of the earlobe thickness.  It really works!  Ordinarily I scale all ingredients for breads, but this one is casual enough (and you kind of know how soft and pliable a pita dough should be, right?) that I used conventional, non-weight measurements.  Be sure to start the bread 12-18 hours before you want to bake the pitas.

Sourdough Pita Bread
yields 8 breads

For the sourdough "poolish":
  • 1 c. 100% hydration starter, well fed
  • 2 c. bread flour
  • 1/2 c. whole wheat flour
  • 1 c. water
To finish the pitas: 
  •  1 T. olive oil
  • 2 t. granulated sugar
  • 1/4 c. plain yogurt
  • 1 1/2 t. kosher salt
  • 1/2 c. bread flour (plus 1/2 cup additional, likely)
Start the poolish at least 12 hours before baking.  Mix all ingredients together well.  The dough will be more like a batter than a stiff dough.  Cover tightly, and put into the refrigerator to rest.

When ready to continue (12-18 hours later), take the sourdough poolish out of the fridge and add it to the bowl of a stand mixer.  Add the olive oil, sugar, yogurt, salt and 1/2 cup of flour and mix well.  (You can do this by hand if you like, but it's easier in a stand mixer.)  The dough will be quite sticky, and will likely need another 1/2 cup of flour as it is being kneaded.  Knead for about 5-7 minutes until you can feel the dough turn soft and pliable. Turn the dough out onto a lightly floured surface and knead for a minute or two adding just enough flour to bring together a soft dough.  The dough may still be a little tacky, and this is ok.  (Try not to add too much flour so the dough feels soft rather than tight and dry.)  Put into a clean container (I didn't bother to grease it), cover well with cling film, and let it rise at room temperature until doubled in size, about 3 hours depending on room temperature.

Turn dough out onto a lightly floured surface, and divide into 8 equal portions.  Roll each portion into a ball, trying not to add too much additional flour.  One at a time, use a rolling pin to roll each ball into a disc about 6-7 inches across.  Aim for even thickness across the disc, that is about the same thickness as your earlobe.  Let the discs rest on a lightly floured surface, covered by a clean, lint free cloth.  Preheat the oven to 500 degrees with a pizza stone or unglazed tiles (a plain sheet pan in a pinch) in the center of the oven.

After the stone has fully heated, about 30 minutes, take a disc of pita and gently stretch it out slightly as it probably sprang back a little bit.  The discs might feel a little tacky again as they rested, and that's ok; it's easier to take the side that feels driest and make that the bottom of the bread.  You can bake as many pitas at once as your stone will allow - 3 or 4 for me - but I recommend baking one first to observe about how long it will take.  It should be fully puffed and lightly browned within 5-6 minutes.  After baking, transfer to a stack of towels.  You may have to help the steam come back out of the middles - just let them rest for a few minutes, then gently and carefully (to avoid burning yourself) press down on them  to flatten.

sourdough pita

These breads are not quite as tender as the non-sourdough version, but I really enjoyed them.  In fact, I had too much bread going around here this past week, and plan on turning the last few into pita chips today - which I figure will be a very good use for aged and sturdy pita breads.

Be sure to check out sourdough flatbreads from the many other Sourdough Surprises participants.  There's sure to be plenty of inspiration!

A good, old-fashioned bread post...

NW sourdough

I mentioned recently that I was actually disgusted by bread for a good many weeks.  I couldn't think about it, or even have it in my line of sight.  I purchased the first bread I've bought in years just to get my boys through, and I had to make sure it was hidden in a cabinet.  I swear, I could smell it through the plastic packaging.  Fortunately, that wave of nausea and bread phobia has passed, and I have felt like I'm making up for lost time: reading new-to-me bread books with vigor and back with a vengeance for playing with dough.

Halfway through the levain recipe section of Ken Forkish's Flour, Water, Salt, Yeast, it dawned on me just how much I have to learn about bread.  Going to bed each night now, calculating mentally (which is difficult for a math-challenged person like me) how to convert my "liquid levain" 100% hydration starter successfully into a 80% hydration starter so I can start on his formulas, wondering if keeping two separate starters is smart or economical, wondering if instead I can figure out the formulas to convert his 80% recipes to fit my 100% lifestyle.

In a way, I wish I was 20 again and could just enroll heart and soul in a baking program - but that time for me has passed.  I'm at the mercy of baking once or twice a week, learning as much from those few loaves as possible and hopefully snowballing it into future successes.  The comforting thing is that I learn best from experimenting, and even without notes I seem to have a preternatural ability to remember every single baking experience, as if they are all children birthed to me in a unique way.

As good as the bread is around here, I have serious envy of those serious bread bloggers, Susan over at Wild Yeast, and Teresa at Northwest Sourdough for example.  Loaves that seems to always work with their careful calculations.  This past week and a half, I've been obsessed with the Northwest Sourdough "Blond Wig" bread.  It's a bread that Teresa developed for a friend with cancer, and it's not totally unlike the Peter Reinhart bread I used to have such great success with.  Just after my bread obsession returned, I tried a "Wisconsin Sourdough" for old time's sake and had terrible results.  Not inedible, but a bread that was lacking in the character of my previous successes.  When Teresa's version popped up on Facebook, I could think of nothing else.

Varying slightly from the flour, water, salt, yeast basic sourdough, this bread also has a touch of dairy.  I think it makes the finished bread stale slightly quicker, but we've eaten every morsel so I can't count that much as a negative.  As always, the true test of a good bread (in my opinion) is how good is the toast on days 2, 3, and if I'm lucky, day 4.  It is exceptional toast.  So good, that I was almost tempted to buy a little bunch of overpriced fresh basil and some imported Mexican tomatoes and pretend I was basking in the heat of Summer.  Instead I started a Winter-hearty minestrone soup, anticipating toasted bread in the bottoms of the bowls.

lunch.

I had kind of settled into a rhythm with the Tartine bread method, higher hydration bread that is folded every 30 minutes for 4 hours or so, not requiring the use of my (sometimes compromised) stand mixer or my sensitively skinned hands.  I can now make that bread in my sleep, and sometimes I do, when I start too late in the day and then pull myself groggy from deep, REM sleep to attend to it in the middle of the night.

But this Blond Wig bread has me beguiled.  I mix it in my stand mixer for several minutes and then it lazes about on the counter for 6 hours, only being folded 3 times before bench resting.  I've autolysed and not autolysed with similar results, I wouldn't say the extra time spent on the autolyse is even worth it.  I've made the motherdough (60% hydration firm starter) and let it cure at room temperature for 4 hours before putting it into the fridge, and I've made it and popped it right into the cold.  Both methods seem fine to me depending on my time frame.  Without refreshing, the motherdough holds for at least 3 days in the fridge.  I made my breads when it was 2 days old, and when my 100% hydration starter was well fed (and floated in water like Chad Robertson recommends), in the morning before I mix.

Ken Forkish wrote somewhere in that book I'm reading that when the proportion of already fermented dough is high, autolyse isn't really necessary, and I'm suspecting that the small addition of milk makes the gluten break down in a really labor-free way for a home baker.  At any rate, this loaf of bread has a sweet tang that comes from the refrigerated motherdough, a creamy texture and a cracking, brittle crust since I bake in a pot... all with the benefit of not so much work.

NW sourdough

I'll let you pull up the recipe from Northwest Sourdough, but I'll give you my notes for my last loaves, which I had the foresight to scribble on a scrap of paper:

12:45  Mixed dough, no autolyse, using stand mixer.  I let it mix with the dough hook until it pulled away from the sides of the bowl and formed a ball.
13:00  Covered the mixing bowl with a towel and then a stainless lid.  Bulk rise until 19:00, with folds at 15:45, 17:00, and 18:00.
19:00  Preform dough into loaf and bench rest.  I didn't mean for it to rest for a whole hour but it was before-bed reading time.
20:00  Form into loaves.  I only have one brotform but need another, so one went into the basket and another into flour dusted cloth tucked into a colander.  (The bread that rises in the cane basket always looks nicer, and seems to rise better.)  I covered each of the baskets with a plastic bag and put them immediately into the fridge.
06:30  Took loaves out of the fridge.
06:45  Jury rigged my oven into a proofing box (boiling water in a bowl on the lowest shelf, breads still wrapped in plastic, on the shelf above) and let the loaves proof for 3 hours.
09:45  Breads out of the proofer and onto the counter.  Took off the plastic bags and let them sit open to the air while the oven preheated to 500 f.

I baked the loaves in cast iron pots at 450 f. (reduce heat as soon as the breads are put into the oven), for 30 minutes with the lids on.  After removing the lids, let them bake until deep brown, another 10-15 minutes or so.

 NW sourdough

Last week, I let the loaves rise at room temperature for about 4 hours before refrigerating, then put them into the cold for 6 hours before letting them proof for only 1 hour in my oven.  I feel like the loaves last week had slightly better oven spring, but it could be that I should have left today's loaves to proof a little longer.  Truth be told, I was aiming for a loaf that would be cool enough to slice by lunchtime...  I need continual reminding that rushing the bread is never a good idea.

I also didn't slash today's bread, thinking that it would break apart naturally, like the Forkish (and Lahey) bread, at the seams that I placed into the bottoms of the proofing baskets.  It didn't rise enough in the oven to split, another clue that I should have let it proof longer.  I knew I should have gotten up earlier to attend to it...

NW sourdough

But alone with some cheese, it was the perfect lunch, an extra half hour a proofing time hard to imagine being much of an improvement. 

Today is a day of Spring-like warmth, before we wake tomorrow to tackle a cold and desolate Winter once again.  When sitting in my dining room with the windows open to properly enjoy such wintertime luck, this bread is my companion, a reminder of birth and rebirth, and living, breathing dough.  It's enough reason for me to never want to leave my kitchen, to come close to perfection, or at least perfection for now.  I know better than anyone that there is always a new bread to be obsessed with.

It feels so good to be back to my old self.

Daring Baker Challenge January 2013: Speculaas Gevulde

Francijn of Koken in de Brouwerij was our January 2013 Daring Bakers’ Hostess and she challenged us to make the traditional Dutch pastry, Gevulde Speculaas from scratch! That includes making our own spice mix, almond paste and dough! 

speculaas.

This month, the Daring Baker challenge was another thing I've never eaten, speculaas.  Indeed, I've never really heard much about it my neck of the woods.  The closest I ever came to any experimentation was when I read this piece by David Leibovitz over 2 years ago.  I imagined what the flavor of that speculoos spread tasted like, and wondered if I'd ever see a jar of it here, or better if I could make some myself.  Then I promptly forgot about it until this month when it rang a bell once again.

Speculaas Gevulde is Dutch, comprised of an almond paste center and a top and bottom layer of spiced shortbread.  There apparently are famous cookies, bearing the traditional shapes of their Dutch (or Belgian) counterparts.  This piqued my interest.  Some of the only non-homemade cookies I remember at my Gram's house were perpetual boxes of "Windmill Cookies".  They were almondy and brittle thin, slightly spiced and excellent when dunked in milk.  In fact, many cookies in my possession went submerged too long and turned into that miraculous cookie sludge in the bottom of my glass, that I happily drank after no doubt negotiating more cookies to replace them.  Perhaps that wasn't far off from the speculoos spread that Leibovitz heralded...

It appears that "speculoos" and "speculaas" refer to the same thing, names bound by a common Latin moniker I'd imagine, and used by citizenry of different countries.  What little online research I did prying into the past of speculaas didn't confirm much in the way of how a brittle spice cookie turned into a semi-soft, layered confection.  The term "gevulde speculaas" is Dutch for filled speculass, which is what this cookie-cake is called.  It really makes no difference to me how it came to evolve, because this little cake was actually very easy to make and incredibly delicious!

speculaas.

Our challenge was actually to make the almond paste middle as well, and since I had stashed some homemade almond paste in the freezer from last September (when I made this wonderful gluten-free upside down cake from the Bojon Gourmet), the cake came together even more quickly.  I used 12 oz. of stored almond paste that I made according to this recipe (except I added extra almond extract - I can never get enough almond!).  I let it thaw overnight in the refrigerator, and it was a perfect consistency to roll for the center of this dessert.  (I used my strange-sized tart tin, which measures 7 inches across the bottom and 8 across the top.)

Maybe 2 days before actually baking the speculaas, I mixed up the spice mixture and then the dough.  Using my food processor, which seemed to be the easiest and least messy way of cutting a good amount of butter into a floury spice mix, I had speculaas dough in short order.  I think the time in the fridge was good for marrying the spicy flavors as well.

speculaas spices.

One of the most interesting things about this challenge was the combination of spices.  Having never tasted the real thing, I relied on the formula our host provided.  In additions to mandatory inclusions like cinnamon, cloves, and ginger, optional spices like nutmeg (mace, nutmeg's weblike exterior coating, interestingly was also a mandatory spice), coriander, and white pepper.  Francijn suggested the parts of spice, but it was basically individual taste that dictated the final flavor.  I added extra ginger powder, but next time I'd like to increase the "spicy-hot" factor by adding more white pepper, and perhaps by using cassia cinnamon which has a hotter profile than Ceylon cinnamon.

Speculaas Spice Mix
(enough for several batches of gevulde speculaas dough)
  • 2 t. cloves
  • 1 t. mace
  • 1 1/2 t. ginger powder
  • 1 t. cardamom
  • 1/2 t. coriander powder
  • 1/2 t. anise seed, crushed to a powder
  • 1 t. nutmeg
  • 1/2 t. white pepper
After weighing the base spices (about 12 g.), I added the cinnamon.  I started with 8 g., which was a little light.  10 g. bumped it up to perfect.  To see Francijn's suggested measuring system for speculaas spices, click here.

speculaas.

The original recipe did not call for specifically for milk, but only to add some if the dough felt dry.  I poured it through the top of the processor as it was pulsing and stopped as soon as the dough pinched together like a pastry dough should. 

Speculaas Gevulde Dough (Francjin, via The Daring Kitchen)
  • 250 g. (1 3/4 c.) AP flour
  • 1 t. baking powder
  • 150 g. (3/4 c. packed) brown sugar
  • pinch of salt
  • 2 T. speculaas spices, see above
  • 175 g. (3/4 c. or 6 oz.) butter, cut into pieces
  • enough whole milk to hold it together, about 2-3 T.
Combine all ingredients except butter and milk in a food processor and pulse several times to combine.  Add the butter, and pulse several times until the mixture resembles "coarse meal".  Add milk as described above if the dough doesn't come together.

Transfer the dough to a plastic bag, form into a disc, and refrigerate at least two hours, and up to several days.  The dough can also be frozen for several months.

Assembling the final Speculaas Gevulde:

When it comes time to assemble your gevulde speculaas, roll out the speculaas dough in two equal pieces exactly the size of your chosen pan.  Use two pieces of cling wrap and roll between them. (It helps to work with the dough cold, as it gets sticky as it warms.) Roll out the almond paste to the same size as well.  Beat an egg for an egg wash, and have some blanched almonds ready for decoration.  (You can easily blanch the almonds and remove the skins yourself:  Bring a small pot of water to a boil.  Add almonds, cover and remove from heat.  Let stand for 1 minute, then drain and the skins will pop right off between your fingers.)

Butter your baking dish (glass pan, tart pan, etc.) well, then fit a layer of speculaas dough into the bottom.  Brush liberally with egg wash, then fit the almond layer over the top.  Brush again liberally with egg wash.  Top with the second piece of speculaas dough.  Brush a final time with egg wash, then decorate with the blanched almonds.  Bake in a preheated 350 degree oven for 40 minutes.  The top will be nicely browned, and the cake will feel set and dense.  Cool completely in the pan before removing and slicing.

speculaas.

I had just a small amount of speculaas dough left over and an even smaller amount of almond paste.  This came from trimming to fit a circular tart tin.  I made 9 small balls of the speculaas dough, and 9 tiny almond past balls, fit the two together, then pressed with a glass to an even thickness.  I refrigerated them until the gevulde speculaas was done baking, then popped them into the oven at 350 until they were browned and crisp, about 20 minutes.  They were much crunchier than the layered speculaas, and I liked them a lot!  I probably like the layered cake better, so I wouldn't make the dough especially into cookies, but it's a great use for the leftover trimmings.

speculaas.

 I really enjoyed this cake as it aged.  I stored it in my new obsession: these reusable, beeswax coated, hemp and cotton flats that can be made into envelopes around food.  I can't thank Deena enough for sending me a package of them - I had never heard of them, and I really love them!  The wrapping kept it moist and dense, and I feel like the flavors deepened as the days passed.

I'm so pleased with the way this challenge went.  An elegant, petite spice cake, spiked with almond and nearly endlessly adaptable to your liking?  How could I feel anything but pure love for this dessert?  Thank you to Francjin for a wonderful challenge selection!  Be sure to check out the original recipe, and a short history of the spice trade and the Netherlands role in this confection!